Crème brûlée is a dessert that embodies elegance and simplicity, combining creamy custard with a crisp, caramelized sugar topping. This article explores how to caramelize crème brûlée to achieve that perfect, glassy sugar crust that cracks delightfully under a spoon. You’ll learn about the science behind caramelization, essential tools, step-by-step techniques, and troubleshooting tips to elevate your culinary skills. Let’s get started!
Table of Contents
Understanding Crème Brûlée and Caramelization
What is Crème Brûlée?
Crème brûlée, meaning “burnt cream” in French, is a timeless dessert loved for its contrasting textures and flavors. The base is a silky, vanilla-infused custard, while the topping is a caramelized sugar layer that offers a satisfying crunch. Originating in Europe, it’s now a staple in fine dining and home kitchens alike.
The hallmark of this dessert lies in the caramelized sugar crust. This topping, created by melting sugar at high heat, balances the custard’s sweetness with a slight bitterness. No wonder it’s adored worldwide!
The Science Behind Caramelization
Caramelization is more than just burning sugar—it’s a chemical transformation that brings out complex flavors. When sugar is exposed to heat (usually above 320°F), its molecules break down, releasing nutty, toasty, and slightly bitter notes.
But beware: there’s a thin line between perfectly caramelized sugar and burnt sugar. Controlling the heat and timing is key to nailing the perfect caramelized topping. When done right, this process creates the golden, crackly layer that makes crème brûlée so iconic.
Essential Tools and Ingredients for Caramelizing Crème Brûlée

Tools Needed for Caramelization
To achieve that perfect caramelized sugar crust on your crème brûlée, having the right tools is crucial. A culinary torch is the most popular choice among home cooks and professionals alike. This handheld device allows for precise control, ensuring an even caramelization without overheating the custard beneath. When selecting a torch, look for one with adjustable flame settings and a comfortable grip for safety and ease of use.
If you don’t have a torch, don’t fret. An oven broiler can serve as an alternative. By placing the ramekins under the broiler, you can melt the sugar topping. However, this method requires careful attention to prevent the custard from warming too much. Position the ramekins close to the heat source and monitor them closely to achieve the desired caramelization.
Selecting the Right Sugar
The type of sugar you use significantly impacts the caramelization process. Granulated white sugar is the standard choice due to its consistent grain size, which promotes even melting and browning. Its neutral flavor also complements the custard without overpowering it.
Alternatively, superfine sugar (also known as caster sugar) can be used. Its smaller crystals melt more quickly, potentially reducing the risk of burning. However, it may result in a thinner caramel layer. Avoid using powdered or confectioners’ sugar, as it contains additives like cornstarch that can hinder proper caramelization.
By equipping yourself with the appropriate tools and selecting the right sugar, you’re well on your way to mastering how to caramelize crème brûlée to perfection.
For insights into what crème brûlée is made of, check out What is crème brûlée made of, which provides a detailed breakdown of its key ingredients.
Step-by-Step Guide to Caramelizing Crème Brûlée
Preparing the Custard Base

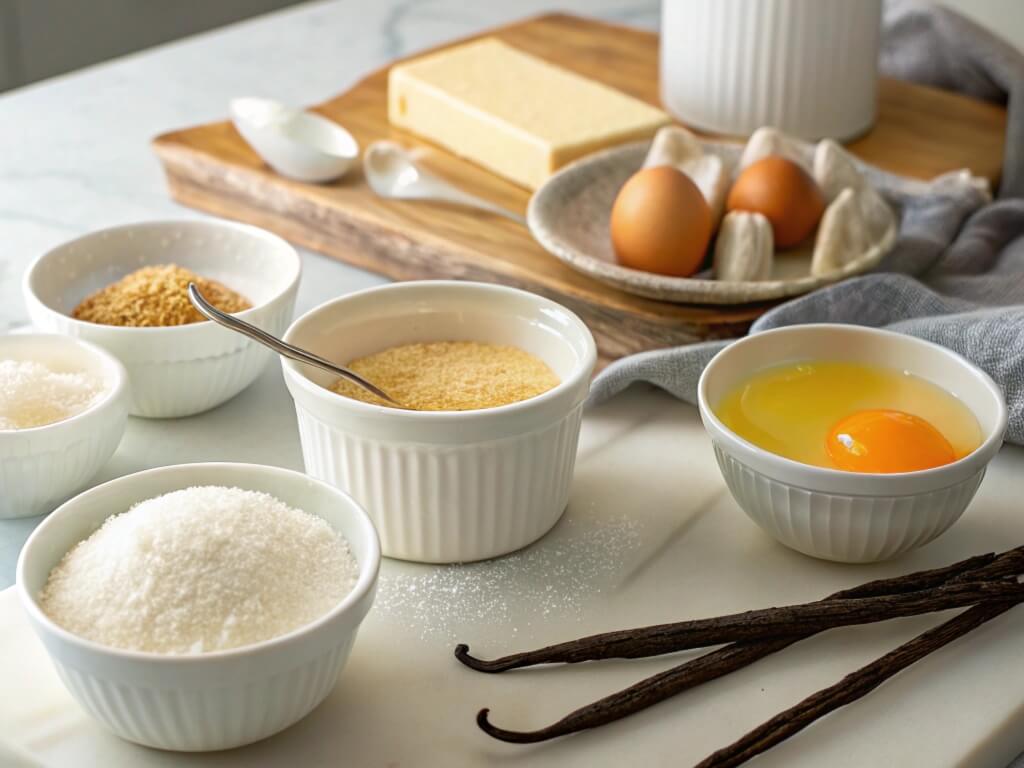
Creating a smooth and creamy custard is the foundation of any great crème brûlée. Begin by gathering the following ingredients:
- 2 cups heavy cream
- 1 vanilla bean (or 1 teaspoon vanilla extract)
- 5 large egg yolks
- 1/2 cup granulated sugar
- A pinch of salt
Instructions:
- Infuse the Cream: In a saucepan, combine the heavy cream and the seeds of the vanilla bean (or vanilla extract). Heat over medium heat until it just begins to simmer, then remove from heat and let it steep for 15 minutes to enhance the vanilla flavor.
- Whisk Egg Yolks and Sugar: In a separate bowl, whisk together the egg yolks, granulated sugar, and salt until the mixture becomes pale and slightly thickened.
- Combine Mixtures: Slowly pour the warm cream into the egg yolk mixture, whisking continuously to prevent the eggs from cooking. This gradual combination ensures a smooth custard base.
- Strain the Custard: Pour the mixture through a fine-mesh sieve into a clean bowl to remove any curdled bits or vanilla bean remnants, ensuring a silky texture.
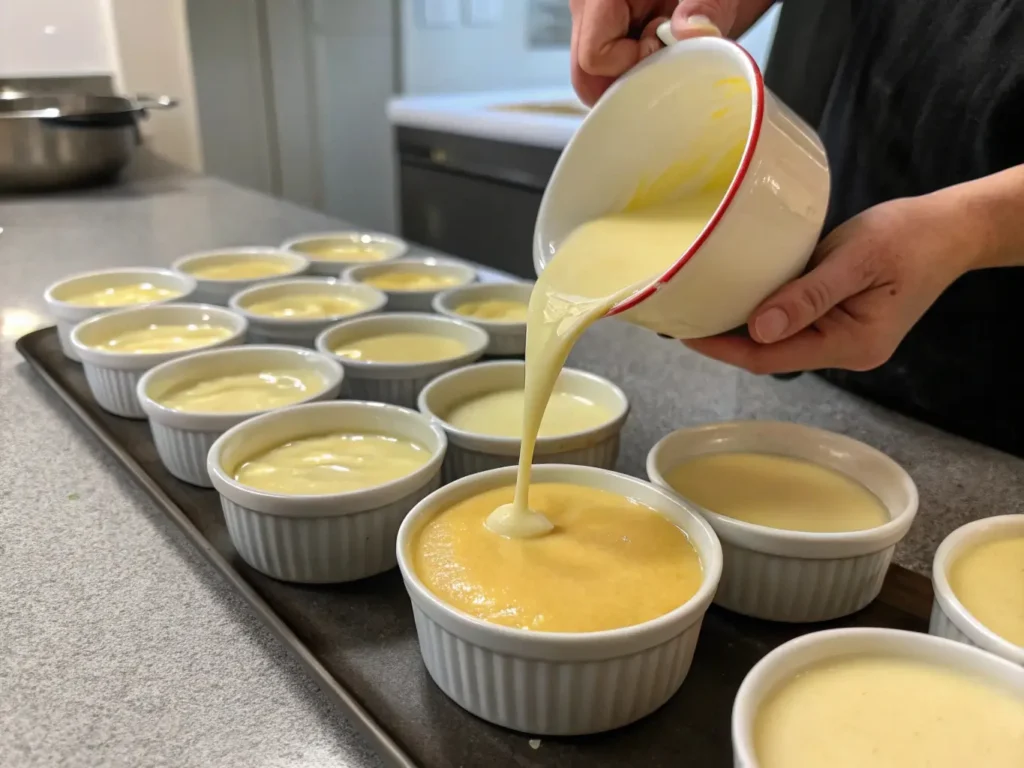
- Bake the Custard: Preheat your oven to 325°F (160°C). Divide the custard evenly among ramekins and place them in a baking dish. Fill the dish with hot water halfway up the sides of the ramekins to create a water bath, which helps cook the custard evenly. Bake for 40-45 minutes, or until the custards are set but still slightly jiggly in the center.
- Chill the Custard: Remove the ramekins from the water bath and let them cool to room temperature. Then, cover and refrigerate for at least 2 hours, or overnight, to allow the custard to fully set.
Applying the Sugar Layer

Once your custards are thoroughly chilled, it’s time to prepare them for caramelization:
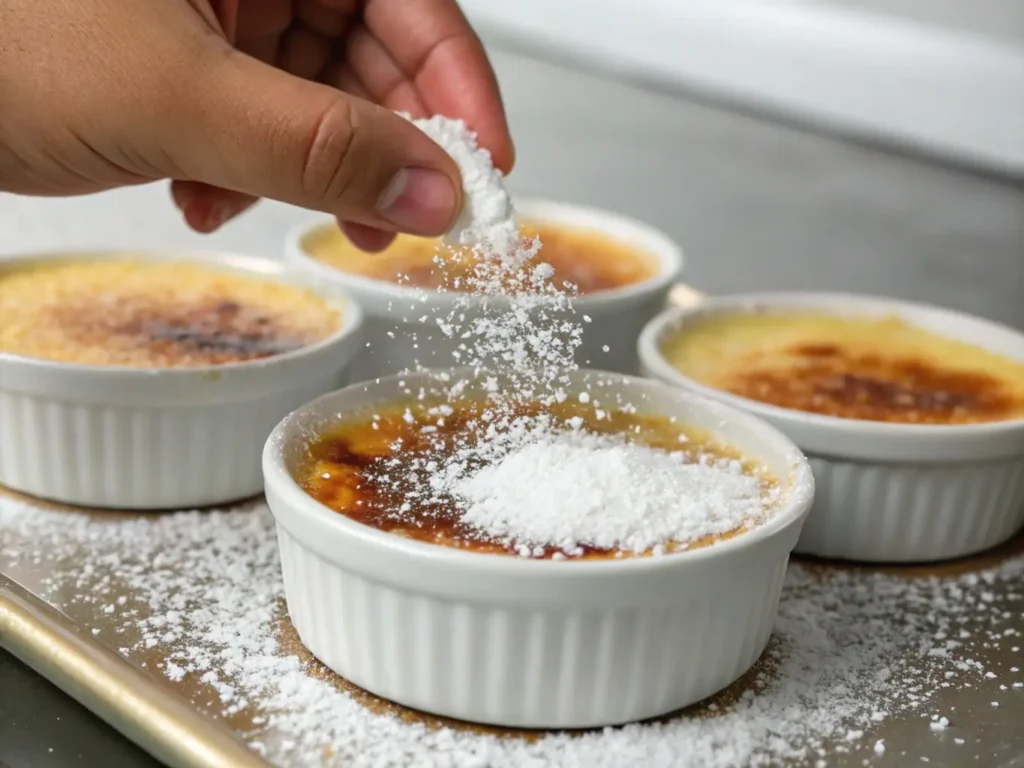
- Evenly Sprinkle Sugar: Sprinkle a thin, even layer of granulated sugar over the surface of each custard. Aim for about 1 to 2 teaspoons per ramekin. Tilt and rotate the ramekin to distribute the sugar uniformly, ensuring complete coverage.
- Remove Excess Sugar: Tap out any excess sugar to prevent uneven caramelization or burning. A consistent layer ensures a uniform caramel crust.
Caramelizing with a Culinary Torch
Using a culinary torch provides control and precision:
- Ignite the Torch: Follow the manufacturer’s instructions to safely ignite your torch. Adjust the flame to a medium setting for optimal control.
- Caramelize the Sugar: Hold the torch about 2 inches away from the sugar surface. Move it in a slow, circular motion to evenly melt and caramelize the sugar. Watch as it transforms into a golden-brown, glassy surface.
- Cool Before Serving: Allow the caramelized sugar to cool and harden for 1 to 2 minutes before serving. This brief cooling period ensures a crisp crust that contrasts beautifully with the creamy custard beneath.
Alternative Caramelization Methods
If a culinary torch isn’t available, consider these alternatives:
Using an Oven Broiler:
- Preheat the Broiler: Set your oven’s broiler to high and allow it to preheat thoroughly.
- Prepare the Ramekins: Place the sugar-topped custards on a baking sheet.
- Broil: Position the baking sheet on the top oven rack, close to the broiler element. Broil for 1 to 3 minutes, keeping a close eye to prevent burning. Rotate the ramekins as needed for even caramelization.
Stovetop Caramelization:
- Create Caramel Separately: In a saucepan, melt granulated sugar over medium heat until it reaches a golden-brown color.
- Top the Custards: Quickly pour the hot caramel over the chilled custards, tilting to spread it evenly before it hardens.
This method requires swift action, as caramel hardens rapidly upon cooling.
By following these steps, you’ll master how to caramelize crème brûlée, achieving a delightful balance between the creamy custard and the crisp, caramelized sugar topping.
Troubleshooting Common Issues in Caramelizing Crème Brûlée
Even with careful preparation, challenges can arise when learning how to caramelize crème brûlée. Understanding common pitfalls and their solutions will help you achieve that perfect, glassy sugar crust every time.
Avoiding Burnt or Under-Caramelized Sugar
Achieving the ideal caramelization requires attention to detail. Here are some tips to help you avoid common issues:
- Even Sugar Layer: Ensure the sugar is spread uniformly across the custard’s surface. An uneven layer can lead to spots that are burnt or under-caramelized.
- Appropriate Sugar Quantity: Using too much sugar can result in a thick, overly hard crust, while too little may not caramelize properly. Aim for about 1 to 2 teaspoons per ramekin.
- Controlled Heat Application: Whether using a culinary torch or broiler, apply heat evenly and monitor closely. Holding the torch too close or leaving the ramekins under the broiler for too long can cause burning.
Preventing Custard Overheating
Maintaining the custard’s creamy texture is essential. To prevent overheating:
- Chill Thoroughly: Ensure the custards are well-chilled before caramelizing. This helps them withstand the heat applied during the caramelization process.
- Quick Caramelization: Aim to caramelize the sugar quickly to minimize heat exposure to the custard.
- Monitor Consistency: If you notice the custard becoming too soft or liquid after caramelizing, reduce the heat intensity or duration in future attempts.
By addressing these common issues, you’ll enhance your skills in how to caramelize crème brûlée, resulting in a dessert that’s both visually appealing and delightful to taste.
Enhancing Your Crème Brûlée Experience
Once you’ve mastered the basics of how to caramelize crème brûlée, consider elevating your dessert with creative variations and thoughtful presentation.
Flavor Variations and Infusions
Adding unique flavors can transform your crème brûlée into a personalized culinary masterpiece. Here are some ideas to inspire you:
- Vanilla Bean: Infuse the custard with fresh vanilla beans for a classic, aromatic flavor.
- Citrus Zest: Incorporate lemon or orange zest into the custard base to add a refreshing, tangy note.
- Coffee Essence: Mix in a small amount of espresso or coffee extract for a rich, mocha-infused dessert.
- Seasonal Fruits: Top the finished crème brûlée with fresh berries or poached fruits to complement the creamy custard and crunchy caramel.
Presentation and Serving Suggestions
Enhancing the visual appeal of your crème brûlée can make the dining experience even more enjoyable. Consider these serving ideas:
- Elegant Ramekins: Serve the custard in decorative ramekins to add a touch of sophistication.
- Garnishes: Add a sprig of mint, a dusting of powdered sugar, or edible flowers for a beautiful finish.
- Accompaniments: Pair your crème brûlée with a glass of dessert wine or a cup of freshly brewed coffee to balance the sweetness.
For more delicious recipes and culinary inspiration, check out our recipe article.
By experimenting with flavors and presentation, you can create a crème brûlée that not only tastes exquisite but also delights the eyes, making your dining experience truly memorable.
Frequently Asked Questions (FAQ)
When it comes to how to caramelize crème brûlée, questions often arise about techniques, tools, and troubleshooting. Here are answers to some of the most common inquiries:
Can I use brown sugar for caramelizing crème brûlée?
While brown sugar can be used, it is not the ideal choice. Its higher moisture content may lead to uneven caramelization, and the molasses flavor might overpower the custard. Stick with granulated white sugar or superfine sugar for the best results.
What can I use if I don’t have a kitchen torch?
If you don’t have a culinary torch, your oven’s broiler is a great alternative. Simply place the sugar-topped custards on a baking sheet and broil them on the top rack until the sugar caramelizes. Keep a close eye to prevent burning!
Another option is stovetop caramelization, where you melt sugar in a pan and pour it over the custards. However, this method requires speed and precision to spread the caramel evenly.
How thick should the sugar layer be on crème brûlée?
The sugar layer should be thin enough to melt quickly but thick enough to create a satisfying crack when tapped. Typically, 1 to 2 teaspoons of sugar evenly spread across the custard surface achieves the perfect balance.
Why is my crème brûlée custard not setting properly?
A custard that fails to set could be due to insufficient cooking time or incorrect oven temperature. Always bake the custards in a water bath at a steady 325°F (160°C) until the edges are firm but the centers remain slightly jiggly. Chilling the custards for at least two hours after baking is also essential for them to fully set.
Crème Brûlée
Equipment
- Mixing Bowls
- Whisk
- Fine-Mesh Strainer
- Ramekins
- Baking Dish
- Kitchen Torch or Oven Broiler
Ingredients
Custard Base
- 2 cups heavy cream
- 1 vanilla bean (or 1 tsp vanilla extract)
- 5 large egg yolks
- 1/2 cup granulated sugar
- 1 pinch salt
Caramelized Sugar Topping
- 4 tsp granulated sugar (1 tsp per ramekin)
Instructions
- Preheat oven to 325°F (160°C). Place ramekins in a large baking dish.
- In a saucepan, heat heavy cream and vanilla bean (or extract) over medium heat until it just begins to simmer. Remove from heat and let it steep for 10 minutes.
- In a mixing bowl, whisk egg yolks, sugar, and salt until pale and slightly thickened.
- Slowly pour the warm cream into the egg mixture, whisking constantly to prevent scrambling.
- Strain the mixture through a fine-mesh sieve to ensure a smooth custard.
- Divide custard evenly among the ramekins. Fill the baking dish with hot water halfway up the sides of the ramekins to create a water bath.
- Bake for 40-45 minutes until the custards are set but still slightly jiggly in the center.
- Remove from the water bath and let cool at room temperature for 30 minutes, then refrigerate for at least 2 hours (or overnight).
- Before serving, sprinkle 1 tsp of granulated sugar evenly over each custard.
- Caramelize the sugar using a kitchen torch, moving in a circular motion until golden and crisp. Alternatively, place under a broiler for 1-3 minutes, watching closely.
- Let the caramelized topping cool for 1-2 minutes before serving to allow it to harden.
Notes
Conclusion
Mastering the Art of Caramelizing Crème Brûlée
Learning how to caramelize crème brûlée is an art that combines technique, creativity, and attention to detail. By understanding the science of caramelization, using the right tools, and mastering step-by-step processes, you can achieve a perfect dessert every time.
Whether you stick to classic vanilla or experiment with exciting flavor infusions, crème brûlée is a show-stopping dessert that never fails to impress. With a little practice, you’ll be crafting a crisp, caramelized topping that cracks perfectly under a spoon, revealing a luscious custard beneath.
Now that you’ve explored every aspect of making this delightful dessert, why not give it a try? Let your culinary journey begin, and enjoy the rewarding experience of creating your own crème brûlée masterpiece.
By mastering the technique of caramelizing crème brûlée, you’ll elevate your dessert game and impress your guests. Remember, the key lies in even sugar distribution and careful torching. For more tips on dessert recipes, visit our collection of quick and delicious ideas.
Enjoy crafting your perfect crème brûlée!
- Tropical Pineapple Salsa -Fresh, Flavorful, and Easy to Make
- Homemade Salsa for Canning – Honeybunch Hunts
- Easy Homemade Salsa Verde | Complete Guide
- Black Bean Corn Salsa – Fresh and Flavorful Recipe
- Pineapple Salsa That Wows at Every Party

