Category

Dinner

Category

This post contains affiliate links. As an Amazon Associate, I earn from qualifying purchases. This comes at no extra cost to you.

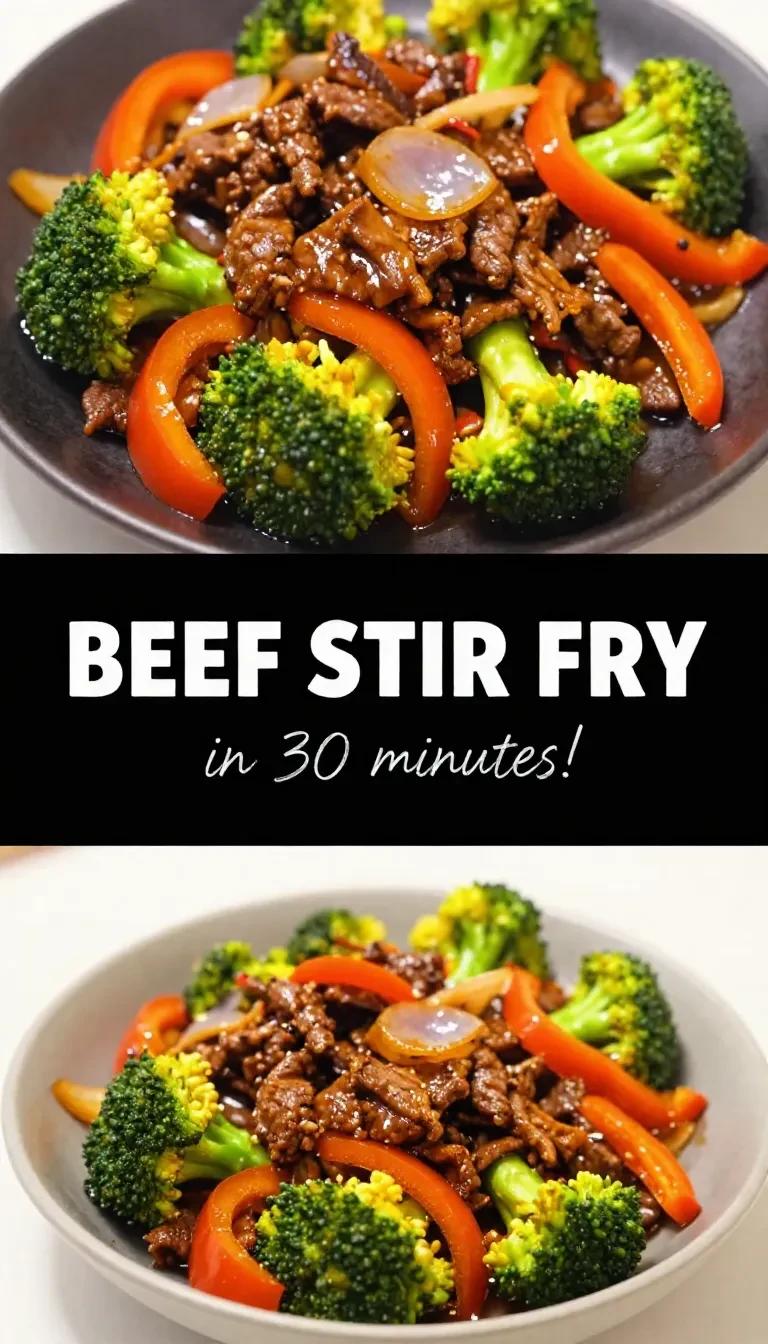
Beef Stir Fry with Vegetables Recipe

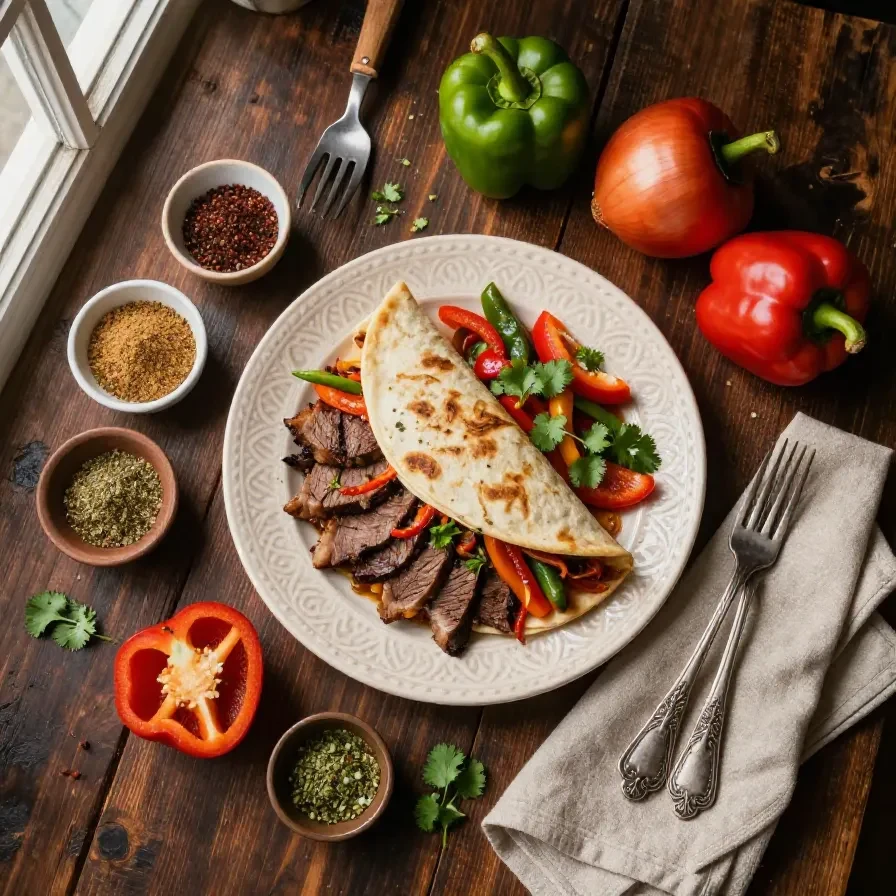
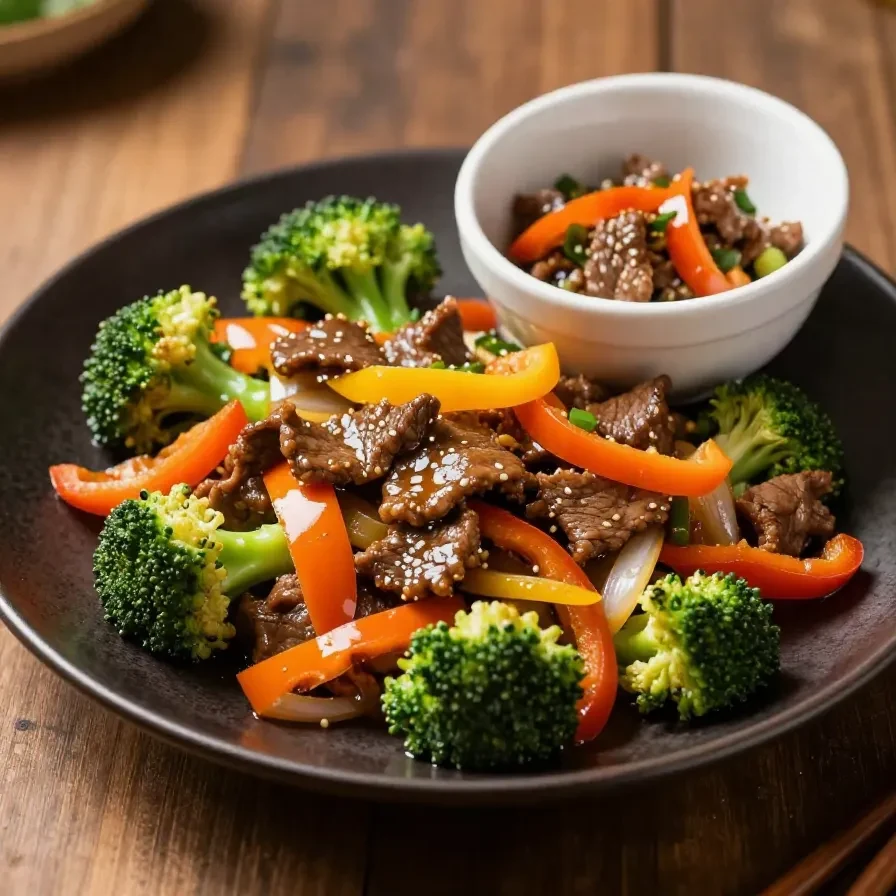
Beef and veggies stir-fry recipe is a quick, flavorful dish made with thinly sliced beef, vibrant vegetables like bell peppers and broccoli, stir-fried in a savory sauce, and ready in under 30 minutes. This dish yields approximately four servings and is perfect for weeknight dinners or meal prep, offering a balanced combination of protein and vegetables.

The tender texture of the beef contrasts beautifully with the crispness of the vegetables, while the sauce infuses everything with an irresistible umami kick. After testing this recipe in my kitchen, I found the secret lies in cutting the beef against the grain for ultimate tenderness.
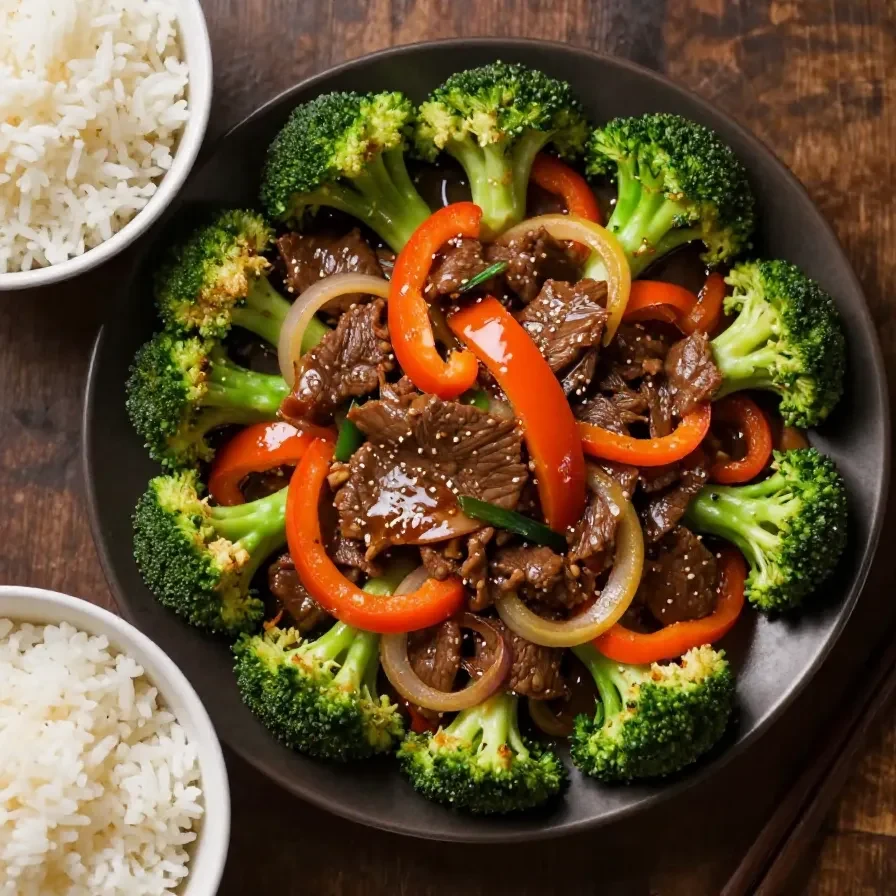
A close-up of a beef stir fry with colorful vegetables served in a white bowl.

Table of Contents

This dish is popular because it is quick to prepare, versatile, and packed with nutrients. It delivers a balanced mix of protein, vegetables, and flavor, making it a crowd-favorite for busy households.

  • Done in 30 minutes, it’s ideal for weeknight dinners.
  • You can tailor the vegetables to your preferences or what you have on hand.
  • Loaded with lean protein and fiber-rich vegetables.
  • The savory sauce ties the dish together perfectly.

What ingredients do you need for Beef Stir Fry with Vegetables?

The recipe requires a handful of essential ingredients, including fresh vegetables, beef, and pantry staples for the sauce.

Breville Smart Wok

Kitchen ApplianceBreville Smart Wok

An electric wok that maintains consistent high heat for perfect stir-frying.

View on Amazon →

Lodge Cast Iron Skillet 12-inch

Essential CookwareLodge Cast Iron Skillet 12-inch

Perfect for stir-frying beef and vegetables with even heat distribution.

View on Amazon →

Fresh ginger and garlic enhance the depth of flavor in the sauce, while the hoisin and oyster sauce add complexity to the stir-fry.

How do you make Beef Stir Fry with Vegetables step by step?

This recipe involves marinating the beef, preparing the vegetables, and stir-frying everything together in a hot skillet.

Step 1 — Marinate the beef

Combine the sliced flank steak, soy sauce, and cornstarch in a bowl. Mix well and marinate for 15 minutes to tenderize the beef and infuse flavor.

You might also enjoy our ground beef and broccoli stir fry.

Step 2 — Prepare the sauce

In a small bowl, whisk together hoisin sauce, oyster sauce, and a splash of water. Set it aside for later.

Step 3 — Heat the skillet

Heat vegetable oil in a large skillet or wok over medium-high heat. Once hot, add the marinated beef and stir-fry for 2-3 minutes until browned but not fully cooked.

Step 4 — Cook the vegetables

Add the broccoli, bell pepper, and carrot to the skillet, tossing frequently. Stir-fry for 4 minutes until the vegetables are tender but still crisp.

Step 5 — Add aromatics

Add minced garlic and grated ginger during the last minute of cooking the vegetables. Stir until fragrant.

For more ideas, check out our chinese ground beef and cabbage stir-fry.

Step 6 — Combine and serve

Pour the prepared sauce over the beef and vegetables, stirring to coat evenly. Cook for 2 more minutes, then serve hot over rice or noodles.

Frequently Asked Questions About Beef Stir Fry with Vegetables

Can I use frozen vegetables instead of fresh?

Yes, frozen vegetables can replace fresh ones. Adjust the cooking time slightly to ensure they heat through without becoming soggy.

What cut of beef works best for stir-fry?

Flank steak, sirloin, or skirt steak are ideal due to their tenderness and quick cooking time.

How can I make the dish gluten-free?

Use tamari or coconut aminos instead of soy sauce, and ensure your oyster and hoisin sauces are gluten-free.

Looking for something similar? Try our beef and broccoli stir-fry.

Can I prepare this dish in advance?

The beef can be marinated overnight, and the vegetables prepped ahead. Cook it fresh for the best texture and flavor.

Can you swap ingredients in this dish?

Yes, substitutions are easy for this recipe. Here are some quick ideas:

  • Swap flank steak for chicken breast or shrimp for a different protein.
  • Replace broccoli with green beans or snap peas for a similar crunch.

What is the history of Beef Stir Fry with Vegetables?

Stir-frying originated in Chinese cuisine, a technique designed for quick cooking and maximum flavor retention. This method spread globally, resulting in countless adaptations like Beef Stir Fry with Vegetables.

The combination of beef and vibrant vegetables reflects the balance and versatility celebrated in Asian-style cooking.

What pairs well with Beef Stir Fry with Vegetables?

  • Neutral flavor complements the bold sauce.
  • Adds heartiness and texture to the meal.
  • A light, crispy starter to round out the dish.
  • Refreshing and balances the savory stir-fry.

What mistakes should you avoid when making this dish?

  • Reduces heat and results in steaming instead of stir-frying.
  • Leads to tough, flavorless beef.
  • Makes them mushy instead of crisp-tender.

Beef Stir Fry with Vegetables

Beef Stir Fry with Vegetables
A close-up of a beef stir fry with colorful vegetables served in a white bowl.

Loved this recipe? Save it to your favorite Pinterest board so you can easily find it later! ✨

This post contains affiliate links. As an Amazon Associate, I earn from qualifying purchases. This comes at no extra cost to you.

Table of Contents

KitchenAid Artisan Stand Mixer

Kitchen ApplianceKitchenAid Artisan Stand Mixer

Ideal for whipping mashed potatoes to a creamy consistency — a versatile tool for any kitchen.

View on Amazon →

Lodge Cast Iron Skillet 12-inch

Essential CookwareLodge Cast Iron Skillet 12-inch

Perfect for searing chicken and creating a rich gravy — ensures even heat distribution.

View on Amazon →

Creamy Garlic Chicken Recipe with Gravy and Mashed Potatoes

Creamy Garlic Chicken Recipe with Gravy and Mashed Potatoes

Loved this recipe? Save it to your favorite Pinterest board so you can easily find it later! ✨

Easy queso dip with meat

Easy queso dip with meat is a rich and cheesy appetizer made with seasoned ground beef, diced tomatoes, and melted cheddar and Monterey Jack cheese. Ready in just 25 minutes, this recipe yields six servings and pairs perfectly with tortilla chips for dipping.

Ground Beef Queso Dip balances a creamy texture with a hint of spice from chili powder, paprika, and cumin. The addition of fresh cilantro and jalapeño provides a refreshing pop of flavor against the hearty richness.

Early in my cooking career, I fell in love with queso at a Tex-Mex restaurant, and this homemade version captures the same indulgent magic—with a welcome addition of savory ground beef.

Table of Contents

Why is Ground Beef Queso Dip special?

Ground Beef Queso Dip is special because it combines hearty beef with creamy cheese for a flavorful, satisfying appetizer. Its savory and slightly spicy profile makes it a hit at parties and game days alike.

  • Perfect for sharing: With six servings, it’s ideal for gatherings, ensuring everyone gets a taste of its cheesy goodness.
  • Customizable flavors: Add jalapeños for heat or cilantro for freshness to tailor the dip to your preference.
  • Quick and easy: Ready in just 25 minutes, this recipe fits into any schedule without compromising taste.
  • Versatile pairing: Serve with tortilla chips, veggies, or even drizzle it over nachos for added excitement.

What ingredients do you need for Ground Beef Queso Dip?

To make Ground Beef Queso Dip, you’ll need a mix of pantry staples and fresh ingredients for a balanced flavor. Here’s the full list:

  • 1 tablespoon olive oil
  • 1 pound ground beef
  • 1 teaspoon chili powder
  • 1 teaspoon paprika
  • 1 teaspoon cumin
  • 1/2 teaspoon garlic powder
  • 1/2 teaspoon onion powder
  • Salt and pepper to taste
  • 1 cup diced tomatoes (canned or fresh)
  • 2 cups shredded cheddar cheese
  • 1 cup shredded Monterey Jack cheese
  • 1 cup milk
  • 1/2 cup diced onions
  • 2 tablespoons chopped fresh cilantro (optional)
  • 1 jalapeño, diced (optional)
  • Tortilla chips for serving

The combination of cheddar and Monterey Jack cheeses ensures a smooth, creamy texture while the ground beef adds heartiness to the dip.

How do you make Ground Beef Queso Dip step by step?

Making Ground Beef Queso Dip is simple and requires only one skillet. Follow these steps:

You might also enjoy our the best cheesy ground beef quesadillas.

Step 1 — Heat the olive oil

Heat the olive oil in a large skillet over medium heat.

Step 2 — Cook the onions

Add the diced onions to the skillet and sauté for 2-3 minutes until softened.

Step 3 — Brown the ground beef

Add the ground beef and break it apart with a spatula. Cook until browned, about 6-8 minutes.

A bowl of creamy ground beef queso dip garnished with chopped green onions and served with tortilla chips.

Step 4 — Season the beef

Sprinkle chili powder, paprika, cumin, garlic powder, onion powder, salt, and pepper over the beef. Stir well to combine.

For more ideas, check out our the best cheesy ground beef quesadillas.

Step 5 — Add diced tomatoes

Pour in the diced tomatoes and stir. Cook for an additional 2-3 minutes or until heated through.

Step 6 — Add milk

Reduce the heat to low and slowly add the milk, stirring constantly to prevent clumping.

Step 7 — Melt the cheese

Add the shredded cheddar and Monterey Jack cheeses a handful at a time. Stir after each addition until the mixture is smooth and fully melted.

Step 8 — Finish with optional ingredients

For extra flavor, stir in diced jalapeño and chopped cilantro. Serve warm!

Looking for something similar? Try our hobo casserole ground beef recipe.

Frequently Asked Questions About Ground Beef Queso Dip

Can I make Ground Beef Queso Dip ahead of time?

Yes, you can prepare the dip in advance and reheat it gently on the stovetop before serving.

What’s the best way to store leftovers?

Store leftovers in an airtight container in the fridge for up to 3 days. Reheat gently for the best texture.

Can I substitute the cheeses?

Yes, you can use other melting cheeses like Velveeta or Colby Jack for a slightly different flavor and texture.

Is Ground Beef Queso Dip spicy?

It has mild spice from chili powder and paprika. Adjust the heat by adding or omitting the jalapeño.

What are the best chips for dipping?

Tortilla chips work best as their sturdy texture holds the dip well. Thicker chips prevent breakage.

Expert Tips for Perfect Ground Beef Queso Dip

Get the most out of your Ground Beef Queso Dip with these tips:

  • Use fresh cheese: Avoid pre-shredded cheese, as it contains anti-caking agents that can impact texture.
  • Keep the heat low: Gradually melt the cheese over low heat to prevent separation or graininess.
  • Customize the spice: Add cayenne pepper for extra heat or use smoked paprika for a deeper flavor.
  • Prepare fresh accompaniments: Serve with fresh cilantro or diced jalapeños for a vibrant finish.

Ground Beef Queso Dip

Prep Time 10 minutes
Cook Time 15 minutes
Total Time 25 minutes
Servings 6 servings
Calories 350
A creamy and flavorful queso dip made with ground beef, spices, and melted cheese. Perfect for serving with tortilla chips at parties or gatherings.

Equipment

  • Large Skillet
  • Spatula
  • Mixing bowl
  • Cheese grater
  • serving bowl

Ingredients

Instructions 

  • Heat the olive oil in a large skillet over medium heat.
  • Add the diced onions and cook for 2-3 minutes until softened.
  • Add the ground beef to the skillet and break it apart with a spatula. Cook until browned, about 6-8 minutes.
  • Season the ground beef with chili powder, paprika, cumin, garlic powder, onion powder, salt, and pepper. Stir to combine.
  • Add the diced tomatoes and stir. Cook for an additional 2-3 minutes until the mixture is well combined and heated through.
  • Reduce the heat to low and gradually add the milk to the skillet, stirring constantly.
  • Add the shredded cheddar cheese and Monterey Jack cheese a handful at a time, stirring after each addition until melted and smooth.
  • If desired, stir in the diced jalapeño and chopped cilantro for added flavor and color.
  • Transfer the queso dip to a serving bowl and serve warm with tortilla chips.

Notes

For a spicier dip, add more jalapeño or use hot chili powder. You can substitute the ground beef with ground turkey or omit it for a vegetarian version.
Calories: 350kcal
Cost: $15
Course: Appetizer
Cuisine: Mexican
Keyword: Cheese Dip, Ground Beef, queso dip
A bowl of creamy ground beef queso dip garnished with chopped green onions and served with tortilla chips.

Loved this recipe? Save it to your favorite Pinterest board so you can easily find it later! ✨

This post contains affiliate links. As an Amazon Associate, I earn from qualifying purchases. This comes at no extra cost to you.

Easy school night meals

Easy school night meals are hearty, satisfying dishes designed for busy evenings. Cheesy Chicken and Veggie Pasta Bake combines penne pasta, tender shredded chicken, fresh vegetables, marinara sauce, and gooey mozzarella cheese, baked to bubbly perfection in just 40 minutes. This recipe makes six servings and offers a nutritious, flavorful option for dinner.

The aromatic blend of oregano and paprika complements the creamy sauce, while the melted cheese forms a golden crust on top. It’s a dish that feels wholesome and indulgent all at once. I’m always reminded of the comforting meals from my grandmother’s kitchen, where cheese and vegetables were the star of so many family favorites.

Table of Contents

Cheesy Chicken and Veggie Pasta Bake is popular because it’s easy to assemble, packed with veggies, and comforting for a wide range of palates. Its creamy texture and melted cheese appeal to kids and adults alike.

  • Parents love it as a way to sneak vegetables into their kids’ dinner without complaints.
  • It’s versatile and great for leftovers, saving time on busy school days.
  • The combination of protein, carbohydrates, and fiber makes it a balanced meal.
  • It’s easy enough for kids to help assemble, turning dinner prep into a family activity.

What ingredients do you need for Cheesy Chicken and Veggie Pasta Bake?

This recipe features common pantry staples combined with fresh vegetables and chicken for a wholesome yet indulgent meal.

The heavy cream helps create a velvety sauce, while the mozzarella and Parmesan deliver a cheesy finish that ties the dish together beautifully.

How do you make Cheesy Chicken and Veggie Pasta Bake step by step?

To make Cheesy Chicken and Veggie Pasta Bake, follow this simple method that transforms pasta and vegetables into a creamy, baked delight.

Step 1 — Preheat the oven

Preheat your oven to 375°F (190°C).

Step 2 — Cook the pasta

Cook the penne pasta according to the package instructions until al dente. Drain and set aside.

Step 3 — Sauté aromatics

In a large skillet, heat olive oil over medium heat. Add the chopped onion and garlic, and sauté until fragrant and softened, about 2-3 minutes.

You might also enjoy our 27 easy lazy fall high.

Step 4 — Add vegetables

Add the diced zucchini to the skillet and cook for another 3-4 minutes until slightly tender. Stir in the chopped spinach and frozen peas, and cook for 2 minutes until the spinach wilts.

A table set with easy-to-make back-to-school dinner dishes, including pasta and fresh salad.

Step 5 — Make the sauce

Reduce the heat to low and pour in the marinara sauce and heavy cream. Stir to combine, then season with oregano, paprika, salt, and pepper. Simmer for 3-4 minutes.

Breville Smart Oven Pro

Kitchen ApplianceBreville Smart Oven Pro

A premium countertop oven that ensures even baking and broiling for perfect results.

View on Amazon →

Pyrex 3-Quart Glass Baking Dish

Essential CookwarePyrex 3-Quart Glass Baking Dish

A durable and versatile baking dish perfect for casseroles and pasta bakes.

View on Amazon →

Step 6 — Add chicken

Add the cooked and shredded chicken to the skillet, stirring to coat evenly in the sauce.

Step 7 — Assemble and bake

In a large mixing bowl, combine the cooked pasta with the chicken and veggie sauce. Mix well. Transfer the pasta mixture into a greased 9×13-inch baking dish. Sprinkle the shredded mozzarella and grated Parmesan cheese evenly over the top.

Step 8 — Finish baking

Bake in the preheated oven for 20-25 minutes, or until the cheese is melted and bubbly. Let cool slightly before serving. Garnish with parsley, if desired.

For more ideas, check out our the top healthy pregnancy dinner recipes.

Frequently Asked Questions About Cheesy Chicken and Veggie Pasta Bake

Can I use a different type of pasta?

Yes, you can substitute penne with other short pasta shapes like fusilli or rigatoni for a similar texture.

How do I make this dish gluten-free?

To make it gluten-free, use gluten-free pasta and ensure all other ingredients are certified gluten-free.

Can I prepare this dish ahead of time?

Yes, you can assemble the pasta bake and refrigerate it unbaked for up to 24 hours. Bake when ready to serve.

What vegetables can I add besides zucchini?

Other vegetables like bell peppers, mushrooms, or broccoli can be added to suit your taste preferences.

How long will leftovers last?

Leftovers can be stored in the refrigerator for up to 3 days and reheated as needed.

Looking for something similar? Try our spinach pasta recipe for a.

Can you swap ingredients in Cheesy Chicken and Veggie Pasta Bake?

Yes, there are several simple substitutions you can make to customize this dish while keeping its delicious flavor intact.

  • Swap marinara sauce for Alfredo sauce for a richer taste.
  • Use shredded rotisserie chicken instead of cooked chicken breast for convenience.
  • Replace mozzarella with cheddar cheese for a sharper flavor profile.

How do you store and reheat Cheesy Chicken and Veggie Pasta Bake?

To store, cover the baking dish tightly with plastic wrap or transfer leftovers to an airtight container.

Refrigerate for up to 3 days or freeze for up to 3 months. To reheat, bake in a preheated oven at 350°F (175°C) until warmed through, or microwave individual portions.

If frozen, thaw overnight in the refrigerator before reheating for best texture.

Cheesy Chicken and Veggie Pasta Bake

Prep Time 20 minutes
Cook Time 25 minutes
Total Time 45 minutes
Servings 6 servings
Calories 450
A comforting and hearty pasta bake loaded with chicken, veggies, and cheesy goodness. Perfect for family dinners!

Equipment

  • Large Skillet
  • Mixing bowl
  • 9x13-inch baking dish
  • Oven
  • Cutting Board

Ingredients

Instructions 

  • Preheat your oven to 375°F (190°C).
  • Cook the penne pasta according to the package instructions until al dente. Drain and set aside.
  • In a large skillet, heat olive oil over medium heat. Add the chopped onion and garlic, and sauté until fragrant and softened, about 2-3 minutes.
  • Add the diced zucchini to the skillet and cook for another 3-4 minutes until slightly tender. Stir in the chopped spinach and frozen peas, and cook for 2 minutes until the spinach wilts.
  • Reduce the heat to low and pour in the marinara sauce and heavy cream. Stir to combine, then season with oregano, paprika, salt, and pepper. Simmer for 3-4 minutes.
  • Add the cooked and shredded chicken to the skillet, stirring to coat evenly in the sauce mixture.
  • In a large mixing bowl, combine the cooked pasta with the chicken and veggie sauce. Mix well.
  • Transfer the pasta mixture into a greased 9x13-inch baking dish. Sprinkle the shredded mozzarella and grated Parmesan cheese evenly over the top.
  • Bake in the preheated oven for 20-25 minutes, or until the cheese is melted and bubbly.
  • Remove the bake from the oven and let it cool slightly before serving. Garnish with chopped parsley, if desired.

Notes

You can substitute zucchini with bell peppers or mushrooms. Use rotisserie chicken for convenience.
Calories: 450kcal
Cost: $15
Course: Main Course
Cuisine: Italian-American
Keyword: Cheesy, Chicken, Pasta Bake
A table set with easy-to-make back-to-school dinner dishes, including pasta and fresh salad.

Loved this recipe? Save it to your favorite Pinterest board so you can easily find it later! ✨

This post contains affiliate links. As an Amazon Associate, I earn from qualifying purchases. This comes at no extra cost to you.

The Best Cheesy Ground Beef Quesadillas combine perfectly seasoned halal ground beef, sautéed vegetables, and melted cheddar and mozzarella cheeses inside crispy golden-brown flour tortillas. Each bite is packed with bold spices, creamy cheese, and tender bites of beef, making it an irresistible dish any day of the week. Serve it hot with sour cream, salsa, and optional guacamole for a quick, flavorful meal.

Table of Contents

Why This Dish Is Perfect

  • The Best Cheesy Ground Beef Quesadillas create a quick, hearty meal that fits perfectly into busy schedules. With just 25 minutes of prep and cook time, it’s ideal for fast dinners or a satisfying lunch break.
  • The ingredients are simple yet flavorful, ensuring every bite is loaded with bold spices, creamy cheese, and tender halal beef. This dish also allows you to use pantry staples without sacrificing taste.
  • These quesadillas are kid-friendly and customizable, making them a great choice for picky eaters. Serve them with sour cream and salsa, or let family members craft their perfect quesadilla pairing.
  • The crispy tortilla exterior combined with the gooey, cheesy interior makes every bite texturally rich and satisfying. Whether for game night or casual dinners, it guarantees an enjoyable eating experience.

Ingredients List

The halal-certified ground beef provides a rich and savory base that’s perfectly enhanced by the blend of cumin, paprika, and chili powder. The combination of cheddar and mozzarella cheese ensures a balanced mix of sharp and creamy flavors.

Step-by-Step Instructions

  1. Heat olive oil in a large skillet over medium heat.
  2. Add the diced onions and bell peppers to the skillet and sauté for 2-3 minutes until softened.
  3. Add the ground beef to the skillet and cook, breaking it up with a spoon, until fully browned and cooked through, about 5-7 minutes.
  4. Season the ground beef with cumin, smoked paprika, chili powder, garlic powder, onion powder, salt, and black pepper. Stir well to evenly coat the beef in the spices.
  5. Remove the skillet from heat and set the beef mixture aside.
  6. Heat a clean skillet or griddle over medium heat. If desired, lightly spread butter on one side of each tortilla for extra crispiness.
  7. Place one tortilla in the skillet, buttered side down if using butter.
  8. Sprinkle 1/4 cup of cheddar cheese and 1/4 cup of mozzarella cheese evenly on one half of the tortilla.
  9. Add 1/4 of the cooked ground beef mixture on top of the cheese layer.
  10. Fold the tortilla in half over the filling, pressing gently to seal.
  11. Cook the quesadilla for 2-3 minutes on each side, or until the tortilla is golden brown and crispy, and the cheese is melted.
  12. Repeat the process with the remaining tortillas, cheese, and ground beef mixture.
  13. Slice each quesadilla into wedges and serve warm with sour cream, salsa, and guacamole on the side.
A close-up of cheesy ground beef quesadillas served on a wooden plate with a side of salsa and sour cream.

Breville Smart Griddle Pro

Kitchen ApplianceBreville Smart Griddle Pro

Ideal for cooking multiple quesadillas at once with precise temperature control.

View on Amazon →

Lodge Cast Iron Skillet 12-inch

Essential CookwareLodge Cast Iron Skillet 12-inch

Perfect for evenly cooking ground beef and crisping tortillas — essential for this recipe.

View on Amazon →

Ingredient Swaps and Substitutions

  • Swap halal ground beef for ground chicken or turkey to create a lighter version while maintaining great flavor.
  • Use plant-based ground meat alternatives for a vegetarian-friendly option. The spices blend perfectly with these substitutes for a similar taste profile.
  • Replace flour tortillas with whole wheat or gluten-free tortillas to fit dietary preferences. The crispiness may vary, but the fillings remain indulgent.

A Brief History of Quesadillas

Quesadillas originated in Mexico and were traditionally made with corn tortillas and cheese, often accompanied by beans or squash. Over time, variations incorporated meats, vegetables, and diverse cheeses to adapt to different palates and regional influences.

The combination of melted cheese and a toasted tortilla became a global favorite because of its simplicity and versatility. Today, quesadillas are a popular comfort food worldwide, celebrated for their flavorful fillings and satisfying textures.

You might also enjoy our ground beef and broccoli stir fry.

Meal Prep and Storage Tips

Store leftover quesadillas in an airtight container in the refrigerator for up to 3 days. To freeze, wrap each quesadilla tightly in plastic wrap and store in a freezer bag for up to 2 months.

For more ideas, check out our honey sriracha ground chicken and.

Reheat refrigerated quesadillas in a skillet over medium heat for 2-3 minutes per side to restore crispiness. Frozen quesadillas can be reheated directly in a skillet or baked at 375°F for 10-15 minutes until heated through.

Looking for something similar? Try our slow cooker cheesy ranch chicken.

Common Mistakes to Avoid

  • Overloading the tortillas with filling can make them difficult to seal and flip. Stick to the recommended measurements for even cooking.
  • Cooking at too high of a heat can burn the tortillas before the cheese melts. Use medium heat to achieve a golden-brown exterior and gooey interior.
  • Skipping butter can result in less crispy tortillas. While optional, it adds an extra layer of flavor and texture worth trying.

The Best Cheesy Ground Beef Quesadillas

Prep Time 10 minutes
Cook Time 20 minutes
Total Time 30 minutes
Servings 4 servings
Calories 450
A quick and delicious recipe for cheesy ground beef quesadillas, perfect for a family meal or snack.

Ingredients

Instructions 

  • Heat olive oil in a large skillet over medium heat.
  • Add the diced onions and bell peppers to the skillet and sauté for 2-3 minutes until softened.
  • Add the ground beef to the skillet and cook, breaking it up with a spoon, until fully browned and cooked through, about 5-7 minutes.
  • Season the ground beef with cumin, smoked paprika, chili powder, garlic powder, onion powder, salt, and black pepper. Stir well to evenly coat the beef in the spices.
  • Remove the skillet from heat and set the beef mixture aside.
  • Heat a clean skillet or griddle over medium heat. If desired, lightly spread butter on one side of each tortilla for extra crispiness.
  • Place one tortilla in the skillet, buttered side down if using butter.
  • Sprinkle 1/4 cup of cheddar cheese and 1/4 cup of mozzarella cheese evenly on one half of the tortilla.
  • Add 1/4 of the cooked ground beef mixture on top of the cheese layer.
  • Fold the tortilla in half over the filling, pressing gently to seal.
  • Cook the quesadilla for 2-3 minutes on each side, or until the tortilla is golden brown and crispy, and the cheese is melted.
  • Repeat the process with the remaining tortillas, cheese, and ground beef mixture.
  • Slice each quesadilla into wedges and serve warm with sour cream, salsa, and guacamole on the side.

Notes

For extra flavor, you can add chopped cilantro or jalapeños to the ground beef mixture. Adjust the spice level by increasing or decreasing the chili powder.
Calories: 450kcal
Cost: $15
Course: Main Course
Cuisine: Mexican
Keyword: Cheesy, Ground Beef, quesadillas
A close-up of cheesy ground beef quesadillas served on a wooden plate with a side of salsa and sour cream.

Loved this recipe? Save it to your favorite Pinterest board so you can easily find it later! ✨

This post contains affiliate links. As an Amazon Associate, I earn from qualifying purchases. This comes at no extra cost to you.

The Best Cheesy Ground Beef Quesadillas bring together flavorful seasoned ground beef, gooey melted cheddar and mozzarella cheeses, and fresh vegetables, all wrapped in a golden, crispy tortilla. The savory aroma of smoked paprika and cumin combined with the creamy textures of melted cheese makes this dish an instant favorite. Perfect for a quick dinner or a satisfying snack, these quesadillas are sure to become your go-to recipe.

Table of Contents

Why This Recipe Works

  • The Best Cheesy Ground Beef Quesadillas are quick to make, with minimal prep and cook time, perfect for busy weeknights. You’ll have a satisfying, homemade meal in just 30 minutes.
  • The combination of ground cumin, smoked paprika, and chili powder brings depth to the ground beef, creating bold flavors that pair perfectly with melted cheese. These seasonings make every bite rich and mouthwatering.
  • This recipe uses simple ingredients that are pantry staples, making it budget-friendly and accessible. Flour tortillas, shredded cheese, black beans, and fresh vegetables come together seamlessly for a balanced dish.
  • The crispy tortilla exterior combined with the gooey cheese inside creates a satisfying texture contrast. It’s crispy on the outside and irresistibly melty on the inside.

Ingredients List

The mix of smoked paprika and cumin is essential, adding smoky and earthy notes to the ground beef that make these quesadillas stand out. Halal-certified beef and butter ensure the recipe remains accessible for diverse dietary preferences.

Step-by-Step Instructions

  1. Heat olive oil in a large skillet over medium heat.
  2. Add the ground beef and cook until browned, breaking it up with a spatula, about 5-7 minutes.
  3. Season the beef with ground cumin, smoked paprika, garlic powder, onion powder, chili powder, salt, and pepper. Stir to combine and allow the spices to coat the meat evenly.
  4. Add diced onion and green bell pepper to the skillet. Cook until softened, about 3-4 minutes, stirring occasionally to prevent sticking.
    Cheesy ground beef quesadillas served on a wooden platter with a side of salsa and sour cream.

    Breville Smart Oven Air Fryer

    Kitchen ApplianceBreville Smart Oven Air Fryer

    A versatile appliance for reheating quesadillas or preparing other dishes with precision.

    View on Amazon →

    Lodge Cast Iron Skillet 12-inch

    Essential CookwareLodge Cast Iron Skillet 12-inch

    Perfect for searing and cooking quesadillas evenly — essential for this recipe.

    View on Amazon →

  5. Stir in the black beans and cook for another 2 minutes. Remove the skillet from heat and set aside.
  6. In a separate bowl, mix the shredded cheddar and mozzarella cheeses together.
  7. Place a large tortilla on a clean surface. Spread a generous layer of the beef mixture on one half of the tortilla, leaving space around the edges.
  8. Sprinkle a handful of the cheese mixture on top of the beef filling.
  9. Fold the tortilla in half to cover the filling.
  10. Heat 1/2 tablespoon of butter in a clean skillet over medium heat. Place the folded tortilla in the skillet and cook for 2-3 minutes on each side, or until golden brown and the cheese is melted.
  11. Repeat the process with the remaining tortillas, adding more butter to the skillet as needed.
  12. Slice the quesadillas into wedges and garnish with fresh cilantro, if desired. Serve warm with sour cream and salsa on the side.

Meal Prep, Storage, and Reheating

The Best Cheesy Ground Beef Quesadillas are ideal for meal prep as you can make the beef filling ahead of time. Store the cooked beef filling in an airtight container in the fridge for up to 3 days or freeze it for up to 2 months.

Reheat the beef in a skillet or microwave until warmed through before assembling the quesadillas. Once the quesadillas are fully cooked, you can store them in the fridge for up to 2 days and reheat in a skillet to restore crispiness.

You might also enjoy our ground beef and broccoli stir fry.

Serving Suggestions

  • Pair these quesadillas with a refreshing side salad to add crunch and balance the richness of the cheese.
  • Serve with tangy guacamole or creamy avocado slices for a vibrant, fresh contrast.
  • Include a side of Mexican-style rice for a hearty, filling addition to the meal.
  • Top with hot sauce or drizzle with lime juice for extra zest to elevate the flavor.

Common Mistakes to Avoid

  • Avoid overcrowding the skillet, as it prevents the tortillas from crisping evenly. Cook one quesadilla at a time for perfect results.
  • Don’t overfill the tortillas, as excess filling can spill out and make flipping the quesadilla difficult.
  • Use freshly shredded cheese instead of pre-packaged shredded cheese, which often contains additives that can affect melting quality.

Dish Background & Origins

Quesadillas originate from Mexican cuisine and are traditional street food staples. They are known for their versatility, allowing cooks to experiment with fillings, from cheese and meats to vegetables and beans.

For more ideas, check out our honey sriracha ground chicken and.

This recipe honors the classic flavors of Mexican fare with a modern twist by combining seasoned ground beef and black beans with gooey cheeses for a robust and satisfying dish. It’s simple yet packed with layers of texture and flavor.

Looking for something similar? Try our slow cooker cheesy ranch chicken.

The Best Cheesy Ground Beef Quesadillas

Prep Time 10 minutes
Cook Time 20 minutes
Total Time 30 minutes
Servings 4 servings
Calories 450
A delicious and easy-to-make quesadilla recipe featuring cheesy ground beef, black beans, and fresh vegetables. Perfect for a quick meal or snack!

Ingredients

Instructions 

  • Heat olive oil in a large skillet over medium heat.
  • Add the ground beef and cook until browned, breaking it up with a spatula, about 5-7 minutes.
  • Season the beef with ground cumin, smoked paprika, garlic powder, onion powder, chili powder, salt, and pepper. Stir to combine.
  • Add diced onion and green bell pepper to the skillet. Cook until softened, about 3-4 minutes.
  • Stir in the black beans and cook for another 2 minutes. Remove the skillet from heat and set aside.
  • In a separate bowl, mix the shredded cheddar and mozzarella cheeses together.
  • Place a large tortilla on a clean surface. Spread a generous layer of the beef mixture on one half of the tortilla, leaving space around the edges.
  • Sprinkle a handful of the cheese mixture on top of the beef filling.
  • Fold the tortilla in half to cover the filling.
  • Heat 1/2 tablespoon of butter in a clean skillet over medium heat. Place the folded tortilla in the skillet and cook for 2-3 minutes on each side, or until golden brown and the cheese is melted.
  • Repeat the process with the remaining tortillas, adding more butter to the skillet as needed.
  • Slice the quesadillas into wedges and garnish with fresh cilantro, if desired.
  • Serve warm with sour cream and salsa on the side.

Notes

For a spicier version, add diced jalapeños to the filling. You can also substitute the cheddar and mozzarella cheeses with your favorite cheese blend.
Calories: 450kcal
Cost: $15
Course: Main Course
Cuisine: Mexican
Keyword: Cheesy, Ground Beef, quesadillas
Cheesy ground beef quesadillas served on a wooden platter with a side of salsa and sour cream.

Loved this recipe? Save it to your favorite Pinterest board so you can easily find it later! ✨

This post contains affiliate links. As an Amazon Associate, I earn from qualifying purchases. This comes at no extra cost to you.

This Sloppy Joe Potato Skillet is a hearty one-pan recipe where golden, tender potatoes meet flavorful ground beef coated in a tangy, savory sauce. Topped with melted cheddar cheese, this dish offers a satisfying combination of textures and rich aromas. Perfect for halal diets, it’s an easy option for quick dinners or lazy weekends.

Table of Contents

Why This Dish Matters

  • It simplifies dinner prep by using just one pan, reducing cleanup effort. The combination of potatoes and ground beef delivers a filling meal in less than an hour.
  • This recipe is halal-friendly, making it accessible for diverse households. Using halal Worcestershire sauce and certified cheese ensures dietary compliance without sacrificing flavor.
  • The dish is perfect for busy families seeking comfort food without complicated steps. The ingredients are straightforward, and the cooking process is beginner-friendly.
  • This skillet recipe is customizable for different palates. Adjust the heat with additional chili powder or garnish with herbs like parsley for a fresh touch.

Ingredients List

  • 2 medium russet potatoes, diced into bite-sized cubes
  • 2 tablespoons olive oil
  • 1 pound ground beef (halal-certified)
  • 1 small onion, finely diced
  • 1 small green bell pepper, finely diced
  • 3 cloves garlic, minced
  • 1/2 cup tomato sauce
  • 1/4 cup ketchup
  • 2 tablespoons halal Worcestershire sauce
  • 1 tablespoon yellow mustard
  • 1 teaspoon smoked paprika
  • 1 teaspoon chili powder
  • 1/2 teaspoon salt
  • 1/4 teaspoon black pepper
  • 1/2 cup shredded cheddar cheese (halal-certified)
  • 2 tablespoons chopped fresh parsley (optional, for garnish)

Russet potatoes are ideal for this dish because their starchy texture holds up well during cooking, creating a satisfying base. The halal-certified ground beef provides a rich, savory element, complemented by the tangy sauce mix.

Step-by-Step Instructions

  1. Heat 1 tablespoon of olive oil in a large skillet over medium heat. Add the diced potatoes and cook for 8-10 minutes, stirring occasionally, until golden and tender. Remove them from the skillet and set aside.
  2. In the same skillet, add the remaining tablespoon of olive oil and the ground beef. Break up the meat with a wooden spoon while cooking for 5-6 minutes, ensuring it’s browned and fully cooked.
  3. Add the diced onion, green bell pepper, and garlic to the skillet. Sauté for 3-4 minutes until the vegetables soften and their flavors meld.
  4. Stir in the tomato sauce, ketchup, halal Worcestershire sauce, yellow mustard, smoked paprika, chili powder, salt, and black pepper. Mix thoroughly and let the sauce simmer for 3-4 minutes to thicken slightly.
  5. A close-up view of a skillet filled with sloppy joe mixture served over baked potato slices.

    KitchenAid Artisan Stand Mixer 5 Quart

    Kitchen ApplianceKitchenAid Artisan Stand Mixer 5 Quart

    Makes mixing dough and batters effortless — a kitchen game-changer for versatile recipes

    View on Amazon →

    Lodge Cast Iron Skillet 12-inch

    Essential CookwareLodge Cast Iron Skillet 12-inch

    Perfect for searing and baking — this recipe needs even heat distribution

    View on Amazon →

  6. Add the cooked potatoes back into the skillet and gently stir to coat them in the sauce. Heat everything through for 2-3 minutes, allowing the flavors to combine.
  7. Sprinkle the shredded cheddar cheese evenly over the skillet. Cover and let the cheese melt completely, about 2 minutes.
  8. Remove from heat and garnish with chopped parsley if desired. Serve warm for a hearty meal.

Common Questions

  • Can I use a different type of potato? Yes, Yukon Gold potatoes work well due to their creamy texture, but avoid waxy varieties like red potatoes as they don’t crisp up as nicely.
  • What can I substitute for halal Worcestershire sauce? Tamari or soy sauce can be used as an alternative, but ensure they meet any dietary requirements. Adjust the quantity to taste.
  • How do I make this spicier? Add more chili powder or a pinch of cayenne pepper during the sauce preparation step for additional heat.

Mistakes to Avoid

  • Overcooking potatoes: Cooking diced potatoes beyond 10 minutes can cause them to become mushy. Stir occasionally to ensure even browning and doneness.
  • Skipping the sauce simmer: The sauce needs time to thicken and develop its rich flavors. Don’t rush this step by cutting the simmering time short.
  • Using unevenly diced ingredients: Aim for similar-sized cubes of potatoes and finely diced vegetables. This ensures even cooking and avoids undercooked or overcooked pieces.

Serving Ideas

  • Pair with our potato soup with hash browns for a hearty potato-themed dinner.
  • Serve with a side of garlic bread for a complementary crunch and added depth of flavor.
  • Enjoy it alongside a fresh green salad dressed with balsamic vinaigrette for a balanced meal.
  • Add steamed broccoli or roasted carrots for a pop of color and extra nutrition on the plate.

Meal Prep Tips

Store leftovers in an airtight container in the fridge for up to 3 days. To freeze, transfer the cooled dish to freezer-safe containers and keep it for up to 2 months.

Reheat in a skillet over medium heat or in the microwave until warmed through. If frozen, thaw in the refrigerator overnight before reheating to maintain the best texture and flavor.

Sloppy Joe Potato Skillet

Prep Time 10 minutes
Cook Time 25 minutes
Total Time 35 minutes
Servings 4 servings
Calories 450
A hearty and flavorful skillet dish combining tender potatoes, seasoned ground beef, and melted cheddar cheese for a comforting meal.

Ingredients

Instructions 

  • Heat 1 tablespoon of olive oil in a large skillet over medium heat. Add the diced potatoes and cook for 8-10 minutes, stirring occasionally, until they are golden and tender. Remove the potatoes from the skillet and set aside.
  • In the same skillet, add the remaining 1 tablespoon of olive oil and the ground beef. Cook for 5-6 minutes, breaking up the meat with a wooden spoon, until browned and fully cooked.
  • Add the diced onion, green bell pepper, and garlic to the skillet with the beef. Cook for 3-4 minutes, stirring occasionally, until the vegetables soften.
  • Stir in the tomato sauce, ketchup, halal Worcestershire sauce, yellow mustard, smoked paprika, chili powder, salt, and black pepper. Mix well and let the sauce simmer for 3-4 minutes to thicken slightly.
  • Add the cooked potatoes back into the skillet and gently stir to coat them in the sloppy joe mixture. Let everything heat through for 2-3 minutes.
  • Sprinkle the shredded cheddar cheese evenly over the skillet. Cover the skillet and allow the cheese to melt, about 2 minutes.
  • Remove from heat and garnish with chopped fresh parsley, if desired. Serve warm.

Notes

For a spicier version, add a pinch of cayenne pepper or red pepper flakes. You can substitute ground turkey for ground beef if preferred.
Calories: 450kcal
Cost: $12
Course: Main Course
Cuisine: American
Keyword: halal, potato skillet, sloppy joe
A close-up view of a skillet filled with sloppy joe mixture served over baked potato slices.

Loved this recipe? Save it to your favorite Pinterest board so you can easily find it later! ✨

This post contains affiliate links. As an Amazon Associate, I earn from qualifying purchases. This comes at no extra cost to you.


Spinach Ricotta Pasta Bake Recipe

This Spinach Ricotta Pasta Bake blends tender pasta, creamy ricotta, and vibrant spinach, all bathed in rich marinara sauce and topped with golden melted cheese. The aroma of garlic and Italian seasoning combined with bubbly mozzarella creates an irresistible comfort meal. Perfect for gatherings or weeknight dinners, this dish is fully halal and incredibly satisfying.

Table of Contents

Why Spinach Ricotta Pasta Bake Works for Your Busy Life

  • This dish requires minimal prep time, making it ideal for busy weeknights. The straightforward layering ensures even novice cooks can master it with ease.
  • Loaded with protein and greens, it’s a nutritious one-pan meal that satisfies without feeling heavy. Ricotta provides creaminess, while spinach adds essential vitamins.
  • It’s easily customizable, so you can adjust the seasoning or cheese to fit your preferences. Plus, leftovers reheat beautifully for quick lunches or dinners.
  • Using common pantry staples like pasta, marinara sauce, and garlic powder, it’s budget-friendly without sacrificing flavor.

Ingredients for Spinach Ricotta Pasta Bake

Ricotta cheese is key to creating the creamy texture that balances the acidity of the marinara sauce. The chopped spinach brings a fresh element to the dish, complementing the cheeses perfectly.

Step-by-Step Instructions

  1. Preheat your oven to 375°F (190°C). Grease a large baking dish with olive oil and set it aside.
  2. Cook the pasta according to the package instructions until al dente. Drain and set it aside to cool slightly.
  3. In a large mixing bowl, combine ricotta cheese, garlic powder, Italian seasoning, salt, and pepper. Stir until well blended, then fold in the chopped spinach.
  4. In the prepared baking dish, layer half of the cooked pasta. Spread half of the marinara sauce on top, followed by half of the ricotta-spinach mixture.
  5. Sprinkle half of the shredded mozzarella cheese and grated Parmesan cheese over the ricotta-spinach layer.
    A freshly baked spinach ricotta pasta dish topped with melted cheese in a casserole dish.

    KitchenAid Artisan Stand Mixer 5 Quart

    Kitchen ApplianceKitchenAid Artisan Stand Mixer 5 Quart

    Perfect for mixing ricotta and spinach effortlessly — a versatile kitchen tool.

    View on Amazon →

    Pyrex 3-Quart Glass Baking Dish

    Essential CookwarePyrex 3-Quart Glass Baking Dish

    Ideal for layering and baking pasta dishes evenly — durable and easy to clean.

    View on Amazon →

  6. Repeat the layers with the remaining pasta, marinara sauce, ricotta-spinach mixture, mozzarella, and Parmesan cheese.
  7. Cover the baking dish with foil and bake for 20 minutes. Remove the foil and bake for an additional 10 minutes, or until the cheese is melted and bubbly.
  8. Remove the dish from the oven and let it sit for 5 minutes before serving. This helps the layers set and makes slicing easier.

Common Mistakes to Avoid

  • Skipping the step to grease the baking dish can lead to sticking, making cleanup harder. Always use olive oil or cooking spray to coat the dish.
  • Overcooking the pasta results in a mushy texture after baking. Cook it just to al dente for best results.
  • Forget to cover the dish during the first baking stage, and the cheese may dry out before it has a chance to melt. Foil traps moisture and prevents this issue.

Expert Tips and Shortcuts

  • To save time, prep the ricotta-spinach mixture while the pasta cooks. This streamlines the assembly process and reduces downtime.
  • Use pre-shredded cheeses to minimize prep work, especially on busy days. Freshly grated Parmesan, however, offers a stronger flavor if you have time.
  • Double the recipe and freeze half before baking for a ready-to-go meal later. Wrap tightly with foil and freeze for up to two months.
  • If you’re cooking for one, assemble the bake in individual ramekins for single servings. This prevents food waste and makes portioning effortless.

Serving and Pairing Ideas

  • Pair this dish with our garlic parmesan pasta for a cheesy side that complements its robust flavors.
  • Lighten the meal with a simple arugula salad tossed in balsamic vinaigrette. The peppery greens balance the richness of the bake.
  • Serve with warm, crusty bread for dipping into the marinara sauce. It’s a satisfying addition that rounds out the meal.
  • Offer a refreshing drink like iced tea or lemonade to contrast the savory tones of the dish.


Spinach Ricotta Pasta Bake

Prep Time 15 minutes
Cook Time 30 minutes
Total Time 45 minutes
Servings 6 servings
Calories 450
A delicious and comforting pasta bake featuring ricotta cheese, spinach, and marinara sauce, perfect for a family dinner.

Instructions 

  • Preheat your oven to 375°F (190°C). Grease a large baking dish with olive oil and set aside.
  • Cook the pasta according to the package instructions until al dente. Drain and set aside.
  • In a large mixing bowl, combine the ricotta cheese, garlic powder, Italian seasoning, salt, and pepper. Mix until well blended.
  • Add the chopped spinach to the ricotta mixture and stir to combine.
  • In the prepared baking dish, layer half of the cooked pasta. Top it with half of the marinara sauce, then spread half of the ricotta-spinach mixture over the sauce.
  • Sprinkle half of the shredded mozzarella cheese and grated Parmesan cheese over the ricotta-spinach layer.
  • Repeat the layers with the remaining pasta, marinara sauce, ricotta-spinach mixture, mozzarella, and Parmesan cheese.
  • Cover the baking dish with foil and bake for 20 minutes. Remove the foil and bake for an additional 10 minutes, or until the cheese is melted and bubbly.
  • Remove the dish from the oven and let it sit for 5 minutes before serving.

Notes

You can substitute kale for spinach or use a vegan ricotta alternative for a dairy-free version.
Calories: 450kcal
Cost: $15
Course: Main Course
Cuisine: Italian
Keyword: Pasta Bake, Spinach Ricotta

A freshly baked spinach ricotta pasta dish topped with melted cheese in a casserole dish.

Loved this recipe? Save it to your favorite Pinterest board so you can easily find it later! ✨

This post contains affiliate links. As an Amazon Associate, I earn from qualifying purchases. This comes at no extra cost to you.

Grilled Chicken Caprese is a vibrant fusion of smoky grilled poultry and the classic caprese trio of mozzarella, basil, and tomato, enhanced by zesty balsamic glaze. Its tender chicken breasts are marinated in garlic, oregano, and olive oil, delivering bold flavor with every bite. Topped with creamy cheese and garden-fresh ingredients, this dish is a perfect balance of hearty and refreshing.

Table of Contents

Why This Dish Is Perfect For You

  • This recipe is ideal for anyone craving a healthy dinner on the grill that’s both satisfying and fresh. The combination of tender chicken with vibrant caprese toppings ensures you get balanced flavors and textures in every bite.
  • If you’re searching for grilling food ideas that are quick yet versatile, Grilled Chicken Caprese fits the bill. With just 25 minutes of total preparation and cooking time, it’s an easy grilling dinner that works beautifully for busy weeknights.
  • The dish relies on wholesome ingredients, making it one of the grilled chicken healthy meals you can feel great about. Perfectly marinated chicken paired with low-fat mozzarella and fresh vegetables highlights its nutritional value.
  • This recipe minimizes cost by using accessible ingredients without sacrificing its gourmet appeal. Dinner recipes grilling like this one prove you can enjoy restaurant-quality meals at home without breaking the bank.

Ingredients List

Fresh mozzarella elevates this dish, adding creaminess that complements the juicy chicken and crisp vegetables. Opt for high-quality balsamic glaze for a tangy finish that ties all flavors together beautifully.

Step-by-Step Instructions

  1. Preheat your grill to medium-high heat (approximately 375°F or 190°C). Ensure the grates are clean and lightly oiled to prevent sticking.
  2. In a small bowl, mix olive oil, garlic powder, dried oregano, salt, and black pepper to prepare the marinade. Stir until fully combined for even flavor distribution.
  3. Rub the marinade evenly onto the chicken breasts, ensuring both sides are well coated for maximum flavor.
  4. Place the marinated chicken breasts on the preheated grill. Cook for 5-6 minutes per side, ensuring the internal temperature reaches 165°F (74°C).
  5. During the last 2-3 minutes of grilling, lay a slice of fresh mozzarella cheese on top of each chicken breast. Allow it to soften and slightly melt.
  6. Remove the chicken from the grill and let it rest for 2-3 minutes to retain its juices.
  7. Arrange the chicken on a serving platter, topping each piece with a tomato slice and fresh basil leaves.
  8. Drizzle balsamic glaze and lemon juice over the chicken and its toppings. Add a touch of olive oil for extra richness, if desired.
  9. Serve immediately and garnish with extra basil leaves for a bright and aromatic finish.
Grilled chicken breast topped with fresh mozzarella, tomato slices, and basil leaves on a white plate.

Origin of This Dish

The caprese salad, originating from Italy’s Capri region, inspired this grilled chicken interpretation. Combining Mediterranean flavors like mozzarella, basil, and tomato with smoky grilled chicken creates a modern twist on this beloved classic.

Weber Spirit II E-310 Gas Grill

Kitchen ApplianceWeber Spirit II E-310 Gas Grill

Achieve perfect grilling results with this high-quality gas grill, ideal for recipes like Grilled Chicken Caprese.

View on Amazon →

ThermoPro TP03 Digital Instant-Read Meat Thermometer

Essential CookwareThermoPro TP03 Digital Instant-Read Meat Thermometer

Ensure your chicken reaches the perfect internal temperature of 165°F for safe and juicy results.

View on Amazon →

Grilling lends depth to the dish, reflecting Southern European traditions where fresh ingredients meet bold cooking techniques. Its balance of simplicity and flavor highlights why caprese-style recipes remain timeless.

Common Questions

  • Can I prepare this recipe without a grill? If grilling isn’t an option, use a stovetop grill pan or broiler to cook the chicken while replicating the charred flavor.
  • How do I know when the chicken is fully cooked? Use a meat thermometer to ensure the internal temperature reaches 165°F (74°C), guaranteeing safe and juicy results.
  • Can I make this dish ahead of time? Yes, you can marinate the chicken a day prior and grill it when ready. Assemble the toppings immediately before serving to keep them fresh.

Storing and Reheating

To store leftovers, transfer cooled chicken to an airtight container and refrigerate for up to 3 days. For longer storage, freeze the grilled chicken for up to 2 months — without the toppings, as tomatoes and basil don’t freeze well.

Reheat refrigerated chicken gently in the microwave or oven at a low temperature to retain moisture. For frozen portions, thaw overnight in the fridge before reheating to preserve flavor.

Serving and Pairing

This dish pairs wonderfully with light sides like our easy grilled thai chicken skewers to complement the fresh flavors. For a heartier option, serve alongside garlic bread or quinoa tossed with roasted vegetables.

For a refreshing contrast, add a crisp green salad with vinaigrette, or balance the meal with a chilled pasta salad. Each side enhances the vibrancy of the caprese ingredients, making your dinner grill ideas complete.

Grilled Chicken Caprese

Prep Time 10 minutes
Cook Time 12 minutes
Total Time 22 minutes
Servings 4 servings
Calories 350
A flavorful and fresh grilled chicken dish topped with mozzarella, tomatoes, basil, and balsamic glaze.

Ingredients

Instructions 

  • Preheat your grill to medium-high heat (around 375°F/190°C).
  • In a small bowl, mix olive oil, garlic powder, dried oregano, salt, and black pepper to create a marinade.
  • Rub the marinade evenly over the chicken breasts, ensuring they are well coated.
  • Place the chicken breasts on the preheated grill and cook for about 5-6 minutes per side, or until the internal temperature reaches 165°F (74°C).
  • During the last 2-3 minutes of grilling, place a slice of fresh mozzarella cheese on top of each chicken breast to allow it to melt slightly.
  • Remove the grilled chicken from the grill and let it rest for 2-3 minutes.
  • Arrange the grilled chicken on a serving platter and top each piece with a slice of tomato and a few basil leaves.
  • Drizzle balsamic glaze and lemon juice over the chicken and toppings. Add a light drizzle of olive oil if desired.
  • Serve immediately, garnished with extra basil leaves for a fresh and vibrant presentation.

Notes

For best results, use fresh, high-quality mozzarella and ripe tomatoes. Adjust seasoning to taste.
Calories: 350kcal
Cost: $15
Course: Main Course
Cuisine: Italian
Keyword: basil, Caprese, Grilled Chicken
Grilled chicken breast topped with fresh mozzarella, tomato slices, and basil leaves on a white plate.

Loved this recipe? Save it to your favorite Pinterest board so you can easily find it later! ✨

This post contains affiliate links. As an Amazon Associate, I earn from qualifying purchases. This comes at no extra cost to you.

Blackstone Steak Fajitas combine juicy, halal-certified beef with perfectly sautéed bell peppers and onions for a flavorful explosion wrapped in warm tortillas. The smoky aroma from the smoked paprika in the marinade mingles beautifully with the vibrant charred vegetables. This Tex-Mex classic comes alive on the Blackstone griddle, making it an irresistible option for outdoor cooking enthusiasts.

Table of Contents

Why Blackstone Steak Fajitas Are Perfect

  • Quick and flavorful outdoor cooking: Blackstone Steak Fajitas allow you to prepare a vibrant, restaurant-quality meal in just 30 minutes. The efficient griddle surface ensures evenly cooked meat and vegetables every time.
  • Customizable toppings for everyone’s taste: Whether you prefer a dollop of guacamole or a hit of spicy jalapeños, these fajitas let you personalize each tortilla to your liking. This flexibility makes them ideal for gatherings and picky eaters.
  • Perfectly balanced Tex-Mex flavors: The marinade infuses the steak strips with a tangy and smoky profile, complemented by the natural sweetness of sautéed peppers and onions. This depth of flavor makes it a standout dish no matter the occasion.
  • Halal-friendly recipe: Using halal-certified ingredients ensures Blackstone Steak Fajitas are accessible for those following halal dietary requirements. It’s a thoughtful option for inclusive dining that doesn’t compromise on flavor.

Ingredients List

Smoked paprika stands out as a key ingredient, giving the steak its irresistible smoky depth. Coupled with lime juice, it ensures the marinade delivers a perfect blend of tang and spice.

Step-by-Step Instructions

  1. In a medium bowl, whisk together olive oil, lime juice, soy sauce, cumin, chili powder, smoked paprika, garlic powder, onion powder, salt, and black pepper to create the marinade.
  2. Slice the steak into thin strips and place them in a resealable plastic bag or shallow dish. Pour the marinade over the steak, ensuring it fully coats each piece. Seal or cover and refrigerate for at least 30 minutes, or up to 2 hours for enhanced flavor.
  3. Preheat the Blackstone griddle to medium-high heat.
  4. Drizzle 1 tablespoon of olive oil onto the heated griddle and add the sliced bell peppers and onions. Sauté, stirring occasionally, until the vegetables soften and develop a slight char, approximately 7-8 minutes. Move them to the side to keep warm.
  5. Add the marinated steak strips to the griddle. Stir occasionally, cooking for about 4-5 minutes until the beef is browned and cooked to your desired doneness.
  6. Warm the tortillas directly on the griddle for 30-60 seconds per side, ensuring they are soft and slightly toasted.
  7. Assemble the fajitas by filling each tortilla with the cooked steak and vegetables. Add optional toppings like cilantro, jalapeños, sour cream, or guacamole as desired.
  8. Serve immediately and enjoy your flavorful Blackstone steak fajitas!
A sizzling plate of steak fajitas cooked on a Blackstone griddle, served with colorful bell peppers and onions.

KitchenAid Artisan Stand Mixer 5 Quart

Kitchen ApplianceKitchenAid Artisan Stand Mixer 5 Quart

Perfect for mixing marinades or dough for homemade tortillas, this stand mixer is a versatile kitchen tool.

View on Amazon →

Blackstone Griddle 36-inch

Essential CookwareBlackstone Griddle 36-inch

Ideal for outdoor cooking, this griddle provides even heat distribution for perfectly cooked steak fajitas.

View on Amazon →

FAQs About Blackstone Steak Fajitas

  • Can I use a different cut of beef? Yes, sirloin, flank, or skirt steak work well for this recipe. Choose thin cuts for easier slicing and better marinade absorption.
  • How can I make it spicier? Add extra chili powder or toss sliced jalapeños onto the griddle alongside the vegetables for a spicy kick.
  • What’s the best way to keep the tortillas warm? Wrap them in a clean kitchen towel after heating, or place them in a tortilla warmer until ready to serve.

Expert Tips for Blackstone Steak Fajitas

  • Marinate the steak overnight for deeper flavor. Extended marination allows the spices and lime juice to fully infuse the meat.
  • Use fresh vegetables for the best texture and taste. Thinly slice the peppers and onions to ensure even cooking on the griddle.
  • Don’t overcrowd the griddle. Cooking in batches prevents steaming and ensures everything develops a proper char.
  • Preheat the griddle fully before adding ingredients. This ensures the steak and vegetables cook evenly without sticking.

Storage and Reheating Guide

Store leftover Blackstone Steak Fajitas in airtight containers in the refrigerator for up to 3 days. Keep the steak and vegetables separate from the tortillas to avoid sogginess.

For freezing, place the cooked steak and vegetables in freezer-safe bags, removing excess air. They can be frozen for up to 2 months. Reheat on the Blackstone griddle over medium heat or in a skillet, adding a splash of olive oil if needed.

If freezing tortillas, wrap them tightly in foil to maintain their softness. Reheat directly on the griddle or in a microwave, ensuring they stay pliable.

History of Fajitas

Fajitas originated in the ranchlands of Texas during the early 20th century. The dish was created by Mexican ranch workers who used inexpensive cuts of beef like skirt steak, grilling them and serving with tortillas and simple accompaniments.

Over time, fajitas gained popularity beyond Texas, evolving to include vibrant bell peppers, onions, and a variety of toppings. Today, they are a staple in Tex-Mex cuisine, enjoyed across the globe in countless variations.

Blackstone Steak Fajitas

Prep Time 30 minutes
Cook Time 15 minutes
Total Time 45 minutes
Servings 4 servings
Calories 450
Delicious and flavorful steak fajitas cooked on a Blackstone griddle, perfect for a quick and satisfying meal.

Ingredients

Instructions 

  • In a medium bowl, whisk together olive oil, lime juice, soy sauce, cumin, chili powder, smoked paprika, garlic powder, onion powder, salt, and black pepper to create the marinade.
  • Slice the steak into thin strips, then place the strips in a resealable plastic bag or shallow dish. Pour the marinade over the steak, ensuring all pieces are coated. Seal or cover, then refrigerate for at least 30 minutes (or up to 2 hours for extra flavor).
  • Preheat the Blackstone griddle to medium-high heat.
  • Drizzle 1 tablespoon of olive oil onto the griddle surface, then add the sliced bell peppers and onions. Cook, stirring occasionally, until the vegetables are softened and slightly charred, about 7-8 minutes. Move the vegetables to the side of the griddle to keep warm.
  • Add the marinated steak strips to the griddle. Cook for 4-5 minutes, stirring occasionally, until the steak is browned and cooked to your desired doneness.
  • Warm the tortillas directly on the griddle for 30-60 seconds per side until soft and slightly toasted.
  • Assemble the fajitas by filling each tortilla with cooked steak and vegetables. Add optional toppings such as chopped cilantro, sliced jalapeños, sour cream, or guacamole, if desired.
  • Serve immediately and enjoy!

Notes

For extra flavor, marinate the steak overnight. Adjust spice levels to your preference.
Calories: 450kcal
Cost: $15
Course: Main Course
Cuisine: Mexican
Keyword: Blackstone griddle, steak fajitas
A sizzling plate of steak fajitas cooked on a Blackstone griddle, served with colorful bell peppers and onions.

Loved this recipe? Save it to your favorite Pinterest board so you can easily find it later! ✨