If you're anything like me, the allure of crispy, golden-brown bites without the guilt of deep frying is hard to resist. That's why I’ve compiled a list of my favorite air fryer recipes that not only deliver that satisfying crunch but also pack in incredible flavors. From the crispiest gnocchi to succulent honey garlic salmon bites, each recipe in this guide promises simplicity and deliciousness that can fit into any mealtime. Dive in with me, and discover the joy of creating these tasty treats that will surely impress your family and friends while making your cooking experience effortless and fun!
1. Crispiest Air Fryer Gnocchi

why make this recipe
This recipe makes gnocchi very crispy on the outside and soft inside. It is quick and uses the air fryer to cut oil and time. You can use shelf-stable, refrigerated, or frozen gnocchi. For a quick drink idea to serve with this snack, see Earl Grey and chocolate pairing for a simple match.
introduction
Crispiest Air Fryer Gnocchi is a fast side or snack. You only need a few ingredients and an air fryer. The outside gets brown and crunchy while the inside stays tender. If you like a light herbal drink with snacks, this pair goes well with ideas from lavender Earl Grey pairing.
how to make Crispiest Air Fryer Gnocchi
Preheat your air fryer and toss the gnocchi with oil, spices, and parmesan. Do not thaw frozen gnocchi. Add them in a single layer to the basket and air fry until golden and crispy. Shake the basket a few times so they brown on all sides. For a small note on timing and heat distribution, see tips below for small changes that help.
Ingredients :
1 lb gnocchi (shelf-stable, refrigerator, or frozen (regular, cauliflower, or sweet potato))
1 – 2 tbsp extra-virgin olive oil
½ tsp garlic powder
½ tsp salt
½ tsp black pepper
2 – 3 tbsp freshly grated parmesan
Directions :
Preheat your air fryer to 390°F and lightly grease the basket with olive oil spray.
In a large mixing bowl, toss the gnocchi with the rest of the ingredients. If using frozen gnocchi, DO NOT thaw it.
Add seasoned gnocchi to the preheated basket. Try to avoid overlapping because they won’t get as crispy.
Shelf-Stable & Refrigerated Gnocchi: Air fry at 390°F for 11 – 14 minutes, shaking the basket every 4 to 5 minutes, so they are perfectly golden on all sides. The gnocchi is done when the outsides are golden (not burned) and crispy.
Frozen Gnocchi: Air fry at 390°F for 13 – 16 minutes, shaking the basket every 4 to 5 minutes, so they are perfectly golden on all sides. Frozen gnocchi takes a little bit longer to air fry, but the gnocchi should still be done when the outsides are golden (not burned) and crispy.
Enjoy immediately. Garnish with extra parmesan cheese and fresh parsley. Serve as a side with your favorite main dish, as an appetizer with marinara sauce or pesto for dipping, or add as a “crouton” on your favorite salad.
how to serve Crispiest Air Fryer Gnocchi
Serve hot for best crunch. Offer a small bowl of marinara or pesto for dipping. You can top the gnocchi with extra parmesan and chopped parsley. For a light drink to pair, you might check a tea pairing idea like Earl Grey and chocolate pairing to balance the salt and cheese.
how to store Crispiest Air Fryer Gnocchi
Cool the gnocchi to room temperature. Store in an airtight container in the fridge for up to 3 days. Reheat in the air fryer at 350°F for 3–5 minutes to bring back crispness. Do not store for a long time if you used fresh herbs or sauce.
tips to make Crispiest Air Fryer Gnocchi
- Do not crowd the basket. Overlap makes them soft.
- Use a little more oil on very dry gnocchi for better browning.
- Shake the basket every 4–5 minutes so all sides crisp.
- For extra crunch, add 1 tbsp of panko or coarse crumbs when tossing with parmesan.
- If you need a calm drink with this snack, try a floral tea idea from lavender Earl Grey pairing to match the flavors.
Serving Ideas (if any)
- Serve as an appetizer with marinara, pesto, or garlic butter.
- Use as a crunchy topping on salads instead of croutons.
- Pair with roasted chicken or grilled fish as a simple side.
Final Thoughts
This method gives crisp gnocchi fast and with little oil. It works for regular, cauliflower, and sweet potato gnocchi. Follow the timing for your type and shake the basket well. Keep servings simple and serve hot.
FAQs
Q: Can I use frozen gnocchi straight from the freezer?
A: Yes. Do not thaw. Air fry a bit longer (13–16 minutes) and shake often.
Q: Can I skip the parmesan?
A: Yes. Parmesan helps browning and flavor, but you can skip it or use a vegan cheese.
Q: Will this work in all air fryers?
A: Most air fryers will work, but times can vary. Check at the lower time and add minutes if needed.
Q: Can I double the recipe?
A: Avoid putting too much in the basket at once. Air fry in batches for best crisp.
Q: How do I re-crisp leftover gnocchi?
A: Reheat in the air fryer at 350°F for 3–5 minutes. This helps restore the crunch.
Conclusion
For a step-by-step recipe idea and photo guide, see Crispiest Air Fryer Gnocchi – Healthful Blondie which shows a similar method. If you want a quick read with tips and a short cook time, check Crispy Air Fryer Gnocchi (Ready in 20-Minutes!) for another clear take.
2. Air Fryer Egg and Cheese Toast

why make this recipe
This Air Fryer Egg and Cheese Toast is fast. It gives you a warm, filling breakfast in minutes. You can change the cheese or add avocado for flavor. This recipe is good when you want a quick meal and little clean up. For a simple drink idea to go with it, try Earl Grey and chocolate pairing.
introduction
This toast uses one slice of bread, one egg, and cheese. The air fryer cooks the egg evenly and makes the bread a little crispy. It is easy for beginners and works well as a single serving. If you like simple comfort food, this fits well with other easy dishes like simple macaroni and cheese.
how to make Air Fryer Egg and Cheese Toast
You only need a few steps. Break the egg carefully on the bread so the yolk stays whole. Add cheese and any extras, then cook in the air fryer until done. This is a simple method that does not need special skills. If you want to learn more about how classic egg dishes evolved, see what was the original mac and cheese for a quick food history read.
Ingredients :
- 1 slice of bread
- 1 egg
- Cheese (your choice)
- Avocado (optional)
- Spinach (optional)
- Salt and pepper to taste
Directions :
- Preheat the air fryer to 350°F (175°C).
- Place the slice of bread in the air fryer basket.
- Crack the egg onto the slice of bread carefully.
- Top with cheese.
- Season with salt and pepper, and add any additional toppings like avocado or spinach.
- Cook in the air fryer for 5-7 minutes, or until the egg is cooked to your liking.
- Remove from the air fryer, let it cool slightly, then enjoy your delicious egg and cheese toast.
how to serve Air Fryer Egg and Cheese Toast
Serve it warm on a plate. Add sliced avocado or fresh spinach on top if you like. For a light side, pair it with a simple salad such as a 4-ingredient chicken salad or fresh fruit.
how to store Air Fryer Egg and Cheese Toast
Store any leftovers in an airtight container in the fridge for up to one day. Reheat in the air fryer for 2-3 minutes to keep the toast crisp. Do not leave cooked egg at room temperature for more than two hours.
tips to make Air Fryer Egg and Cheese Toast
- Use a slice of bread with a small well in the center so the egg sits better.
- Use a thin slice of cheese so it melts quickly.
- Check at 5 minutes; cook a bit longer if you like a firmer yolk.
- For faster prep, pre-slice avocado or wash spinach ahead.
- For more quick ideas and hacks, see these easy Trader Joe’s recipes.
Serving Ideas (if any)
- Top with hot sauce or cracked black pepper.
- Serve with fresh fruit or a small green salad.
- Make a sandwich by placing another slice of toast on top after cooking.
Final Thoughts
This Air Fryer Egg and Cheese Toast is quick, simple, and tasty. You can change toppings to suit your taste. It is a good choice for a fast breakfast or a light meal any time of day.
FAQs
Q: Can I use frozen bread?
A: Yes. Let it thaw a little first so the egg sits well.
Q: Can I cook two toasts at once?
A: You can if your air fryer basket fits both slices without crowding.
Q: How do I get a runny yolk?
A: Cook for about 5 minutes and check. Add time in 30-second steps until you like it.
Q: What cheese works best?
A: Mild cheddar, Swiss, or mozzarella melt well. Try what you like.
Q: Can I use gluten-free bread?
A: Yes. Use the same steps and time as regular bread.
Conclusion
For more ideas and a full recipe write-up, check this Air Fryer Egg Toast – Cheese Curd In Paradise and this helpful guide from Air Fryer Egg Toast | AirFried.com.
3. Air Fryer Fried Pickles

why make this recipe
Air fryer fried pickles give you a crunchy snack with less oil. They cook fast and stay crisp. You can make them at home with simple items and a small time. They also pair well with light drinks like tea and desserts, see a note on lavender Earl Grey pairing for a mild flavor idea.
introduction
This recipe makes crunchy, golden fried pickles using an air fryer. The pickles stay tangy inside and crispy outside. The steps are simple and the result is a tasty snack. If you like pairing snacks with drinks, you may find ideas in the Earl Grey and chocolate pairing guide.
how to make Air Fryer Fried Pickles
Work in a small space and follow a clear order. First slice the pickles, then set up the breading bowls. Coat each slice well so the coating sticks when you cook them. The air fryer makes them crispy without soaking them in oil. For a simple idea on setting up small recipes, check the Earl Grey and chocolate pairing page for layout tips.
Ingredients :
- Dill pickles (or any pickles of choice)
- Cornmeal
- All-purpose flour
- Eggs
- Breadcrumbs
- Salt
- Pepper
- Garlic powder
- Paprika
- Cooking spray
Directions :
- Slice the pickles into desired thickness.
- Set up a breading station with three bowls: one for flour (mixed with salt, pepper, garlic powder, and paprika), one for beaten eggs, and one for breadcrumbs mixed with cornmeal.
- Dip each pickle slice into the flour, then the egg, and finally coat with breadcrumbs.
- Preheat the air fryer to 400°F (200°C).
- Arrange the breaded pickles in a single layer in the air fryer basket.
- Spray lightly with cooking spray.
- Cook for about 8-10 minutes, flipping halfway through, until crispy and golden.
- Serve with a dipping sauce of your choice.
how to serve Air Fryer Fried Pickles
Serve hot for the best crunch. Put them on a small plate with a dipping sauce like ranch, spicy mayo, or ketchup. You can add lemon wedges to brighten the taste. For a light drink to go with them, try ideas from the lavender Earl Grey pairing page.
how to store Air Fryer Fried Pickles
Let the pickles cool to room temperature. Put them in an airtight container. Store in the fridge for up to 2 days. Reheat in the air fryer at 350°F (175°C) for 3-5 minutes to bring back some crisp.
tips to make Air Fryer Fried Pickles
- Pat pickles dry before breading so the coating sticks better.
- Do not crowd the basket; leave space for air to move.
- Spray lightly with cooking spray for a golden finish.
- Flip halfway for even color.
- Try small tweaks like extra cornmeal for more crunch and see tips from Earl Grey and chocolate pairing notes for simple change ideas.
Serving Ideas (if any)
- Serve as a snack at parties with a mix of dips.
- Add to a sandwich plate with fries and coleslaw.
- Offer with a cold beer or iced tea for a casual meal.
Final Thoughts
Air fryer fried pickles are quick, fun, and easy. They use less oil than deep frying and still give you a crisp, tasty bite. Follow the steps and try different dips to find your favorite combo.
FAQs
Q: Can I use sweet pickles instead of dill?
A: Yes. Sweet or bread-and-butter pickles work. The flavor will be sweeter.
Q: How thick should I slice the pickles?
A: Slice about 1/4 inch to 1/2 inch thick. Thicker slices take longer to heat through.
Q: Can I freeze these after cooking?
A: You can freeze them, but the coating may lose crispness. Reheat in the air fryer to help crisp them again.
Q: Do I need panko or regular breadcrumbs?
A: Either works. Panko gives a lighter, airier crunch.
Q: Can I skip the cornmeal?
A: Yes, but cornmeal adds a nice texture. You can use all breadcrumbs if you like.
Conclusion
For another tested air fryer fried pickles recipe, see this clear version from Air Fryer Fried Pickles | The Recipe Critic. For a fresh take and ideas on flavor, check the recipe at Air Fryer Fried Pickles Recipe – Love and Lemons.
4. Air Fryer Pizza Rolls

Below is a simple recipe article for Air Fryer Pizza Rolls.
introduction
This recipe shows how to make easy Air Fryer Pizza Rolls at home. They cook fast and taste like a warm snack. For a quick idea of pizza sizes you can read this 10-inch pizza guide to help plan portions.
why make this recipe
Make these pizza rolls because they are quick, crispy, and kid-friendly. You need few ingredients and the air fryer does the work. They work well for snacks, parties, or a small meal. If you like simple baking tips, check this short guide about everything about a 10-inch pizza for more ideas.
how to make Air Fryer Pizza Rolls
Follow the steps below to make the rolls. Keep the filling tight so the rolls do not leak. For help with filling tricks, see this note on keeping fillings inside similar rolls.
Ingredients :
- 1 package of pizza dough
- 1 cup of marinara sauce
- 1 cup of shredded mozzarella cheese
- 1/2 cup of pepperoni slices
- 1 egg (for egg wash)
- Italian seasoning (optional)
- Olive oil spray
Directions :
- Preheat your air fryer to 375°F (190°C).
- Roll out the pizza dough and cut it into small squares.
- On each square, place a small spoonful of marinara sauce, some mozzarella cheese, and a few slices of pepperoni.
- Fold the dough over to seal the filling inside and pinch the edges to ensure they’re sealed tightly.
- Brush the tops with beaten egg and sprinkle with Italian seasoning if desired.
- Spray the air fryer basket with olive oil and place the rolls in a single layer.
- Air fry for 8-10 minutes or until golden brown and crispy.
- Serve warm with extra marinara sauce for dipping.
how to serve Air Fryer Pizza Rolls
Serve warm on a plate with a small bowl of marinara for dipping. You can add extra cheese on the side or a small salad. A warm tea or a simple drink pairs well. For a sweet drink idea that matches small bites, you might like this Earl Grey and chocolate pairing read.
how to store Air Fryer Pizza Rolls
Cool the rolls to room temperature. Put them in an airtight container and keep in the fridge for up to 3 days. To freeze, place on a tray until firm, then move to a freezer bag for up to 1 month. Reheat in the air fryer at 350°F (175°C) for 4-6 minutes from chilled, or 8-10 minutes from frozen.
tips to make Air Fryer Pizza Rolls
- Use a little less sauce so the dough does not get soggy.
- Press edges well to stop leaks. For help with fillings in rolls, see this tip on apple cinnamon rolls.
- Do not crowd the basket. Cook in one layer for even browning.
- Watch the first batch so you find the best time for your air fryer.
Serving Ideas (if any)
- Serve with extra marinara or ranch dip.
- Add a side salad or carrot sticks for a light meal.
- Pair with a simple fruit cup for kids.
Final Thoughts
This recipe makes quick, tasty pizza rolls with simple steps. You can change fillings to make different flavors. They work well for snacks, lunches, or party bites.
FAQs
Q: Can I use store-bought frozen pizza rolls instead?
A: Yes. You can cook frozen pizza rolls in the air fryer. Check package time and adjust as needed.
Q: Can I use different fillings?
A: Yes. Try cooked sausage, veggies, or extra cheese. Keep fillings small so they fit inside.
Q: Do I need the egg wash?
A: No, but egg wash gives a golden shine. You can brush with milk or skip it.
Q: How many rolls does this recipe make?
A: It depends on dough size. Usually 12–16 small rolls from one package of dough.
Q: Can I bake these in a regular oven?
A: Yes. Bake at 375°F (190°C) for 12–15 minutes until golden.
Conclusion
For another step-by-step guide focused on frozen options, this article on Frozen Pizza Rolls in Air Fryer is useful. For a different take and extra tips, read this version at Air Fryer Pizza Rolls – Tried and True Recipes.
5. Air Fryer Honey Garlic Salmon Bites

A quick, simple recipe you can make any night.
introduction
This recipe makes small, tasty salmon bites with a sweet garlic glaze. It cooks fast in an air fryer. You can serve it with rice or salad and have dinner ready in minutes. For a calm drink idea to go with it, see this lavender Earl Grey pairing.
why make this recipe
This dish is quick, healthy, and full of flavor. The air fryer gives a light crisp on the outside and keeps the fish moist inside. If you like easy meat dishes, you might also enjoy this garlic butter beef recipe for another quick dinner.
how to make Air Fryer Honey Garlic Salmon Bites
Make the glaze, toss the salmon, and air fry. Keep the pieces the same size so they cook evenly. For a small sweet treat or drink idea to enjoy after the meal, check this earl grey and chocolate pairing.
Ingredients :
- 1 lb salmon fillets, cut into bite-sized pieces
- 1/4 cup honey
- 3 cloves garlic, minced
- 2 tablespoons soy sauce
- 1 tablespoon olive oil
- Salt and pepper to taste
- Cooking spray
Directions :
- In a bowl, mix honey, garlic, soy sauce, olive oil, salt, and pepper to make the glaze.
- Toss the salmon pieces in the glaze until well coated.
- Preheat the air fryer to 400°F (200°C).
- Spray the air fryer basket with cooking spray.
- Place the salmon bites in the basket in a single layer.
- Cook for 8-10 minutes, flipping halfway through, until the salmon is cooked through and crispy.
- Serve immediately with rice, veggies, or salads.
how to serve Air Fryer Honey Garlic Salmon Bites
Serve the salmon bites hot. Place them on rice or a bed of greens. Spoon any extra glaze over the top. A side of steamed vegetables or a simple salad works well.
how to store Air Fryer Honey Garlic Salmon Bites
Let the salmon cool to room temperature. Put leftovers in an airtight container. Store in the fridge for up to 2 days. Reheat gently in the air fryer or oven to keep some crisp.
tips to make Air Fryer Honey Garlic Salmon Bites
- Cut the salmon into even pieces so they cook the same way.
- Pat the salmon pieces dry before adding the glaze for better texture.
- Do not crowd the air fryer basket; give pieces room to crisp.
- If you want more sauce, double the glaze and warm it before serving.
- For a quick drink pairing idea, you can try this garlic butter beef page for other simple meal ideas.
- For a calm tea to serve with dessert, see this lavender Earl Grey pairing.
Serving Ideas (if any)
- Serve over steamed white or brown rice.
- Add a sesame seed and green onion garnish.
- Pair with roasted broccoli or snap peas.
- Toss into a grain bowl with quinoa and fresh veggies.
Final Thoughts
This recipe is fast, tasty, and good for busy nights. The honey and garlic make a simple glaze that many people like. Use fresh salmon for best taste. The air fryer makes it easy and quick.
FAQs
Q: How can I tell when the salmon is done?
A: Salmon is done when it flakes easily with a fork and the inside is opaque. Cook to about 145°F if you use a thermometer.
Q: Can I use frozen salmon?
A: You can, but thaw it first and pat it dry. Frozen salmon may release more water and not crisp as well.
Q: Can I make the glaze ahead of time?
A: Yes. Make the glaze up to a day ahead and store it in the fridge. Mix again before coating the salmon.
Q: Can I use a different sweetener than honey?
A: Yes. Maple syrup or brown sugar mixed with a little water can work in place of honey.
Conclusion
If you want a similar recipe with step-by-step photos, try this version from The Recipe Critic for extra tips: Honey Garlic Glazed Air Fryer Salmon Bites | The Recipe Critic. For another easy take on air fryer salmon, see this write-up with simple steps: Air Fryer Honey Garlic Salmon Bites.
6. Air Fryer Baked Garlic Parmesan Potatoes

why make this recipe
This recipe gives you crispy, golden potatoes with a strong garlic and Parmesan taste. It cooks fast in the air fryer and needs few ingredients. For a note on pairing flavors, you can read a short guide at Earl grey and chocolate pairing for simple ideas that help when you plan a meal.
introduction
These Air Fryer Baked Garlic Parmesan Potatoes are easy and tasty. They use Yukon Gold potatoes, oil, garlic and Parmesan to make a crunchy outside and soft inside. If you want tips on cooking potatoes for special eating plans, see this helpful page on potatoes and fasting at Fasting with potatoes: delicious recipes and tips.
how to make Air Fryer Baked Garlic Parmesan Potatoes
Toss the quartered potatoes with the oil and spices, then add Parmesan and mix well. Arrange the potatoes in a single layer in the air fryer basket and cook until they are golden and crisp. For ideas on pairing this side with meat, you can look at a simple recipe idea here: garlic butter beef.
Ingredients :
4 medium-sized Yukon Gold potatoes, washed and quartered, 2 tablespoons olive oil, 2 teaspoons garlic powder, 1 teaspoon onion powder, 1 teaspoon dried oregano, 1 teaspoon dried thyme, 1 teaspoon paprika, Salt and black pepper to taste, 1/2 cup grated Parmesan cheese, 1 tablespoon fresh parsley, chopped (optional for garnish)
Directions :
Preheat the air fryer to 400°F (200°C)., In a large mixing bowl, combine the olive oil, garlic powder, onion powder, oregano, thyme, paprika, salt, and black pepper. Mix this seasoning blend thoroughly., Add the quartered potatoes to the bowl, ensuring they’re evenly coated with the seasoning., Sprinkle the grated Parmesan cheese over the potatoes and mix until they are well covered., Place the seasoned potatoes in the air fryer basket in a single layer, ensuring they are not overcrowded for optimal crispiness., Air fry the potatoes for 15-20 minutes, shaking the basket halfway through cooking to ensure even browning. They should be crispy and golden brown when done., Once cooked, remove the potatoes from the air fryer and transfer them to a serving dish., Optional: Garnish with fresh chopped parsley for an extra touch of flavor and presentation., Serve immediately as a delicious side dish or a satisfying snack.
how to serve Air Fryer Baked Garlic Parmesan Potatoes
Serve hot as a side with grilled chicken, steak, or fish. You can also serve them with a simple salad or steamed vegetables. For a small twist, serve with a dollop of sour cream or a sprinkle more Parmesan.
how to store Air Fryer Baked Garlic Parmesan Potatoes
Let the potatoes cool to room temperature before storing. Put them in an airtight container and keep them in the fridge for up to 3 days. Reheat in the air fryer or oven to bring back some crispiness.
tips to make Air Fryer Baked Garlic Parmesan Potatoes
Dry the potatoes well before seasoning so the oil and spices stick better. Cut the pieces evenly so they cook at the same rate. Shake the basket once or twice during cooking for even browning. For more potato ideas and care tips, you can read this guide again: Fasting with potatoes: delicious recipes and tips.
Serving Ideas
Serve these potatoes with a protein like grilled chicken or steak, or keep them as a snack with a dipping sauce like garlic aioli or ketchup. You can also mix them into a warm bowl with greens and a soft-boiled egg for a simple meal.
Final Thoughts
This air fryer recipe makes a quick, tasty side that is crisp outside and tender inside. It uses common spices and a bit of Parmesan for flavor. It fits many meals and works well for weeknights or guests.
FAQs
Q: Can I use other potatoes for this recipe?
A: Yes. You can use red or russet potatoes, but cooking time may change.
Q: Do I need to peel the potatoes?
A: No. The skin adds texture and holds the potato shape, but you can peel if you prefer.
Q: Can I make these in the oven instead of an air fryer?
A: Yes. Bake at 425°F (220°C) on a baking sheet for 25-35 minutes, turning once to brown evenly.
Q: How do I make them extra crispy?
A: Use a little more oil, do not overcrowd the basket, and shake the basket more often.
Q: Can I add fresh garlic instead of garlic powder?
A: You can, but fresh garlic may brown faster; add it toward the end of cooking to avoid burning.
Conclusion
For another take on garlic Parmesan air fryer potatoes, try this recipe walkthrough at Air Fryer Garlic Parmesan Potatoes – Sprinkled With Balance. You can also compare techniques and ideas with this crunchy potato guide at Easy Crispy Air Fryer Parmesan Red Skin Potatoes – No Plate Like ….
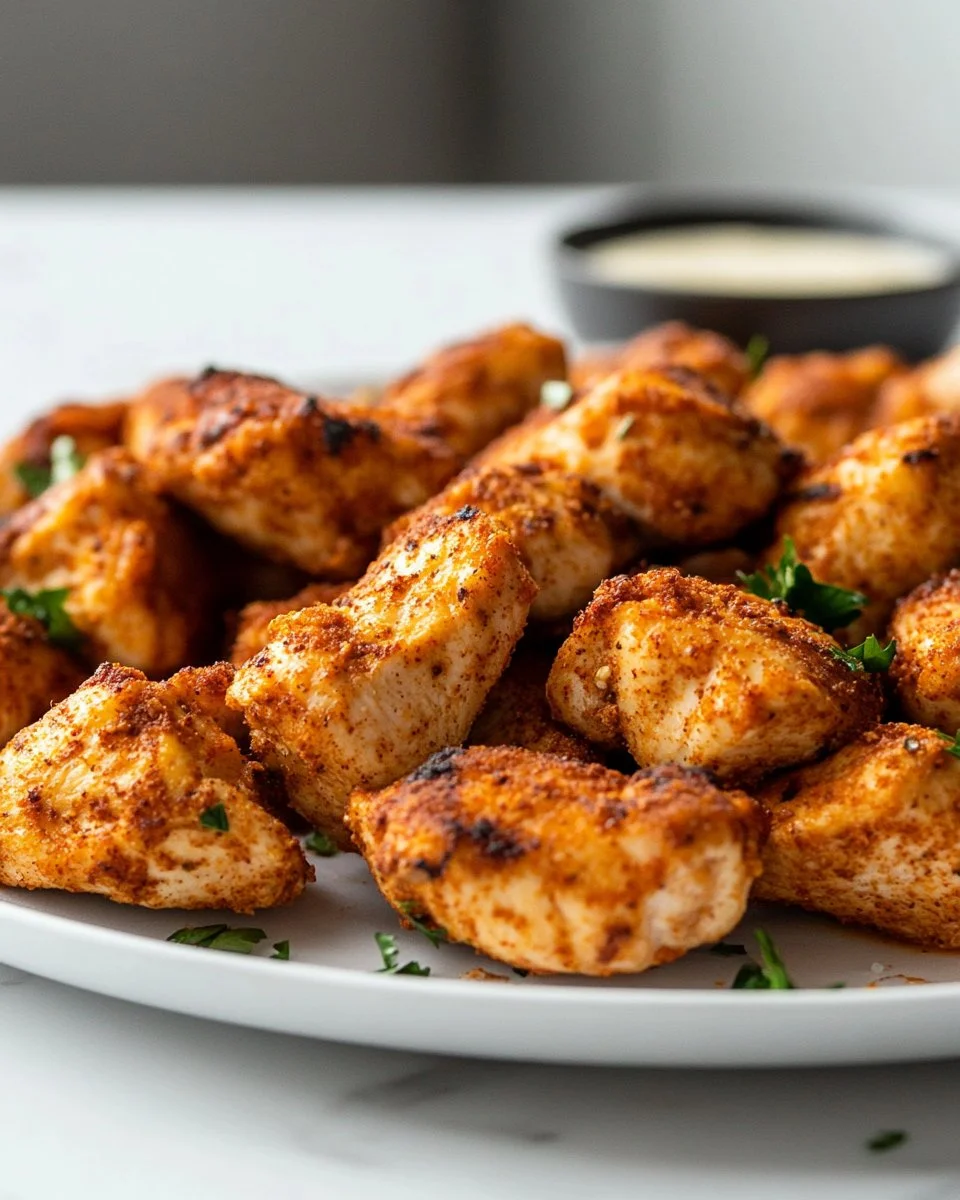
7. Air Fryer Ranch-Crusted Chicken Bites
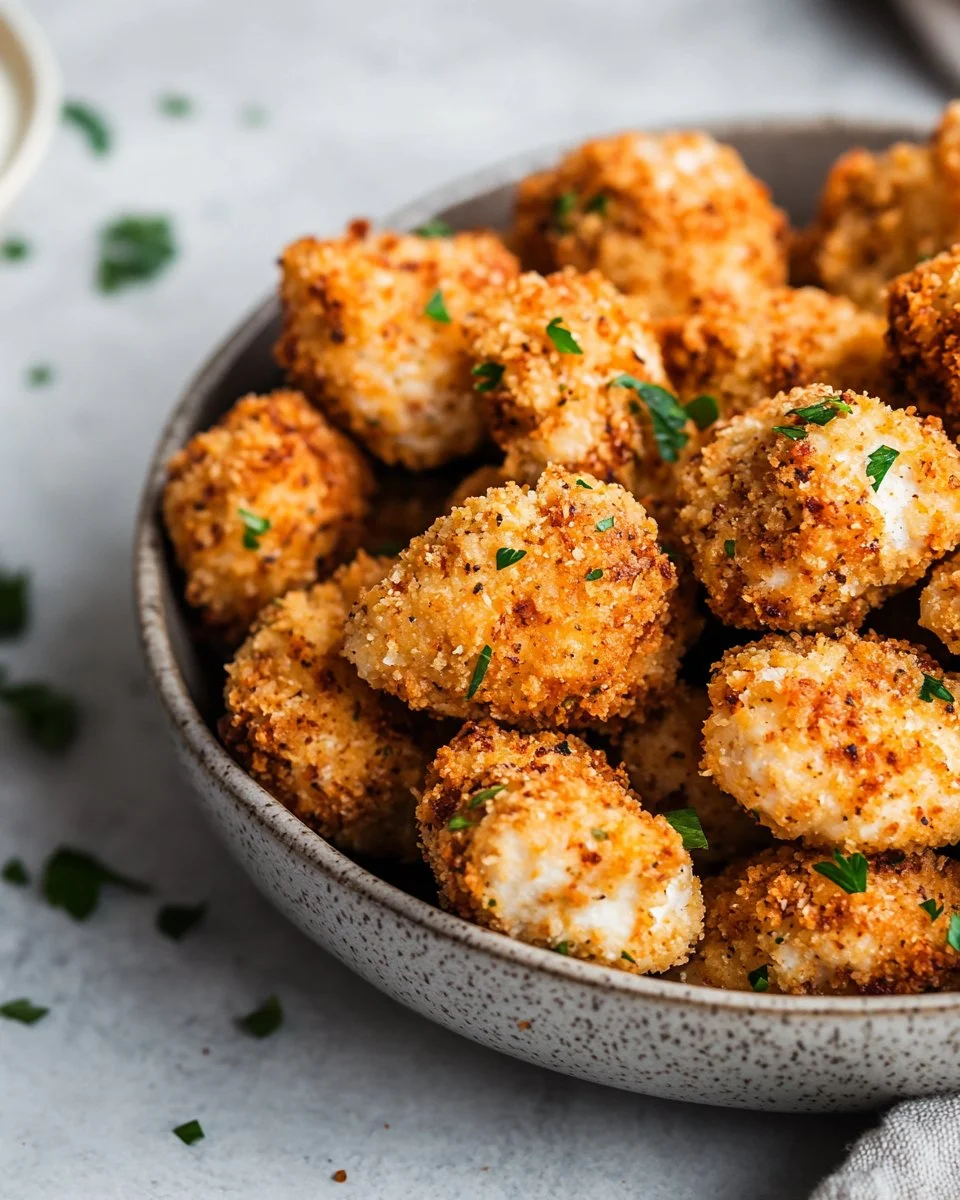

The table is set with mismatched plates and a bowl of cut carrots for the kids, and I can already hear the soft tap of little feet coming back from the yard. The warm, herby smell of ranch and toasted breadcrumbs fills the kitchen and feels like a tiny holiday in our weeknight. If you want a dish that brings people together without fuss, these Air Fryer Ranch-Crusted Chicken Bites do exactly that, and they pair wonderfully with a quick salad like the one I reach for when the day is busy 4-ingredient chicken salad.
Why This Air Fryer Ranch-Crusted Chicken Bites Feels Like Home
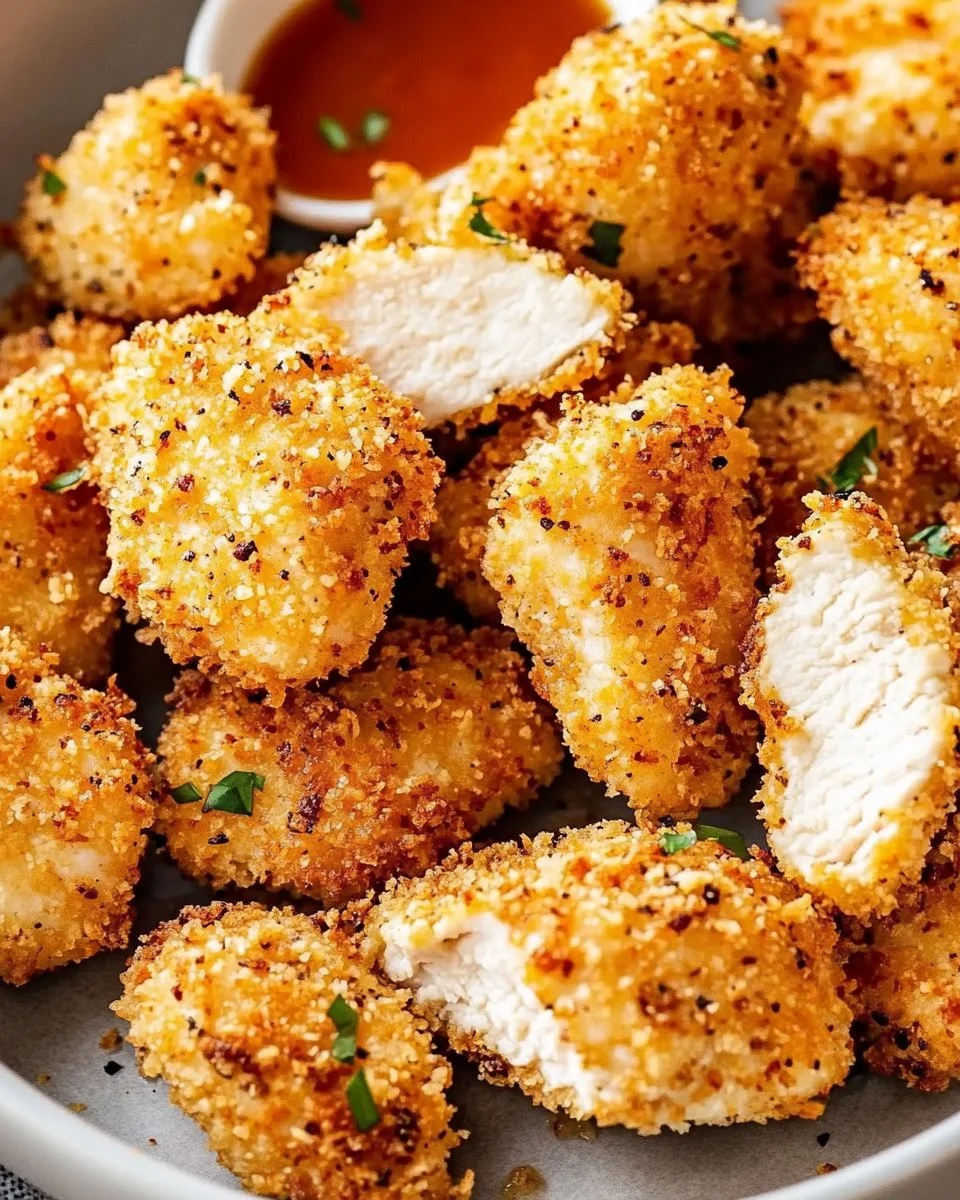
There are recipes that impress and recipes that comfort. This one does both. The crunchy exterior, thanks to panko and Parmesan, gives a satisfying crackle, while the ranch seasoning wraps each bite in familiar savory notes. It is the kind of food that makes my family pause conversations mid-sentence and reach for another piece.
I learned to make dishes like this from watching busy mornings turn into cozy dinners. The air fryer shortens the time without sacrificing that golden crust my grandmother loved to achieve in her skillet. And if you ever wonder why a crunchy bite tastes so cozy, it is partly about texture and partly about the small rituals of sharing food.
This meal also fits into our busy evenings. Quick prep, few dishes, and the machine does most of the work while I check homework and fold a towel. If you like dishes that feel like a hug and keep your evenings calm, this one deserves a spot in your weeknight rotation. It even pairs nicely with a warming bowl of homemade stock recipes like this chicken bone broth recipe when you want something extra soothing on the side.
Why Air Fryer Ranch-Crusted Chicken Bites is Our New Family Favorite
There is a simple reason this recipe has become a regular at our house. It takes the flavors kids know and love and gives them a grown-up crunch. Ranch seasoning makes the chicken approachable for picky eaters, while Parmesan and panko add that golden color and texture adults appreciate.
The air fryer keeps the kitchen cooler than an oven and gets dinner on the table faster. The hands-on parts are fun to share: my kids love dipping the chicken in the egg and rolling it in the crumbs. It is a meal that makes them feel involved and proud. Meanwhile, I get a tasty dinner with minimal cleanup and plenty of smiles.
The Simple Magic Behind Air Fryer Ranch-Crusted Chicken Bites
These bites are all about balance. Tender chicken meets a crisp coating, and a touch of Parmesan brings a salty lift that keeps every bite interesting. The ranch packet is a shortcut to flavor, and it plays nicely with the neutral crunch of panko.
When you fry in air instead of oil, you let air and heat create the crust instead of a pool of fat. That means less mess and fewer calories without giving up the golden texture. If you want a little more color, a light spray of oil helps brown the crust without making the chicken greasy.
“This is where the magic happens—when the aroma fills the kitchen and my kids come running in, asking ‘Is it ready yet?’”
How to Make Air Fryer Ranch-Crusted Chicken Bites, The Heartwarming Way
Step-by-Step Overview: Keeping It Simple
The process is short and predictable. You will see the breadcrumb mixture turn golden and smell the ranch as it toasts. The chicken goes from pale to a beautiful amber in under 12 minutes. Look for a firm texture and juices that run clear as your cues that the chicken is done.
This method gives you color and crunch without overcooking. The air fryer encourages quick browning, so flipping halfway helps both sides get evenly crisp. You will be amazed at how much flavor you can get with small steps and a little patience.
The Cooking Process, Made Joyful
Preheat the air fryer to 375°F. This gives the basket time to get hot so the coating starts to crisp right away. If your model runs hot, try 360°F and check a minute earlier the first time you try this.
Next up, assemble your stations. A bowl for egg, a bowl for crumbs, and a tray for the finished pieces make the process flow. Let the kids help press breadcrumbs onto the chicken. It is a small job that leads to big pride at the table.
Ingredients You’ll Need
What goes into this recipe is simple and forgiving. You can use what you have and still end up with something special. Here is the list I use every time.
- 1 lb chicken breast, cut into bite-sized pieces
- 1 cup panko breadcrumbs
- 2 tbsp ranch seasoning mix
- 1/2 cup grated Parmesan cheese
- 2 large eggs, beaten
- Cooking spray
A friendly note: if you have fresh herbs like parsley, add a tablespoon to the crumbs. It brightens the flavor and makes the dish feel fresh. This is a recipe that welcomes small swaps, and if you are feeling adventurous, try a pinch of smoked paprika for a subtle warmth. If you want a different protein, the same coating works well on thin pork cutlets or even on firm tofu.
You might enjoy trying this coating idea with a slow cooker favorite to mix up dinner nights, especially when you want comfort food with an easy prep like this crockpot Mississippi chicken I keep in my rotation.
Step-by-Step Directions
-
Preheat the air fryer to 375°F.
This step helps the coating start crisping as soon as the chicken hits the basket.
If your air fryer took a break between uses, give it a full 3 minutes to warm. -
In a bowl, combine panko breadcrumbs, ranch seasoning mix, and Parmesan cheese.
Mix until the crumbs look evenly speckled with the ranch.
A little extra Parmesan makes the crust more flavorful. -
Dip each piece of chicken into the beaten eggs, ensuring they are well-coated.
Shake off excess egg to avoid a soggy coating.
This is a great job for little hands; they love the splashy part. -
Coat the egg-dipped chicken pieces in the breadcrumb mixture, pressing lightly to ensure a good coating.
Pressing helps the crumbs stick during cooking.
If a piece looks sparse, give it another gentle press. -
Arrange the coated chicken bites in a single layer in the air fryer basket. Lightly spray with cooking spray.
Crowding the basket prevents the air from crisping the coating.
If needed, cook in batches so every bite gets golden. -
Air fry for 10-12 minutes, flipping halfway through, until the chicken is golden brown and cooked through.
Flip gently with tongs so the coating stays intact.
Look for a firm feel and an internal temperature of 165°F. -
Serve with your favorite dipping sauce.
Let them rest a minute for the juices to settle.
Ranch, honey mustard, and a smoky barbecue are all family hits here.
Quick tip from my kitchen: a little browning is flavor. I watch the first batch closely and then use that as my guide for the next batches. If the outside is golden but the inside needs a touch more time, reduce the temperature by 10 degrees and cook an extra minute or two.
Serving Air Fryer Ranch-Crusted Chicken Bites with Love
When we serve these chicken bites, everything goes in the middle of the table. A large platter of hot chicken, small bowls of dipping sauces, a simple salad, and roasted veggies create a family-style moment. My kids like to stack bites and dip them in different sauces to taste test, which delights me because food becomes a small game.
I often add crunchy carrot sticks and celery on the side, and sometimes a warm biscuit for my partner. For a lighter meal, toss the bites on top of a green salad and drizzle a little extra ranch. If you enjoy pairing flavors, try a sweet element like apple slices; the contrast of sweet and salty is always surprising in a good way. If you want to explore pairing tea with this meal, the contrast works well with a rich pairing like this Earl Grey and chocolate pairing that brightens the table conversation.
Storage & Reheat Tips (Keeping the Goodness)
Saving leftovers is easy and smart. Store cooled chicken bites in an airtight container in the refrigerator for up to 3 days. If you want to freeze them, lay them out on a tray until firm, then transfer to a freezer bag for up to a month.
Reheating without losing crispness is the trick. The air fryer brings back the crunch best. Preheat to 350°F and heat for 3-5 minutes until warmed through. The oven works too: 350°F for 8-10 minutes on a sheet pan. The microwave is fine for a quick lunch, but the crust will soften. If you use the microwave, then pop them into a toaster oven or air fryer for a minute to rescue some texture.
Honest tip: I sometimes reheat frozen bites in the air fryer straight from the freezer. Add a couple of minutes to the time and check often.
My Kitchen Notes & Shortcuts
- Make the crumb mix ahead and store it in a jar. It keeps well in the pantry and saves time on busy nights.
- Use thinly sliced chicken breasts for faster cooking. This reduces air fry time by a minute or two.
- Let the chicken sit in the egg for a minute before coating. It helps the crumbs stick better.
- If kids want in on the action, give them a small bowl of crumbs to roll pieces in. It feels like a craft project and is easy to supervise.
- To make this meal gluten-free, swap panko for a gluten-free breadcrumb and check your ranch mix label.
These small shortcuts save time but keep the heart of the recipe intact. They let you be generous with flavor and present a meal that feels special even when life is packed.
Family-Friendly Variations
Make it your own. Here are a few ways we change this dish up to keep it interesting.
- Lighter version: Use low-fat Parmesan and skip the cooking spray. A light mist of avocado oil keeps browning.
- Kid-friendly: Use a milder seasoning or less ranch if your child prefers simple flavors. Serve with a fun dip platter.
- Spicy twist: Add a teaspoon of chili powder or cayenne to the crumbs for grown-up heat.
- Herb boost: Mix chopped fresh parsley and chives into the crumbs for a bright finish.
- Salad topping: Serve the bites on a mixed greens salad with grated carrot and a squeeze of lemon for a quick lunch.
These tweaks are invitations. Try one and imagine how your family reacts. Maybe they will ask for the same change every week.
FAQs About Air Fryer Ranch-Crusted Chicken Bites
Can I make this ahead for a busy week?
Absolutely. You can assemble the coated but uncooked bites and store them in the fridge for a few hours. If you make them a day ahead, the crumbs cling even better and the flavor settles.
How do I know the chicken is cooked through?
The safest method is an instant-read thermometer. Aim for 165°F. If you do not have one, cut into the thickest bite. The meat should be white with clear juices, no pink.
Can I use store-bought ranch dressing instead of the mix?
Yes, but adjust the crumbs. If you use wet dressing, add some flour or extra panko to help the coating stick. I prefer the dry mix for ease, but a quick brush of dressing before the crumbs can add richness.
What if my air fryer basket is small?
Cook in batches. It is better to give pieces room than to overcrowd the basket. Batches help keep the coating crisp and the timing consistent.
Do you have tips for longer storage?
Freeze fully cooked bites on a tray until solid, then transfer to a freezer-safe container. Reheat from frozen in the air fryer at 350°F for 6-8 minutes.
One Final Thought from My Kitchen
Until next time, happy cooking. I hope these Air Fryer Ranch-Crusted Chicken Bites bring a little extra joy to your table and make weeknights feel lighter. If a recipe helps you gather, laugh, or create a small new family ritual, I consider it a success.
Conclusion
If you want to see a version with slightly different crisping or ideas for serving on a hearty salad, check this helpful recipe for inspiration from Allrecipes, which shows a similar method in a few variations like extra crispy nuggets, described in the Crispy Ranch Air Fryer Nuggets Recipe. For more ideas on using ranch-crusted chicken in creative dishes, Sarah Halstead offers a fun take by pairing air fryer ranch chicken bites on a Cobb salad, which can spark a new weeknight favorite at your table in Air Fryer Ranch Chicken Bites On A Cobb Salad – Sarah Halstead.
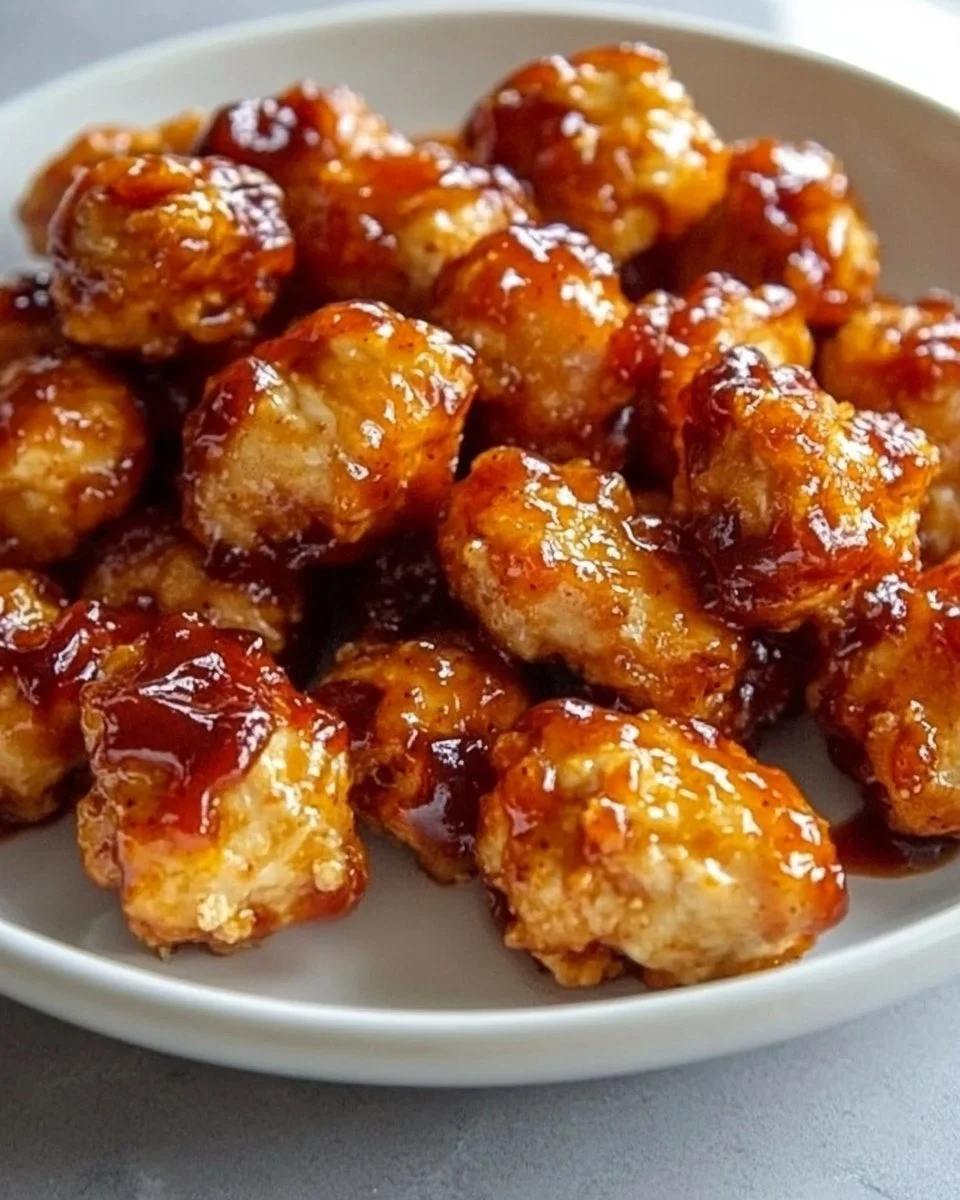
8. Air Fryer Honey BBQ Chicken Bites


The house smells like sticky sweet barbecue and warm honey, and I can hear my little ones clinking plates in the next room while the air fryer hums its happy song. That sound takes me back to cozy Saturday dinners at my grandmother’s house by the dam, where everyone waited for the crispy edges and that first saucy bite. If you love quick comfort food that still feels special, this Air Fryer Honey BBQ Chicken Bites recipe will fit right into your weeknight rotation and maybe become a new memory maker at your table. If you want a light, tossed salad to go with it, I often reach for a simple chicken salad that everyone likes: simple chicken salad recipe.
Why This Air Fryer Honey BBQ Chicken Bites Feels Like Home
There is something about honey and BBQ sauce together that tastes like celebration and comfort at once. The honey gives a gentle sweetness and the BBQ sauce brings that smoky, tangy backbone. Together they make a glaze that caramelizes in the air fryer and creates little pockets of crispy, sticky joy.
This recipe works because it keeps things simple. Bite-sized chicken cooks fast and evenly, and the air fryer does the heavy lifting to make the outside crisp while keeping the inside tender. Meanwhile, the sauce does the emotional work. It is an easy way to get big flavor without complicated steps.
Why this matters for busy nights is simple: minimal prep, one main cooking tool, and a result that feels like you cared enough to make something worth pausing for. It is the kind of meal that invites conversation and small moments, like asking about the best part of someone’s day while you pass the bowl.
How to Make Air Fryer Honey BBQ Chicken Bites, The Heartwarming Way
“This is where the magic happens—when the aroma fills the kitchen and my kids come running in, asking ‘Is it ready yet?’”
Start with tender chicken cut into small pieces so every bite gets a perfect crisp. Next up, a simple honey and BBQ mix becomes a glossy coating that browns in the air fryer and clings to each piece.
As you cook, look for color and texture cues. You want deep golden edges and a sticky sheen on the chicken. If a corner looks lightly charred, that is flavor, not fault. Once cooled just a bit, the pieces will keep their juiciness and the sauce will settle into every nook.
Ingredients You’ll Need
1 pound chicken breast, cut into bite-sized pieces
1/2 cup honey
1/2 cup BBQ sauce
Salt and pepper to taste
Cooking spray
Friendly note: Don’t skip the salt and pepper. They bring out the background notes in both the honey and the BBQ sauce. If you like a little herb lift, throw in a sprinkle of dried oregano or a few chopped fresh parsley leaves at the end. If your sauce feels too thick, a tablespoon of chicken bone broth can loosen it while adding depth; I keep a batch on hand and sometimes use it to thin quick sauces: chicken bone broth guide.
Step-by-Step Directions
-
Preheat the air fryer to 400°F (200°C).
This gives the basket a hot start so the chicken begins crisping right away.
A hot first minute locks in juices for tender bites. -
In a bowl, mix together honey and BBQ sauce.
Stir until the honey blends smoothly into the sauce.
Taste a little on a spoon and adjust for sweetness or tang. -
Season the chicken bites with salt and pepper.
Make sure each piece has a light coating of seasoning.
Salt helps the honey and BBQ flavors sing together. -
Coat the chicken pieces in the honey BBQ mixture.
Toss gently so every piece is evenly covered.
If you want, reserve a little sauce for brushing later. -
Spray the air fryer basket with cooking spray and place the coated chicken bites in a single layer.
Crowding makes steam and softer edges, so give pieces a little breathing room.
Cook in batches if you need to—that extra space is worth the crisp. -
Cook for 12-15 minutes, shaking the basket halfway through, until the chicken is cooked through and crispy.
Look for golden brown edges and a glossy coating that has set.
A quick internal temperature check of 165°F (74°C) confirms doneness. -
Serve warm and enjoy!
Let the chicken sit for a minute so the sauce stops slipping off.
Sprinkle fresh herbs or a squeeze of lemon if you like a bright finish.
Quick tips from my kitchen: a little browning here builds flavor, just like grandma showed me. Let the kids stir the sauce—this is the fun bit where they can feel useful and proud.
Serving Air Fryer Honey BBQ Chicken Bites with Love
We serve these bites family-style in the middle of the table so everyone can help themselves. I like to put out small bowls of extra BBQ sauce, a bowl of pickles, and a simple slaw for crunch. A warm pan of roasted potatoes or a tray of quick veggies makes the meal feel complete without much fuss.
One of our favorite ways is to make small sliders with soft rolls, a leaf of lettuce, and a little extra sauce. Another is to pile the bites over a bed of rice or a mound of buttery mashed potatoes for a cozy bowl. For nights when I want a slower-cooked option too, I’ll make a big pot of something comforting like our slow-cooked Mississippi chicken to have ready for another meal: slow-cooked Mississippi chicken.
Storage & Reheat Tips (Keeping the Goodness)
Store leftovers in an airtight container in the refrigerator for up to 3 days. The sauce will continue to soak into the chicken over time, which can be a plus for flavor.
For reheating, the oven or air fryer is your friend. Preheat to 350°F (175°C) and warm the bites for 6-8 minutes until heated through. This brings back some of the crisp. The microwave works for a quick lunch; cover the pieces to avoid splatter and heat in short bursts so the chicken stays moist.
If you have the bites frozen, thaw overnight in the refrigerator. Re-crisp in a hot oven or air fryer for best texture. If the sauce looks dry, brush a tiny amount of extra BBQ or honey before reheating to revive the shine.
My Kitchen Notes & Shortcuts
- Prep ahead: Cut the chicken and mix the sauce in the morning or the night before. Keep them separately and toss right before cooking. This saves 10 minutes when evening chaos hits.
- Make extra sauce: Double the sauce and keep some in a jar. It is a lovely topping for roasted veggies or a quick drizzle on sandwiches.
- Kid helpers: Give children a small spoon to drizzle honey or stir the sauce. It is safe, simple, and they love being part of the process.
- Flavor tweak: If you like a deeper note, add a teaspoon of smoked paprika to the sauce. It gives a warm, smoky layer without extra work.
- Pairings note: I sometimes set out tea with dessert, and a little pairing knowledge goes a long way. If you plan a sweet finish, these ideas from my tea experiments can add a thoughtful touch: Earl Grey and chocolate pairing.
What I’ve learned making this again and again is that the best meals are often the ones you can make with love and a short list of ingredients. Let the process be joyful, not perfect.
Family-Friendly Variations
- Lighter version: Swap half the honey for apple cider vinegar and use a lower-sugar BBQ sauce. It keeps the tang while cutting back on sweetness.
- Kid-approved poppers: Cut chicken into slightly larger chunks and serve with toothpicks so little hands can do their own dipping.
- Spicy honey BBQ: Add a pinch of cayenne or a drizzle of hot sauce to the honey mix for adults who like heat.
- Veggie boost: Toss roasted bell peppers and onions with a little of the reserved sauce and serve alongside the bites.
- Tea twist: If you like ending meals with a warm cup and a chat, a floral tea brings a calming note that matches the sweetness here; try a lavender note if you want something special: lavender Earl Grey pairing.
These ideas are invitations, not rules. Try one and see what your family smiles at the most.
FAQs About Air Fryer Honey BBQ Chicken Bites
What air fryer temperature works best?
400°F (200°C) is ideal because it crisps the outside quickly while keeping the inside juicy. If your air fryer runs hot, drop to 375°F and add a couple minutes of cooking time.
Can I make this ahead for a busy week?
Absolutely. You can cut the chicken and mix the sauce in advance. Toss them together and refrigerate for an hour or overnight—letting the flavors get to know each other is a small secret to better taste.
Is there a gluten-free option?
Yes. Most BBQ sauces are gluten-free, but check the label. Use a certified gluten-free BBQ sauce and you are set.
How do I prevent the sauce from burning?
Avoid high sugar concentration in direct contact with the heating element. Shake the basket halfway through so the pieces rotate and the sauce browns evenly rather than singeing in one spot.
Can I use thighs instead of breast?
You can. Thighs stay juicy and will need similar timing, though they can be slightly more forgiving if you leave them in a touch longer.
One Final Thought from My Kitchen
These Air Fryer Honey BBQ Chicken Bites are a small recipe with big heart. They are easy enough for a weeknight and tasty enough for a weekend gathering. I hope they bring a warm, sticky-smile kind of comfort to your table and invite little conversations and big laughs.
Conclusion
If you want another take on air fryer BBQ-style pieces, I like to read variations like this one for ideas and inspiration from different cooks: Air Fryer Honey BBQ Chicken Nuggets from Slimming Eats. For a slightly different texture and method that still celebrates honey and BBQ, this guide has helpful tips and a fresh perspective: Easy Air Fryer BBQ Chicken Bites from Sauced Up! Foods.
Until next time, happy cooking. Give this one a try—you might surprise yourself, and your family might just ask for it again.
9. Korean Fried Chicken Air Fryer
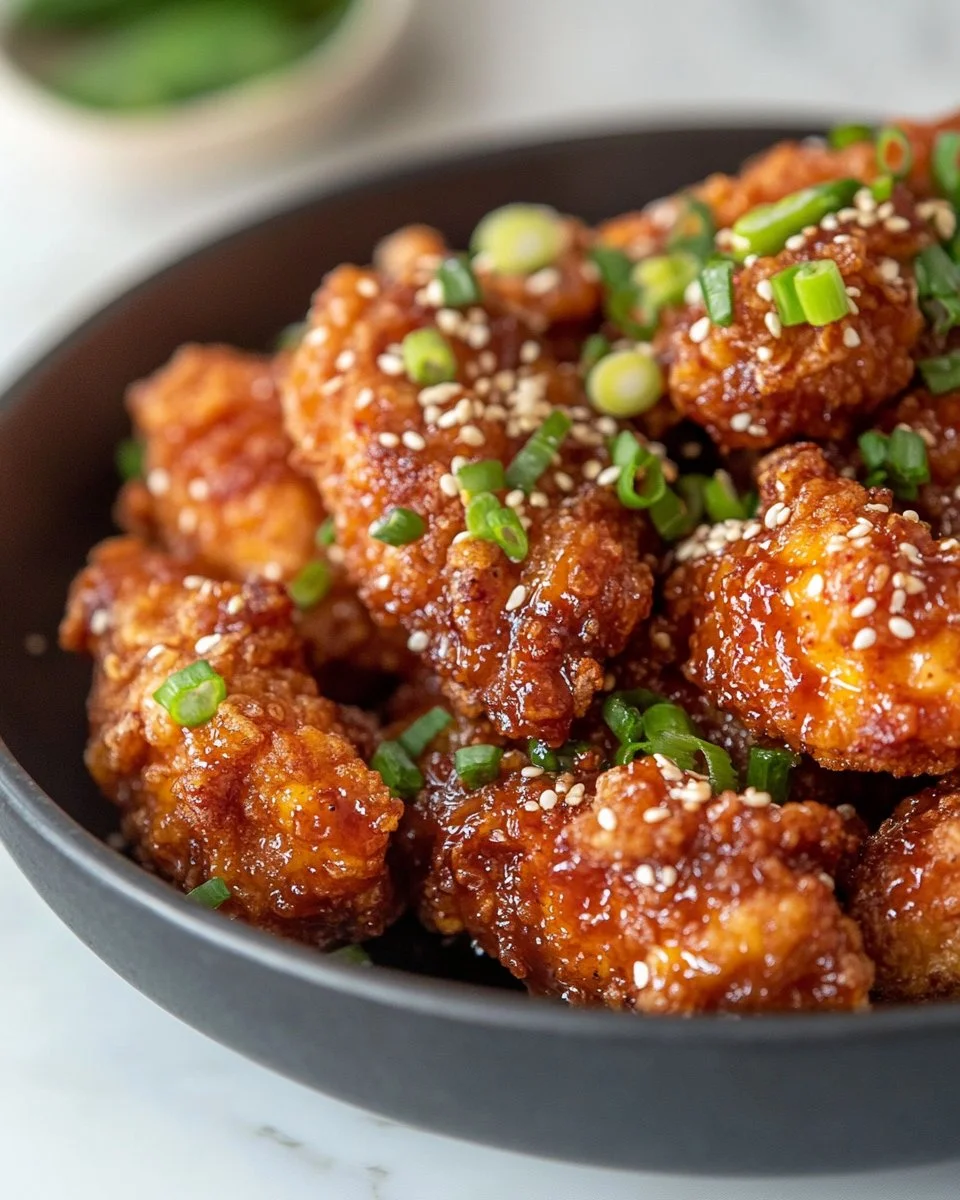
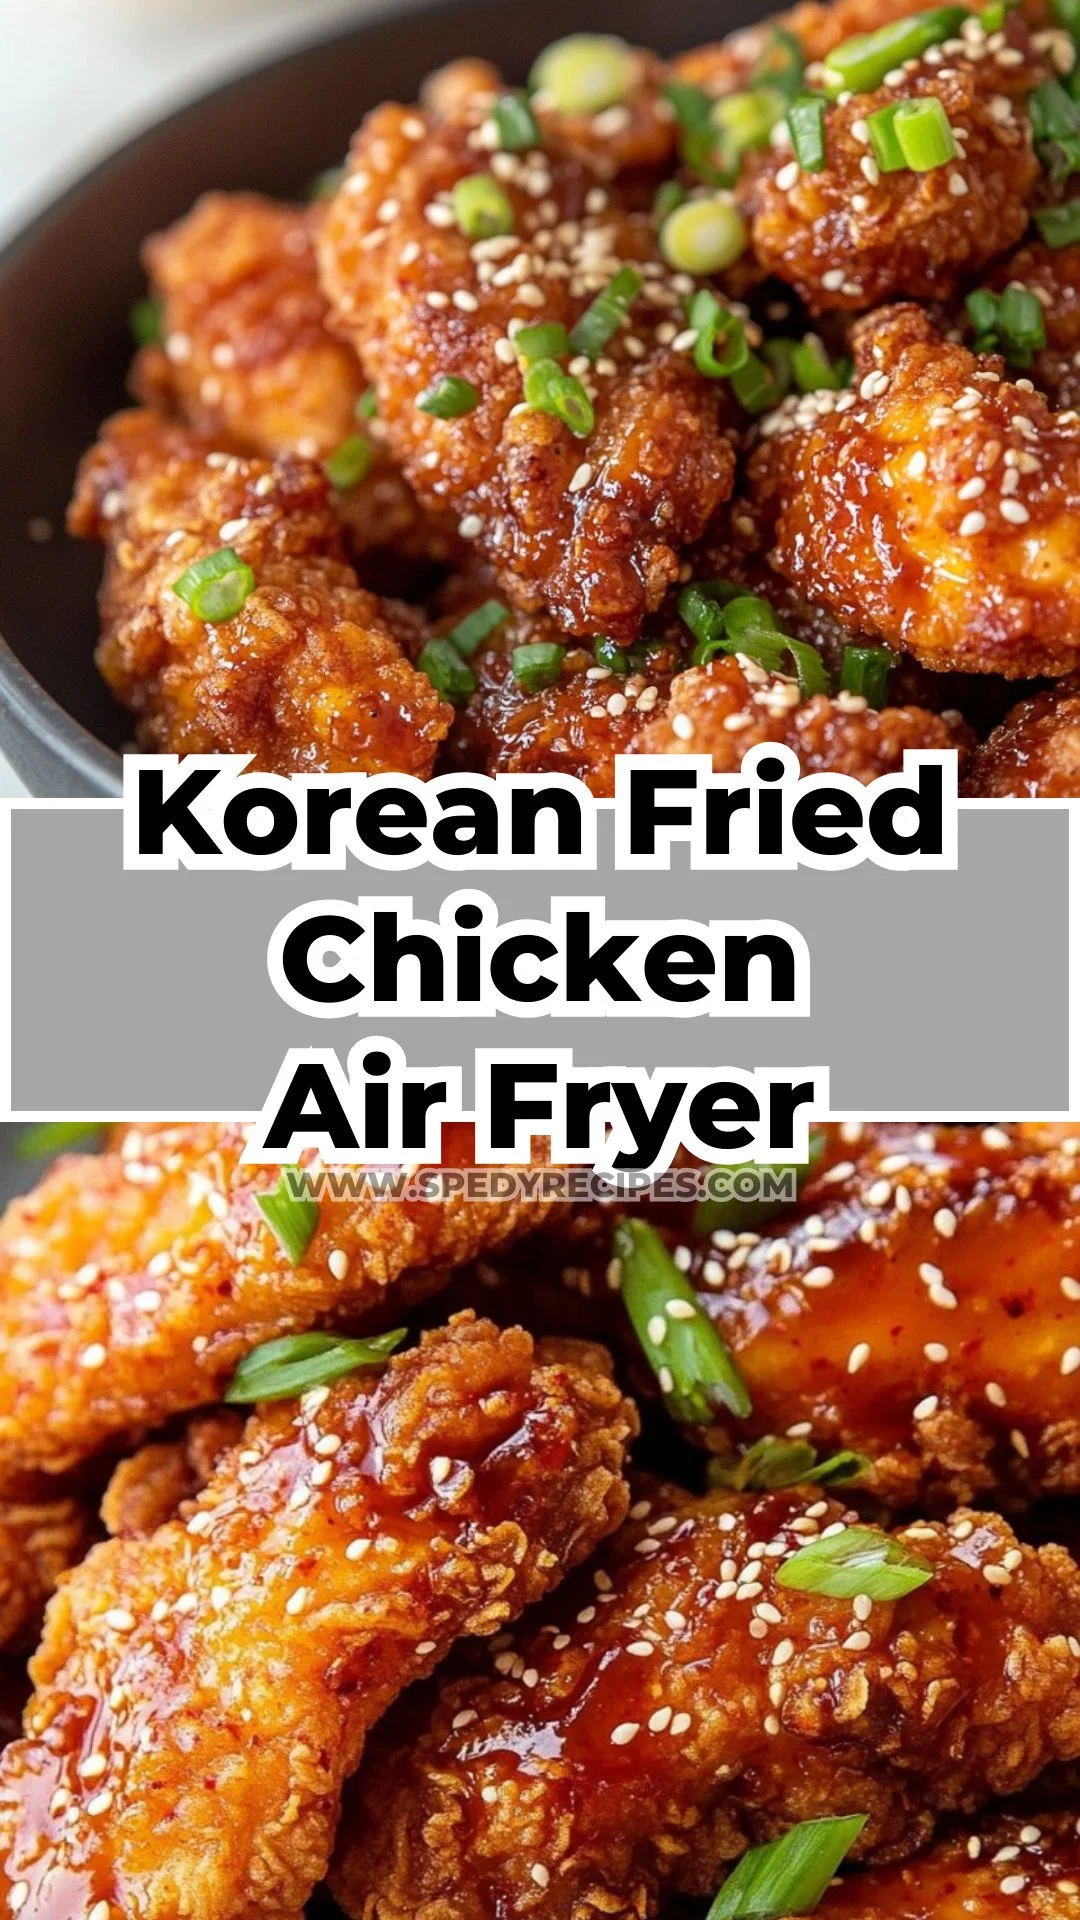
The clatter of plates, the warm, sweet-spicy steam rising from a pan, and my little one calling from the doorway, "Is it ready?" That moment is the reason I cook. This Korean Fried Chicken Air Fryer recipe brings that same small, steady joy. It crisps up golden, sings with gochujang and honey, and fills the house with a smell that makes everyone pull their chairs in close. If you like simple, satisfying chicken recipes that become family favorites, you might enjoy how this one slips into weeknight routines much like my 4-ingredient chicken salad did for our summer picnics.
Why This Korean Fried Chicken Air Fryer Feels Like Home
There is something about crunchy chicken coated in a sticky, glossy sauce that reads like comfort in every bite. This version uses the air fryer to get that deep crunch without a pot of oil, so it feels a little lighter while still being indulgent.
When I make this on busy nights, it gives me back time. The prep is short, the cleanup is smaller, and the result is a dish that people notice. My kids will tell you they love the crackle when you bite into the crust and the small heat that clings to the honeyed sauce.
Why it matters: this recipe blends speed and warmth. It is easy enough to become a weeknight staple and special enough to serve to friends. The texture is crisp on the outside, tender inside, and the sauce brings a sweet, umami-rich finish that invites second helpings.
Why Korean Fried Chicken Air Fryer is Our New Family Favorite
I call this our new favorite because it checks the household boxes: quick, bold, and shareable. The air fryer does the heavy lifting, and the sauce ties everything together. Kids like the crispy coating; adults appreciate the depth of flavor from gochujang and sesame.
Meanwhile, it pairs beautifully with simple sides and small salads, so you can keep the evening relaxed. For a light contrast on the table, try a cold cabbage slaw or a cup of warm broth, the kind you’d find in this chicken bone broth recipe, which is wonderful when you want a gentle, warming sip between bites.
The Simple Magic Behind Korean Fried Chicken Air Fryer
This recipe rests on two pieces of logic. First, a crunchy coating that holds up after sauce makes every bite satisfying. Second, a sauce built on a balance of sweet, spicy, salty, and toasty notes so it feels complete with a few ingredients.
The air fryer delivers even browning and crispness, so you get the crunch without the mess. From there, the sauce—gochujang, honey, garlic, and a splash of mirin—adds a glossy, sticky layer that clings lovingly to each tender.
“This is where the magic happens—when the aroma fills the kitchen and my kids come running in, asking ‘Is it ready yet?’”
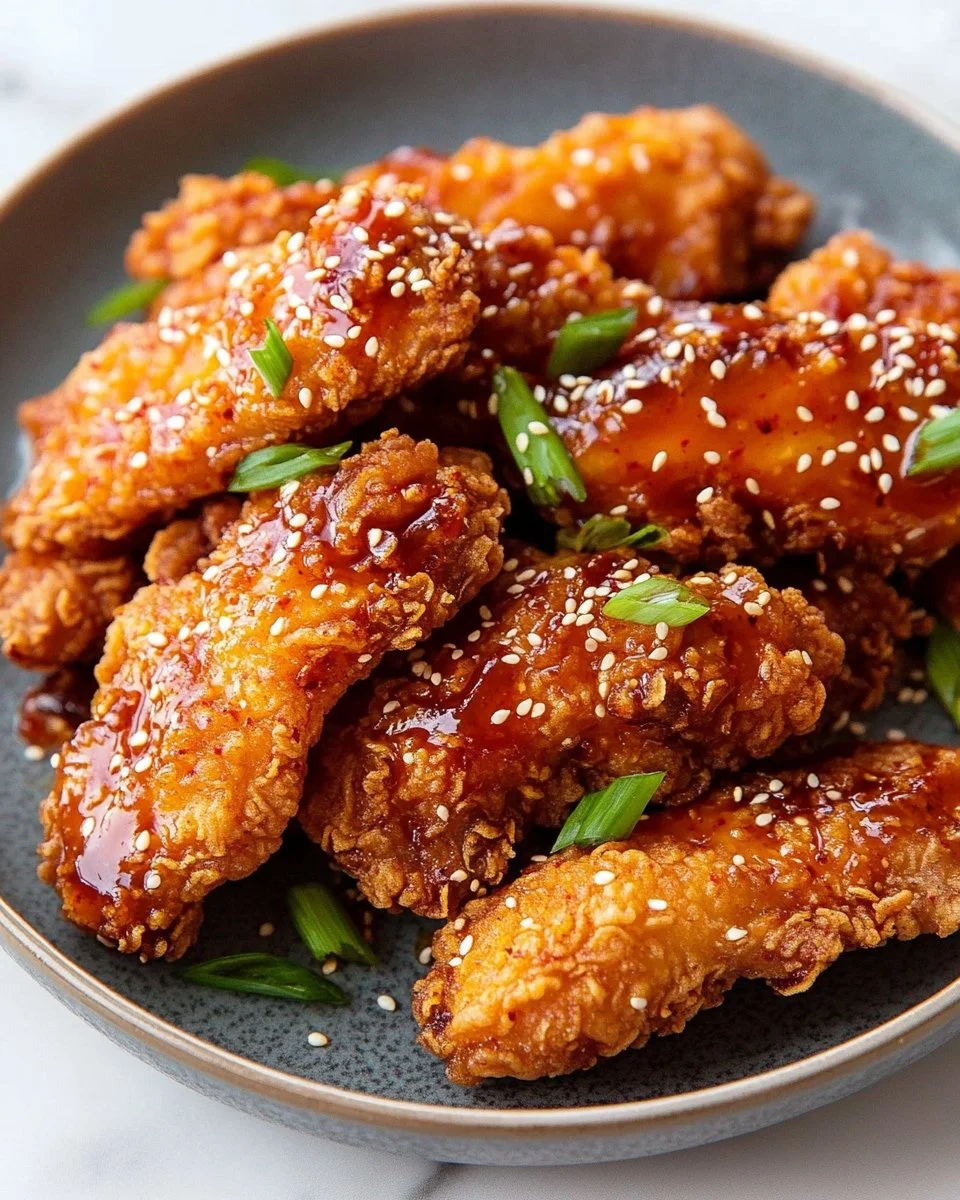
The visual cues to look for: golden brown coating, no pale patches, and a sauce that glazes smoothly without pooling. The sound cues: a soft crackle as you bite. Those are your signs that you’ve made something both homey and exciting.
Ingredients You’ll Need
What goes into this feels almost like pantry comfort with a small splash of special ingredients. Gather these, and you’ll be ready.
- 8 pieces chicken tenders
- 1 cup of crushed corn flakes
- 1 tbsp of garlic powder
- 1 tsp of paprika
- 2 eggs
- 1 tsp of salt
- 1 tsp of pepper
- Korean Style Sauce
- 1 tbsp avocado oil
- 2 cloves of garlic (minced)
- 2 stalks of green onion (whites and greens separated)
- 2 tbsp of gochujang
- 3 tbsp honey
- 3 tbsp ketchup
- 2 tbsp mirin
- 1 tbsp sesame oil
- Toasted sesame seeds
Friendly note: don’t skip the green onion whites in the sauce—they add a gentle savory base. If you’re missing mirin, a small splash of rice vinegar with a touch more honey can stand in. Use what’s in your fridge; this is about flavor, not perfection.
If you like keeping quick chicken meals in rotation, this one slots in next to comforting slow-cooker dishes like that crockpot Mississippi chicken. Both are easy on busy nights and big on smiles.
How to Make Korean Fried Chicken Air Fryer, The Heartwarming Way
Let’s keep the steps friendly and clear. This process moves fast, and you’ll get confident by the second try. The goal: crunchy shell, tender interior, and a sauce that shines without overwhelming.
Step-by-Step Overview: Keeping It Simple
-
Prepare the Chicken Tenders:
- Set three shallow bowls: beaten eggs; seasoned flour mix (garlic powder, paprika, salt, pepper if you like); crushed corn flakes.
- Dip each tender in egg, then flour mix if using, then press into corn flakes so they stick well.
- Quick tip: press firmly so the flakes create a sturdy crust. A little extra pressing avoids loose bits in the air fryer.
-
Air Fry the Chicken Tenders:
- Lightly brush or spray the tenders with avocado oil so they brown in the air fryer.
- Cook at 400°F for 10-12 minutes, turning halfway. Look for golden brown color and an internal temperature of 165°F.
- Encourage the kids to set the timer and watch the first minute of crisping. It’s fun and safe.
-
Prepare the Korean Style Sauce:
- Warm the sesame oil in a small pan, add the white parts of the green onion and minced garlic. Sauté until soft and fragrant.
- Stir in gochujang, honey, ketchup, and mirin. Simmer for 2-3 minutes until glossy. Taste and adjust salt or honey.
- A little browning here builds flavor; if the sauce thickens too much, thin with a teaspoon of water.
-
Coat the Chicken Tenders:
- Toss the hot tenders gently in the sauce, or spoon sauce over and give a light toss. The goal is a thin, even glaze.
- Sprinkle with green onion greens and toasted sesame seeds. Serve immediately.
- Tip from experience: coat just before serving so the crust stays crisp. If you coat too early, the crust softens.
-
Serve:
- Arrange tenders family-style in the middle of the table. Let everyone grab what they want.
- Add a small bowl of extra sauce for dipping. A quick cucumber salad or steamed rice rounds the plate.
- Encourage family sharing: my daughter likes hers plain, while my husband asks for extra sesame seeds.
The Cooking Process, Made Joyful
There is a rhythm to this recipe. Prep is quick. The air fryer does the work. Meanwhile, the sauce cooks in minutes and wraps everything together.
Once the chicken hits the air fryer, you have time to toss a simple salad or set the table. I often have my son slice scallions and sprinkle sesame seeds. It gives him a safe task and makes the meal feel like a team effort.
The air fryer also teaches patience. Let the chicken cook the full time so the interior reaches the right temperature. A little undercooked is unsafe; a little overcooked can dry the tender. Aim for 165°F and a golden crust.
Serving Korean Fried Chicken Air Fryer with Love
When it’s time to eat, I lay everything out family-style in the center of the table. Bowls of rice, a quick slaw with vinegar and sugar, and pickled radish make the meal bright and balanced.
For flavors that play well with this dish, try a lightly dressed cucumber salad or a simple kimchi side if you have it. My family divides roles: someone takes the salad, someone keeps the sauce coming, and the kids pass plates.
If you want a drink on the side, milder teas or a cold soda are lovely. For a thoughtful pairing, consider trying something a bit floral to cut the richness, perhaps learning from a fun tasting like the lavender Earl Grey pairing if you like experimenting on the beverage side.
Storage & Reheat Tips (Keeping the Goodness)
Leftovers are a blessing, and this chicken does well for a next-day meal if you store it right.
- To store: place tenders in an airtight container with a paper towel to absorb excess moisture. Refrigerate up to 3 days.
- To reheat: the oven or air fryer brings back the crunch. Reheat at 375°F for 6-8 minutes until warmed through. The microwave is fine for a quick lunch, but the oven gives you that fresh texture.
- Sauce note: if you coated the chicken and it softened, keep extra sauce on the side and re-glaze after reheating for best texture.
If you are saving bones to make a simple stock, don’t forget that a slow-simmered broth is a lovely use of leftovers and pairs well with many meals, like the chicken bone broth recipe I use when I want something restorative.
My Kitchen Notes & Shortcuts
What I have learned makes this recipe faster and kinder to busy nights:
- Prep the sauce while the chicken cooks. It takes only minutes and frees your hands.
- Crush corn flakes in a zip-top bag with a rolling pin. Kids can help and it keeps things tidy.
- Use pre-minced garlic in a pinch, but fresh garlic is worth it for flavor.
- Make a double batch of sauce and refrigerate. It keeps 3-4 days and makes reheating a breeze.
- If you need gluten-free, swap the corn flakes for gluten-free panko or crushed rice cereal.
These simple moves keep the heart of the dish intact while saving time.
Family-Friendly Variations
Make it your own with these small changes that keep the soul of the dish but add variety.
- Kid-Friendly: Reduce gochujang to 1 tablespoon and add a bit more honey to keep the heat low.
- Lighter Crunch: Use air-fryer panko for a lighter texture and fewer crumbs.
- Extra Heat: Add a teaspoon of chili-garlic sauce to the glaze for a bold kick.
- Vegetarian Twist: Try this method with tofu strips pressed, breaded, and air-fried, then tossed in the same sauce.
- Make It a Bowl: Serve over steamed rice with quick pickles, cucumber, and a soft-boiled egg.
These changes invite your family to add small traditions of their own.
FAQs About Korean Fried Chicken Air Fryer
Can I make this ahead for a busy week?
Absolutely. You can bread the tenders and refrigerate them for a few hours before air frying. Cooked tenders also reheat well in the air fryer.
How spicy is the sauce?
It depends on your gochujang. For milder heat, use one tablespoon and add more honey. For more kick, add another tablespoon or a splash of chili oil.
Do I have to use corn flakes?
No. Corn flakes give a light crunch, but panko or crushed rice cereal work too. Gluten-free options are available.
What air fryer settings work best?
I use 400°F for 10-12 minutes and flip once. Times may vary by model, so check for an internal temp of 165°F.
Can I freeze these?
You can freeze cooked tenders for up to one month. Freeze on a tray and then transfer to a bag to avoid sticking. Reheat from frozen in the air fryer at 375°F, a few extra minutes.
One Final Thought from My Kitchen
Cooking for family is about more than food. It is about the way we gather, the small rituals of setting the table, and the stories that come with each recipe.
Conclusion
I hope this Korean Fried Chicken Air Fryer recipe finds its way into your weeknight rotation and into the moments where your family gathers, laughs, and lingers at the table. If you want a different take or more technique notes, these recipe pages inspired me and are great references for variations and tips: Air Fryer Korean Fried Chicken | All Ways Delicious and Best Air Fryer Korean Fried Chicken · i am a food blog. Until next time, give it a try—you might surprise yourself, and your kitchen will smell amazing.
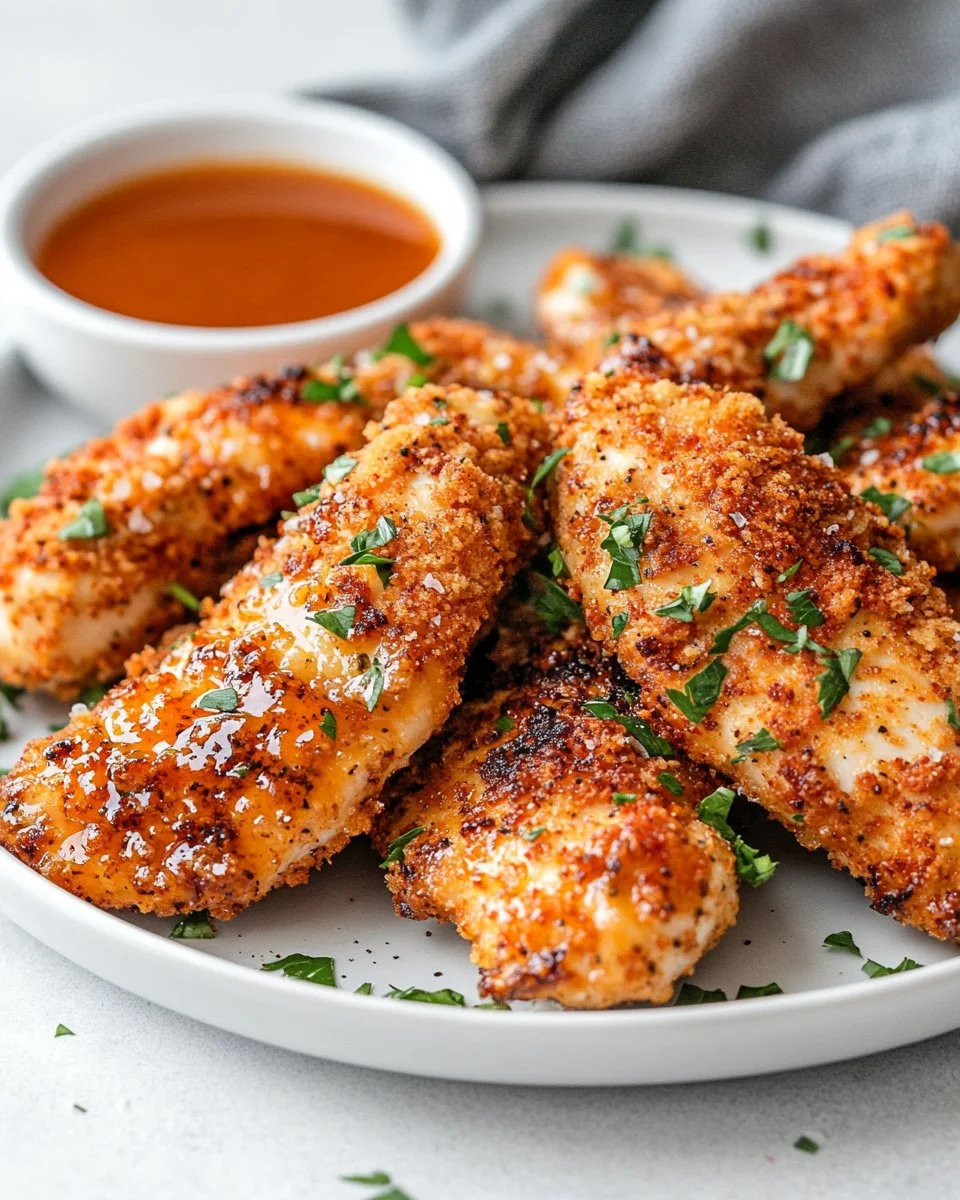
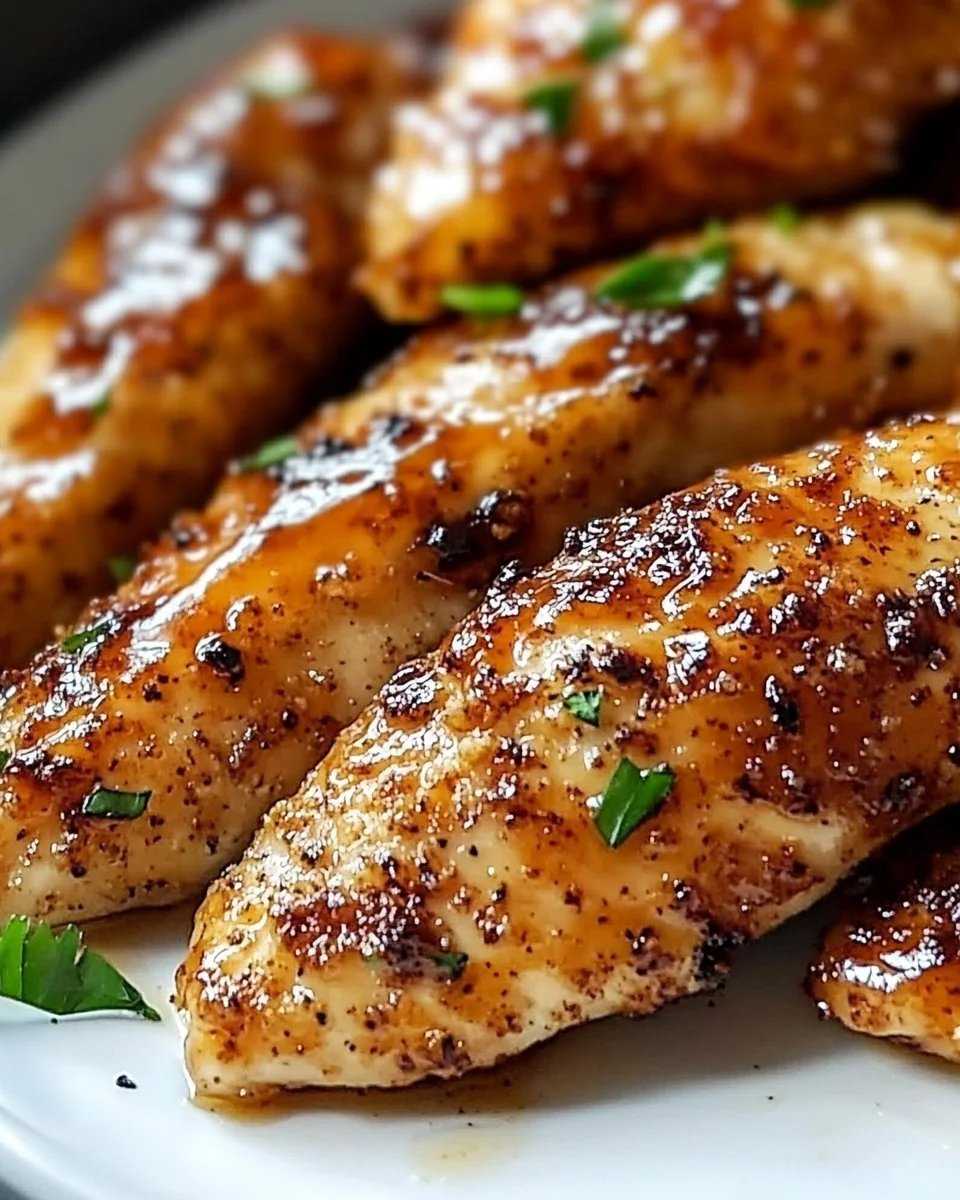
10. Air Fryer Honey Butter Garlic Chicken Tenders Recipe

I can still hear the clink of plates and my youngest’s footsteps as the house smells like warm honey and garlic. That small, cozy sound tells me dinner is almost ready and everyone will gather close. You can try this recipe as a little shortcut to those same moments, and if you like slow, comforting stocks and pantry tricks, you might also enjoy my chicken bone broth recipe for another rainy-day dinner idea my chicken bone broth recipe.
Why This Air Fryer Honey Butter Garlic Chicken Tenders Recipe Feels Like Home
This recipe — Air Fryer Honey Butter Garlic Chicken Tenders Recipe — hits that sweet spot between comfort and speed. It takes simple pantry staples and turns them into something that tastes like a hug. My kids love the crunchy outside and the sticky, sweet garlic finish. It is the kind of meal that gets scooped up, discussed, and remembered.
Meanwhile, this dish is forgiving. The flavors are familiar: honey, garlic, butter, and a gentle paprika warmth. You do not need to measure like a lab scientist. A quick whisk, a roll in breadcrumbs, and a blast of hot air make golden tenders with very little fuss. When life gets busy, recipes that deliver and don’t demand too much attention are worth their weight in smiles.
This tender recipe also pairs well with other family favorites. If you love bold buttery flavors, think about the rich sauce in my cowboy butter steak recipe for another special night cowboy butter steak recipe. The idea is simple: pick small wins that build a week of good meals and lasting memories.
Why Air Fryer Honey Butter Garlic Chicken Tenders Recipe is Our New Family Favorite
Our family calls this one the “please-can-we-have-it-again” meal. It comes together in under 30 minutes and leaves the kitchen smelling like comfort. From time to time I purposefully double the batch because leftovers are gone by lunch. Kids and adults both like the contrast between a crisp breadcrumb crust and the soft, saucy inside.
The air fryer transforms a simple breadcrumb coating into a crunchy, golden finish without a big pot of oil. That makes cleanup faster and dinner less stressful. For weeknights where time is short and smiles are a must, this recipe earns its place.
It also teaches kids a few tiny kitchen lessons: whisking, dipping, and the joy of a carefully rolled breadcrumb. Let them help with the coating step; it is a small job that makes them feel part of the meal.
The Simple Magic Behind Air Fryer Honey Butter Garlic Chicken Tenders Recipe
The magic is this: hot air, a sticky sauce, and a light breadcrumb shell. The honey-butter mixture browns and caramelizes just enough to give depth. The breadcrumbs provide texture and shelter the chicken from drying out. The garlic keeps things bright and savory.
If you want more crunch, use panko breadcrumbs. If you want a milder bite for little ones, reduce the garlic by one clove. The flavor logic is straightforward: fat plus sugar plus acid or spice equals a balanced bite that keeps people coming back.
How to Make Air Fryer Honey Butter Garlic Chicken Tenders Recipe, The Heartwarming Way
“This is where the magic happens, when the aroma fills the kitchen and my kids come running in, asking ‘Is it ready yet?’”
Next up, a quick look at the whole cooking process so you know what to expect. First you make a honey garlic mixture, which acts as both marinade and drizzle. Then you coat the tenders so they crisp up in the air fryer. Finally, you finish with a glaze for that sticky, shiny finish. Look for golden brown on the outside and a firm, opaque center inside to know they are done.
Ingredients You’ll Need
1 lb chicken tenders
¼ cup honey
2 tbsp unsalted butter, melted
3 cloves garlic, minced
1 tsp paprika
1 tsp salt
½ tsp black pepper
1 cup breadcrumbs (panko or regular)
Cooking spray
Friendly note: don’t skip the garlic if you like savory balance. If fresh garlic is not available, use 1 tsp garlic powder. Also, try fresh herbs as a finishing touch — they are the soul of the dish and brighten every bite. If you want a richer flavor, use panko for crunch and stir in a little grated Parmesan into the breadcrumbs for an extra layer of taste. If you like trying new pairings, my garlic butter beef ideas can inspire a similar glaze for other proteins garlic butter beef.
Step-by-Step Overview: Keeping It Simple
-
Make the Honey Garlic Mixture: In a small bowl, whisk together honey, melted butter, minced garlic, paprika, salt, and pepper. Set aside half of the mixture to use as a drizzle.
Tip: Use warm melted butter so the honey blends easily. Let kids help whisk here — it is fun and safe. -
Coat the Chicken: Dip each chicken tender into the honey garlic mixture, ensuring an even coating. Roll the tenders in breadcrumbs to create a crispy layer.
Tip: Press breadcrumbs gently so they stick. If the mixture is too thin, let it sit for five minutes to thicken slightly. -
Preheat the Air Fryer: Set the air fryer to 400°F (200°C). This high temperature helps achieve a crisp exterior while keeping the chicken tender inside.
Tip: A quick preheat will help the crust set fast and brown nicely. -
Arrange and Cook: Lightly spray the air fryer basket with cooking spray. Arrange the chicken tenders in a single layer and air fry for 10–12 minutes, flipping halfway through, until golden brown and fully cooked.
Tip: Do not overcrowd the basket. Cooking in batches keeps everything crisp and even. -
Finish and Serve: Drizzle the reserved honey garlic sauce over the tenders for an extra burst of flavor. Serve immediately.
Tip: A little browning builds flavor. Let the tenders rest for a minute so the juices settle and the glaze sets.
Give it a try — this structure makes things predictable and kind. If you are short on time, assemble the coating ahead and refrigerate for up to an hour before cooking. For another bright, easy chicken idea that keeps weeknights fresh, see this four-ingredient chicken salad recipe that saves time and tastes great four-ingredient chicken salad.
Preparing Air Fryer Honey Butter Garlic Chicken Tenders Recipe Without the Stress
Start simple: lay out the chicken, measure the honey mixture, and set breadcrumbs in a shallow bowl. Keep a tray for finished tenders so the kids can help arrange them. From there, the air fryer does most of the heavy lifting.
While the tenders cook, tidy up the counter. Little actions now mean less cleanup later and more time to sit down with the family when the meal is ready. If you want to make this dish a little fancier, add a squeeze of lemon to the reserved drizzle for a bright pop at the end.
Serving Air Fryer Honey Butter Garlic Chicken Tenders Recipe with Love
We set the plate family-style in the middle of the table and let everyone serve themselves. It feels homey and unpretentious. I like to place tenders on a large platter with a small bowl of extra honey butter garlic sauce, a ramekin of ranch or a yogurt dip, and a scattering of fresh parsley.
Sides that work well: a crisp green salad, roasted sweet potatoes, steamed green beans, or even simple buttered pasta for the kids. If you want quick grocery inspiration or pairing ideas, I often browse 50 simple swaps and Trader Joe’s-friendly ideas for fast sides 50 easy Trader Joe’s recipes.
Storage & Reheat Tips (Keeping the Goodness)
Store leftovers in an airtight container in the refrigerator for up to 3 days. Place a small sheet of paper towel under the tenders to absorb any extra moisture and help keep the crust from getting soggy.
Reheat in the air fryer at 350°F (175°C) for 4–6 minutes. That brings back crispness and warms the center without drying it out. If you are reheating a single portion in the microwave, cover it loosely and heat in short bursts, then finish in a hot skillet or under the broiler for a minute to crisp.
If you plan to freeze, flash-freeze the tenders on a tray, then transfer to a freezer bag for up to 2 months. Reheat from frozen in a 375°F (190°C) oven for about 15–20 minutes until heated through and crisp.
My Kitchen Notes & Shortcuts
- Use panko for extra crunch. It browns faster and feels lighter.
- Prep a coating station: honey mix in one bowl, breadcrumbs in another, and a baking sheet ready for the air fryer. This keeps the process humming.
- Double the sauce and save half for dipping. It keeps well in the fridge for three days.
- For less sticky hands, use tongs to dip and roll the tenders. Kids can still help lay them in the air fryer.
- Swap butter for olive oil if you want a dairy-free version. It will change the flavor but still be delicious.
These small shortcuts make the dinner flow easier and keep the mood relaxed. A relaxed kitchen often means a more joyful table.
Family-Friendly Variations
- Lighter version: use less honey and add a squeeze of lemon to the reserved drizzle for brightness.
- Spicy twist: add ¼ tsp cayenne or a pinch of chili flakes to the honey mixture.
- Herb crunch: mix finely chopped fresh parsley and a pinch of lemon zest into the breadcrumbs for a fresh finish.
- Gluten-free: use gluten-free breadcrumbs or crushed cornflakes.
- No-bread option: skip the breadcrumbs and air fry the tenders with a light spray of oil, finishing with the honey butter garlic drizzle.
Each tweak lets you weave your family’s tastes into the recipe. Try one variation at a time and note which gets the biggest response from your table.
FAQs About Air Fryer Honey Butter Garlic Chicken Tenders Recipe
Can I make this ahead for a busy week?
Absolutely. You can coat the tenders and keep them chilled for up to an hour before cooking. If you want to fully prep, cook them and reheat in the air fryer for a few minutes the next day.
What if my chicken is thicker than tenders?
If you use thicker strips or small breasts, add a few minutes to the air fry time and check for an internal temperature of 165°F (74°C).
Is the sauce safe for kids?
Yes. The honey and butter create a mild, sweet flavor that most kids love. Reduce the garlic if you want a gentler taste.
How do I know the tenders are done?
Look for a golden brown crust and firm, opaque meat inside. The safest test is an instant-read thermometer: 165°F (74°C) in the thickest part.
Can I make this dairy-free?
Yes. Substitute melted coconut oil or olive oil for the butter. The flavor changes gently but remains tasty.
One Final Thought from My Kitchen
This Air Fryer Honey Butter Garlic Chicken Tenders Recipe is a small, reliable joy. It gives you time back in the evening and a plate that invites conversation. I hope it becomes one of the recipes you reach for when you want comfort without fuss. Give it a try — you might surprise yourself.
Conclusion
If you want another take on honey garlic tenders with tips from a dedicated air fryer site, check this helpful guide on Air Fryer Honey Garlic Chicken Tenders – My Air Fryer Kitchen for more photos and notes. For a different no-breading method to cook chicken in the air fryer, you may find useful techniques at Air Fryer Chicken Tenders (Easy, No Breading) – Wholesome Yum.
Thank you for letting me share this recipe from my kitchen. I hope it fills your table with warmth and a little extra time together.
11. Air Fryer Boneless Chicken Bites

I can still hear the clink of plates from a Saturday night years ago when the kids were small, and the whole house smelled like garlic and warm comfort. That sound and smell is what I chase with simple, good food now, like these Air Fryer Boneless Chicken Bites that make everyone gather, laugh, and eat with their hands. If you need a quick family meal that feels like a little celebration, try pairing these bites with my recipe for a simple, cool salad like the simple 4-ingredient chicken salad for a light, happy contrast.
Why This Air Fryer Boneless Chicken Bites Feels Like Home
There is something about bite-sized chicken that makes evenings feel easy and warm. These little pieces cook quickly, brown beautifully, and carry a familiar, cozy flavor that reminds me of weekday dinners at my grandmother’s table. The air fryer gives them a crisp outside and a juicy inside without a sink full of oil-splattered pans.

Why this recipe matters is simple: it is fast, forgiving, and crowd-pleasing. It comes together in minutes and asks for only a few seasonings that probably live in your spice drawer. You can make a batch for a busy weeknight and still sit down to eat warm food together. Meanwhile, the kids set the table, and someone pours a drink. Little moments become memories.
I should mention something practical from my kitchen: when life gets hectic, I keep a jar of grated Parmesan and smoked paprika on the counter because they rescue so many weeknight meals. If you want deeper comfort, stir some of my slow-cooked flavors into the meal by thinking ahead with a rich stock — try my chicken bone broth recipe when you plan to make extra sauces.
How to Make Air Fryer Boneless Chicken Bites, The Heartwarming Way
“This is where the magic happens—when the aroma fills the kitchen and my kids come running in, asking ‘Is it ready yet?’”
Here’s a friendly overview of how this all comes together. You’ll toss bite-size chicken in olive oil and a few warm spices, let the air fryer do its crisping work, and end up with golden bites that steam lightly when you break them. Look for a golden-brown color and an internal temperature of 165°F (75°C) to know they are done. The surface should feel set and have faint caramelized edges.
The cooking process is fast — think of it like a short, intense conversation with the oven, not a long letter. Next up, you’ll add a sprinkle of Parmesan if you like that nutty finish. From there, serve family-style so everyone helps themselves and the small talk starts before plates are emptied.
Ingredients You’ll Need
- 4 boneless, skinless chicken breasts (about 1.5 lbs), cut into bite-sized pieces
- 2 tsp olive oil
- 2 tsp garlic powder
- 1 tsp smoked paprika
- 1/2 tsp salt
- 1/4 tsp black pepper
- 1/4 cup grated Parmesan cheese (optional)
A few friendly notes as you gather your ingredients: don’t skip the salt — it’s the quiet hero that brings out the chicken’s flavor. If you have fresh herbs like parsley or thyme, chop a little and sprinkle them on at the end because they feel like a hug for the dish. Use what’s in your fridge; this is about creativity, not perfection. If you want a saucier twist, I sometimes lean on a slow-cooker comfort dish vibe and add flavors inspired by a crockpot Mississippi chicken for lively family meals.
Step-by-Step Directions
-
Preheat your air fryer to 400°F (200°C) for 5 minutes.
- Give the air fryer a head start so the chicken hits a hot surface and browns nicely.
- A warm basket helps the pieces crisp instead of steam.
-
In a large bowl, whisk together olive oil, garlic powder, smoked paprika, salt, and pepper.
- The oil helps spices coat the chicken evenly and builds that lovely crust.
- Taste a tiny pinch of the mix if you like; you’ll learn how bold you want it.
-
Add chicken pieces to the bowl and toss until well coated.
- Make sure each piece has a thin coat; overcrowding with too much oil clumps the seasoning.
- Let the kids toss the bowl if they want — it’s an easy, fun job.
-
Place the seasoned chicken in a single layer in the air fryer basket.
- Crowding the basket will make them steam, so give them space to breathe.
- Work in batches if you need to; each batch gets goldier and crispier.
-
Cook for 10-12 minutes or until golden brown and internal temperature reaches 165°F (75°C).
- Flip or shake the basket halfway through to get even browning.
- A little browning builds flavor, just like grandma showed me; don’t panic at the first sizzle.
-
Serve with your favorite dipping sauce or alongside roasted veggies.
- Sprinkle Parmesan right after they come out while they’re still warm so it melts just a touch.
- Let them rest a minute; that short pause keeps them juicy inside.
A few encouragements from my experience: timing may shift a minute or two depending on your air fryer model, so keep an instant-read thermometer nearby. If you love popcorn chicken-style crisp, add a very thin breadcrumb or panko coat to the pieces. But honestly, sometimes less is more; the simple spice mix lets the chicken shine.
Serving Air Fryer Boneless Chicken Bites with Love
We serve these Air Fryer Boneless Chicken Bites family-style in the middle of the table, just like my mother used to set down bowls at dinner. One big platter holds the bites, a stack of small bowls for sauces, and a few bowls of crunchy sides so everyone builds their perfect plate.
Our favorite combos include roasted sweet potato wedges, a crisp green salad, or simple steamed broccoli. I love to place a bowl of herby yogurt dip and a tangy BBQ or honey mustard nearby so everyone can choose. My younger one always mixes sauces and proclaims their “best dipping invention,” and we all laugh and try it. Little rituals like that make the meal memorable.
A fun pairing is something slightly sweet, like a lavender-infused drink or tea. If you enjoy pairing tastes, I sometimes reach for notes inspired by a gentle Earl Grey and chocolate pairing to set a calm vibe while the kids are clearing plates.
Storage & Reheat Tips (Keeping the Goodness)
Store leftover chicken bites in an airtight container and refrigerate within two hours of cooking. They will keep well for 3 to 4 days. For longer storage, freeze in a single layer on a baking sheet, then transfer to a freezer-safe bag; they will keep for about 2 months.
When you reheat, the oven or air fryer is your friend. Preheat to 350°F (175°C) and reheat for 6 to 8 minutes until hot and crisp. The microwave is fine in a pinch for a quick lunch, but it can make the coating soft. If the chicken seems a little dry after reheating, drizzle a tiny bit of olive oil or add a spoonful of reserved sauce to bring it back.
If you plan meals for the week, consider storing the sauce separately. Once cooled, toss the chicken into a salad, grain bowl, or wrap for a new meal the next day.
My Kitchen Notes & Shortcuts
What I’ve learned making this again and again:
- Pre-cut the chicken when you buy it and keep it in a sealed container for easy assembly later.
- If you are in a real rush, use pre-shredded Parmesan and measure spices into a small jar so you can shake the mix over chicken.
- Use the air fryer’s shake alarm or set a timer to remind you to turn the pieces; it saves mental bandwidth on busy nights.
- Swap smoked paprika for regular paprika if you prefer a milder, sweeter flavor.
- For a gluten-free option, skip breadcrumbs entirely — the spice and Parmesan are all you need.
And one last trick: for an even easier weeknight dinner, roast a tray of seasonal vegetables while the chicken cooks, then bring everything to the table at once. You get a balanced plate with less fuss and more family time. If you like gentle floral notes at the table, try a small pot of something inspired by a lavender Earl Grey pairing to sip while you chat.
Family-Friendly Variations
Play with the seasonings to suit your family. Here are a few easy directions to make this recipe your own:
- Kid-friendly mild: reduce smoked paprika, add a little honey to the oil for a touch of sweetness, and serve with ketchup or plain yogurt.
- Bold and smoky: increase smoked paprika, add a pinch of cayenne, and serve with a smoky BBQ sauce.
- Herbaceous and bright: toss warm chicken with lemon zest and chopped parsley after cooking.
- Crunchier texture: toss lightly in panko before air frying and spray with a touch of oil for extra crunch.
- Global twist: mix in a teaspoon of curry powder or zaatar for an entirely new profile.
Think of these bites as a starting point. You can make them lighter, richer, or more adventurous based on what your table loves.
FAQs About Air Fryer Boneless Chicken Bites
Can I make this ahead for a busy week?
Absolutely. In fact, letting it sit for an hour lets the flavors get to know each other, just like an old family recipe. Store in the fridge and reheat in the air fryer for the best texture.
How do I know they are cooked through?
Use an instant-read thermometer. The safe internal temperature for chicken is 165°F (75°C). If you do not have a thermometer, look for no pink inside and clear juices.
Can I use thighs instead of breasts?
Yes. Boneless chicken thighs are forgiving and remain very juicy. They may need an extra minute or two in the air fryer because they are slightly denser.
What dipping sauces pair best?
Honey mustard, BBQ, garlic-yogurt sauce, and even a tangy hot sauce work beautifully. Offer a couple of options so everyone finds their favorite.
Is this recipe healthy?
It can be. Air frying uses far less oil than deep frying, and the spice levels keep things flavorful without heavy breading. Pair with a salad or roasted vegetables for a balanced plate.
One Final Thought from My Kitchen
Cooking is often about making small decisions that lead to big comfort. These Air Fryer Boneless Chicken Bites are a tiny, reliable miracle for busy nights — quick, tasty, and full of heart. I hope they bring a little warmth and a lot of conversation to your table. Give it a try; you might surprise yourself with how often this becomes the dish people ask for.
Conclusion
If you want another take on air-fried chicken bites, I like how different cooks put their spin on the technique, and this version from Air Fryer Chicken Bites – The Country Cook offers a comforting, family-friendly approach. For recipe variety and another simple method to compare, see Air Fryer Chicken Bites – Food Banjo which gives a slightly different seasoning profile to inspire your next batch.
12. Air Fryer Mozzarella Sticks
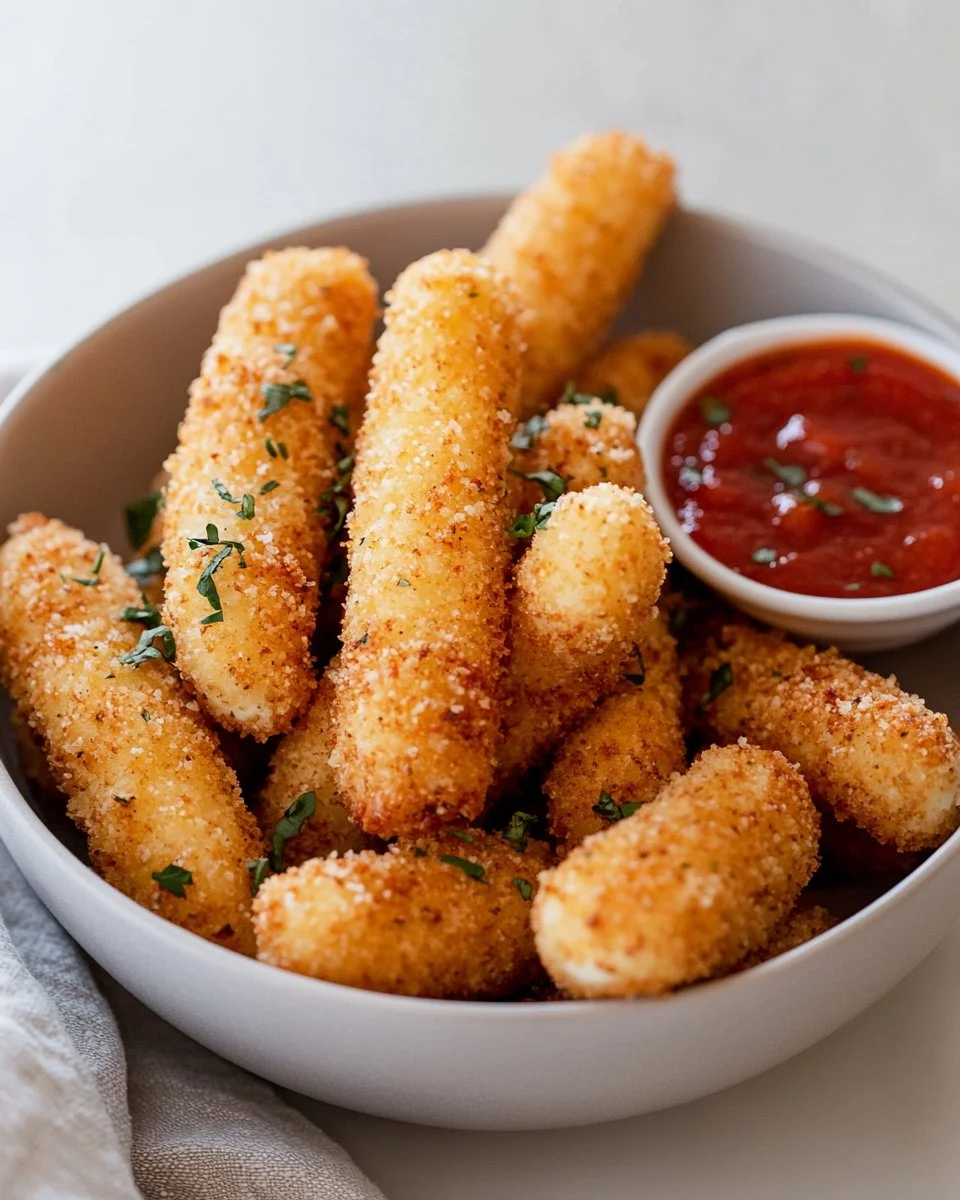

There is a little moment in my kitchen that I love: the timer dings, the air fryer hums down, and that warm, cheesy scent slips under the door while my kids set the table and laugh about who gets the biggest stick. It makes the whole evening fall into place, like a small, reliable ritual that turns a busy weeknight into a memory. If you like pairing a cozy snack with tea, you might enjoy a quiet pairing note like this Earl Grey and chocolate pairing while you wait.
Why This Air Fryer Mozzarella Sticks Feels Like Home
There is something instantly comforting about mozzarella pulled like warm taffy and a golden crust that snaps when you bite. These Air Fryer Mozzarella Sticks take that childhood favorite and make it cleaner, faster, and less fussy. 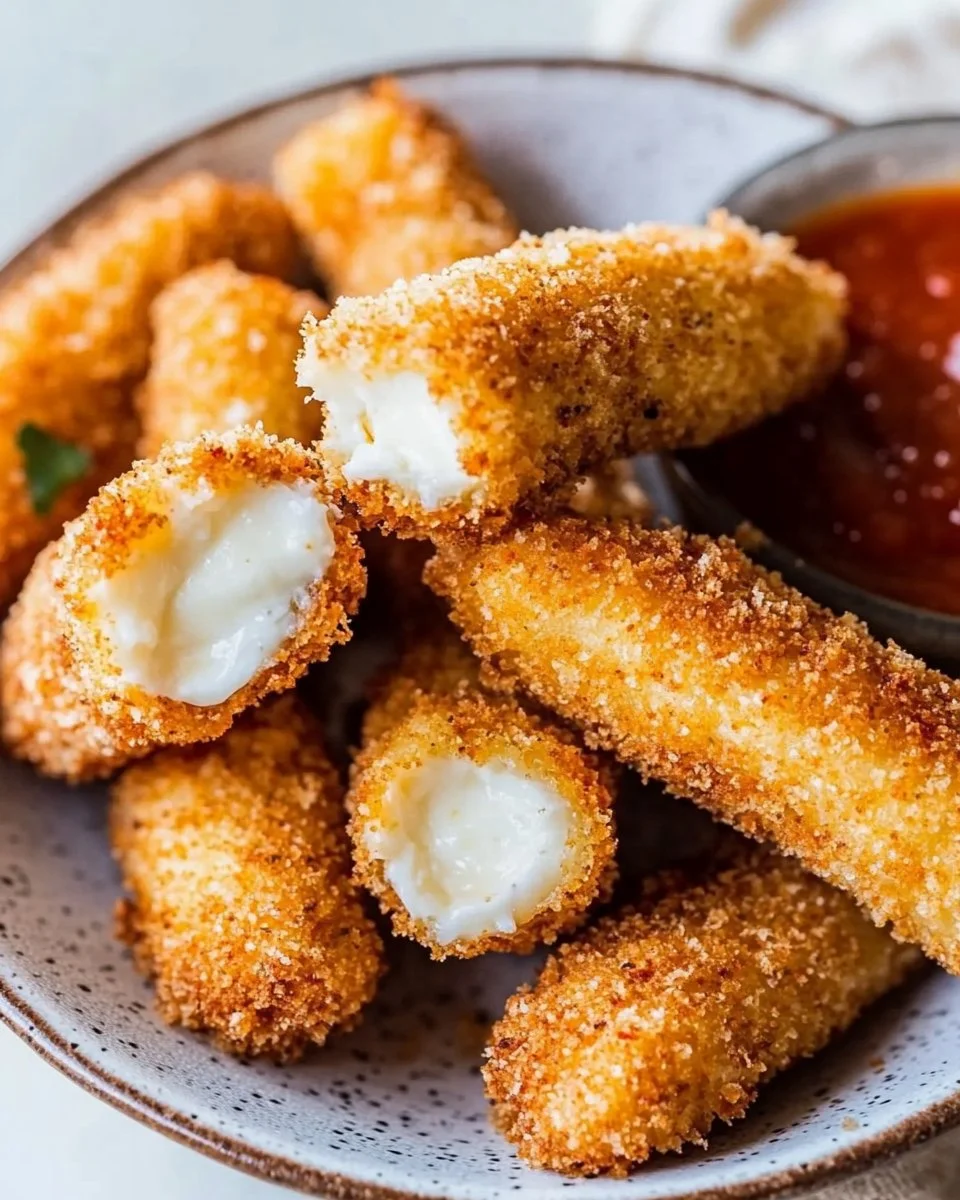
They are perfect when life is busy but you still want a special snack or a starter for a family dinner. They require only a few bowls, and the air fryer gives you that crisp outside and melty inside without deep frying. That means fewer dishes and less worry about hot oil in the kitchen.
I remember my grandmother handing me a plate of fried cheese and saying, "Careful, it bites back." What she taught me was really about timing and patience. These sticks honor that lesson with a friendly, modern twist. If you like floral twists with your snacks, consider this gentle idea about tea pairing lavender Earl Grey pairing to make your evening feel extra cozy.
How to Make Air Fryer Mozzarella Sticks, The Heartwarming Way
“This is where the magic happens—when the aroma fills the kitchen and my kids come running in, asking ‘Is it ready yet?’”
Start by freezing the sticks so the cheese stays inside the crust. From there, a simple breading station keeps everything tidy: flour, egg, and seasoned crumbs. The air fryer does the heavy lifting, turning the outside golden while keeping the center soft and gooey.
Watch for visual cues: the breadcrumbs should be evenly golden brown, and you might see a tiny bubble of cheese at the seam just as they finish. That little bubble is a green light, but give them a minute to cool so no one gets burned. It’s easier than it looks, and the reward is worth a tiny bit of patience.
Ingredients You’ll Need
List all 12 mozzarella sticks, 1 cup all-purpose flour, 2 large eggs, 1 cup breadcrumbs, 1 teaspoon Italian seasoning, 1/2 teaspoon garlic powder, 1/2 teaspoon salt, Cooking spray
- 12 mozzarella sticks
- 1 cup all-purpose flour
- 2 large eggs
- 1 cup breadcrumbs
- 1 teaspoon Italian seasoning
- 1/2 teaspoon garlic powder
- 1/2 teaspoon salt
- Cooking spray
Friendly notes: Use what’s in your fridge. If you have panko and want extra crunch, swap half the breadcrumbs for panko. Don’t skip the Italian seasoning; it is the little herb hug that makes the crust sing. If you are curious about pairing flavors with snacks like this one, you might enjoy a short read on Earl Grey and chocolate pairing for a warm beverage idea.
Step-by-Step Directions
-
Freeze mozzarella sticks for at least 30 minutes.
- Freezing firms the cheese and prevents oozing.
- I pop them in a single layer so they don’t stick together.
-
Set up a breading station: Place flour in one bowl, beaten eggs in another, and combine breadcrumbs, Italian seasoning, garlic powder, and salt in a third bowl.
- Label the bowls if kids are helping; it keeps the counter neater.
- A fork works fine for whisking the eggs.
-
Dip each frozen mozzarella stick first in flour, then in egg, and finally in the breadcrumb mixture, ensuring they’re well coated.
- Press the crumbs gently so they stick, and double-coat if you want a thicker shell.
- Let them rest a minute on a tray; it helps the coating set.
-
Preheat air fryer to 390°F (200°C).
- A hot basket delivers the golden color without long cook time.
- If your air fryer runs hot, check a minute earlier the first time.
-
Lightly spray the basket with cooking spray, then arrange the breaded mozzarella sticks in a single layer.
- Give them breathing room so the air can crisp every side.
- Work in batches to avoid overcrowding.
-
Air fry for 6-8 minutes or until golden brown and crispy.
- Watch the last minute closely; cheese can break through if overdone.
- That golden brown is your cue, and a tiny cheese bubble at the seam means they are ready.
-
Serve immediately with marinara sauce for dipping.
- Let them cool for a minute so no one gets burned, then share.
- We love a sprinkle of fresh basil on the marinara for extra aroma; it makes it feel special.
Tip from my kitchen: If you want extra assurance, pop the breaded sticks back in the freezer for 10 minutes before air frying. It tightens the coating and reduces leak risk. And if the kids love to help, let them do the egg dip; it’s the most fun part.
Serving Air Fryer Mozzarella Sticks with Love
I put everything in the center for family-style dipping: a big bowl of marinara, a small dish of pesto, and a plate of sticks stacked like cozy little logs. Kids pick their favorite sauce and argue delightfully about who gets the last one.
We often serve them with simple sides: a crisp green salad, some carrot sticks, or garlic bread if we want a heartier spread. For a weekend treat, I add a small bowl of honey for the adventurous eater. If you are pairing drinks, a light black tea can be beautiful alongside this snack—try exploring a gentle tea pairing idea like lavender Earl Grey pairing to lift the experience.
I find it works best when everyone helps. Someone handles the plates, another sets the napkins, and the smallest family member is on marshaling dessert duties. The shared doing makes the eating sweeter.
Storage & Reheat Tips (Keeping the Goodness)
Leftovers can be a joy if stored and reheated well. Place cooled sticks in an airtight container with a paper towel to absorb excess moisture. They will keep in the fridge for up to 2 days.
To reheat and keep that crisp, use the air fryer at 350°F for 3-4 minutes. The oven works too: 375°F for about 8-10 minutes on a baking sheet brings back the crunch. If you choose the microwave for speed, know it will soften the crust and may cause the cheese to leak, so microwave briefly and then crisp in a hot pan if you can.
Freezing for longer storage is possible. Freeze the breaded, uncooked sticks in a single layer and then transfer to a freezer bag for up to one month. Bake straight from frozen, adding a couple of minutes to the cook time.
My Kitchen Notes & Shortcuts
- Double coating tip: Freeze the breaded sticks for 10 minutes before air frying for a sturdier crust.
- Breadcrumb swap: Use panko for a lighter, crunchier texture or seasoned crumbs for a flavor boost.
- Kid helpers: Let kids shake the breadcrumb bowl with a lid for safe involvement and big grins.
- Make ahead: Bread the sticks and freeze them on a tray. Store in a bag and bake from frozen for quick snacks.
- Oil spray: A light spray on the crust gives extra even browning without deep frying.
These are honest shortcuts I use when weeknights are loud. They keep things real and delicious.
Family-Friendly Variations
- Herb and crumb: Add fresh parsley or chopped basil to the breadcrumbs for a bright herb note.
- Spicy: Mix 1/4 teaspoon cayenne or chili flakes into the breadcrumb mix for kids who like a little kick.
- Cheesy mix: Try half mozzarella and half smoked provolone for a deeper flavor.
- Gluten-free: Use a 1:1 gluten-free flour mix and gluten-free breadcrumbs; the method stays the same.
- Baked platter: Make smaller sticks from string cheese for a bite-size party platter.
Each variation is an invitation to make this your family’s version. Swap, try, and then keep what they ask for next week.
FAQs About Air Fryer Mozzarella Sticks
Q: Can I make this ahead for a busy week?
A: Absolutely. Bread them and freeze on a tray, then store in a bag. Air fry from frozen and add a minute or two to the time. It is a great make-ahead trick.
Q: My sticks melted out. What did I do wrong?
A: Likely they were not cold enough before frying or the coating was thin. Freeze them longer before breading or double-coat with crumbs. Also avoid overcrowding the basket.
Q: Can I use shredded mozzarella instead of sticks?
A: Shredded cheese is tricky because it needs a binder to stay in shape. If you want shredded, mix it with a little cream cheese and chill until firm before shaping.
Q: Is the air fryer safe for this recipe?
A: Yes. Air fryers are designed for this kind of breaded snack. Use caution when removing the hot basket and let the cheese rest a minute before serving.
Q: What is the best dipping sauce?
A: Classic marinara wins in our house, but pesto, ranch, or a honey-drizzled mustard are delightful too. Let the family vote.
One Final Thought from My Kitchen
Cooking doesn’t have to be complicated to be memorable. These Air Fryer Mozzarella Sticks are a small, joyful way to bring everyone together without a fuss. Let the kids help, keep the sides simple, and laugh when the last stick goes missing. This recipe is about the sound of plates clinking and the comfort of a shared snack.
Conclusion
If you want another tested version of this snack to compare techniques, the Air Fryer Mozzarella Sticks Recipe is a helpful reference for timing and variations. For a different take on crunchy coating and family-friendly notes, check out this version of Air Fryer Mozzarella Sticks for extra inspiration.
Happy cooking, and may your kitchen be full of warm smells and laughter. Give it a try; you might surprise yourself.
13. Keto Air Fryer Chicken Nuggets
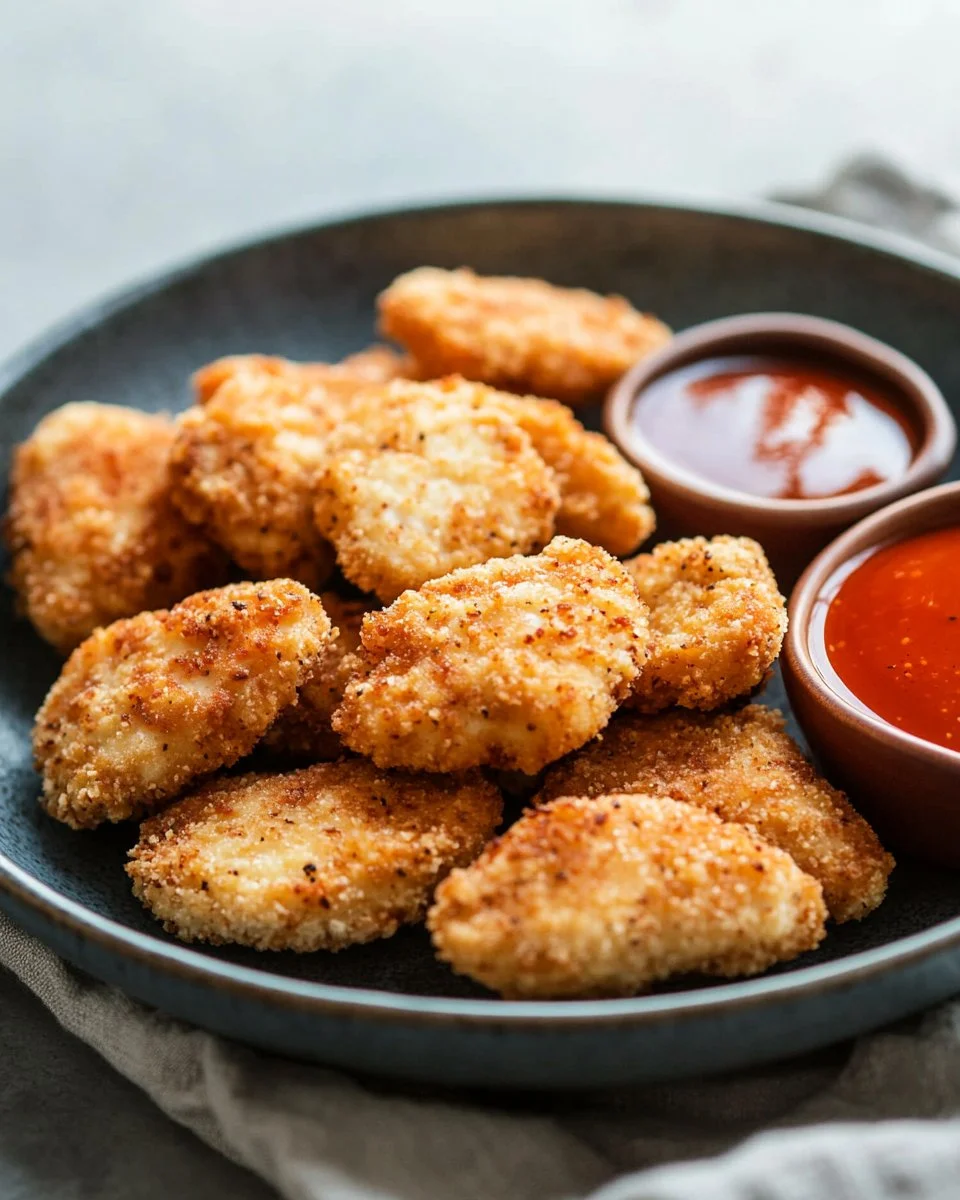
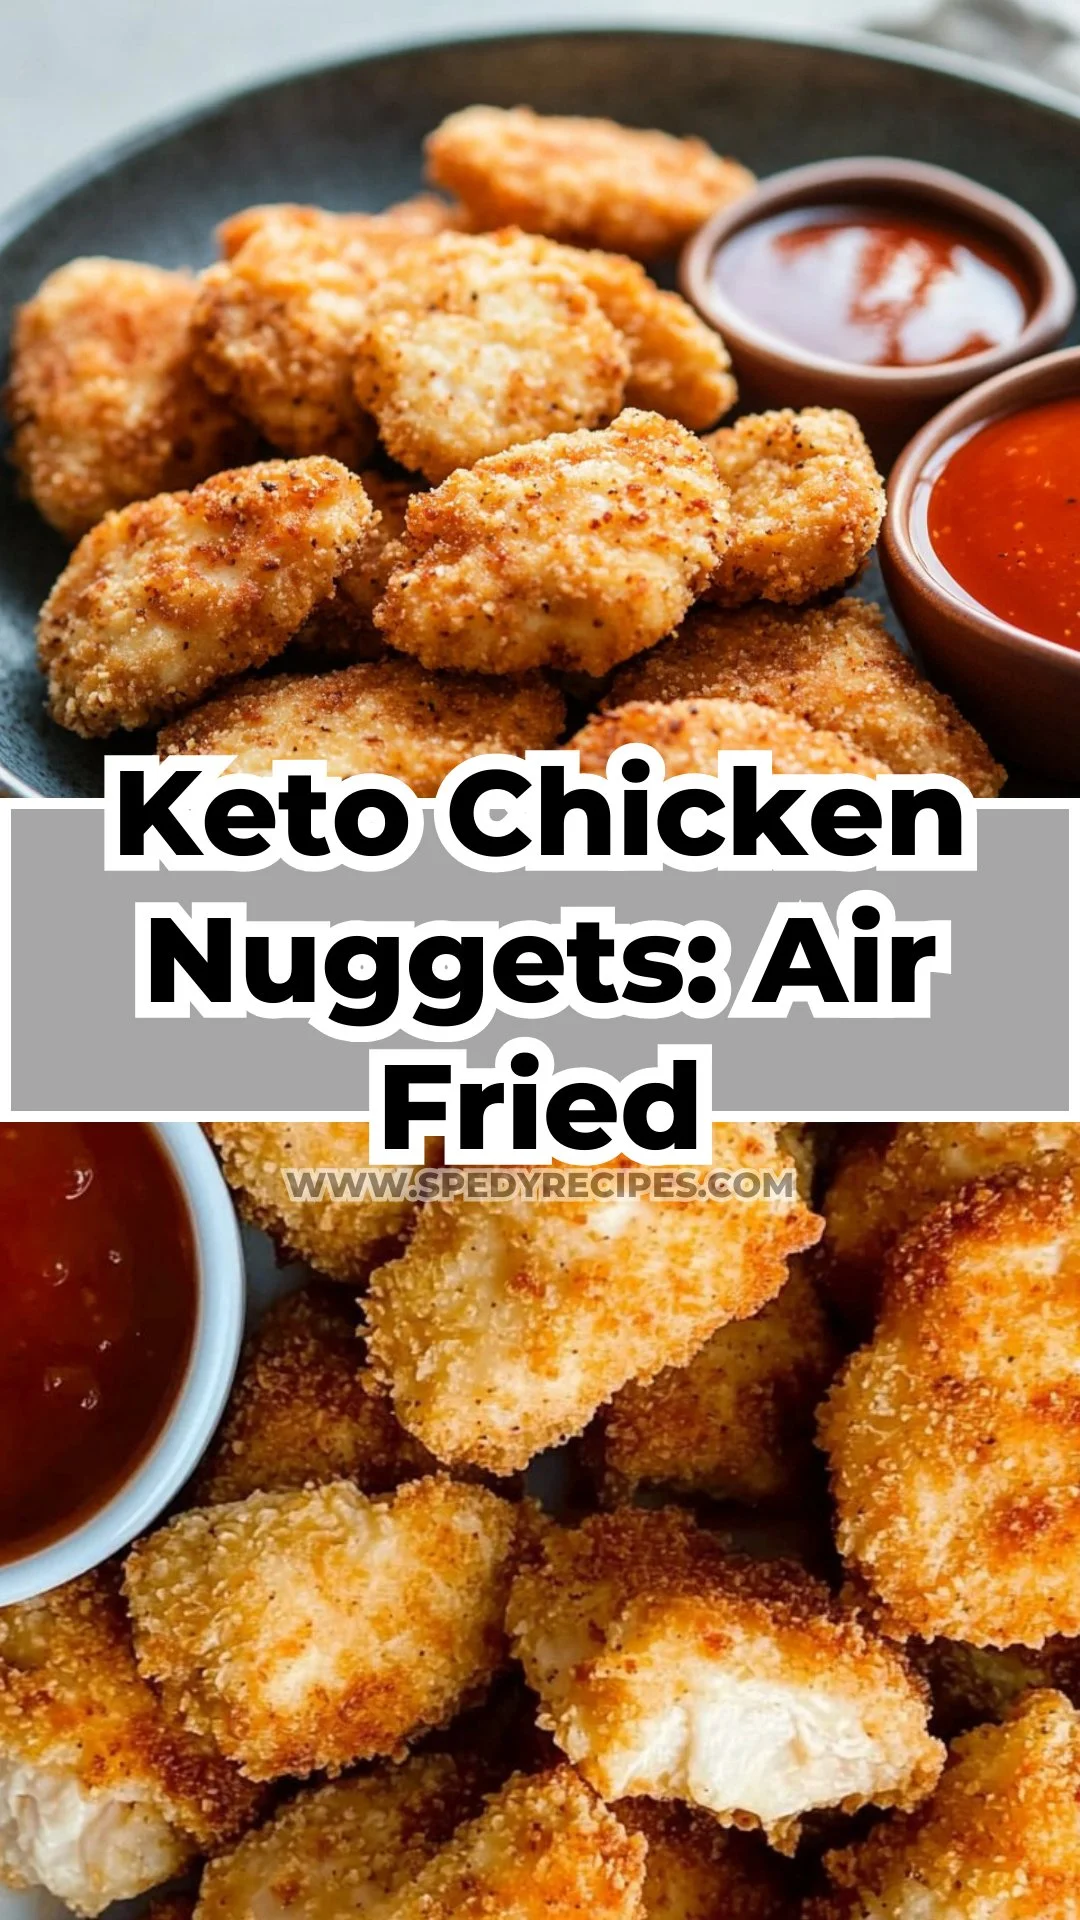
I can still hear the clatter of plates from that rainy Thursday when I first made these for my kids. The air smelled warm and toasty, with a hint of garlic and parmesan, and my youngest ran in announcing that dinner smelled like a pizza place. There is a small, steady joy in seeing everyone gather around a simple plate of nuggets, laughing and dipping as if it is the most special thing on the table. It reminds me of why I cook: to make quick, comforting food that keeps our family talking and smiling. For a small dash of inspiration, I often think back to a simple chicken salad recipe that taught me how a few good ingredients can change everything, and it lives in my notes here the 4-ingredient chicken salad I rely on.
Why This Keto Air Fryer Chicken Nuggets Feels Like Home
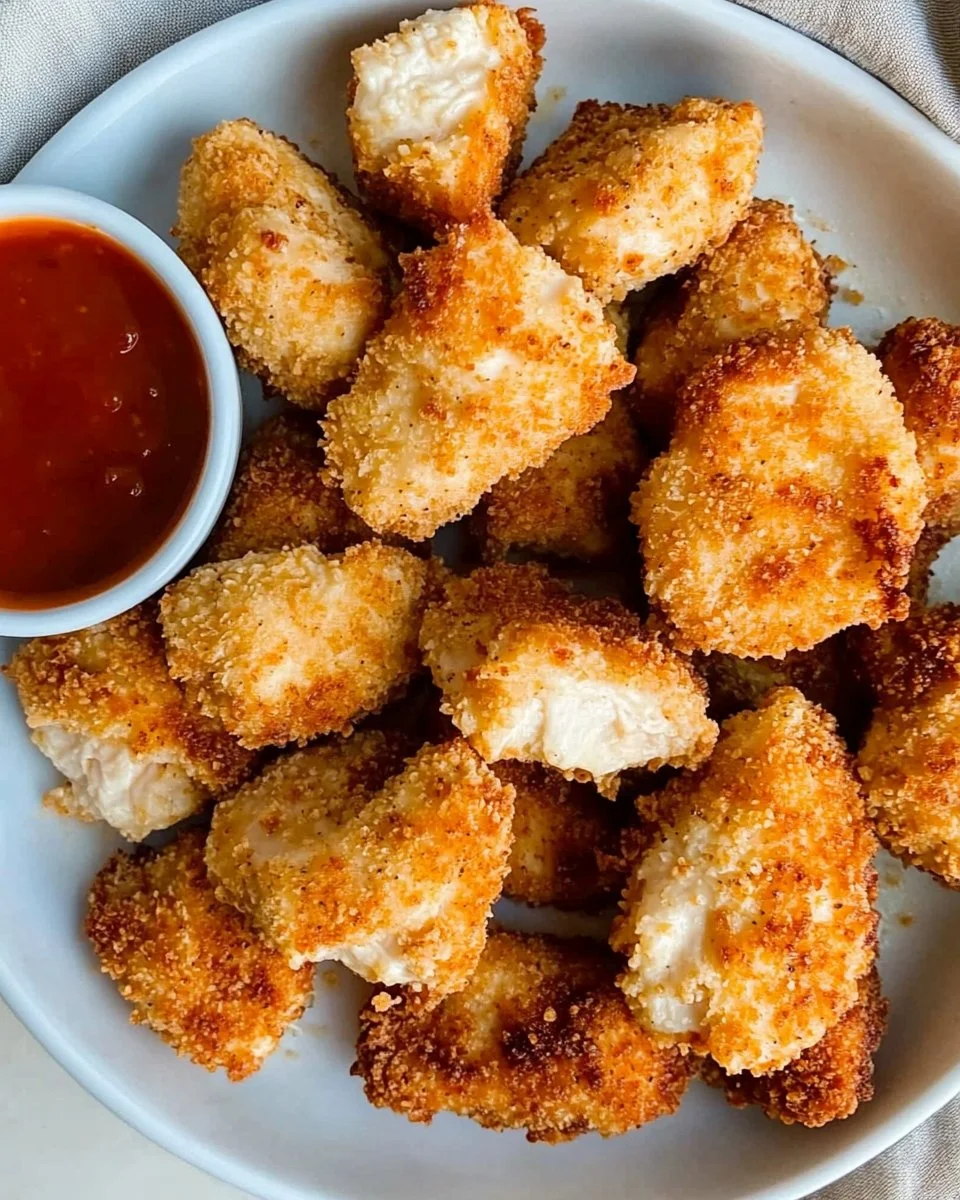
There is something about the crisp, golden crust and the tender, juicy chicken inside that pulls me back to cozy weeknights and weekend movie marathons. These nuggets are comfort food with a mindful twist. They feel like home because they are easy to make, forgiving when life gets messy, and familiar enough for picky eaters but flavorful enough for adults.
They work because they cut the fuss without cutting the taste. The almond flour and parmesan give a nutty, toasty crunch, while the spices bring a hint of warmth. They cook fast in the air fryer, so you get more time to set the table, pour a glass, and enjoy the moment.
Why this matters in our house is simple: we want meals that taste like hugs, come together quickly, and leave the kitchen tidy. These nuggets check all those boxes and then some. If you love the idea of turning a few pantry staples into a family favorite, this recipe is your new go-to. Meanwhile, you still get that satisfying sizzle and browning that signals good cooking and a hungry kitchen.
Why Keto Air Fryer Chicken Nuggets is Our New Family Favorite
These nuggets have become a family favorite for three reasons: speed, texture, and flexibility.
First, speed. From cutting the chicken to serving takes less than 30 minutes. That matters on evenings when soccer practice runs late and someone forgot to defrost dinner.
Second, texture. The outer coating crisps up beautifully in the air fryer. It gives you the crunch you want without frying in oil. Inside, the chicken stays juicy because almond flour protects it from drying out.
Third, flexibility. Swap spices, change dips, or double the batch and freeze for later. They are forgiving and adaptable, which makes them perfect for feeding a crowd or a picky five-year-old who prefers plain over spicy.
How to Make Keto Air Fryer Chicken Nuggets, The Heartwarming Way
“This is where the magic happens—when the aroma fills the kitchen and my kids come running in, asking ‘Is it ready yet?’”
Here is the short, joyful overview. You’ll cut chicken into bite-sized pieces, whisk eggs, and coat each piece with a seasoned almond flour and parmesan mix. The air fryer crisps them up in about 10 to 12 minutes. You are aiming for a deep golden brown on the outside and a clear, hot center inside. When the nuggets are ready, they should sound slightly crackly when you tap them and smell warmly of toasted cheese and spices.
Watch the color and use a meat thermometer when you first make them. Chicken is safe at an internal temperature of 165°F (74°C). Once you know they reach that temperature reliably, you can also check by cutting one open to ensure there is no pink in the middle. From there, enjoy the ritual of dipping, laughing, and passing plates around the table.
Ingredients You’ll Need
1 pound chicken breast, cut into bite-sized pieces
1 cup almond flour
1/4 cup grated parmesan cheese
1 teaspoon garlic powder
1 teaspoon onion powder
1 teaspoon paprika
Salt and pepper to taste
2 large eggs, beaten
Buffalo sauce for dipping
Ranch dressing for dipping
A small friendly note: don’t skip the parmesan. It adds a toasty, savory backbone that pulls everything together. If you want to make things even more nourishing, I sometimes simmer leftover chicken bones into broth before I start cooking; it’s a little ritual that adds depth to soup nights and is great to have on hand I keep my favorite bone broth recipe nearby.
Step-by-Step Overview: Keeping It Simple
-
Preheat the air fryer to 400°F (200°C).
Preheating gives you that immediate burst of heat that helps the coating become crisp right away.
It’s an easy step that makes a big difference; try it and you’ll notice the crunch. -
In a bowl, mix the almond flour, parmesan cheese, garlic powder, onion powder, paprika, salt, and pepper.
Stir until everything looks evenly distributed and a warm scent of spices rises.
Tasting the dry mix isn’t for flavor but for balance; adjust the salt if you like it a touch stronger. -
Dip each piece of chicken into the beaten eggs, then coat with the almond flour mixture.
Press gently so the coating clings to the chicken and forms a little crust.
Let the kids help here; it’s splattery and fun and they love feeling involved. -
Place the coated chicken nuggets in the air fryer basket in a single layer.
Don’t overcrowd the basket; air needs to circulate to get that even browning.
Cook in batches if you have to; each batch is worth the little extra time. -
Cook for 10-12 minutes, shaking the basket halfway through, until crispy and golden brown.
Check for an internal temperature of 165°F (74°C) or cut a piece to check for no pink inside.
A little browning here builds flavor, just like grandma showed me when she roasted chicken. -
Serve with buffalo sauce and ranch dressing for dipping.
Let them rest for a minute so the coating firms up and you avoid steam softening the crust.
Then call everyone to the table and watch the instant satisfaction as they dunk and crunch.
Preparing Keto Air Fryer Chicken Nuggets Without the Stress
This recipe is designed to be patient-friendly. If life interrupts you mid-batch, you can pause with uncooked, coated nuggets on a plate in the fridge for a short period. If you want to prepare ahead, you can coat the chicken and store it in the fridge for a day, then pop it into the air fryer when you are ready. The air fryer does the heavy lifting so you can focus on making a quick salad or heating a simple side.
A note on safety: always keep raw chicken separate from other ingredients and wash your hands and tools after handling. When reheating, use the oven or air fryer to bring back the crunch rather than the microwave.
Serving Keto Air Fryer Chicken Nuggets with Love
We serve these family-style, right in the middle of the table on a big platter. Bowls of buffalo sauce and ranch go on either side, and each person grabs what they like. On busy nights I pair the nuggets with simple sides that are quick and satisfying: steamed green beans, a crunchy slaw, or a cauliflower mash. For extra heartiness, I sometimes serve them alongside a slow cooker dish that’s been bubbling all afternoon—comfort from two angles.
In our house, the kids have rituals. My daughter insists on a pile of napkins, and my son lines up the nuggets by size. It is small and silly and utterly sweet. For adult palates, a squeeze of lemon or a sprinkle of fresh parsley brightens the whole plate.
If you want a one-dish feel, toss a green salad or roasted vegetables on the same sheet to minimize dishes. Another family favorite pairing is a rich, slow-cooked chicken dish that contrasts the crisp nuggets; it’s a lovely way to give the meal variety and keep everyone happy we often pair with a slow cooker favorite.
Storage & Reheat Tips (Keeping the Goodness)
Store cooled nuggets in an airtight container in the fridge for up to 3 days. If you want longer storage, freeze them on a tray until firm, then transfer to a freezer bag for up to 3 months.
When reheating from the fridge, the air fryer or a preheated oven at 350°F (175°C) will bring back the crunch in 6 to 8 minutes. If they are frozen, reheat at 375°F (190°C) for about 12 to 15 minutes. The microwave is fine for a quick lunch, but it will soften the crust and make the nuggets less snappy.
Honest tip: reheat in small batches so each nugget gets a turn in the hot air. It makes a noticeable difference.
My Kitchen Notes & Shortcuts
- Prep-ahead: Cut the chicken into pieces the night before and store in a sealed container. It shaves minutes off dinner time.
- Kids’ job: Let them whisk the eggs and sprinkle the coating. It’s messy but fun, and they feel proud.
- Shortcut swap: Use finely grated pecorino if you love a sharper bite. It still crisps beautifully.
- Double batch: Cook one tray for dinner and freeze the other for a fast lunch. It saves a future you a lot of time.
- Flavor pairing note: When I want a little grown-up contrast, I think about small flavor matches, like a tea or dessert that echoes the meal’s tone, and I jot ideas in my recipe book I often pair flavors with simple treats.
Family-Friendly Variations
- Mild and cheesy: Add an extra tablespoon of parmesan into the coating for kids who like a cheesier bite.
- Herby and bright: Mix in 1 tablespoon of chopped fresh parsley or chives to the coating for a herb-forward twist.
- Spicy kick: Add 1/4 to 1/2 teaspoon cayenne to the dry mix for those who love heat.
- Picky-eater version: Keep one tray plain and another seasoned so everyone finds their favorite.
- Make it a bowl: Serve nuggets over cauliflower rice with avocado, a drizzle of ranch, and a sprinkle of paprika.
Play with these as invitations to make the recipe your own. If you enjoy gentle floral notes after a meal, consider pairing dessert or tea elements that echo the dinner; it becomes a small ritual that feels special try a light floral note for a playful finish.
FAQs About Keto Air Fryer Chicken Nuggets
Can I make this ahead for a busy week?
Absolutely. You can coat the chicken and keep it in the fridge for up to a day, or freeze fully cooked nuggets for up to three months. Reheat in the air fryer for the best texture.
Will almond flour give a different flavor than regular breadcrumbs?
Yes. Almond flour has a nuttier, richer flavor and creates a tender crust. It crisps up nicely and keeps the chicken moist.
Can I use dark meat or canned chicken?
You can use dark meat like thigh; it will be juicier and forgiving. I recommend fresh pieces over canned for the best texture, but if you need a fast substitution, canned chicken can be seasoned and pressed into small patties to air fry gently.
How do I know the nuggets are cooked through?
Use an internal thermometer. Chicken is safe at 165°F (74°C). The outer color should be golden brown and the juices should run clear.
Is the air fryer necessary?
The air fryer makes it faster and crispier with less oil. You can bake them at 425°F (220°C) on a greased sheet for 12 to 16 minutes, flipping halfway through, but the air fryer gives a special crisp that feels like a treat.
One Final Thought from My Kitchen
I love that this recipe keeps things simple without skimping on warmth or flavor. It is the kind of meal that creates small rituals: the call to the table, the shared dip, the tiny debates over which sauce is best. It is also forgiving, economical, and honest—practical cooking with a tender heart.
Conclusion
I hope this recipe finds its way into your weeknight rotation and brings a little extra warmth to your family table. If you want another take on low-carb chicken nuggets with a helpful video, check out this detailed version for inspiration at Crispy Low Carb Chicken Nuggets (Air Fryer Recipe + Video), and if you are curious about a version using canned chicken and easy tricks, this recipe is a useful read Keto Chicken Nuggets in the Air Fryer | easy using canned chicken.
Until next time, happy cooking. Give it a try—you might surprise yourself with how quickly comfort and connection arrive at your table.