
The skillet hisses and a warm, familiar smell curls through the house. My kids set the table in uneven rows while my grandmother’s old timer clock ticks on the wall. That small, deep joy of everyone pausing their day because dinner smells like home is exactly what Southern Fried Chicken brings to our table. If you want a simple side that pairs perfectly with this comfort, try a light salad like this 4-ingredient chicken salad that keeps things easy and bright.
Why This Southern Fried Chicken Feels Like Home
There is something honest about a plate of Southern Fried Chicken. Crispy golden coating, warm tender meat inside, and that little crackle when you bite in. 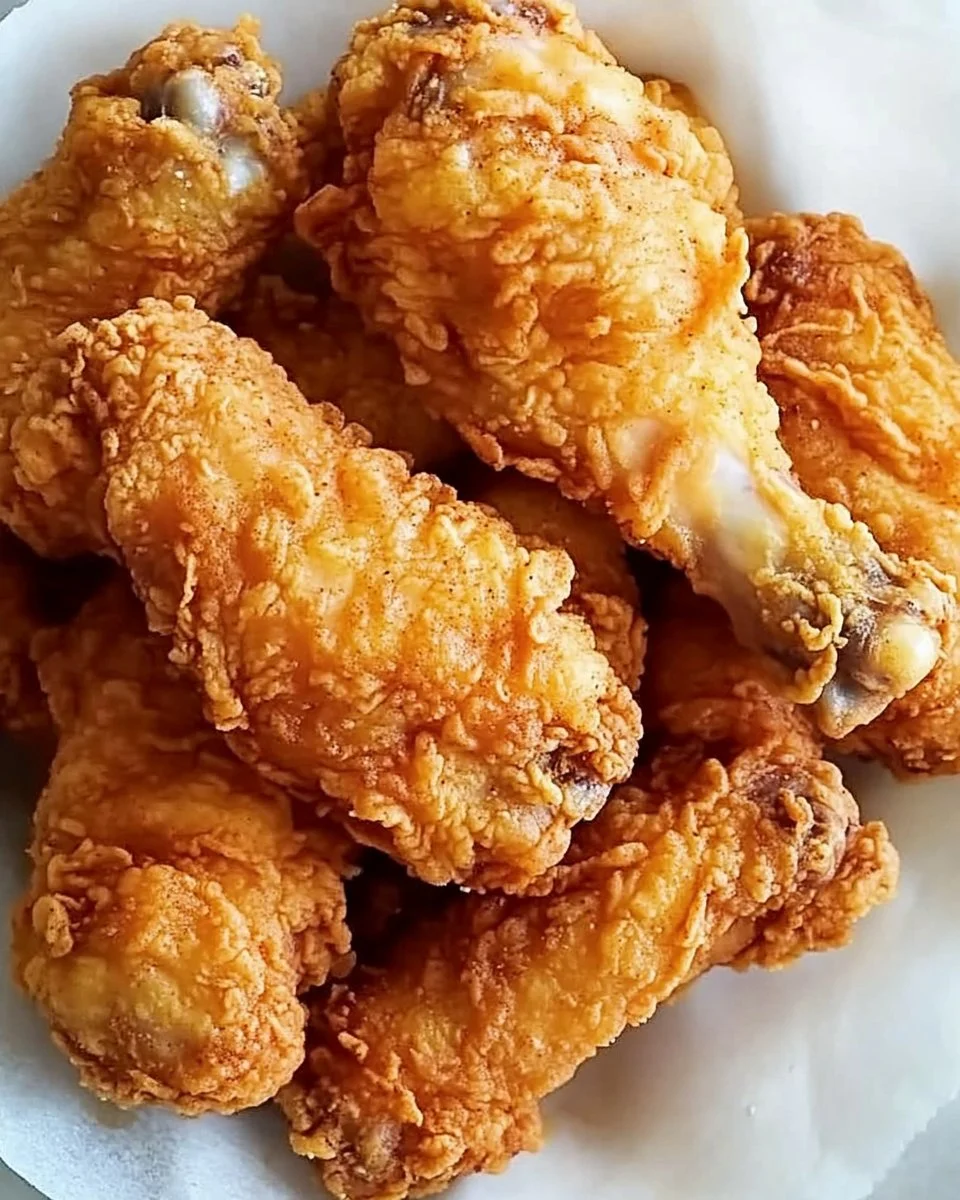
This recipe is not about fancy techniques. It is about simple steps done well so you can focus on the people at your table. It fits busy nights when you want something special with little fuss. It tastes like a hug and doubles as a celebration when friends drop by.
I learned to cook this while watching my grandmother work the kitchen after a long morning. She never measured too much, but she knew the look of the crust and the sound of a good fry. I kept those lessons and added a few modern tricks for safety and consistency. Meanwhile, you’ll get a reliable recipe that comes together with confidence.
How to Make Southern Fried Chicken, The Heartwarming Way
“This is where the magic happens, when the aroma fills the kitchen and my kids come running in, asking ‘Is it ready yet?’”
Here is a quick overview before we roll up our sleeves. First we let the chicken soak in tangy buttermilk and a little hot sauce. That keeps the meat tender and adds a subtle tang. Next we dredge each piece in a seasoned flour mix that crisps into a deep golden shell. Finally we fry at a steady temperature until the exterior is crisp and the inside is safely cooked.
Look for certain cues along the way: the coating should be evenly colored, not burnt. The crust should be firm and not soggy. When you tap the thickest part, it should feel firm and the juices clear. For safety and tenderness, the internal temp should reach at least 165 F for white meat and 175 F for dark meat if you prefer fall-apart thighs.
Ingredients You’ll Need
3 pounds chicken pieces (cut into 8 pieces (2 breasts, 2 thighs, 2 drumsticks, 2 wings))
2 cups buttermilk
1 tablespoon hot sauce
2 cups all-purpose flour
2 teaspoons salt
1 teaspoon black pepper
0.5 teaspoon paprika
0.5 teaspoon garlic powder
0.5 teaspoon onion powder
4 cups vegetable oil or shortening (for frying)
Friendly note: Don’t skip the buttermilk. It is the soul of the dish for me. If you don’t have buttermilk, a quick swap is 2 cups milk plus 2 tablespoons lemon juice or vinegar, let it sit 5 minutes. And use what’s in your fridge when you need to; the best meals are the ones you finish, not the ones you overthink.
If you like deeper flavor in your sides, a pot of bone broth makes everything feel cozier. I often simmer one while the oil heats, using a simple method like this chicken bone broth recipe to keep things homey and warm.
Step-by-Step Directions
-
Prep the chicken and marinade.
Pat the pieces dry with paper towels then place them in a large bowl. Pour the buttermilk and hot sauce over the chicken so each piece is well coated. Cover and refrigerate for at least 1 hour, up to overnight. (Overnight gives extra tenderness.) -
Mix the dry coating.
In a shallow dish, stir together the flour, salt, pepper, paprika, garlic powder, and onion powder. Use a fork to break any lumps. The seasonings are important here; they make the crust sing. -
Set up your dredging station.
Remove chicken from the fridge and let it sit 10 minutes at room temp while you heat the oil. Dredge each piece in the flour mixture, pressing lightly so the flour sticks. Shake off the excess. (A light hand helps the crust stay even.) -
Heat the oil.
Pour the oil into a large cast iron skillet or heavy-bottomed pan to a depth of about 1 inch. Heat to 325 F to 350 F. If you do not have a thermometer, test with a small pinch of flour; it should sizzle steadily. Use medium heat so the outside browns without burning. -
Fry the chicken in batches.
Add pieces skin-side down first. Do not crowd the pan; crowding drops the oil temperature and makes the crust greasy. Fry until golden, turning once. Dark meat takes longer than breasts. Expect about 12 to 18 minutes per batch depending on size. Use tongs for gentle handling. -
Check for doneness.
Use an instant-read thermometer. White meat should reach 165 F, and dark meat benefits from 175 F for that tender, fall-off-the-bone texture. If you prefer, you can finish thicker pieces in a 350 F oven for 8 to 10 minutes to ensure even cooking. -
Drain and rest.
Transfer the fried pieces to a wire rack set over a baking sheet. Rest 8 to 10 minutes before serving. Resting lets the juices redistribute and keeps the crust crisp. -
Clean as you go.
While the chicken rests, lower the heat and carefully wipe any small splatters from the stovetop. If you need ideas for slow-simmered sides while the kids help clear plates, try a comforting crockpot recipe like this crockpot Mississippi chicken that can run in the background and free your time.
A little browning builds flavor, just like grandma taught me. Let the kids stir the flour mix for a small kitchen job they can do safely. This recipe is easier than it looks. Give it a try and you might surprise yourself.
Serving Southern Fried Chicken with Love
We bring this meal to the table family-style. I place the wire-racked chicken in the center, a big bowl of mashed potatoes to one side, a skillet of green beans to the other, and a jug of sweet tea nearby. Everyone helps themselves and the conversation flows.
I like to offer small bowls of honey, hot sauce, and pickles. Someone in my family always wants the dark meat with extra pickles, and another insists on a drizzle of honey over a drumstick. It is those little habits that make the meal ours.
For a lighter twist, serve with a crisp slaw and corn on the cob. If you want a leafy side, toss baby greens with a lemon vinaigrette before serving. The goal is simple: make it easy for everyone to find what they love on their plate. 
Storage & Reheat Tips (Keeping the Goodness)
Store leftovers in an airtight container in the fridge for up to 3 to 4 days. If you want to freeze, wrap each piece tightly and place in a freezer bag for up to 3 months. Label with the date so you use older pieces first.
To reheat and bring back crispness, preheat your oven to 375 F. Place the chicken on a wire rack set over a baking sheet and heat for 10 to 15 minutes, or until warmed through. A quick 3 to 4 minute finish under a broiler will revive the crust if needed.
The microwave is fine for a quick lunch, but it will soften the crust. If you must microwave, then pop the piece in a hot skillet for a minute to re-crisp. For the best texture, avoid reheating directly in oil or on a damp surface.
If the crust becomes too dark or oil-smelled, discard the oil and start fresh next time. Good oil and clean frying practices help flavor and safety.
My Kitchen Notes & Shortcuts
- Brine the night before. Letting the chicken sit in buttermilk for several hours makes a real difference in tenderness. I do this whenever I can.
- Use a thermometer. It takes the guesswork out of frying and keeps the meat safe and juicy.
- Double-dredge for extra crunch. Dip once in buttermilk, dredge, then dip back into buttermilk and dredge again for a thicker crust.
- Try a shallow fry in two pans. If you are short on deep oil, use two pans and rotate pieces to avoid crowding.
- Get kids involved. They can shake the flour-covered pieces in a paper bag for fun; just supervise around the hot oil.
Family-Friendly Variations
- Lighter version: Bake at 425 F on a wire rack, sprayed with a little oil, about 35 to 40 minutes, flipping halfway. The crust will be lighter but still satisfying.
- Kid-friendly: Omit the hot sauce and use mild paprika. Serve with dipping sauces like ketchup, ranch, or honey mustard.
- Herb-forward: Add finely chopped thyme and parsley to the flour for a fresh, garden flavor.
- Gluten-free option: Use a gluten-free all-purpose flour blend and check your seasoning for gluten-free certification.
- Spicy version: Add cayenne or extra hot sauce in the buttermilk for a confident kick.
These are invitations to make the recipe your own. The small changes become the rituals your family remembers.
FAQs About Southern Fried Chicken
Can I make this ahead for a busy week?
Absolutely. In fact, a longer sit in the buttermilk helps flavors settle. You can prep up to the frying step and refrigerate the dredged pieces on a tray for a few hours before frying.
How do I keep the crust from getting greasy?
Do not crowd the pan. Keep the oil at a steady temperature and drain on a wire rack, not paper towels. Good heat control makes all the difference.
Is it safe to reuse frying oil?
You can reuse oil once or twice if you strain it and store it in a sealed container. If it smells rancid or dark, discard it. Always cool and handle oil safely.
What temperature should the oil be?
Aim for around 325 F to 350 F. Start a bit lower to render fat and finish at a higher temp if needed to crisp the crust. An instant-read or probe thermometer helps a lot.
How long will leftovers keep?
Refrigerated leftovers taste best within 3 to 4 days. For longer storage, freeze up to 3 months.
One Final Thought from My Kitchen
Cooking Southern Fried Chicken has been one of those gentle traditions that taught me how small steps can mean big comfort. It is not about perfection. It is about the hum of the stove, the shared plates, and the small habits that pass from one person to another.
When you make this for your family, notice the quiet moments between bites. Maybe a child will declare this the best chicken ever, or someone will ask for the recipe. Those are the wins I cook for. Until next time, happy cooking and may your table hold warmth and laughter.
Conclusion
If you want another take on a classic Southern fried method, I like this approachable version from The Country Cook for its clear steps and family-style tips. For a deep dive into buttermilk brining and technique, this detailed piece at Serious Eats is an excellent companion to the home-style approach I’ve shared here.

Southern Fried Chicken
Ingredients
For the Chicken
- 3 pounds chicken pieces (cut into 8 pieces (2 breasts, 2 thighs, 2 drumsticks, 2 wings))
- 2 cups buttermilk Don’t skip the buttermilk; it is crucial for tenderness.
- 1 tablespoon hot sauce Omit for a kid-friendly version.
For the Coating
- 2 cups all-purpose flour Can substitute with gluten-free flour for a gluten-free option.
- 2 teaspoons salt
- 1 teaspoon black pepper
- 0.5 teaspoon paprika Use mild paprika for a kid-friendly version.
- 0.5 teaspoon garlic powder
- 0.5 teaspoon onion powder
For Frying
- 4 cups vegetable oil or shortening For frying; ensure proper temperature.
Instructions
Preparation
- Pat the chicken pieces dry with paper towels and place them in a large bowl.
- Pour the buttermilk and hot sauce over the chicken, ensuring each piece is well coated.
- Cover and refrigerate for at least 1 hour, or up to overnight for extra tenderness.
Mix Coating
- In a shallow dish, combine flour, salt, pepper, paprika, garlic powder, and onion powder. Stir well to break up lumps.
Dredge Chicken
- Remove chicken from the fridge and let it sit for 10 minutes at room temperature.
- Dredge each piece in the flour mixture, pressing lightly so the flour adheres.
- Shake off excess flour.
Fry Chicken
- Heat oil in a large cast iron skillet or heavy-bottomed pan to 325°F to 350°F.
- Fry chicken pieces skin-side down, avoiding crowding the pan, until golden brown, about 12 to 18 minutes per batch.
Check Doneness
- Use an instant-read thermometer to ensure white meat reaches 165°F and dark meat 175°F.
Rest and Serve
- Transfer fried chicken to a wire rack set over a baking sheet and rest for 8 to 10 minutes before serving.