I can hear the laughter from the next room as my youngest counts how many popsicles we made, her small voice rising and falling with each number. The kitchen smells like citrus and berries, a bright, sun-warmed scent that makes everyone sit up a little straighter. I reach into the freezer, pull out a tray of homemade freeze pops, and hand one to my husband. He smiles in that quiet way that means a small thing just made his day. If you need a simple treat that brings people together, these are it, and they start with what you already have in the fridge and a little bit of joy. For a fun twist after you make these, I sometimes pair them with the tang from my go-to margarita base homemade margarita mix when guests are over for dessert.
Why This Homemade Freeze Pops is Our New Family Favorite
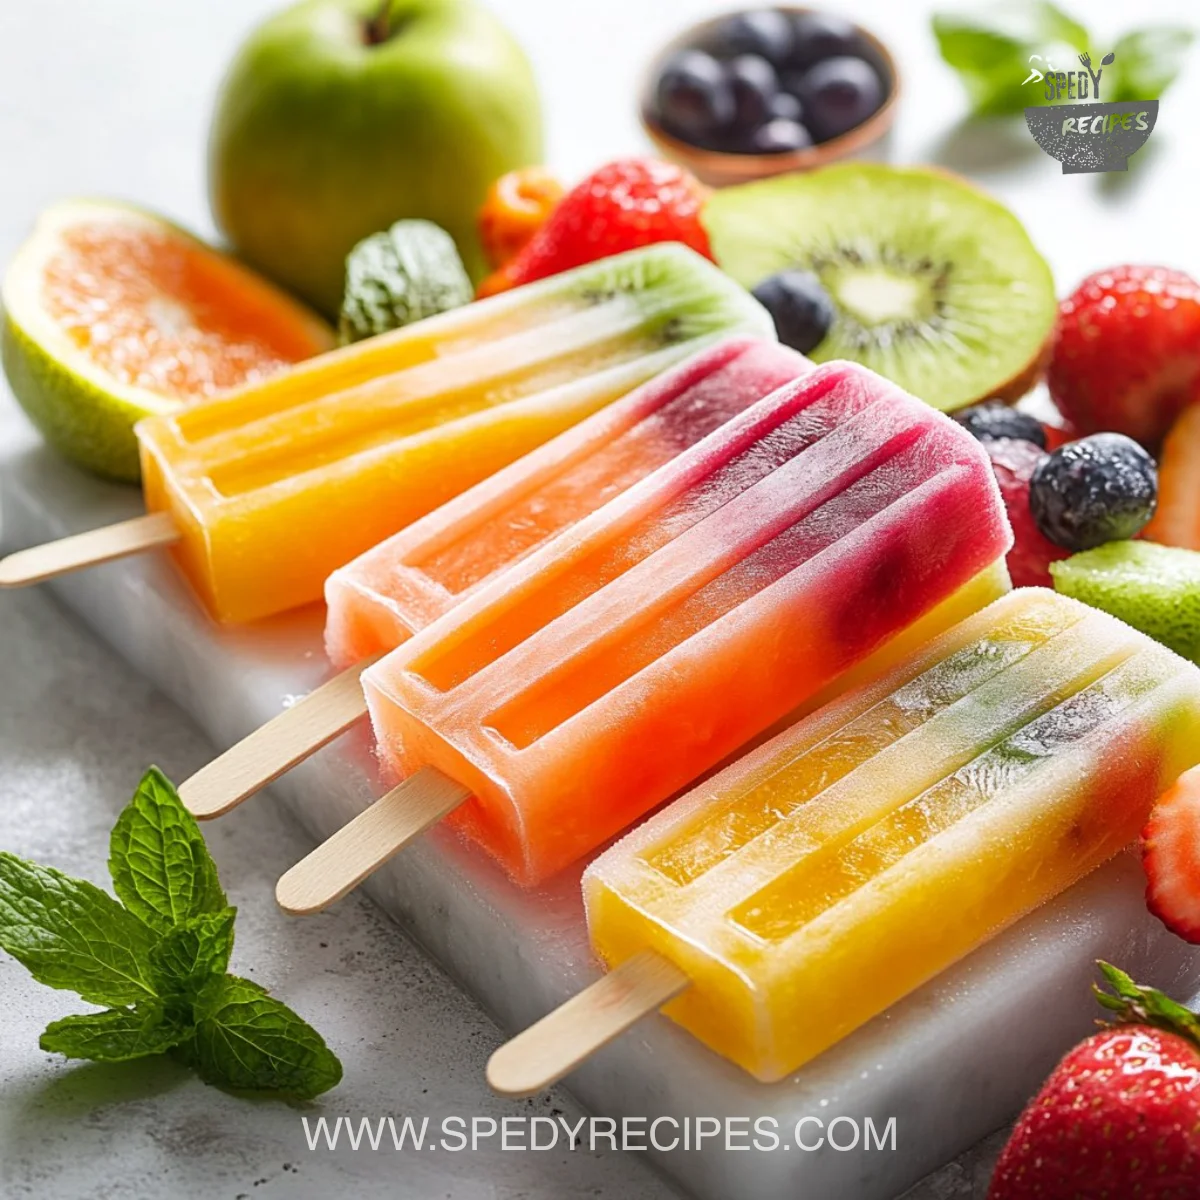
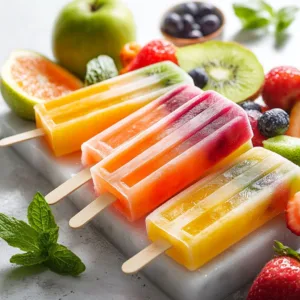
There is an easy comfort to freeze pops that feels like childhood summer and grown-up cleverness at once. They are the kind of treat that needs only a few good ingredients, little time to assemble, and a freezer to work their quiet magic. My kids love to pick flavors, and I love that I can control the sweetness and the fruit content.

These pops are light, bright, and cool without being cloying. They melt slowly enough for little hands to enjoy them and hold up well in a picnic cooler. When the heat gets heavy, they are a small, simple celebration we can carry to the park or the porch. For extra fun, I let my daughter tuck in a few berries or a sliver of mango. It makes each pop feel like a small, personal gift.
The Simple Magic Behind Homemade Freeze Pops
This recipe is not about fancy techniques. It is about honoring flavors and letting them shine. The base is fruit juice, softened with water, and lightly sweetened only if you need it. The resulting texture is smooth and icy rather than syrupy. Colors stay clean and inviting, and the pops give a quick, fresh burst of fruit with every bite.
The reason this works so well for busy families is that it comes together quickly, needs no cooking, and stores easily. You can make a batch in minutes, freeze them overnight, and have a week of treats ready. It is one of those recipes that rewards planning without demanding it.
How to Make Homemade Freeze Pops, The Heartwarming Way
“This is where the magic happens—when the aroma fills the kitchen and my kids come running in, asking ‘Is it ready yet?’”
Start by tasting the juice. If it feels thin, add a little less water. If it feels too sweet, dilute gently with a splash more water. Look for a color that sings and a smell that makes you smile. Once you pour into molds, you will notice the surface glint and the fruit pieces floating in place if you added them. That is your cue that this batch is going to be a hit.
For a playful project, let the children pick the fruit pieces they want to add. It becomes part craft, part snack, and a whole lot of memory making. If you like a more intense flavor, use full-strength juice and skip the water. If you want a lighter, kid-friendly version, use more water and a little extra fruit for texture.
Ingredients You’ll Need
2 cups fruit juice (e.g., orange juice, apple juice, or berry juice)
1 cup water
2 tablespoons sweetener (honey, agave syrup, or sugar, optional)
Fresh fruit pieces (optional, for added flavor and texture)
Use what you have. If you have leftover orange juice from breakfast, this is a happy second act. If you prefer apple for a milder base, go for it. I sometimes swap in a light herbal tea or coconut water for a new twist. Don’t skip the fresh fruit if you want a fun look and a pop of texture. These small choices make the recipe feel like yours.
For a little extra flavor depth, you can stir in a splash of lemon or lime juice, or even a pinch of finely chopped mint. Those small additions make the pops feel thoughtful without adding work. When I want a fancier party version, I reach for muddled berries and a touch of honey.
Step-by-Step Overview: Keeping It Simple
-
In a mixing bowl, combine the fruit juice, water, and sweetener if using. Stir until well mixed.
Mix gently but thoroughly. Taste and adjust; if it needs more brightness, a teaspoon of citrus helps. Let the kids take turns stirring this part. -
Pour the mixture into freeze pop molds, leaving some space at the top for expansion.
Fill slowly to avoid spills. I use a measuring cup with a spout for better control. Leave at least half an inch so the liquid has room as it freezes. -
If desired, add fresh fruit pieces into the molds.
Smaller fruit bits work best. A few blueberries or finely chopped strawberries add color and texture without making it hard to bite. -
Insert the sticks and place the molds in the freezer.
Make sure the sticks are straight so the pops freeze evenly. If your molds need a lid, use it. If not, you can cover the tray with plastic wrap for extra protection. -
Freeze for at least 4-6 hours or until solid.
Overnight is even better. Freezers vary, so check after four hours by gently nudging a pop; if it wiggles, give it more time. -
To serve, run the molds under warm water for a few seconds to help release the pops.
Hold the mold under warm tap water for 5 to 10 seconds. Pull gently and the pop should slide out easily. If it sticks, warm a little longer.
Quick tip from my kitchen: I find that a tiny swirl of thicker juice at the top creates a pretty stripe. Pour half, freeze briefly, add a different juice, and then finish filling. It is easier than it looks and the kids love the surprise stripe when they bite in.
Preparing Homemade Freeze Pops Without the Stress
Making freeze pops does not need a big plan. Keep simple molds on hand, or use small plastic cups and popsicle sticks. I once made a hundred for a neighborhood cookout using paper cups and they were gone in an hour. If you want uniform results, silicone molds are forgiving and easy to clean.
If you are juggling other dinner tasks, pour the mixture before you start cooking the main course and pop them into the freezer when you are done. They will be ready by dessert or the next day. I like that these pops can be both an impromptu treat and a planned sweet.
Serving Homemade Freeze Pops with Love

We place the tray in the center of the table and let everyone choose their own. Little hands reach and laugh while adults take a moment to chat. For a backyard afternoon, I serve them with a pitcher of lemonade and a bowl of mixed nuts. Indoors, they pair beautifully with a light yogurt dip spiked with honey for dipping.
My husband prefers the classic citrus ones, while the kids argue over who gets the berry ones. For a party, line them up in a shallow tray with ice and a few sprigs of mint. They look festive and stay cold longer. Sharing these feels simple and special, like passing around a small, bright memory.
Storage & Reheat Tips (Keeping the Goodness)
Freeze pops store well in the freezer for up to a month. I like to label them when I make different flavors so there are no surprises. If you want to keep them longer, wrap each pop in plastic wrap and place them in a zip-top bag to prevent freezer burn.
There is no reheat step here, but a good tip is to rotate older pops to the front so they get eaten first. If a pop develops a little freezer fog, it may be slightly drier but still tasty. For best texture, enjoy within two weeks.
If you need to thaw a pop quickly for a recipe or a small drizzle, let it sit at room temperature for a few minutes. You can also pulse it in a blender for a quick slushy, which is a favorite at our house on busy afternoons.
My Kitchen Notes & Shortcuts
- Use what you have: I often make these from leftover juice. It is the easiest way to avoid waste and surprise your family.
- Freeze in stages: For layered colors, freeze a half inch, then add another layer and freeze again. It makes a fun striped look with very little extra effort.
- Kid helpers: Let the kids place fruit pieces in molds. It makes them proud and keeps them busy.
- Silicone molds: These make popping out the treats easier and cleaning is simple. If you do not have molds, small paper cups work perfectly.
- Sweetness test: Start light. You can always add a touch more sweetener next batch. I prefer a less sweet pop; my kids like theirs a touch sweeter.
If you want to batch-make these for a week, plan three flavors and freeze them flat in labeled bags. Then you can stack them and grab what you need without fuss.
Family-Friendly Variations
Our house loves experimenting with small swaps. Try mixing coconut water with pineapple juice for a tropical twist. Use diluted lemonade for a tart pick-me-up. For a creamy version, blend yogurt with fruit and a little milk, then freeze in molds for a softer, creamier pop.
For older kids or parties, add a splash of sparkling water just before freezing for a faint fizz. You can also mix herbs like basil or mint into the juice for a grown-up note. My sister swears by small pieces of jalapeno in watermelon juice for a small kick; it sounds wild, but it works at the right party.
If dairy is a concern, stick to fruit juices and coconut milk alternatives. The goal is to keep it fun, approachable, and suited to the people around your table.
FAQs About Homemade Freeze Pops
Can I make this ahead for a busy week?
Absolutely. Make a big batch, freeze overnight, and you will have a week of easy treats. Label flavors if you like variety.
Can I use fresh juice instead of store-bought?
Yes, and I recommend it for the best brightness. Fresh juice may be less sweet, so taste and add a little sweetener if needed.
Will the fruit pieces make it hard to bite?
Use small pieces. Tiny berries and slivers of soft fruit work best. If you use big chunks, they can be tricky for smaller kids.
How long do they keep in the freezer?
Best within two to four weeks. They are safe longer but may lose some texture and flavor with time.
What if my pops don’t come out of the mold easily?
Run the mold under warm water for a few seconds and pull gently. If they still resist, warm a little longer until they release.
One Final Thought from My Kitchen
I hope these freeze pops find their way into your summer afternoons, into picnics, and into the pockets of cold coats for walks home. They are simple, flexible, and full of small delights. Making them is an act of care that takes minutes and gives hours of cool, shared smiles.
Conclusion
If you want more ideas for bright, simple drinks and treats that pair well with these pops, I like the useful tips and flavor notes on Homemade Freeze Pops – Crowded Kitchen for inspiration. For fresh fruit-forward variations and a few colorful photos to spark your creativity, see Homemade Fresh Fruit Freeze Pops | Love and Olive Oil.
Until next time, lean into the small pleasures of the kitchen and give these little pops a try. They are easier than they look, and they have a way of bringing everyone a little closer.
Homemade Freeze Pops
Ingredients
Base ingredients
- 2 cups fruit juice (e.g., orange juice, apple juice, or berry juice) Use whatever fruit juice you have available.
- 1 cup water Adjust water amount based on juice thickness.
- 2 tablespoons sweetener (honey, agave syrup, or sugar, optional) Sweetener is optional; adjust according to taste.
Optional additions
- to taste fresh fruit pieces (e.g., blueberries, strawberries, mango) Add for texture and flavor.
- splash lemon or lime juice For additional brightness.
- pinch finely chopped mint For added freshness.
Instructions
Preparation
- In a mixing bowl, combine the fruit juice, water, and any sweetener if using. Stir until well mixed.
- Taste the mixture and adjust as necessary for sweetness or acidity.
- Pour the mixture into freeze pop molds, leaving some space at the top for expansion.
- If desired, add small pieces of fresh fruit into the molds.
- Insert sticks and place the molds in the freezer.
Freezing
- Freeze for at least 4-6 hours or until solid. Overnight is recommended.
Serving
- Run the molds under warm water for a few seconds to help release the pops.
- Hold the mold under warm tap water for 5 to 10 seconds and gently pull to release the pops.