
There’s something magical about a busy kitchen during the holidays. The gentle clinking of silverware as the kids set the table fills the air. You can smell the sweetness from the dessert, mingling with the aroma of dinner cooking away. It reminds me of my grandmother’s house where we spent countless afternoons laughing and baking together. Now, as we approach Easter, I find myself excited to share a special treat that’s easy to make and brings everyone together: Easter Bunny Coconut Tails – A Sweet No-Bake Treat. This dessert reminds me of those family-filled days, packed with sweetness and love.
Why This Easter Bunny Coconut Tails – A Sweet No-Bake Treat! Feels Like Home
Making Easter Bunny Coconut Tails feels like wrapping yourself in a warm blanket. This recipe brings back fond memories of celebrating with loved ones, all while being simple enough to keep stress at bay. The beauty of these treats lies in their effortless assembly. They allow you to focus on what really matters—connecting with your family while indulging in some delightful sweetness.
You don’t need to devote hours to the kitchen to create something special. These no-bake treats can come together in under an hour, making them perfect for our busy lives. They’re a fun way to get everyone involved in the kitchen. When we create together, we forge connections that go beyond just sharing a meal. The joy of working side by side, mixing, rolling, and coloring, turns cooking into a beautiful family memory.
The Simple Magic Behind Easter Bunny Coconut Tails – A Sweet No-Bake Treat!
What makes the Easter Bunny Coconut Tails truly stand out is how easy they are to whip up. You can have your ingredients assembled and in the bowl within just ten minutes. Plus, they require no baking—yes, you read that right! Just mix, chill, and roll. This simple approach gives us space to be creative, exploring flavors and colors that brighten our table.
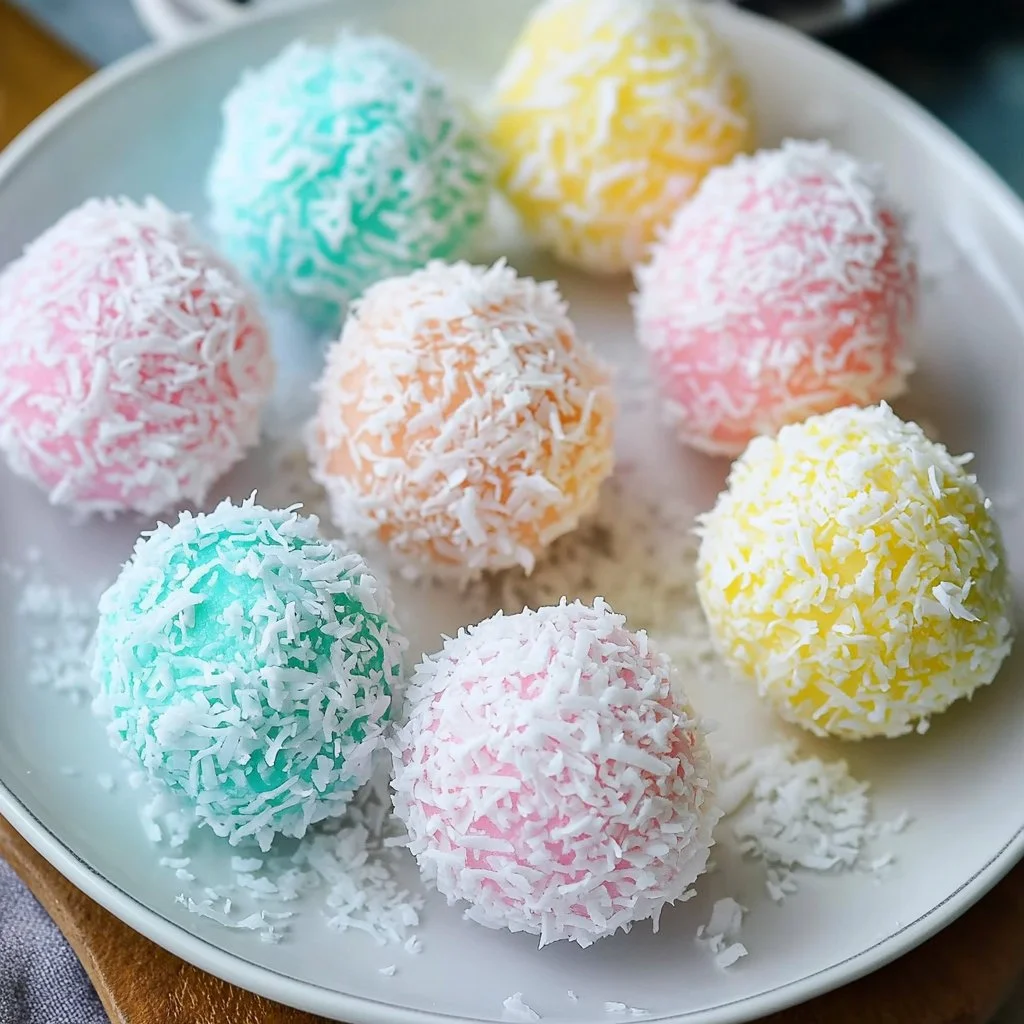
This treat has a soft and chewy texture, with the coconut bringing an irresistible taste. Each bite feels like a little piece of joy, a delightful treat that transports you back to childhood gatherings. The pastel colors are perfect for Easter celebrations, and they look incredibly festive on any dessert table.
Why This Recipe Works for Our Busy, Joyful Nights
When life gets hectic, and the to-do list seems endless, finding time to cook can feel like a daunting task. That’s why I love the Easter Bunny Coconut Tails. They keep the joy in cooking while saving precious time. This recipe bridges the gap between special occasions and everyday cooking, transforming busy weeknights into opportunities for fun.
This treat is a crowd-pleaser, making it suited for family gatherings or quiet nights when you want to enjoy something sweet. Plus, since they don’t require heat, you can keep the kitchen cool and cozy.
How to Make Easter Bunny Coconut Tails – A Sweet No-Bake Treat!, The Heartwarming Way
Ready to dive in? Making Easter Bunny Coconut Tails is a joyful experience. You’ll embrace the colorful, sweet goodness that will enliven your celebrations. Here’s a step-by-step overview to help guide you:
“This is where the magic happens—when the aroma fills the kitchen and my kids come running in, asking ‘Is it ready yet?’”
Step-by-Step Overview: Keeping It Simple
-
Prepare the Mixture
In a large bowl, whisk together the sweetened condensed milk, melted butter, and vanilla extract. You’ll want that creamy base to tie everything together. -
Add the Coconut
Stir in the medium-shredded coconut alongside the confectioner’s sugar. This will give your mixture its delightful texture and sweetness. -
Chill the Mixture
Place the bowl in the refrigerator for about 15 minutes. This little wait makes it much easier to handle when you start rolling them into treats. -
Color the Fine Coconut
Meanwhile, take half a cup of fine shredded coconut for each color you want. Mix with a few drops of food coloring and blend until it’s evenly colored. Let your creativity shine as you create pastel versions of coconut! -
Roll Into Balls
Scoop chilled mixture into 1½ teaspoon portions and roll them into balls. Then, coat each ball in your colorful coconut. This is where the kids can get in on the fun! -
Set and Chill
Place the coated coconut tails on a baking sheet and chill in the refrigerator for about an hour until they are set. -
Serve and Enjoy
Once ready, keep the coconut tails refrigerated until serving. They’re perfect for snacking or for a sweet ending to dinner.
Ingredients You’ll Need
Here’s what you’ll need to gather to get started on your Easter Bunny Coconut Tails:
- 5 cups unsweetened coconut (medium shred)
- 2 cups unsweetened coconut (fine shred)
- 14 oz sweetened condensed milk
- 2 tbsp butter, melted & cooled
- 1 tsp vanilla extract
- ¼ cup confectioner’s sugar
- Liquid food coloring (for pastel magic!)
Keep in mind, you don’t have to stick exactly to the recipe. This treat is all about creativity, so if you have other colors or add-ins on hand, give them a try!
Step-by-Step Directions
- In a large bowl, whisk together the condensed milk, melted butter, and vanilla extract until well combined.
- Stir in the medium-shred coconut and confectioner’s sugar. Once it’s mixed, chill for 15 minutes to firm it up.
- Meanwhile, prepare the fine-shred coconut. Mix ½ cup with 3-4 drops of food coloring until evenly blended. Repeat with other colors if desired.
- After the mixture has chilled, scoop portions of 1½ teaspoons and roll into balls. Then, coat them in the colored coconut.
- Place the finished tails on a baking sheet and chill for 1 hour to set properly.
- Keep in the refrigerator until you’re ready to enjoy these delicious sweet bites.
Serving Easter Bunny Coconut Tails – A Sweet No-Bake Treat! with Love
Bringing the Easter Bunny Coconut Tails to the table is a delightful experience. I always place them in the center so everyone can help themselves. It adds a touch of lightheartedness to our gatherings as we pass around colorful treats and share laughter. Just imagine the smiles when family members take their first bites, caught off guard by how scrumptiously sweet they are.
I love to serve them with some fresh fruit or a light whipped cream on the side. Strawberries or a berry medley complement the sweetness beautifully. And the pastel colors of the treats bring a springtime feel to our dining table that is simply too charming to resist.
Storage & Reheat Tips
Just like most delightful treats, the magic of these Easter Bunny Coconut Tails can linger for days. To keep them fresh and tasty, store any leftovers in an airtight container in the refrigerator. They should stay good for about a week.
If you find you’ve made too many for one occasion, feel free to enjoy the flavors later! Just note that the microwave can be used for a quick snack, but they taste best chilled right out of the refrigerator.
My Kitchen Notes & Shortcuts
Here are some practical shortcuts that I’ve picked up along the way:
- Prep Ahead: Make the mixture a day in advance. Letting it sit in the fridge allows the flavors to deepen.
- Get Creative with Colors: Use different food colorings to create a rainbow effect. It makes the treats visually stunning.
- Involve the Kids: Have your children help with rolling the balls or choosing their favorite colors. It’s a sweet way to bond and create memories.
- Add Texture: Consider adding crushed nuts or chocolate chips for a little crunch.
- Experiment with Flavors: A splash of almond extract instead of vanilla can give a unique twist to the flavor profile.
Family-Friendly Variations
You might want to adapt Easter Bunny Coconut Tails to different tastes. Here are some ideas:
- Nut-Free Alternative: You can swap out coconut for crushed graham crackers for a delicious crumbly texture.
- Healthy Twist: Use maple syrup or honey instead of sweetened condensed milk for a lighter version.
- Mix-ins: Adding mini chocolate chips or crumbled cookies into the mixture provides a delightful surprise in every bite.
Feel free to experiment and make this treat uniquely yours. After all, that is what makes cooking so much fun!
FAQs About Easter Bunny Coconut Tails – A Sweet No-Bake Treat!
Can I make this ahead for a busy week?
Absolutely! In fact, letting it sit for an hour allows the flavors to mingle beautifully, just like a cherished old family recipe.
Can I use sweetened coconut?
Definitely, just be cautious with the sugar added if you do. Using sweetened coconut will intensify the sweetness.
What’s the best way to store them?
Store them in an airtight container in the refrigerator. This will keep them fresh and tasty for a week.
Can I use different flavors in the recipe?
Yes! You can experiment with different extracts, such as coconut or almond, to switch up the flavor profile to your liking.
One Final Thought from My Kitchen
Cooking is not just about feeding the body; it’s also about nourishing the heart and spirit. I hope that making and sharing Easter Bunny Coconut Tails brings your family closer and fills your home with laughter and love. May this treat inspire joy and create memories, just as I cherished growing up. Until next time, happy cooking!
Easter Bunny Coconut Tails
Ingredients
For the Coconut Mixture
- 5 cups unsweetened coconut (medium shred)
- 14 oz sweetened condensed milk
- 2 tbsp butter, melted & cooled
- 1 tsp vanilla extract
- ¼ cup confectioner’s sugar
For Coloring
- 2 cups unsweetened coconut (fine shred) For coloring with food coloring
- Liquid food coloring For pastel colors
Instructions
Preparation
- In a large bowl, whisk together the sweetened condensed milk, melted butter, and vanilla extract until well combined.
- Stir in the medium-shred coconut and confectioner’s sugar. Mix well and chill for 15 minutes.
Color the Coconut
- Mix ½ cup of fine-shred coconut with 3-4 drops of food coloring until evenly blended. Repeat with other colors if desired.
Shaping the Treats
- Scoop chilled mixture into 1½ teaspoon portions and roll them into balls.
- Coat each ball in your colored coconut.
Setting
- Place the coated coconut tails on a baking sheet and chill in the refrigerator for about 1 hour until set.
Serving
- Keep the coconut tails refrigerated until serving. Enjoy alongside fresh fruit or whipped cream.