
The air in my kitchen always seems to change when something sweet starts baking. Tonight it is the warm, chocolatey scent of Flourless Brownies filling the rooms while my little one carefully sets the napkins. I can hear the soft scrape of a spoon against a bowl and my partner humming an old tune by the window. It is a small, steady kind of joy that feels like home.
Why This Flourless Brownies Feels Like Home
There is something honest about a dessert that asks for just a few good things and gives back a whole lot of comfort. These Flourless Brownies are rich, fudgy, and unfussy. They are the sort of thing I reach for when I want a treat that feels homemade but does not steal all evening.
I love how the peanut butter and bananas make the brownies both tender and dense, the way a hug tastes when you need it most. Meanwhile, the cocoa gives a dark, comforting note. This recipe is one I pull out for school nights, casual visitors, or when I know we want something to share without fuss. 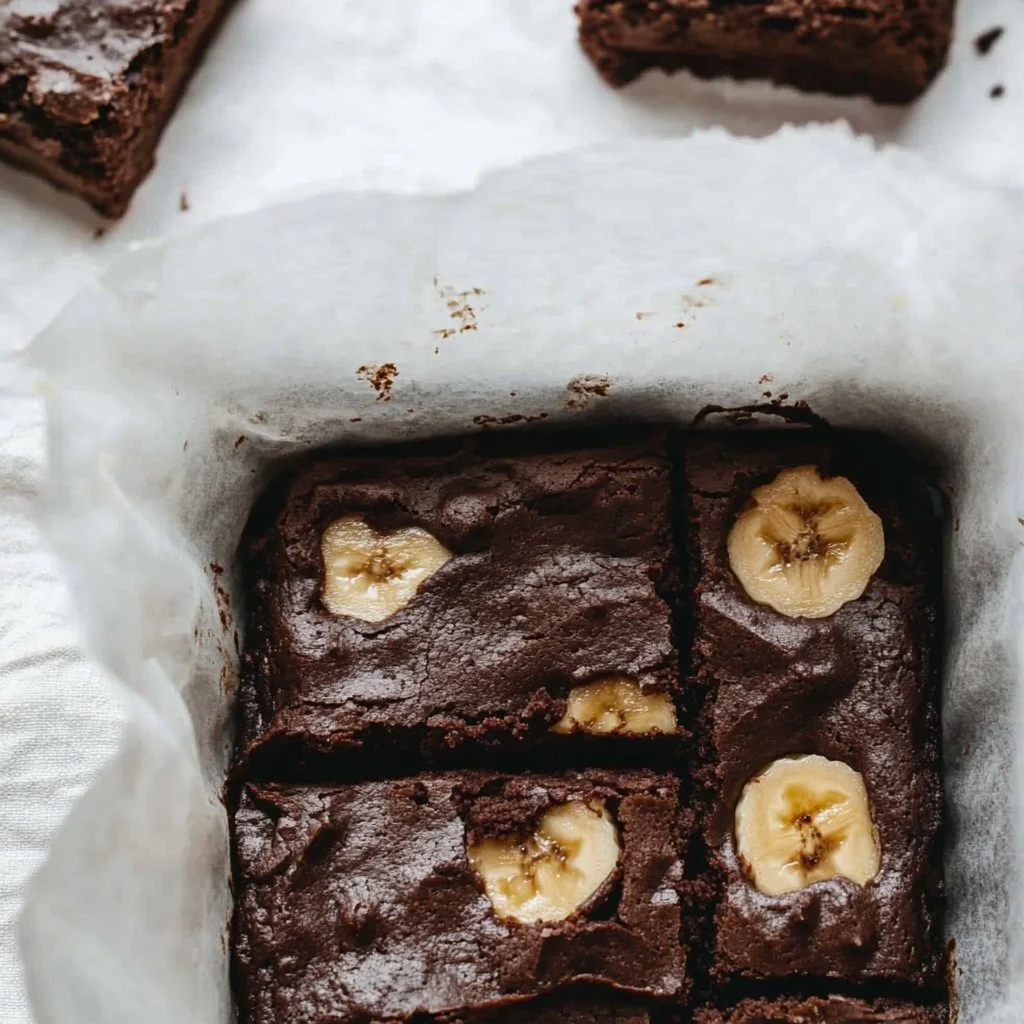
Why Flourless Brownies is Our New Family Favorite
This recipe has a way of pulling people to the table. It comes together quickly, uses what we usually have on hand, and cleans up fast. For busy nights, I can toss everything in a single bowl and be back to reading a bedtime story in minutes.
It also fits everyone at my table. It keeps the dessert simple and kind, the kind that lets conversation lead and sweeten itself over coffee. The texture is cakey yet dense, with just enough stickiness to keep fingers happy. That balance makes it perfect for kids and grown-ups alike.
The Simple Magic Behind Flourless Brownies
There is an easy kind of magic here: no flour, no complicated steps, just three main things that find a way to taste like more. The peanut butter adds fat and flavor, the bananas add moisture and lift, and the cocoa brings chocolate depth. Together they make a brownie that feels indulgent without being fussy.
From an expertise point of view, the banana acts as both binder and sweetener. Peanut butter supplies the fat that flour would normally provide. Cocoa powder concentrates the chocolate without extra liquid. Those simple rules help you understand why this works, and they make it easier to adjust confidently if needed.
How to Make Flourless Brownies, The Heartwarming Way
“This is where the magic happens—when the aroma fills the kitchen and my kids come running in, asking ‘Is it ready yet?’”
Start by gathering your three main items and a pan. Next up, mix them until smooth and bake until the center is set and the edges look a touch glossy. You will know they are ready when the top has tiny cracks and the aroma leans toward deep cocoa rather than raw batter.
The color should be a rich, dark brown. Texture cues are gentle: the brownies should still feel soft in the middle but not wet. Let them cool for a bit; cooling helps the interior finish setting so you can cut clean squares without smoosh. It is simpler than it looks and kinder on the clock.
Ingredients You’ll Need
3 ripe bananas
1 cup peanut butter
1/3 cup cocoa powder
A quick note from my kitchen: use ripe bananas with brown spots for the best sweetness and mash them well. Choose a peanut butter you like the taste of, whether creamy or a bit textured. And don’t skimp on cocoa powder quality—it really shows in that deep chocolate flavor.
If you want, dust the top with a pinch of flaky salt when they come out of the oven. It lifts the chocolate and makes the whole thing sing. But remember: this is a forgiving recipe. Use what’s in your pantry and give it a try.
Step-by-Step Directions
-
Preheat the oven to 350°F (175°C) and grease an 8×8 inch baking pan.
Keep it simple: I always line mine with parchment for easy removal. A light grease under the parchment helps it stay put. -
In a mixing bowl, mash the ripe bananas until smooth.
Use a fork or potato masher. If little hands want to help, let them mash while you supervise. It is part of the fun. -
Add peanut butter and cocoa powder to the mashed bananas and mix until well combined.
Stir until you see a uniform, glossy batter. If the peanut butter is very stiff, warm it briefly so it blends easily. -
Pour the batter into the prepared baking pan.
Smooth the top with a spatula. I like to tap the pan once on the counter to pop any air bubbles. -
Bake for 20-25 minutes or until set.
Edges will pull away a little and the top may have a few cracks. A toothpick in the center should come out with a few moist crumbs, not raw batter. -
Allow to cool, cut into squares, and enjoy!
Cooling is tempting to skip, but it helps the brownies firm up for cleaner slices. Serve warm or at room temperature.
Quick tip: a little browning at the edges brings depth. If you want them extra fudgy, take them out sooner; for a more cake-like texture, add a minute or two. Let the kids stir this part if you want to make it a shared memory.
Serving Flourless Brownies with Love
I usually bring these Flourless Brownies to the table on a simple wooden board, right in the middle, and let everyone pick their favorite piece. Sometimes we add a scoop of vanilla ice cream for the grown-ups, or a spoon of plain yogurt for a tangy counterpoint for the kids.
In our house, one child loves a drizzle of honey, another insists on extra peanut butter on top. My partner prefers a light dusting of powdered sugar. Serving is casual: plates, napkins, a pot of tea, and good talk. It becomes part of the evening rhythm, a small ritual of sweetness. 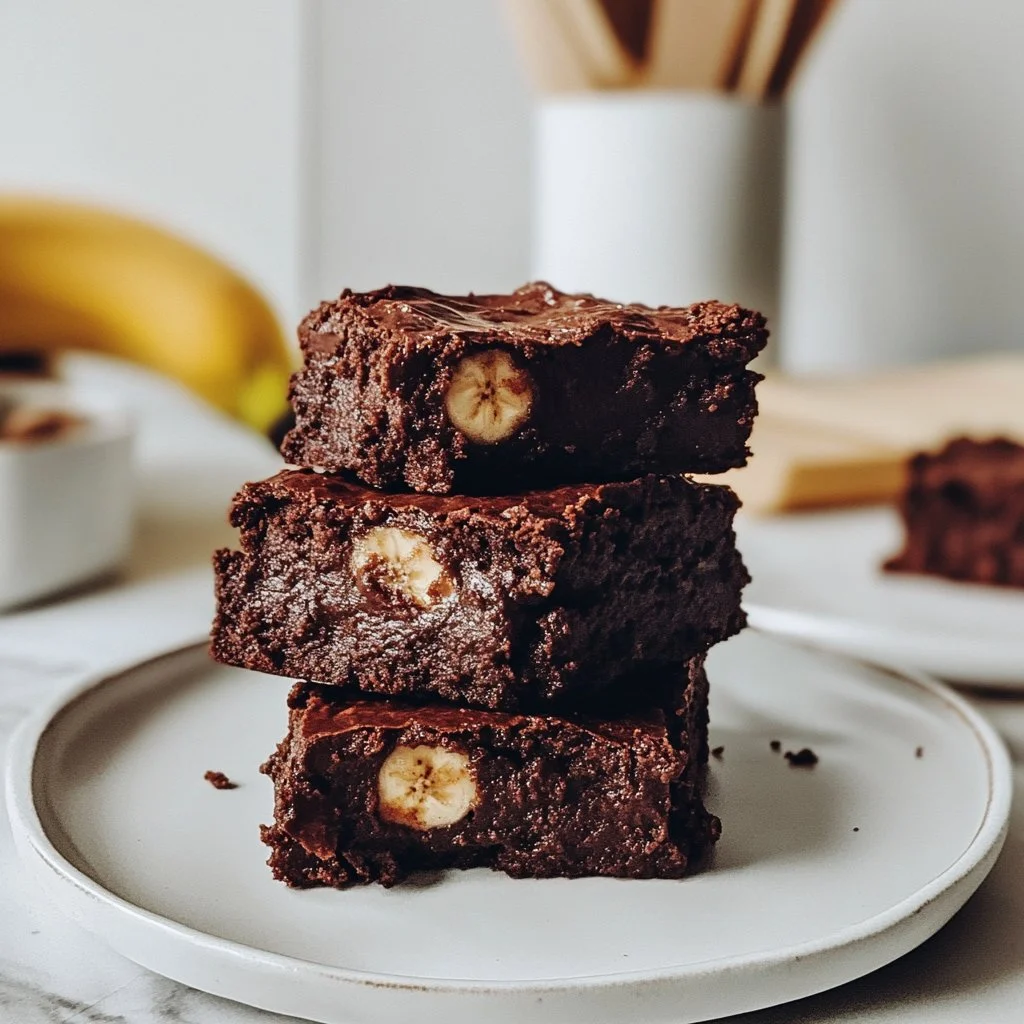
If you need to dress them up, melt a few squares of dark chocolate and spread a thin glaze over the top. Or sprinkle toasted chopped nuts for crunch. The point is to share, not to perfect.
Storage & Reheat Tips (Keeping the Goodness)
Store them in an airtight container at room temperature for up to three days. They keep well because they are moist and dense, which slows drying. If your kitchen is hot, pop them in the fridge for up to a week.
For longer storage, freeze the cut squares separated by parchment in a zip-top bag for up to two months. Thaw on the counter for 30 minutes or heat gently in the microwave for 10 to 15 seconds.
When reheating, the microwave is fine for a quick treat. But if you want to bring back that oven-fresh feel, warm them at 300°F for 5 to 7 minutes. The oven restores a pleasant texture and warms the whole pan evenly.
My Kitchen Notes & Shortcuts
- Swap and play: use almond butter or sunflower seed butter if you have allergies. The texture will be slightly different but still lovely.
- Prep ahead: mash bananas the night before and store covered in the fridge. Mix right before baking.
- Tools that help: a small spatula and a lined pan make cleanup easy. You will thank yourself.
- Kid-friendly tasks: measuring, mashing, and stirring are perfect jobs for small hands. It makes the recipe a shared adventure.
- Taste as you go: if you love a stronger chocolate note, add an extra tablespoon of cocoa powder. Simple adjustments make it your own.
These quick shortcuts are what keep the recipe useful on busy days while holding onto that homemade feeling.
Family-Friendly Variations
Make it your own by adding a handful of mini chocolate chips for pockets of melted chocolate. Stir in a spoonful of espresso powder if you want a deeper cocoa note for adults.
For a nut-free option, try sunflower seed butter. If you want to boost fruitiness, fold in a few chopped strawberries right before baking, though this will change moisture and texture slightly. For a lighter bite, cut into smaller squares and serve with fresh fruit on the side.
Encourage kids to name their version. We once made a batch with orange zest and called it "sunset brownies." Little rituals like that can turn a simple recipe into a family story.
FAQs About Flourless Brownies
Can I make this ahead for a busy week?
Absolutely. These hold up well and actually taste better after a few hours as the flavors mingle. Store in an airtight container and enjoy within a few days.
Can I freeze these brownies?
Yes. Freeze in a single layer with parchment between squares, then transfer to a bag. Thaw on the counter or microwave briefly.
What if my batter is too thick or too thin?
If it is very thick, warm the peanut butter slightly so it thins and mixes evenly. If it seems very thin, add a touch more cocoa powder, a teaspoon at a time, until the texture feels like a thick cake batter.
Are these truly flourless and gluten-free?
Yes, this recipe uses no flour. If you have cross-contamination concerns, use a certified gluten-free cocoa powder and check your peanut butter label.
How do I know when they are done?
Look for slightly cracked tops and edges that pull away from the pan. A toothpick should come out with moist crumbs but not raw batter. Once cooled they will set more firmly.
One Final Thought from My Kitchen
Cooking something simple for the people you love is never small. These Flourless Brownies are a way to make a moment sweeter without taking over the evening. They are practical, comforting, and forgiving. Give them a try, and let this recipe be a small bridge to new kitchen stories.
Conclusion
Thank you for letting me share this recipe and the little ways I make it feel like ours. For more flourless brownie ideas and slightly different takes, you might enjoy this 5-Ingredient Flourless Brownies – The BakerMama for a minimalist twist, and this Amazing Flourless Brownies (GF, No Weird Ingredients) for another reliable method and extra tips.
Until next time, happy baking. I hope these brownies find their way into your family table and the small stories you will tell around it.

Flourless Brownies
Ingredients
Main Ingredients
- 3 pieces ripe bananas Use ripe bananas with brown spots for the best sweetness and mash them well.
- 1 cup peanut butter Choose a peanut butter you like the taste of, whether creamy or a bit textured.
- 1/3 cup cocoa powder Use high-quality cocoa powder for the best chocolate flavor.
Instructions
Preparation
- Preheat the oven to 350°F (175°C) and grease an 8×8 inch baking pan. Line the pan with parchment paper for easy removal.
- In a mixing bowl, mash the ripe bananas until smooth.
- Add peanut butter and cocoa powder to the mashed bananas and mix until well combined.
- Pour the batter into the prepared baking pan and smooth the top with a spatula.
Baking
- Bake for 20-25 minutes or until set with a toothpick coming out with a few moist crumbs.
Cooling and Serving
- Allow to cool, cut into squares, and enjoy.