
The oven is quiet, but the kitchen is full of life. I can almost smell the sweet chocolate of crushed cookies mingling with a soft, tangy cream. You hear the light clink of spoons and the happy chatter of family gathered around the counter.
These little no-bake Oreo cheesecakes bring that kind of warmth. They are simple, fast, and perfect for a weekend dessert that keeps everyone smiling.
Why this works
No-bake desserts are a blessing for busy families. They shave time off prep and skip the oven heat, which matters on hot days or when you already have a dozen things baking in your schedule. Using Oreos for both the crust and the filling gives you a consistent, loved flavor kids and adults both reach for without extra steps.
This recipe is forgiving. You do not need perfect piping skills or a degree in pastry. Press, chill, and top. The results are reliably creamy and chocolatey. That kind of predictability builds confidence in the kitchen, and it encourages kids to help.
Process Overview
“This is where the magic happens—when the aroma fills the kitchen.”
The process is three simple parts. First, you make a sturdy cookie base that gives a crunch behind every creamy bite. Next, you whip together a silky Oreo-studded cheesecake filling that needs only gentle folding. Finally, the chill time lets everything set and lets the flavors marry.
I love to set a timer and use that waiting period to tidy up. It makes serving time feel calm and intentional. The short prep and long chill make this a great choose-ahead dessert for guests.
Ingredients
The list is short and pantry-friendly. I write these with quick tips so your results are consistent and extra comforting.
Oreo cookies (for the base)
Use about 24 Oreos for a dozen mini cheesecakes or 2 1/2 cups of finely crushed cookies for a 9-inch pan. Tip: Remove the cream center if you want a drier crumb that binds with butter more easily. Crush using a food processor or place in a zip-top bag and pound with a rolling pin. Kids love helping with this step.
Cream cheese (softened)
You will want 16 ounces total, softened to room temperature. Tip: To speed softening, cut the blocks into chunks and let sit on a plate. Soft cream cheese blends smooth without lumps, which makes the texture forgiving and silky.
Oreo cookies (crushed for the filling)
Reserve 8 to 10 cookies and crush them into small pieces for the filling. Tip: Keep the pieces a bit larger than the base crumbs so you get distinct cookie bites in each spoonful. Fold them in gently to keep their crunch.
Whipped cream
Use about 1 to 1 1/2 cups of cooled whipped cream or stabilized whipped topping. Tip: For a lighter filling, fold in whipped cream rather than beat it with the cream cheese. This keeps the filling airy and soft.
Butter (melted)
Use 1/4 cup melted butter for a 9-inch pan base, or scale down for smaller molds. Tip: Let the melted butter cool slightly so it does not melt the cookie crumbs too much. Mix until crumbs hold together when pressed.
Directions
Crush the Oreo cookies for the base and mix them with melted butter until combined. Press the mixture into the bottom of cheesecake molds.
- Encouraging note: Press firmly but not so hard you compact the base into a brick. Use the back of a spoon or a small measuring cup for even pressure. If the kids are helping, this is a great step for them to feel useful.
In a bowl, mix softened cream cheese with crushed Oreo cookies until smooth.
- Encouraging note: Start on low speed or use a sturdy spatula. Take your time smoothing any lumps. Add a gentle folding motion when the cookies go in so the filling stays light and chunky.
Spoon the Oreo cheesecake filling over the base and smooth the top. Tap the molds lightly to settle the filling and remove air pockets.
- Encouraging note: Don’t worry about perfect tops. The light tapping helps the filling nestle into the base and removes stray bubbles. If you want a rustic look, run a small offset spatula or the back of a spoon across the tops.
Refrigerate for at least 2 hours to set.
- Encouraging note: Two hours is the minimum. Overnight chill gives the best texture and flavor. Use this time to set the table, make coffee, or let the kids create little paper name tags for their servings.
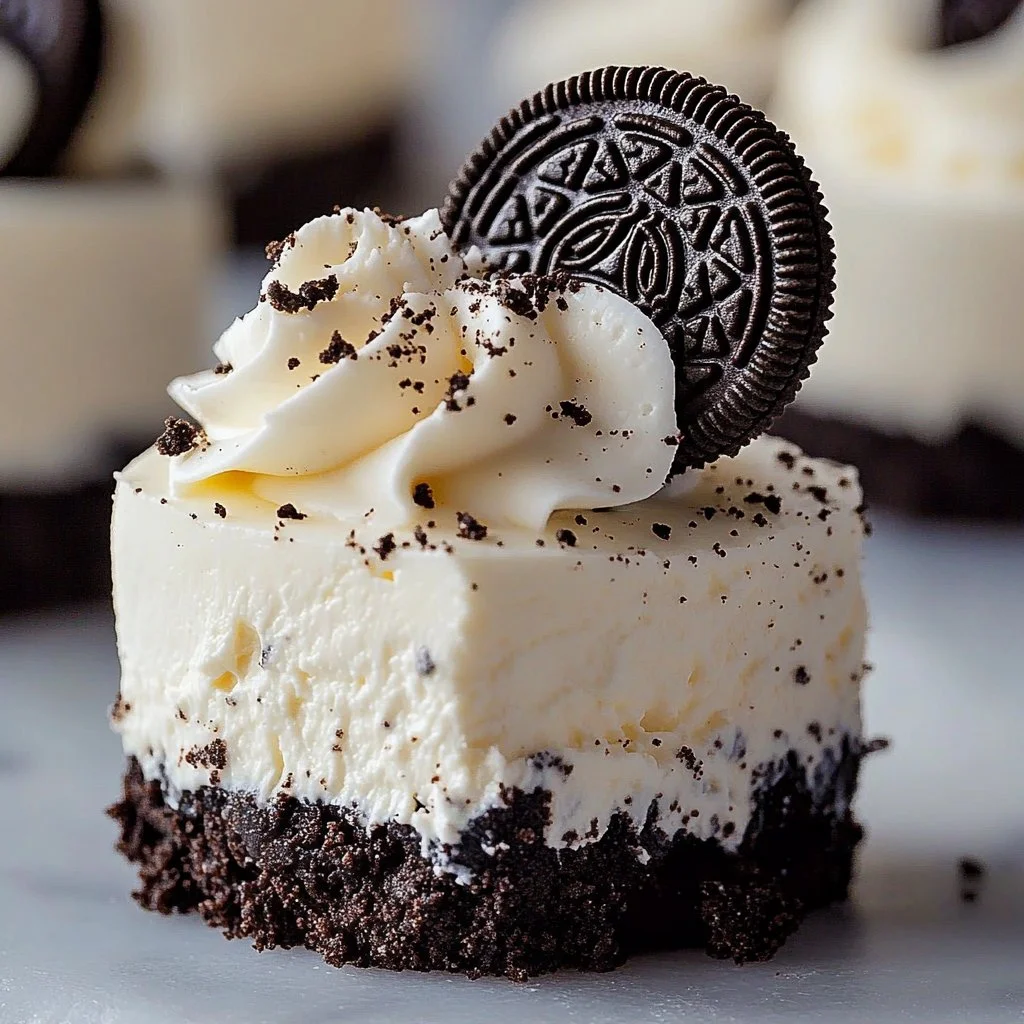
Before serving, top with whipped cream and cookie crumbles.
- Encouraging note: Add the whipped cream just before serving so it stays fluffy. Sprinkle the cookie crumbles by hand for a homemade look. A few whole cookie halves make the presentation feel special for family dessert.
Serving
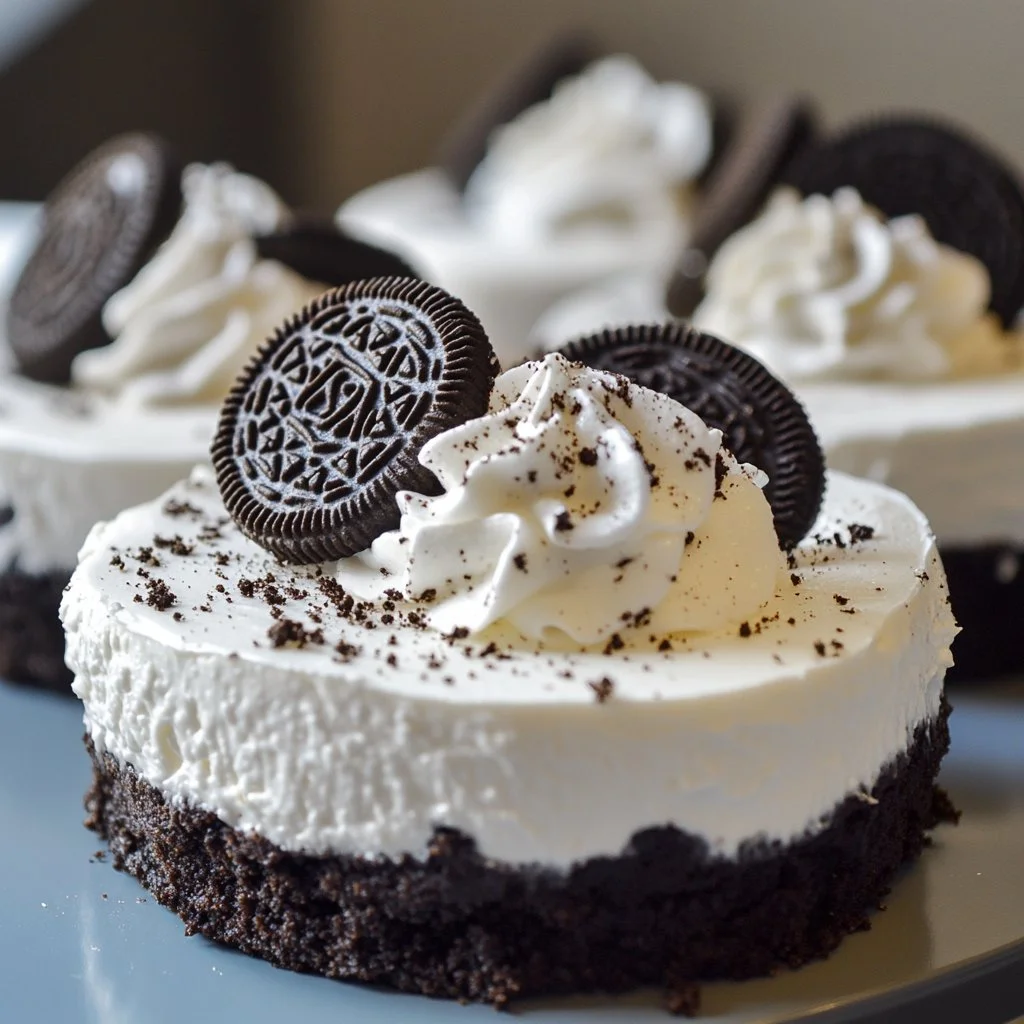
Serve family-style on a large platter or bring the molds to the table and let everyone choose their own. These mini cheesecakes are perfect for little hands. For a grown-up touch, offer a small pitcher of extra whipped cream or chocolate sauce on the side.
If you are serving a crowd, set up a small topping station with extra cookie crumbles, mini chocolate chips, and a few berries. Kids will love customizing their desserts, and it becomes a fun activity. For a sit-down dinner, place one cheesecake on each dessert plate and add a mint leaf for color.
Storage
Refrigerator: Store these cheesecakes in an airtight container for up to 3 days. They stay creamy and safe at cool temperatures. If you stack, put parchment between layers to prevent sticking.
Freezer: For longer storage, freeze cheesecakes in a single layer on a baking sheet until firm, then wrap each piece tightly in plastic wrap and place in a freezer bag. Freeze for up to 1 month. Thaw overnight in the refrigerator before serving.
No reheating: These are no-bake, so reheating is not needed. If you want a softer texture after chilling, let them sit at room temperature for 10 to 15 minutes before serving. That little pause makes the cream cheese softer and more scoopable.
Kitchen Notes
- Use room temperature cream cheese for a lump-free filling. It blends faster and smoother.
- Crush cookies in batches to control texture. Finer crumbs work for bases, chunkier pieces are fun inside the filling.
- For a quicker option, buy pre-crumbed cookie crumbs and skip the crushing step.
- Chill time is important. If short on time, pop cheesecakes in the freezer for 20 to 30 minutes to speed the set.
- Make ahead: You can prepare the cheesecakes a day in advance. Keep toppings separate until serving to preserve freshness.
Variations
- For picky eaters: Make plain mini cheesecakes with no crushed filling and offer crushed Oreos on the side. Some kids prefer the classic vanilla cream cheese taste before trying cookies inside.
- Gluten-free option: Use gluten-free sandwich cookies for both the base and filling. Check labels for cross-contact if serving someone with celiac disease.
- Lower sugar: Use reduced-sugar cookies and light whipped topping. The texture will remain creamy, though the sweetness will be milder.
- Chocolate lovers: Fold in a tablespoon of cocoa powder into the cream cheese filling before adding cookies for a richer chocolate flavor.
- Dairy-free: Use dairy-free cream cheese and dairy-free whipped topping. Choose dairy-free sandwich cookies that match taste and texture.
FAQ
Q: Can I make these in a full-size 9-inch pan instead of molds?
A: Yes. Use the same ingredient ratios and press the base into the pan. Chill until set and slice into wedges to serve.
Q: How long will these hold up at a party table?
A: Keep them refrigerated until ready to serve. At room temperature, they are best eaten within 2 hours. If it is warm out, bring them out in batches from the fridge.
Q: Can I use regular whipped cream from a can?
A: Yes. Canned whipped cream works well and is convenient. If you prefer a firmer topping, use stabilized whipped cream that holds its shape longer.
Q: Why is my filling watery after chilling?
A: Overmixing or using thawed frozen whipped topping can cause separation. Fold whipped cream gently into the cream cheese and use well-chilled ingredients.
Q: Can kids help with the steps?
A: Absolutely. Crushing cookies, pressing bases, and sprinkling toppings are safe and fun tasks for kids. Supervise when using mixers or hot butter.
Conclusion
No-bake Oreo cheesecakes are one of those recipes that bring families together with very little fuss. They are a reliable crowd-pleaser that you can pull together between homework and dinner or prepare ahead for a special weekend.
If you want a step-by-step visual or another variation to compare, I like this rendition from No-Bake Oreo Cheesecake for beautiful photos and a slightly different approach. For more tips on no-bake technique and presentation ideas, check this helpful post at No-Bake Oreo Cheesecake Recipe | Life, Love and Sugar.
Thanks for baking with me. I hope these little cheesecakes become a trusted recipe in your family rotation. Serve them with a smile and watch how quickly they disappear.

No-Bake Oreo Cheesecakes
Ingredients
For the crust
- 24 pieces Oreo cookies (Use for the base; can remove cream center for drier crumb.)
- 1/4 cup butter, melted (Let cool slightly before mixing.)
For the filling
- 16 ounces cream cheese, softened (Cut into chunks to soften faster.)
- 8-10 pieces Oreo cookies, crushed (Keep pieces larger for texture.)
- 1 to 1 1/2 cups whipped cream (Use cooled or stabilized whipped topping.)
Instructions
Prepare the crust
- Crush the Oreo cookies for the base and mix them with melted butter until combined. Press the mixture into the bottom of cheesecake molds.
Make the filling
- In a bowl, mix softened cream cheese with crushed Oreo cookies until smooth.
- Fold in whipped cream gently to keep the filling light and airy.
Assemble and Chill
- Spoon the Oreo cheesecake filling over the base and smooth the top. Tap the molds lightly to settle the filling.
- Refrigerate for at least 2 hours to set.
Serve
- Before serving, top with whipped cream and cookie crumbles.