
How to Keep Cinnamon Roll Fillings From Leaking Out (Without Losing Your Mind)
Table of Contents
There’s nothing more heartbreaking than spending time whipping up a batch of cinnamon rolls only to open the oven and see all that gooey, cinnamon-sugar goodness puddled on the pan instead of nestled in those beautiful spirals. Trust me, I’ve been there covered in flour, kids licking spoons, and wondering, “Where did all the filling go?”
So today, let’s fix that.
Here’s how to keep those delicious fillings right where they belong: inside your cinnamon rolls soft, swirled, and oh-so-satisfying.
🧈 1. Use Softened, Not Melted, Butter
The biggest culprit behind runaway filling? Butter that’s too runny.
When butter is melted, it turns your cinnamon-sugar mixture into a loose paste that doesn’t grip the dough. Instead, use softened butter think spreadable, like cream cheese. This keeps your filling thick enough to stay put, even as you roll.
Emma’s Tip: Cinnamon Roll Fillings
Leave your butter out for 30–60 minutes before baking. It should press easily with your finger but not turn to liquid.
🤚 2. Press the Filling Into the Dough
Don’t just sprinkle and roll press gently with your hands or the back of a spoon to help the filling settle into the dough. This creates a little friction, almost like giving the cinnamon and sugar a cozy blanket to snuggle under.
This step only takes an extra 30 seconds but makes a world of difference in how your rolls hold their shape (and filling!).
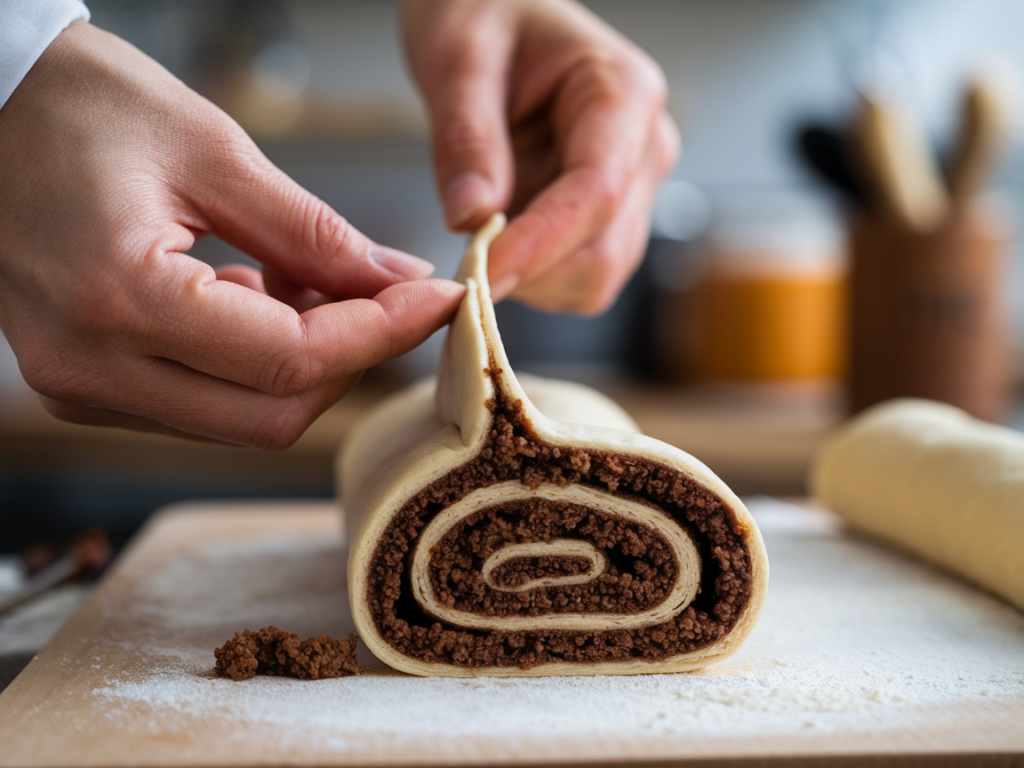
🍥 3. Roll Tightly Without Stretching
We all want beautiful spirals but if you roll too loosely or stretch the dough as you go, you’re basically asking your filling to find the nearest exit.
Instead:
- Start from the long edge and roll slowly and tightly.
- Keep the tension even but don’t pull or stretch the dough.
- Pinch the seam at the end to seal it snugly.
Emma’s Visual:
Think of rolling a cozy sleeping bag, not a yoga mat tight, secure, and comfy.
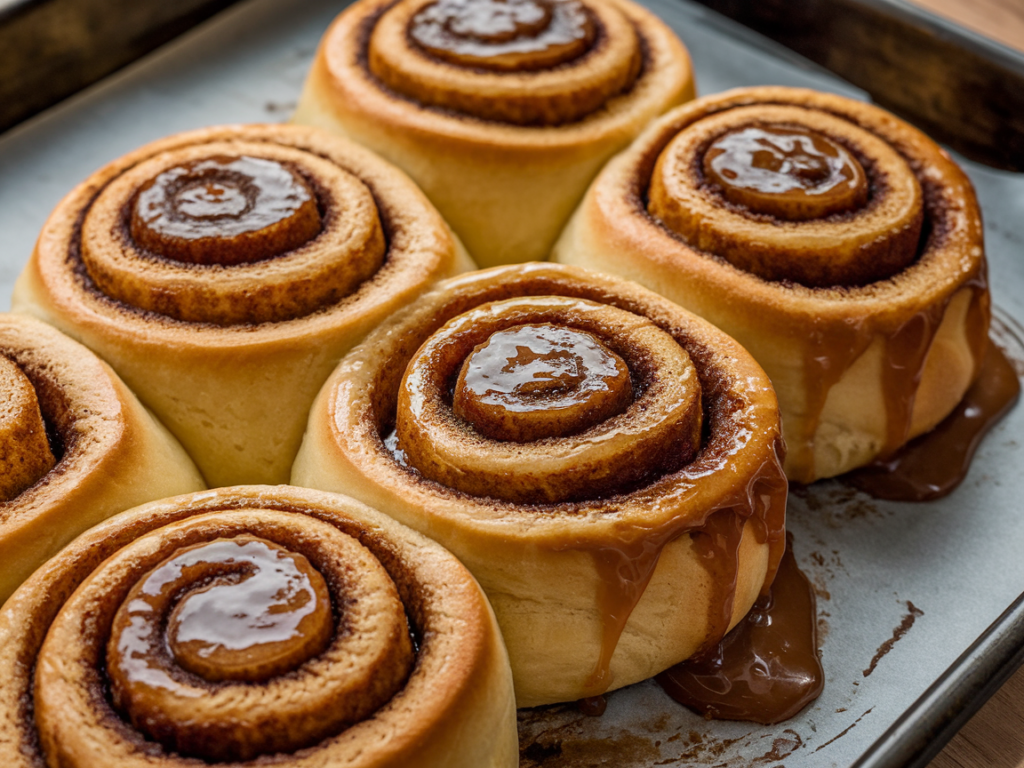
❄️ 4. Chill the Log Before Slicing
This is my secret weapon when I want perfectly clean rolls with minimal mess: after you’ve rolled the log, chill it in the fridge for 10–15 minutes. This firms up the butter in the filling and makes slicing easier, which helps prevent the spirals from uncoiling or smearing.
Bonus: cold dough cuts like a dream. No jagged spirals or filling dragging along the knife!
🔪 5. Use the Right Cutting Tool
Dental floss isn’t just for teeth it’s your best friend for cutting cinnamon rolls without squishing or smearing them.
To use:
- Slide unflavored dental floss under the chilled roll.
- Cross the ends over the top like you’re tying a gift.
- Pull tight and slice through.
Perfect spirals. Zero mess. It’s kitchen magic.
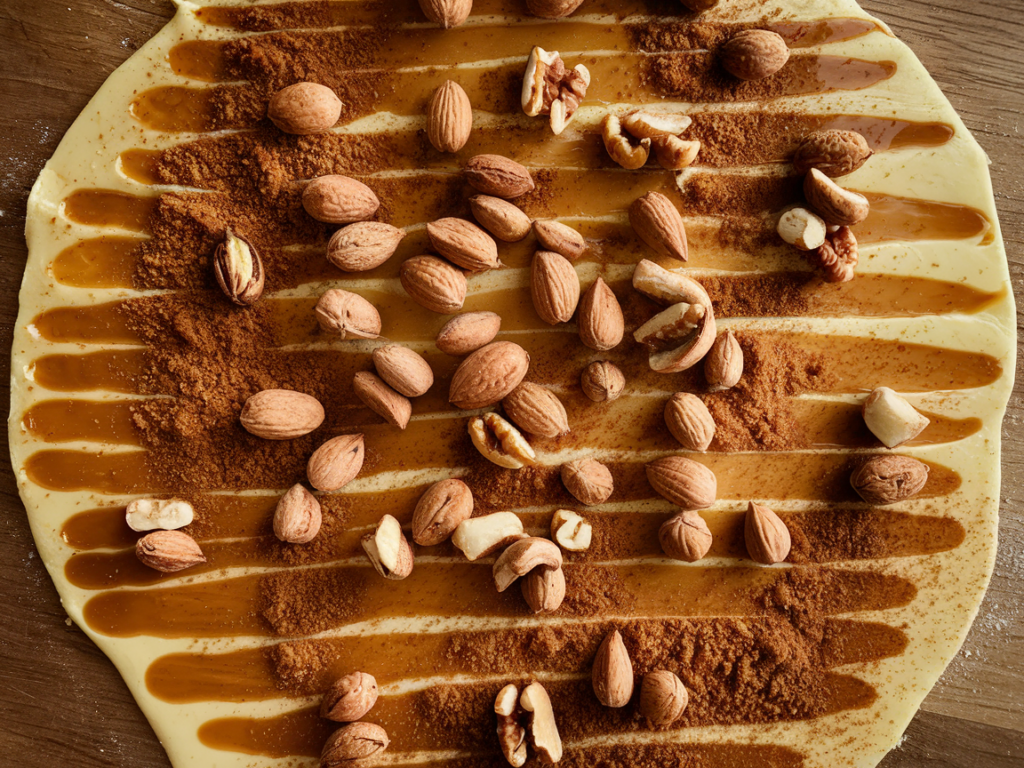
🧁 Bonus Tip: Leave a Little Edge Space
When spreading your filling, leave about ½ inch of bare dough along one long edge. That way, when you roll it up, the filling won’t squeeze out at the seam. This simple spacing trick helps seal everything in neatly.
👩🍳 Wrapping It All Up (Without Leaking!)
Cinnamon rolls aren’t just about taste they’re about texture, aroma, and that satisfying swirl of love and sugar. Keeping your filling in place doesn’t require perfection just a few simple tweaks.
Here’s the quick recap:
- Softened (not melted) butter = grip.
- Press the filling in.
- Roll evenly and tightly.
- Chill the log before slicing.
- Use floss, not a knife.
- Leave a little edge space for sealing.
And remember if your rolls aren’t picture-perfect, they’re still delicious. In our house, the messier ones usually get eaten first… by the chef (me)! 😉
✨ Craving more cozy, sweet baking inspo?
Follow me on Pinterest for irresistible homemade treats that warm every heart (and oven)! 🧁💛
❤️ Related Recipes & Tips from Emma’s Kitchen
- The Heavy Cream Cinnamon Roll Hack That Broke the Internet
- Easy Overnight Cinnamon Rolls for Busy Families
- 5 Ways to Level Up Your Cinnamon Roll Game
- Cinnamon Roll Icing Ideas (Beyond Basic Glaze)
To enhance your recipe experience, check out these related articles from our blog:
- Learn how Cinnamon Rolls with Apple Pie Filling add a fruity twist to your rolls.
- Discover why you should Put Heavy Cream on Cinnamon Rolls Before Baking for extra moisture and flavor.
- Explore whether it’s better to Pre-Cook Apple Pie Filling for consistency and taste.
🍴Let’s Bake Together!
Have your own trick for keeping that filling tucked in tight? Drop it in the comments I love hearing what works in your family kitchen!
Until next time, keep rolling, keep laughing, and don’t worry if the filling leaks a little, that’s just extra caramel on the pan. ❤️
- Ground Beef Queso Dip
- Iowa Party Bites: Hearty Snacks For A Crowd & Fancy But Easy Appetizers
- Iced Coffee Recipe
- Easy Back to School Dinner Ideas
- Mini Apple Muffins (Vegan + Gluten-Free)

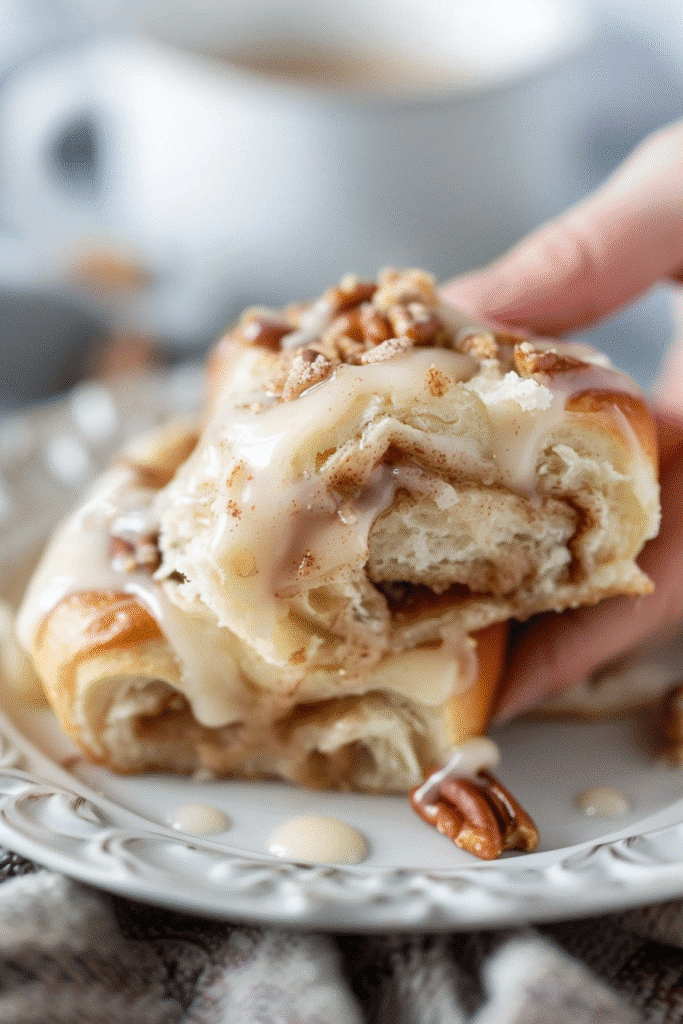
Cinnamon Roll Fillings
Instructions
Tips for Preventing Filling Leakage
- Use softened, not melted butter to keep the filling thick and prevent leakage.
- Press the filling into the dough with your hands or a spoon to help it adhere.
- Roll the dough tightly without stretching to maintain the shape and integrity.
- Chill the rolled log in the fridge for 10-15 minutes before slicing to prevent smearing.
- Use unflavored dental floss to cut the rolls, which helps preserve their shape.
- Leave about ½ inch of bare dough along one long edge when spreading filling for better sealing.