I can still hear the clatter of plates as my little ones race each other to set the table, their laughter filling the kitchen while a warm, citrus scent curls from the oven. It smells like small holidays and slow afternoons at my grandmother’s house near the river, where we would sit on the back steps and watch sunlit peels drift in the breeze. Dried Orange Slices bring that same gentle, bright warmth into our home—simple, pretty, and oddly comforting. I keep a jar on the counter most weeks; it feels like a small, edible ritual that draws my family to the table.
Why Dried Orange Slices is Our New Family Favorite
There is a quiet joy in small things that look homemade. Dried Orange Slices are one of those tiny, cheerful touches that make a meal feel like a celebration without much fuss. They are quick to make, require very little hands-on time, and they last—so they work for busy nights and last-minute guests alike.
They are versatile too. Use them to top warm drinks, tuck them into gift boxes, or string them into a garland for the holidays. Meanwhile, their scent is a gentle hug for the kitchen—citrus and sweetness mingling, and sometimes a tiny bit of caramelized edge that tastes like summer memories.
I often send the kids off to set the table with a slice or two to hide in cups or napkins. They love the little game, and it becomes part of our ritual. If you want to give it a whirl, try a quick read-through of this process and then make it with the kids. It’s one of those projects where the charm is as much in the making as in the finished slices. Also, if you’re curious about playful baking projects to pair with a citrus-themed afternoon, check out this quirky orange fish cookies idea that my friends and I laugh about.
The Simple Magic Behind Dried Orange Slices
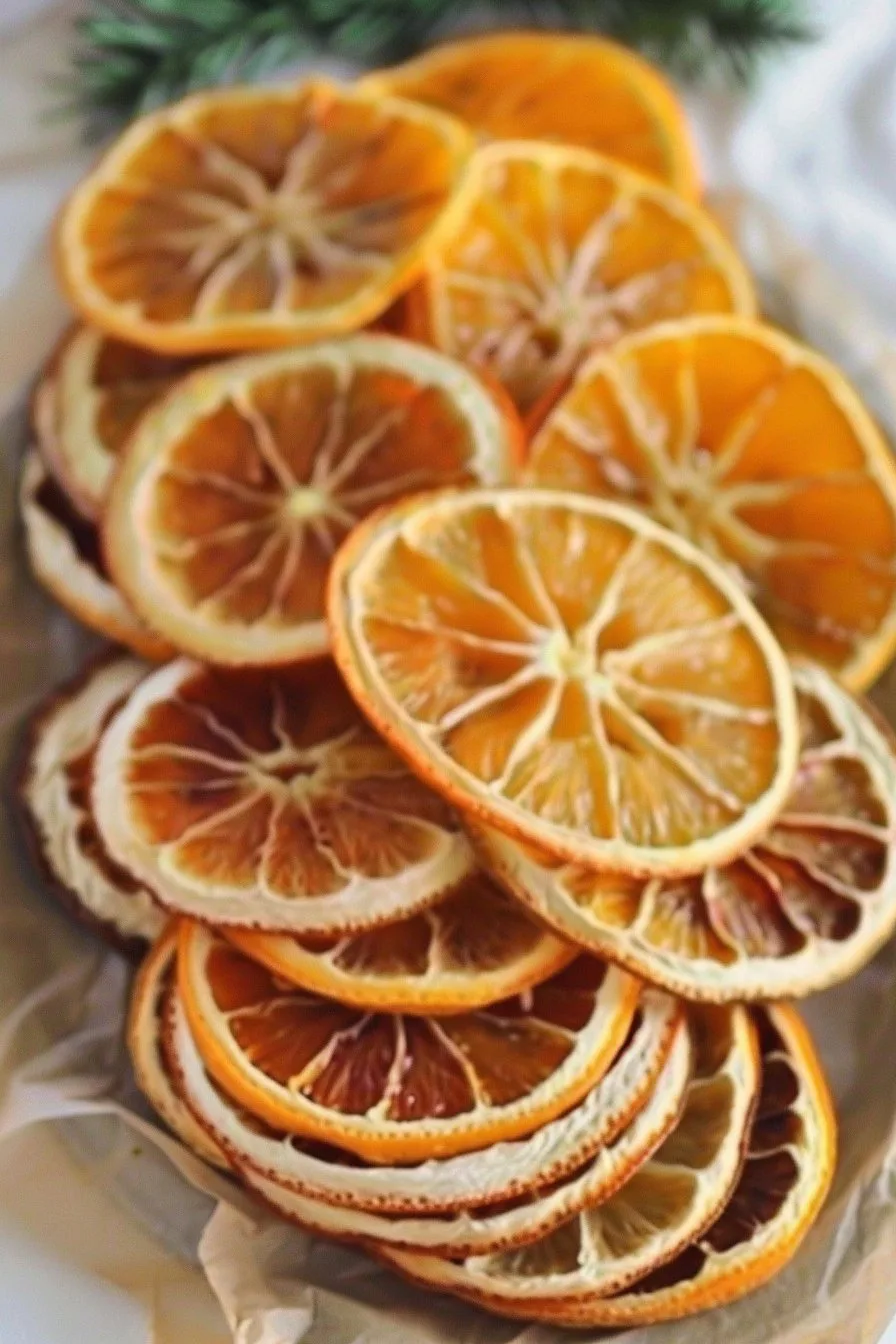
There’s something quietly magical about watching a glossy fresh orange transform into a translucent, sunlit slice. The color deepens, the sugar concentrates, and the aroma opens up. You don’t need fancy tools to do it, just patience and a low oven or a dehydrator.
When I first tried this, my grandmother told me to watch for the edges to take on a tiny bit of brown—that means flavor. She always said, “A little browning is like a story; it tells you it’s been loved.” That stuck with me. The slices should be mostly dry to the touch but still slightly soft in the center, with bright, jewel-like color.
If you want another little activity to pair with this day, try a simple craft a few hours after the slices are done. The kids can help thread them into a garland or glue them to cards. And if you want something savory alongside, I sometimes make sweet treats or tea and turn a few slices into a cheerful garnish. For more creative snack pairing ideas, you might enjoy making something whimsical like these orange fish cookies for a family baking hour.
“This is where the magic happens—when the aroma fills the kitchen and my kids come running in, asking ‘Is it ready yet?’”
How to Make Dried Orange Slices, The Heartwarming Way
This is an easy, low-stress project that gives you a useful, beautiful result. The goal is simple: thin, even slices that dry slowly at low heat so they stay colorful and slightly soft in the middle.
Start by choosing bright, firm oranges. A mix of varieties gives you a pretty range of color—navel, blood, and Cara Cara are all lovely. Slice evenly, keep them single-layered on the tray, and give the oven the time it needs. Texture and aroma cues will guide you: when the slices look translucent and the edges are not sticky, you are close.
During the process, let little helpers take small jobs—lining the tray or turning the slices after the first hour. It’s a gentle way to involve everyone. And if you want more casual kitchen projects to do on a rainy afternoon, I keep a list of favorites including an easy cookie idea you can try with kids: orange fish cookies.
Ingredients You’ll Need
- Navel oranges — 3 to 4, firm and bright
- Blood oranges — 1 to 2, optional for color variety
- Cara Cara orange — 1, optional for a pinker hue
Friendly kitchen note: Use any oranges you have on hand. A mix makes a prettier jar, but plain navel oranges work beautifully every time. Also, if your oranges have thicker skins you may see slightly longer dry times, and that is perfectly fine. For a small, cozy activity, let the kids pick the oranges at the store and make it a mini mission. And if you like the idea of plate decorations for a family tea, pair with a little batch of cookies, or check out a playful recipe like orange fish cookies for extra smiles.
Step-by-Step Directions
-
Preheat your oven to 200°F (93°C) or use a food dehydrator.
This low and slow approach keeps the slices bright and prevents them from burning. Give the oven time to settle at temp before you slide the tray in.
-
Wash and dry the oranges. Slice them into thin rounds, about 1/4 inch thick.
Use a sharp knife or mandoline for even slices. Even thickness means even drying. Let kids help with washing and patting dry—it’s a safe, fun job.
-
Arrange the orange slices on a baking sheet in a single layer.
Use parchment paper to catch any sticky spots and to make clean-up easy. Make sure slices do not overlap so air circulates around each one.
-
If using an oven, bake for 2 to 3 hours until they are dried but still slightly soft. If using a dehydrator, follow the manufacturer’s instructions.
Rotate the tray after the first hour if your oven has hot spots. A little browning at the edges builds flavor, just like grandma showed me. If they seem to be drying too quickly, lower the temp a few degrees.
-
Let the slices cool completely before using them for decoration.
Cooling gives the center a chance to set and become pleasantly chewy. Let them rest on a wire rack so air circulates beneath. This is a good moment to make a cup of tea and admire your work.
Quick tips from my experience: I sometimes start with a slightly higher oven temp for the first 15 minutes to kick the process, then drop it down. Also, if you want perfectly flat slices for garlands, place another baking sheet on top during cooling for a minute to press them gently.
Serving Dried Orange Slices with Love
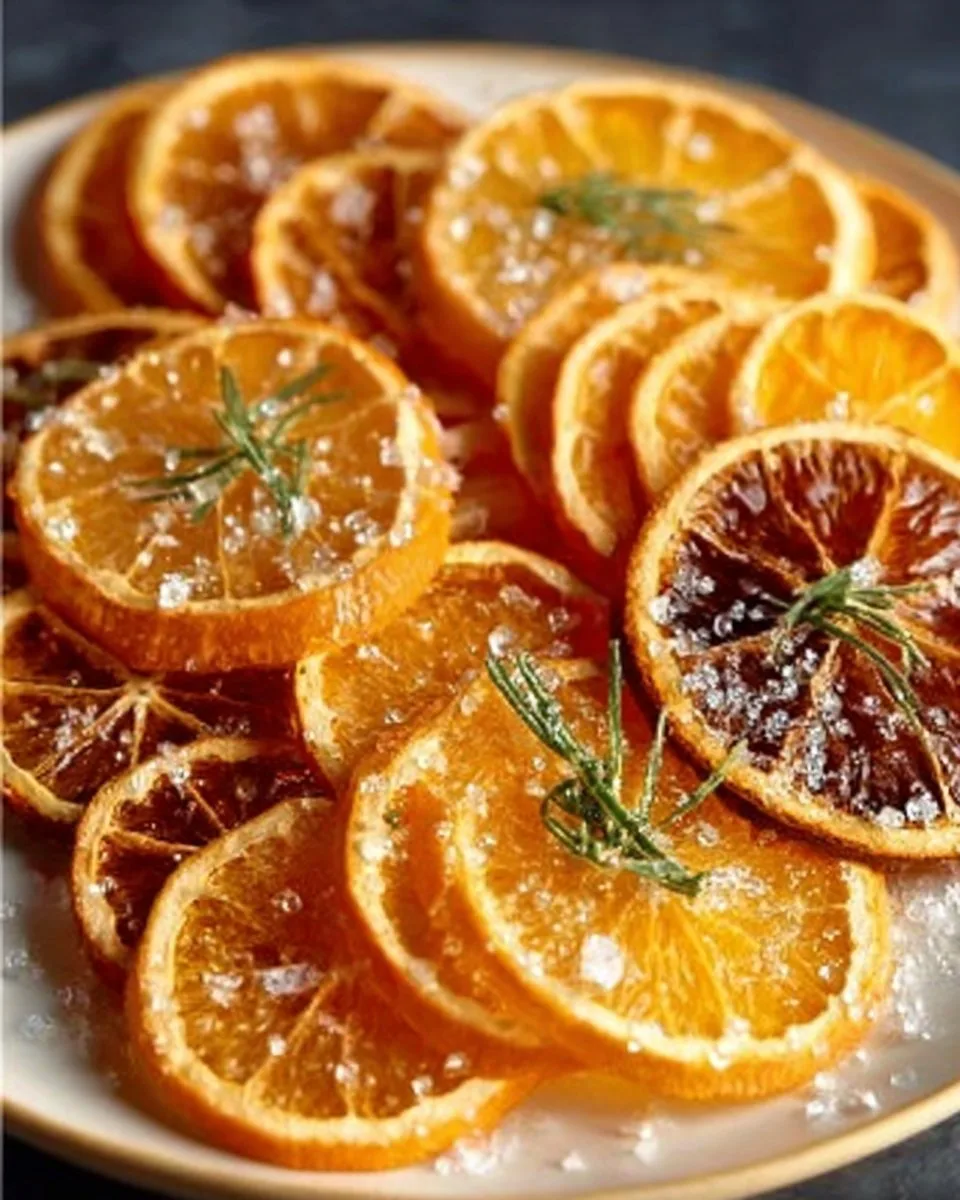
I serve these slices at family meals in small bowls near the table, so everyone can sprinkle a slice into tea or use one as a napkin ring surprise. For parties, arrange them on a platter with roasted nuts and a simple spare of rosemary sprigs—looks chic and requires almost no effort.
They make lovely toppers for warm winter drinks. For a dessert plate, I’ll nestle a couple of slices beside a slice of pound cake or a bowl of spiced yogurt. My youngest loves to float one in sparkling water and watch it bob. Everyone has a favorite way to enjoy them; it becomes a small, shared pleasure.
Before the FAQ, I like to tuck a pretty jar of slices into the center of the table so people can pass it around. It’s an easy, decorative touch that prompts conversation and a few smiles. If you’re planning a themed afternoon, try pairing them with a kid-friendly baking project—my go-to is a silly cookie idea that’s always a hit: orange fish cookies.
Storage & Reheat Tips (Keeping the Goodness)
Storing dried orange slices is simple. Place completely cooled slices in an airtight container or a glass jar. Keep them in a cool, dry cupboard away from direct sunlight.
They will keep well for several weeks to a couple of months depending on humidity. If you live in a humid climate, add a clean, dry silica packet or a small pinch of uncooked rice in a breathable cloth to help absorb excess moisture.
If you want a freshly warmed scent, a quick minute in a warm oven at 200°F (93°C) will revive the aroma. The microwave can make them chewy quickly, but it can also over-soften them, so use it sparingly. As a note, reheating is mostly for aroma and serving warmth rather than changing texture dramatically.
I learned the hard way that warm, not-stored slices left on a counter can attract sticky condensation in humid weather. So once cooled, into the jar they go. If you want a long-lasting, store-bought option for decorating or gifting, there are ready-made choices available too. And for a fun pairing idea next time you make a citrus craft session, consider something playful like these orange fish cookies as an activity.
My Kitchen Notes & Shortcuts
- Use a mandoline for even slices. It saves time and yields consistent results. My hands are more relaxed with a mandoline, and the kids cheer when the slices look like little coins.
- Bake on parchment or silicone mats. They help prevent sticky messes and keep the slices bright.
- Rotate trays and check after 90 minutes. Ovens vary, and a little attention pays off.
- Make a double batch while the oven is warm. They store well and become a lovely stash to gift.
- For kid involvement, let them string cooled slices with ribbon for a simple garland. It keeps little hands busy and proud.
These small tricks make the process smoother and keep it enjoyable rather than stressful. The goal is simple pleasure, not perfection.
Family-Friendly Variations
- Spiced Sugared: Lightly brush slices with a bit of simple syrup and sprinkle with cinnamon sugar before drying for a sweeter snack.
- Rosemary and Orange: Add a tiny sprig of rosemary to slices for a savory aromatic touch—perfect for winter garlands.
- Citrus Mix: Combine lemon and lime slices with orange for a multi-hued bowl that brightens any table.
- Candied Edge: For a fancier look, brush edges with a little honey and let them caramelize in the final 10 minutes of drying.
- Savory Garnish: Use thin dried slices as a citrus garnish on roasted chicken or fish. They add brightness and a pretty finish.
Let your family choose a favorite variation. Small experiments often lead to new traditions.
FAQs About Dried Orange Slices
Can I make this ahead for a busy week?
Absolutely. Dried slices store well in an airtight jar for weeks. They are a perfect ahead-of-time decoration or snack.
Are the slices safe to eat?
Yes. They are perfectly edible and have a chewy, concentrated sweetness. Some people prefer them as decoration, but they are a tasty nibble.
Can I dehydrate different citrus at the same time?
Yes. Lemons, limes, and even grapefruit dry well alongside oranges. Keep an eye on thickness, as grapefruit may need more time.
What if my slices stay sticky?
If they are sticky, they need more drying time. Return them to the oven at low heat and give them more time, checking every 20 minutes.
How can I use them as gifts?
Place cooled slices in a clear jar with twine or combine them into a garland. They make a thoughtful, handmade gift that keeps well.
One Final Thought from My Kitchen
This little project has given me more than a pretty jar on the counter. It has given moments: the slow sound of the oven, the smell that brings my children in, and small hands threading a slice on a string. It has taught me that easy things can be beautiful, and that a tiny ritual can make a weekday feel special.
Give it a try. Invite the family, make a playlist, and let the oven hum. You might be surprised how many small smiles a bowl of Dried Orange Slices can pull into your evening. And if this sparks a desire for more playful baking days, consider pairing it with something fun like these orange fish cookies to make the day a little sweeter.
Conclusion
For further reading and inspiration, I like to save a few trusted resources that walk you through techniques and creative uses. If you want a deep dive into uses and ideas, check out this guide from Dried Orange Slices: How to Make and Use – Art of Natural Living. If you prefer a clear oven method with photos and timing tips, this step-by-step page on How to Make Oven Dried Orange Slices is very practical. For tips on keeping slices bright and colorful, I find this post on The best Way To Dry Oranges So They Stay Vibrant – StoneGable helpful. If you are considering store-bought options for quick decor or last-minute gifts, see listings like Oranfit Dried Orange Slices 3oz/85g(23 to 37 slices … – Amazon.com. And for inspiration on turning your dried slices into decorations, this tutorial on Homemade Dried Orange Garland – The Toasted Pine Nut is full of lovely ideas.
Happy cooking, and may your kitchen be full of warmth, laughter, and the smell of citrus.

Dried Orange Slices
Ingredients
Main Ingredients
- 3 to 4 pieces Navel oranges Choose firm and bright oranges.
- 1 to 2 pieces Blood oranges Optional for color variety.
- 1 piece Cara Cara orange Optional for a pinker hue.
Instructions
Preparation
- Preheat your oven to 200°F (93°C) or use a food dehydrator.
- Wash and dry the oranges. Slice them into thin rounds, about 1/4 inch thick.
- Arrange the orange slices on a baking sheet in a single layer.
Cooking
- If using an oven, bake for 2 to 3 hours until they are dried but still slightly soft. If using a dehydrator, follow the manufacturer's instructions.
- Rotate the tray after the first hour if your oven has hot spots.
- Let the slices cool completely before using them for decoration.