I can smell warm bananas and vanilla the moment I step into the kitchen. The sound of a spoon tapping a bowl feels like a tiny drumroll. Little feet patter and my kids ask the same question: "Is it ready yet?"
I started this recipe years ago to turn overripe bananas into a cool treat. It became a quick win for school snacks, a healthy dessert after dinner, and a recipe my children can help make. If you like baking one-bowl recipes, you might enjoy my banana muffin recipe too.
I am Lily, a food blogger and home cook. I write recipes I cook for my family every week. I test each recipe until it feels simple, reliable, and cozy.
Why this works
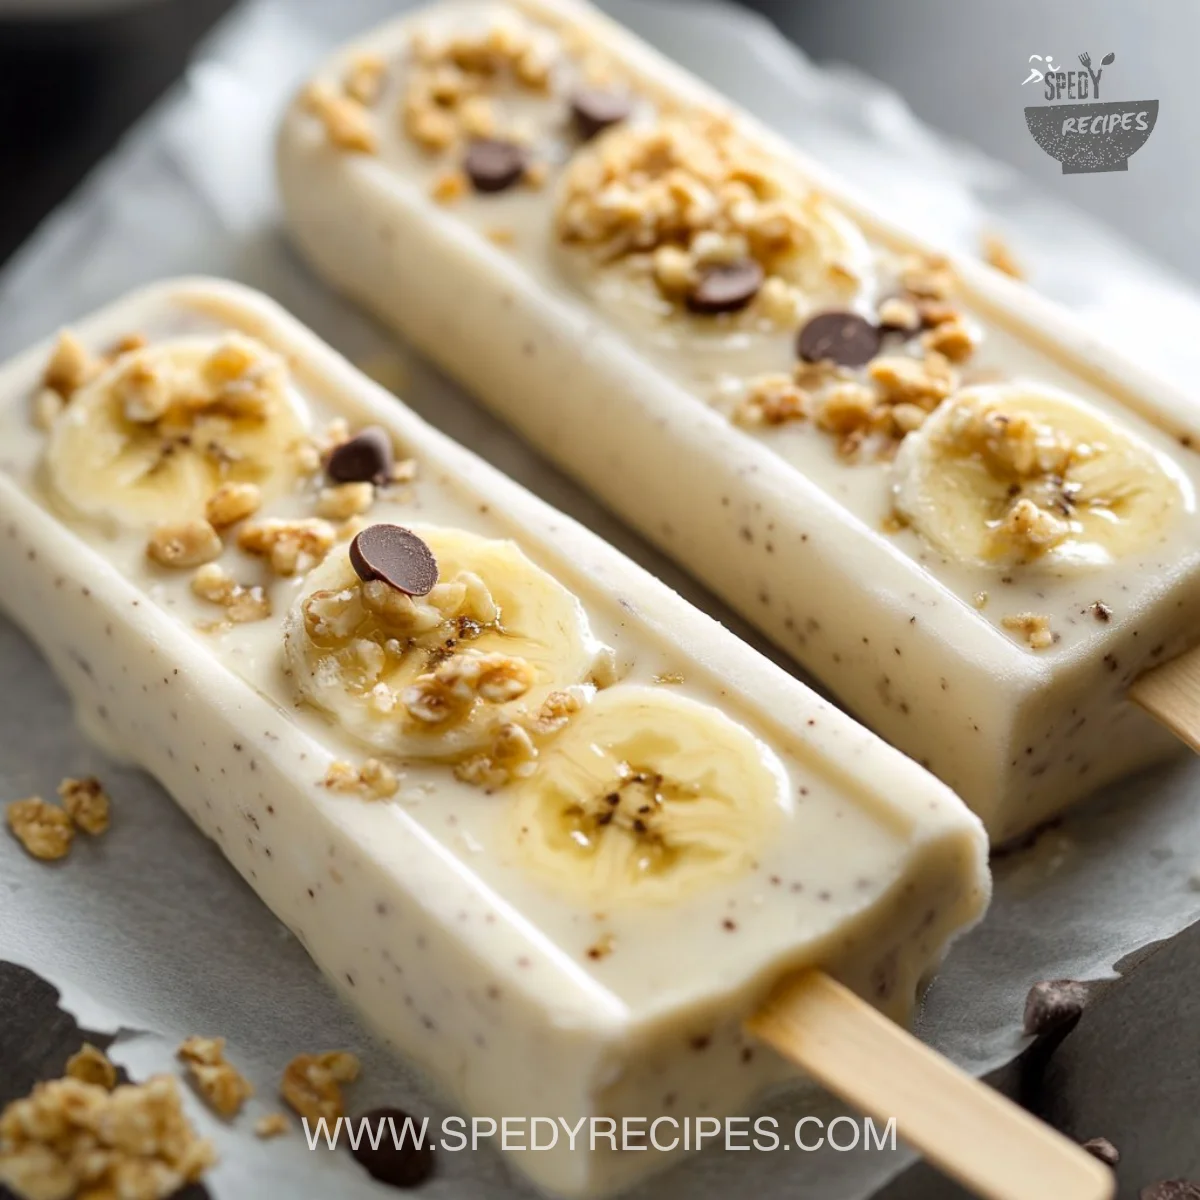
Frozen Yogurt Banana Pops work because they use a few ingredients and deliver big flavor. Bananas give natural sweetness and a creamy texture. Greek yogurt gives protein and tang, balancing the fruit. The mix freezes smooth and scoops easily from molds.
This recipe saves time on busy afternoons. You can blend the base in minutes and freeze it while you tidy the kitchen. The next day you have a ready snack for lunchboxes, after school, or poolside. If you love simple, family-friendly desserts, these pops are a winner. For another family-friendly banana idea that uses ripe bananas in a different way, try another family-friendly banana recipe.
Process Overview
“This is where the magic happens—when the aroma fills the kitchen.”
The process is straightforward. You blend ripe bananas with yogurt and a touch of sweetener and vanilla. Chill or freeze in molds. Optional coatings add texture and make the pops feel like a treat.
I recommend keeping the steps simple when kids help. Let them pour, stir, and decorate. That keeps the kitchen calm and the results consistent.
Ingredients
- 3 ripe bananas, peeled and sliced
- 1 1/2 cups plain Greek yogurt (or dairy-free yogurt)
- 2 tablespoons honey or maple syrup, to taste
- 1 teaspoon vanilla extract
- 1 tablespoon lemon juice
- 1/4 cup mini chocolate chips or finely chopped dark chocolate (optional)
- 1/3 cup chopped nuts, crushed cookies, or granola for coating (optional)
- Popsicle molds or small paper cups and wooden sticks
Personal tips from Lily:
- Popsicle molds: I prefer silicone molds. They pop out easily and save a little time when unmolding. If you have many kids, use several molds to make a larger batch.
- Small paper cups: These work well if you have limited molds. Use foil to cover the top and poke sticks through to hold them upright in the freezer.
- Wooden sticks: Soak wooden sticks in warm water for 5 minutes before inserting into paper cups. This helps keep them centered while freezing.
If you want to compare different ways to use ripe bananas, check this easy baking idea in the middle of the week: easy banana snack ideas.
Directions
-
Slice the ripe bananas and add them to a blender with the yogurt, honey, vanilla, and lemon juice. Blend until smooth and creamy.
- Encourage: Let the blender run until there are no chunks. The kids will love watching it whirl.
-
Taste the mixture and add more honey or maple syrup if desired.
- Encourage: Taste as a family. A little extra sweetness makes the pops more like dessert.
-
Fold in any desired mix-ins like mini chocolate chips.
- Encourage: Add chips or nuts gently so the base stays smooth. Kids can sprinkle these in.
-
Spoon the mixture into popsicle molds or cups, leaving some space at the top.
- Encourage: Fill to about a quarter inch from the rim to allow the mixture to expand as it freezes.
-
Cover with foil (if using cups) and poke a wooden stick through the foil.
- Encourage: Press the stick straight down. Tape the foil lightly on the sides so the sticks stand upright.
-
Freeze until solid, about 4 hours or overnight.
- Encourage: Overnight makes them fully firm. Plan a day ahead if you want them ready for school snacks.
-
Once frozen, dip the pops into melted chocolate or roll in coatings if you wish.
- Encourage: Do this on a baking sheet lined with parchment. Let the chocolate set for a few minutes, then add crushed toppings.
-
Serve family-style with toppings.
- Encourage: Let everyone choose one topping. Little choices make snack time feel special.
For a step that links to another kitchen favorite, remember this tried and tested method for using ripe bananas: kid-approved banana desserts.
Serving

Serve the Banana Yogurt Pops family-style on a large platter. Arrange pops on parchment or a tray lined with parchment. Add small bowls of extra toppings like chopped nuts, crushed cookies, and extra chocolate chips.
Let children pick their own toppings at the table. This makes them proud and more likely to try new flavors. For a picnic, wrap individual pops in small squares of parchment and keep them in a cooler.
Pair the pops with warm moments. I bring them out after backyard games or alongside a simple fruit salad. They make a sweet ending without feeling heavy.
Storage
Store leftover pops in an airtight container or freezer-safe bag. Layer the pops with parchment paper so they do not stick. They keep well for up to 2 months, though I recommend eating them within 2 weeks for best texture.
If a pop softens after being on the counter, return it to the freezer for 30 to 60 minutes. For a quick thaw before serving, unwrap and hold a pop for 2 to 3 minutes. Avoid refreezing a pop that has fully melted and been warmed to room temperature.
For yogurt mixtures, keep any unused base in the fridge for up to 48 hours. Stir it well before refreezing if you plan to make a second batch the next day.
Kitchen Notes
- Use very ripe bananas for the best sweetness and creaminess. The brown spots mean flavor.
- If the mixture is too thick for molds, add 1 to 2 tablespoons of milk to loosen it.
- For dairy-free, choose a thick plant-based yogurt like coconut or almond to keep a creamy texture.
- To make chocolate coating set quickly, chill dipped pops on a tray in the freezer for 10 minutes.
- Double the batch and freeze extras for a busy week. Label bags with the date.
If you need more ways to use ripe bananas around the house, check this baking resource for inspiration: banana baking inspiration.
Variations
- Peanut butter banana: Add 2 tablespoons of creamy peanut butter to the blender. Top with chopped peanuts for crunch.
- Berry swirl: Blend half the mixture with strawberries and layer for a two-color pop.
- Chocolate banana: Add 2 tablespoons of cocoa powder to the base. Mix in chopped dark chocolate for extra depth.
- Low-sugar: Skip the honey or maple syrup if your bananas are very ripe. Sweetness may be enough.
- Nut-free: Use crushed cookies or granola as a coating instead of nuts for school-safe treats.
For picky kids, you can hide flavors in a friendly way. Mix a spoonful of cocoa or a small amount of nut butter so the texture stays familiar. For more ideas that turn ripe bananas into a family favorite, you might enjoy my baking idea for busy families.
FAQ
Q: Can I use frozen bananas?
A: Yes. Thaw frozen banana slices for 10 minutes before blending. Frozen bananas may make the mixture thicker, so add a splash of milk.
Q: How do I keep pops from sticking to molds?
A: Run warm water briefly around the outside of the mold, not the seams. Gently pull the pops free. Silicone molds make this easiest.
Q: Can I make these without a blender?
A: You can mash very ripe bananas well with a fork and whisk into yogurt until smooth. Texture may be slightly chunkier.
Q: Are these safe for toddlers?
A: For toddlers, skip the whole chocolate chips and use ground nuts or crushed cookies if age-appropriate. Always watch for choking risks and check with your pediatrician about allergen introductions.
Q: Can I add protein powder?
A: Yes. Add 1 scoop of your preferred protein powder. You may need a tablespoon or two of milk to reach the right consistency.
Conclusion
I hope these Frozen Yogurt Banana Pops become a regular in your freezer and a bright part of your family’s snack rotation. They are quick to make, kid-friendly, and flexible enough for busy days. If you want to compare variations from other home cooks, take a look at this version for another take on the idea at Frozen Yogurt Banana Pops – Kalejunkie. For a gluten-free perspective and extra tips, this post is a helpful resource: Healthy Frozen Yogurt Banana Pops (gluten-free) – rachLmansfield.
Happy cooking from my kitchen to yours. — Lily
Frozen Yogurt Banana Pops
Ingredients
Main Ingredients
- 3 pieces ripe bananas, peeled and sliced Use very ripe bananas for better sweetness and creaminess.
- 1.5 cups plain Greek yogurt (or dairy-free yogurt) For dairy-free, choose a thick plant-based yogurt.
- 2 tablespoons honey or maple syrup, to taste Adjust based on sweetness preference.
- 1 teaspoon vanilla extract
- 1 tablespoon lemon juice
Optional Mix-ins and Coatings
- 1/4 cup mini chocolate chips or finely chopped dark chocolate Optional for added sweetness and texture.
- 1/3 cup chopped nuts, crushed cookies, or granola for coating Choose based on preference.
- as needed popsicle molds or small paper cups and wooden sticks Silicone molds preferred for easier unmolding.
Instructions
Preparation
- Slice the ripe bananas and add them to a blender with the yogurt, honey, vanilla, and lemon juice. Blend until smooth and creamy.
- Taste the mixture and add more honey or maple syrup if desired.
- Fold in any desired mix-ins like mini chocolate chips.
- Spoon the mixture into popsicle molds or cups, leaving some space at the top.
- Cover with foil (if using cups) and poke a wooden stick through the foil.
Freezing
- Freeze until solid, about 4 hours or overnight.
- Once frozen, dip the pops into melted chocolate or roll in coatings if you wish.
Serving
- Serve family-style on a platter with toppings.