
I can still hear the sizzle and smell the garlic when I think about the first time I made these Garlic Parmesan Cheeseburger Bombs for my family. The kitchen was warm, the kids were curious, and the sound of biscuit dough sealing around melted cheese felt like a small celebration. If you loved my twist on party bites like these, you might remember my take on another crunchy favorite that kids adore from my Crab Rangoon bombs post and find similar comfort in that easy, hand-held format.
This recipe is all about big flavor with little fuss. It is the kind of dish you can sit down to with kids and cousins, and everyone will be reaching for the next one. Read on for the how-to, smart swaps, and tips that keep these bombs juicy and golden every time.
Why this works
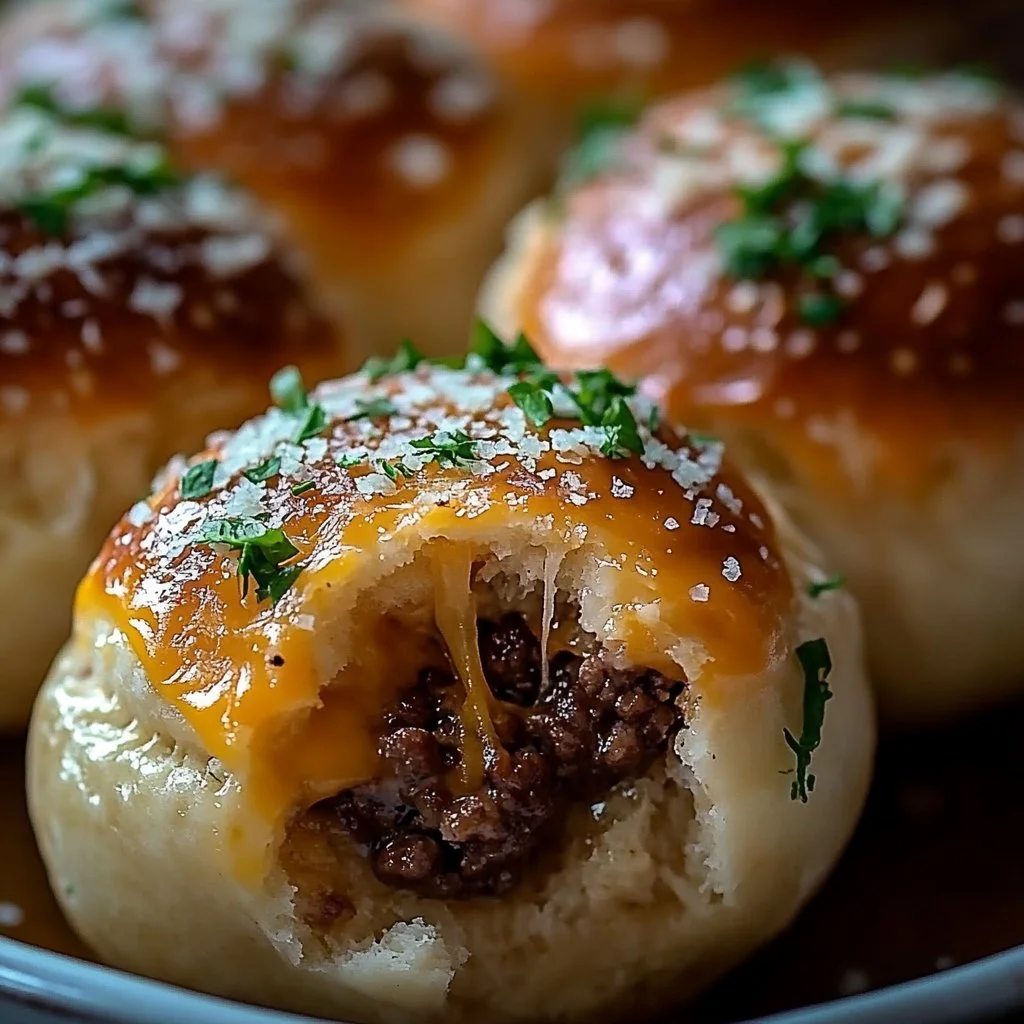
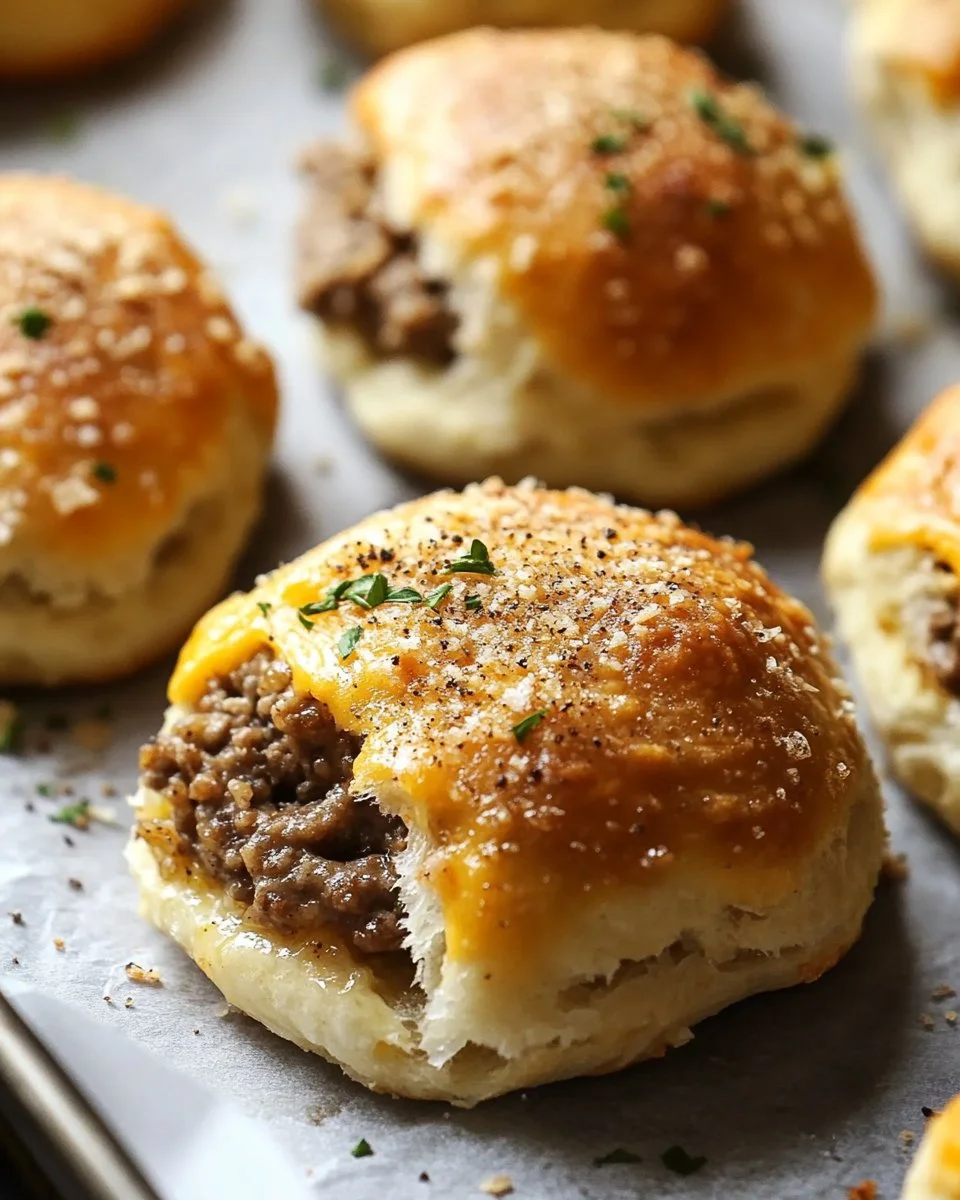
These Garlic Parmesan Cheeseburger Bombs are a family win for a few clear reasons. The filling combines seasoned beef and melted cheddar that kids recognize as classic cheeseburger flavor. The biscuit wrapper browns quickly and gives you that soft, pillowy bite parents love handing to small hands.
They are also time savers. With a skillet and a baking sheet you can have dinner on the table in under 30 minutes. That makes them perfect for busy weeknights, after-school snacks, or game nights when everyone wants something comforting and handheld.
If you want a different flavor profile, try pairing the filling with a buttery garlic approach I use in other recipes. I took inspiration from my notes on rich garlic beef dishes in a garlic-butter beef recipe I shared earlier. That technique helps the beef stay juicy and gives you a deeper, roasted garlic flavor.
Process Overview
“This is where the magic happens—when the aroma fills the kitchen.”
At the heart of this recipe is a simple three-part rhythm. Brown the beef with garlic, fold in the cheddar so it becomes gooey, and then wrap that filling in biscuit dough. Bake until golden and sprinkle with parmesan. The whole kitchen smells amazing and everyone gathers around the oven, which makes dinner feel like an event without extra work.
A quick note on equipment. You will need a medium skillet, a baking sheet, parchment paper, and a spoon for portioning. If you prefer, use a silicone baking mat instead of parchment for easy cleanup. And if you want to make these ahead, the filling can be cooled and refrigerated before assembling the bombs.
Ingredients
- 1 pound ground beef
- 1 cup shredded cheddar cheese
- 1 can (16.3 oz) refrigerated biscuit dough
- 2 tablespoons minced garlic
- 1/2 cup grated parmesan cheese
- Salt and pepper to taste
- Dipping sauces of your choice with Lily’s personal tips for each
Dipping sauce tips
- Ketchup with a twist. Mix ketchup with a little yellow mustard and a pinch of garlic powder for a classic but slightly tangy dip that kids will recognize.
- Honey mustard. A simple mix of equal parts honey and mustard brightens the savory beef and is great for picky eaters who like sweet notes.
- Ranch dressing. Thin ranch with a teaspoon of buttermilk or milk if you like a creamier, pourable dip. Ranch is the most popular at my table.
- BBQ sauce. Use a smoky barbecue for adults or a sweeter one for children. It pairs well if you add smoked paprika to the beef.
- Spicy mayo. Mix mayonnaise with sriracha for a grown-up kick. Start with a small amount and adjust to taste.
A little note on cheese. I recommend shredding your own cheddar if you can. Pre-shredded cheese is convenient but can contain anti-caking agents that affect melting. For a softer melt and creamier bombs try fresh-shredded cheddar.
Directions
-
Preheat the oven to 375°F (190°C).
Warm ovens make baking predictable. While it heats, get your ingredients ready so assembly is quick and calm. -
In a skillet over medium heat, cook the ground beef, seasoning it with salt, pepper, and minced garlic until browned. Drain any excess grease.
Take your time browning. Taste and adjust salt and pepper as the beef cooks. The garlic should smell toasty but not bitter. -
Remove from heat and stir in the shredded cheddar cheese until melted.
Do this off the heat so the cheese melts smoothly into the beef without overcooking. The filling should be gooey and easy to spoon. -
Open the biscuit dough and separate into individual biscuits.
Lay them out on a clean surface. If the dough is very cold, let it rest a few minutes so it is easier to flatten. -
Flatten each biscuit and place a spoonful of the beef and cheese mixture in the center. Wrap the biscuit dough around the filling and pinch to seal.
Be gentle but sure when sealing. If the seam is sealed well, fewer bombs will burst and lose their filling. -
Place the bombs on a baking sheet lined with parchment paper.
Leave a little space between each so they can brown evenly. If you want a glossy top, brush with a little melted butter before sprinkling parmesan. -
Sprinkle the tops with grated parmesan cheese.
Parmesan adds a crisp, salty finish. You can also add a pinch of Italian seasoning if your family likes herby flavors. -
Bake for 12-15 minutes or until golden brown.
Keep an eye on them in the last few minutes. Ovens vary and you want golden, not overly dark. -
Serve warm with your favorite dipping sauces.
These are best hot, but they will still be tasty at room temperature. Arrange them on a large platter and let everyone dip and enjoy.
Each step is forgiving. If you double the recipe, cook the beef in two batches so it browns well. If you are making these for a crowd, consider assembling ahead and freezing before baking. I include freezer tips below.
Serving
Serve these family-style on a large platter so everyone can reach in. Add small ramekins of each dipping sauce so children and adults can choose their favorite. A simple side salad or roasted vegetables rounds out the meal for a balanced plate.
For parties, place them next to napkins and small plates. They are perfect for casual entertaining because guests can stand, chat, and refill as they like. If you want to make the presentation extra friendly, tuck labels by each dip so kids know what they are trying.
If you like pairing similar snacks, these bombs work well alongside other handheld favorites. One evening I served them with my crunchy crab rangoon bombs for a sampler tray, and the mix of textures was a big hit; you can explore that combination in my crab rangoon bombs post.
Storage
Short-term storage: Place cooled bombs in an airtight container in the refrigerator for up to 3 days. Reheat in the oven at 350°F (175°C) for 8-10 minutes to refresh the exterior and fully warm the center.
Freezing: Assemble the bombs and place them on a baking sheet in the freezer until solid. Transfer them to a freezer bag or container. Freeze for up to 2 months. To bake from frozen, add 5-8 extra minutes to the baking time and cover loosely with foil for the first part of baking if the tops brown too quickly.
Microwave reheat: For a quick snack, microwave a bomb for 30 to 45 seconds. The dough will not be as crisp, but the center will be warm. For best texture, finish in a toaster oven or skillet for a minute to restore some crunch.
Labeling tip: Freeze in a single layer first, then stack with parchment between layers to keep them from sticking. Write the date on the bag so you know it’s fresh.
Kitchen Notes
- Use medium heat to brown the beef. High heat can burn the garlic and leave an odd aftertaste.
- Freshly shredded cheese melts better. Shred a block of cheddar for a creamier filling.
- Don’t overfill biscuits. A tablespoon of filling is usually perfect for each biscuit.
- If seams open while baking, a quick dab of beaten egg on the edge before sealing helps glue the dough.
- Assemble on a silicone mat for easy transfer to the baking sheet and simple cleanup.
Variations
- Picky eater swap: Leave out minced garlic and finely chop a baby carrot into the beef for added sweetness without distracting picky kids.
- Vegetarian option: Replace beef with cooked lentils or crumbled firm tofu seasoned with soy sauce and smoked paprika. Add extra cheddar or a dairy-free cheese if needed.
- Spicy version: Add a splash of hot sauce to the beef before mixing with cheddar, or stir in finely chopped jalapeno for heat.
- Mini version: Use smaller biscuit portions for party-sized bite-size bombs that are easier for little fingers.
- Low-carb option: Use low-carb biscuit alternatives or wrap the filling in large mushroom caps and bake until the mushrooms are tender.
FAQ
Q: Can I use frozen ground beef?
A: Thaw it first. Cook it fully and drain excess liquid before assembling to avoid soggy bombs.
Q: Can I make the filling in advance?
A: Yes. Cook the beef, mix in the cheese, cool, and refrigerate for up to 2 days. Assemble and bake when you are ready.
Q: What if my bombs burst while baking?
A: That usually means the seam was not sealed well or the filling was too hot and expanded. Pinch seams tightly and give the filling a few minutes to cool before wrapping.
Q: Are there gluten-free options?
A: Yes. Use a gluten-free biscuit dough or make a simple dough from almond flour and egg for a grain-free wrapper. Baking times may vary.
Q: How can I make them ahead for a party?
A: Assemble and freeze them on a tray. Store in a freezer bag. Bake from frozen, adding a few minutes to the time, for fresh bombs at the party.
Kitchen Experience and Tips
I have been cooking for my family for many years. I learned early that recipes that bring people together are the most rewarding. These bombs are a great example of comfort food that is simple to prepare and feels special. When I teach friends or family how to make them, I encourage them to focus on the basic flavors and let the crispy, cheesy texture do the rest. If you want to deepen the garlic flavor, try roasting garlic ahead of time and mixing it into the beef.
Conclusion
I hope these Garlic Parmesan Cheeseburger Bombs become a go-to at your table. They bring warm, familiar flavors with minimal effort, and they are flexible enough to adapt to whatever your family loves. For another family-friendly bomb recipe with a crunchy twist, see this fun collection of cheeseburger bombs for kids Cheeseburger Bombs That Kids will Love – Life by Leanna. If you want a community-tested take on this exact recipe, you might also enjoy comparing notes on a version shared by home cooks at the Pitmaster Club Garlic Parmesan Cheeseburger Bombs – Pitmaster Club.
Happy baking and enjoy gathering around the oven with loved ones.

Garlic Parmesan Cheeseburger Bombs
Ingredients
For the Bombs
- 1 pound ground beef Use medium heat to brown the beef.
- 1 cup shredded cheddar cheese Freshly shredded cheese melts better.
- 1 can refrigerated biscuit dough (16.3 oz) Separate into individual biscuits.
- 2 tablespoons minced garlic Add for flavoring the beef.
- 1/2 cup grated parmesan cheese Sprinkle on top for a crisp finish.
- to taste Salt and pepper Season to personal preference.
- varies Dipping sauces of your choice Suggested dips: ketchup, honey mustard, ranch dressing, BBQ sauce, spicy mayo.
Instructions
Preparation
- Preheat the oven to 375°F (190°C).
- In a skillet over medium heat, cook the ground beef, seasoning it with salt, pepper, and minced garlic until browned. Drain any excess grease.
- Remove from heat and stir in the shredded cheddar cheese until melted.
- Open the biscuit dough and separate into individual biscuits. Flatten each biscuit and place a spoonful of the beef and cheese mixture in the center. Wrap the biscuit dough around the filling and pinch to seal.
- Place the bombs on a baking sheet lined with parchment paper and sprinkle the tops with grated parmesan cheese.
Baking
- Bake for 12-15 minutes or until golden brown.
- Serve warm with your favorite dipping sauces.