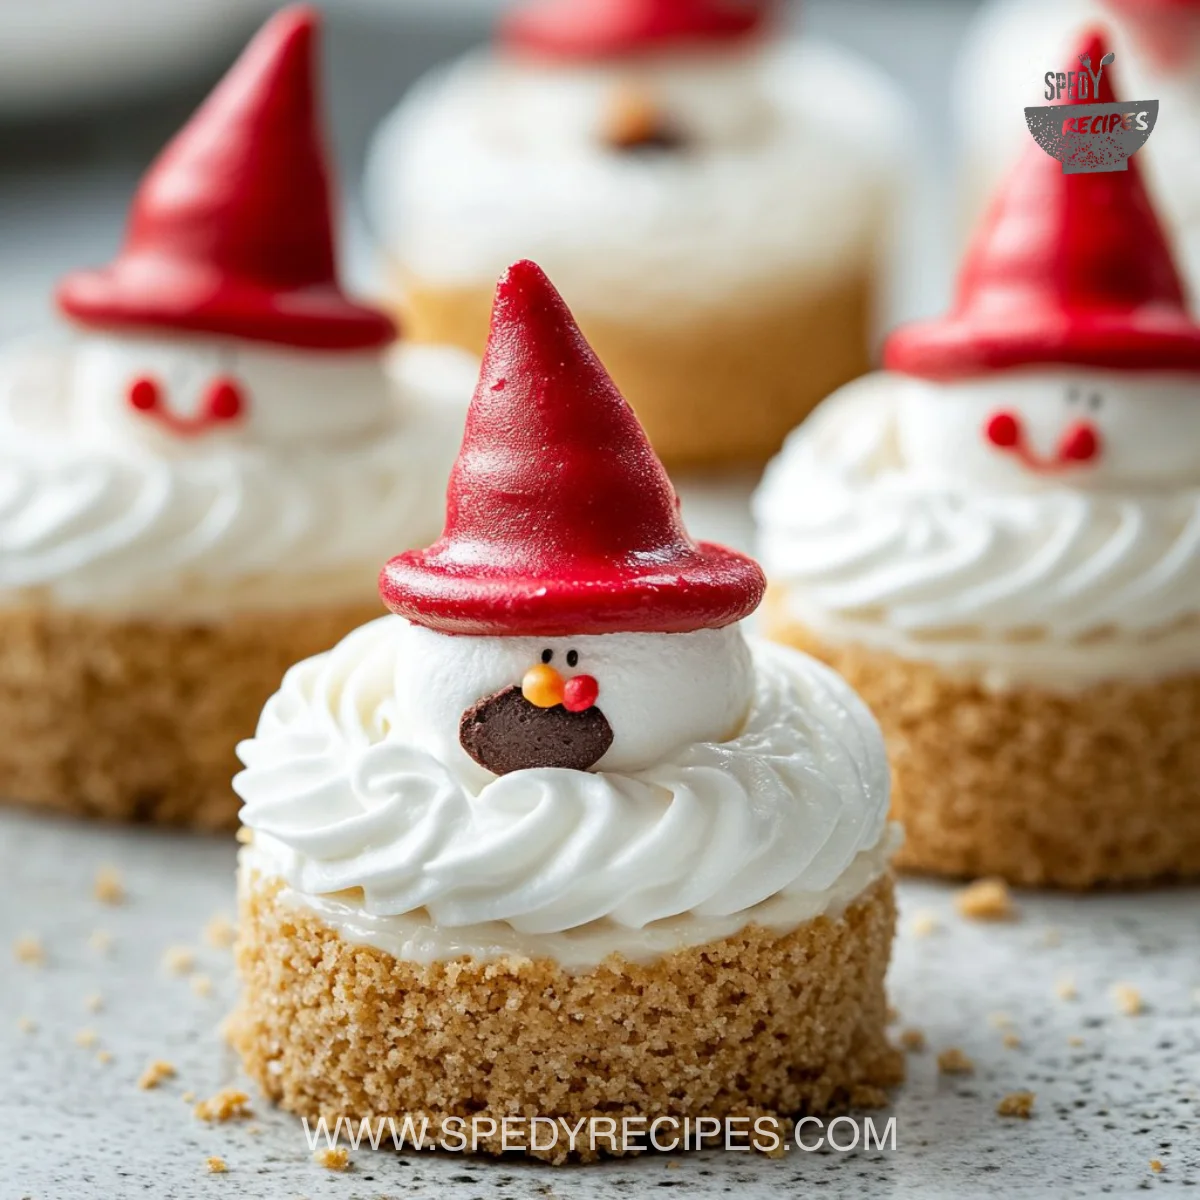
I love the smell of butter and graham crackers warming in a bowl. The kitchen hums with quiet clinks, little spoons tapping ramekins, and the soft laughter of helpers at the counter. These gnome mini cheesecakes are the kind of recipe that fills the house with comfort.
This recipe is simple enough for a weekday treat and special enough for a holiday table. The flavors are familiar, creamy, and bright. I wrote it to be family friendly and forgiving, so you can enjoy the process as much as the result.
Why this works
These mini cheesecakes work because they pair classic flavors with fast, family-friendly steps. The graham cracker base gives a buttery crunch. The whipped cream keeps the filling light and fluffy.
Making minis saves time and portion planning. Kids can decorate their own gnome hats. Parents can prep parts ahead to spread the work across naptime or school carpool. I like recipes that keep kitchen time short and smiles long.
As a home baker and mom of two, I design recipes that respect busy schedules. You do not need special tools or advanced technique. That makes this dessert a winner for weeknight treat, weekend party, or school bake sale.
Process Overview
“This is where the magic happens—when the aroma fills the kitchen.”
I break the process into clear parts: make the crust, whip the filling, assemble, chill, and decorate. Each part is short, and you can share tasks. Younger kids can press the crust. Older kids can add the red hat frosting.
Keep an eye on texture instead of time alone. The filling should be smooth and airy. The crust should hold when you press it but not be rock hard. These cues help you produce consistent minis every time.
Ingredients
-
8 oz cream cheese, softened.
- Lily’s tip: Let it sit at room temperature for about 30 minutes. Soft cream cheese blends smoothly and avoids lumps.
-
1/2 cup powdered sugar.
- Lily’s tip: Sift if you notice any clumps. Powdered sugar dissolves quickly and keeps the filling silky.
-
1 teaspoon vanilla extract.
- Lily’s tip: Use pure vanilla if you have it. The flavor is subtle but makes a big difference.
-
1 cup whipped cream.
- Lily’s tip: Use stabilized whipped cream or softly whipped heavy cream. It gives a light texture and prevents the filling from weeping.
-
1/2 cup graham cracker crumbs.
- Lily’s tip: Pulse whole crackers in a food processor or crush in a sealed bag with a rolling pin for even crumbs.
-
2 tablespoons unsalted butter, melted.
- Lily’s tip: Warm the butter slightly so it mixes fully with the crumbs. Don’t overheat or it will make the crumbs oily.
-
Red food coloring.
- Lily’s tip: Gel coloring gives brighter color with less liquid. Add a drop at a time to reach the shade you like.
-
Chocolate wafers or cookies for decoration.
- Lily’s tip: Use small, flat wafers or mini cookies for easy gnome eyes and base. You can also use chocolate chips.
-
Miniature gnome figures (optional).
- Lily’s tip: These make a fun presentation but are not edible. Place them on right before serving to keep them clean.
These ingredients are chosen to be pantry-friendly and simple. Each item has a small trick that helps you get the best texture and flavor with minimal fuss.
Directions
-
In a mixing bowl, beat the softened cream cheese until smooth. Scrape the bowl to ensure no lumps remain.
- Encouragement: Take your time here. A smooth base means a silky filling. If a small lump hides, a quick scrape will save it.
-
Gradually add powdered sugar and vanilla extract, mixing until well combined without overmixing.
- Encouragement: Taste and adjust sweetness carefully. Gentle mixing keeps air in the batter and avoids a dense texture.
-
Gently fold in the whipped cream with a spatula.
- Encouragement: Use a light hand. Fold until blended and airy. This is where the filling gets that pillow-like quality.
-
In another bowl, combine graham cracker crumbs and melted butter; press this mixture into the bottom of small dessert cups.
- Encouragement: Press firmly but gently. A good crust sets the foundation for every bite. Kids love doing this step.
-
Spoon the cream cheese mixture over the crusts and smooth the tops.
- Encouragement: Fill to the top but leave a little space for decoration. A chilled spatula works great for smoothing.
-
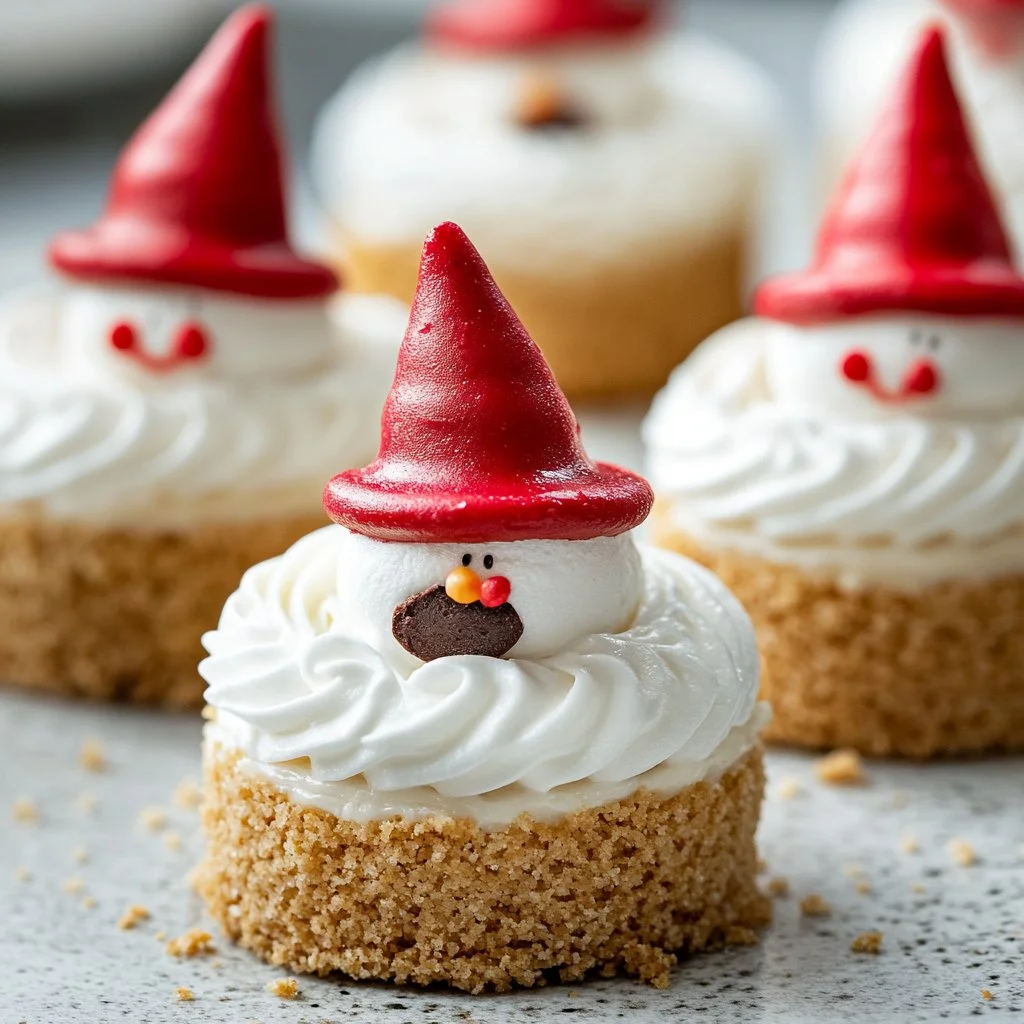
For decoration, add drops of red food coloring for a gnome hat design on top.
- Encouragement: Use a toothpick or small squeeze bottle to shape a hat. A little imperfection makes each gnome charming.
-
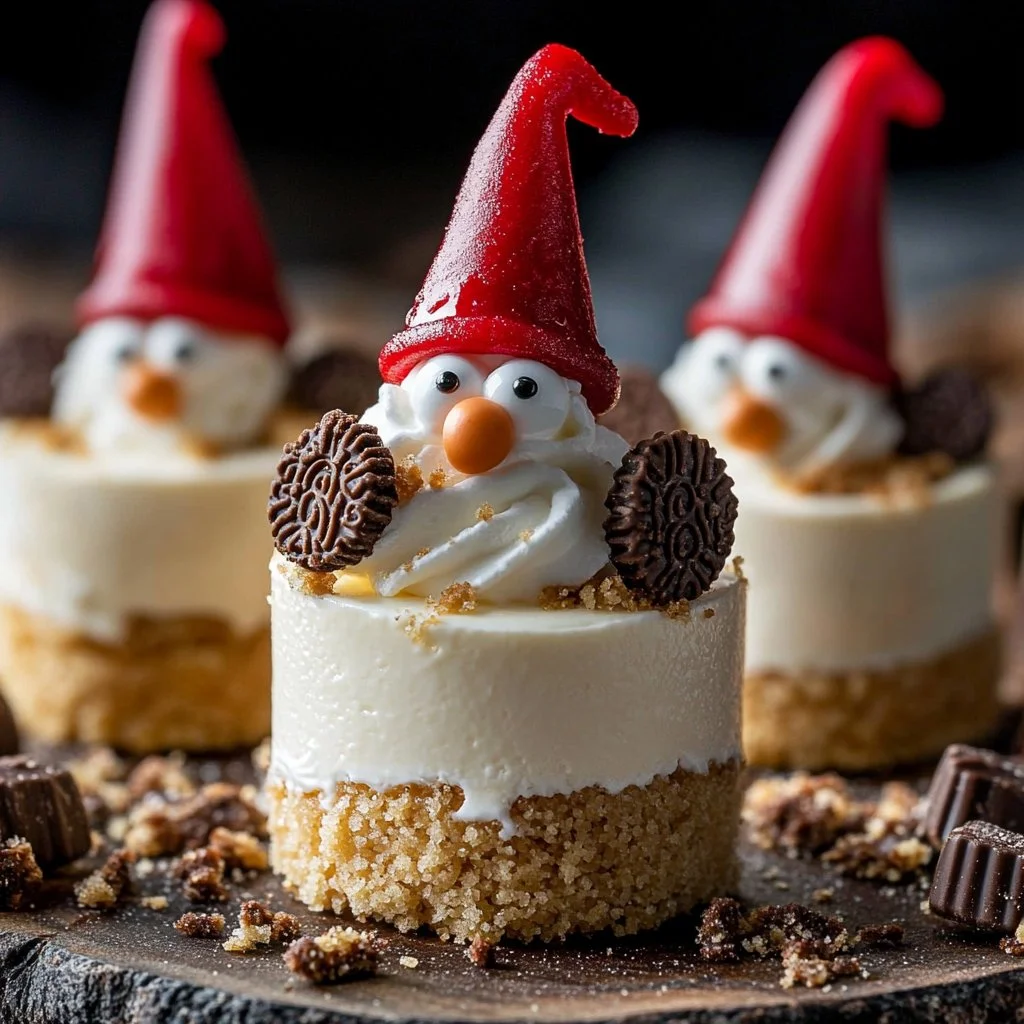
Decorate with chocolate wafers or cookies.
- Encouragement: Press a couple of wafers in gently to form eyes and a hat brim. Let kids get creative with faces and accessories.
-
Chill in the refrigerator for at least 2 hours before serving. Optionally, place miniature gnome figures on top before serving.
- Encouragement: Chilling helps the filling set and flavors meld. If you can, make them the day before so they taste even better.
These directions keep the process joyful and approachable. Each step has a little nudge to help confidence grow in the kitchen.
Serving
Serve family-style on a large platter so everyone can choose a favorite gnome. Arrange the minis in a circle to make an inviting centerpiece. Add napkins and small spoons to the plate for easy portioning.
If you host a party, place small name tags for flavors or decorations. For kids, make a decorating station with extra wafers, sprinkles, and a little red gel for hat touches. These small choices turn dessert into a shared activity.
Bring the cheesecakes to room temperature for 10 to 15 minutes before serving if you prefer a softer texture. They are best fresh, but their charm lasts into the next day if stored correctly.
Storage
Store the mini cheesecakes covered in the refrigerator for up to 4 days. Use an airtight container or cover the platter tightly with plastic wrap. If you left decorations like gnome figures on top, remove them and store separately to prevent moisture or marks.
Freezing is possible. Place cheesecakes on a tray so they do not touch and freeze until solid. Transfer to a sealed container and freeze for up to 1 month. Thaw in the refrigerator overnight, then bring to room temperature before serving.
Do not reheat these cheesecakes in the oven. If you want a softer feel, allow them to warm at room temperature for a short time. Always discard if left out more than 2 hours at room temperature.
For food safety, keep dairy cold and use clean utensils. If you or someone in your family has an allergy, label and separate items to prevent cross-contact.
Kitchen Notes
- Use room temperature tools. Let bowls and spatulas sit out so the batter stays smooth and even.
- Make your crumbs with a food processor for uniform texture, or use a heavy rolling pin in a sealed bag for a no-tech approach.
- Stabilize whipped cream with a little powdered sugar or use a store-bought stabilized product if you want firmer filling.
- Prep assembly components in advance. Keep crusts chilled while you whip the filling to speed up assembly.
- For quicker clean up, line your prep area with parchment paper and wipe bowls with a damp cloth between steps.
These shortcuts save time and keep baking calm and inviting for everyone helping in the kitchen.
Variations
- Chocolate graham crust: Add 1 tablespoon cocoa powder to the crumbs for a chocolatey base. It pairs beautifully with the red hat decoration.
- Fruit twist: Fold in 1/3 cup finely chopped strawberries or raspberries for a fresh burst. Use less powdered sugar if berries are sweet.
- No-bake vanilla: Use vanilla pudding mix dissolved in milk folded into the cream cheese for a different but kid-friendly filling.
- Lighter option: Substitute light cream cheese and low-fat whipped topping for lower calories. Texture will be slightly different but still delicious.
- Gluten-free: Use gluten-free graham crackers or almond meal for the crust. Press firmly to get a stable base.
These options help you adapt the recipe to picky eaters, dietary needs, and seasonal produce.
FAQ
Q: Can I make these ahead of time?
A: Yes. Make them a day ahead and chill. The flavors deepen and the texture stays great. Add any non-edible gnome decorations right before serving.
Q: Can I freeze the mini cheesecakes?
A: You can freeze them up to 1 month. Freeze on a tray first so they do not stick together, then transfer to an airtight container. Thaw in the fridge overnight.
Q: My filling got a little runny. What happened?
A: The whipped cream may have been overmixed or not stabilized. Next time, fold gently and consider using a stabilizer like a small amount of powdered sugar or a commercial stabilizer.
Q: Can kids help with this recipe?
A: Absolutely. Kids can press the crust, spoon filling, and do most of the decorating. Keep sharp tools and food coloring under supervision.
Q: How do I make the red hat look neat?
A: Use a small piping bag or a toothpick to shape the hat. Start with a small amount of gel coloring and build color slowly. A steady hand and a little practice go a long way.
These questions come from years of making family desserts. I include practical solutions so you can feel confident.
Kitchen Safety and Tips for Success
I always wash hands before and during prep when swapping tasks. Clean counters and use separate utensils for raw and finished foods. When working with dairy, keep items chilled until you mix them.
If you are serving to a crowd, label any items that contain common allergens like nuts, gluten, or dairy. This keeps everyone safe and included.
A small thermometer is handy if you are unsure about temperatures when baking or chilling larger desserts. For these minis, temperature cues are more about texture than exact degrees.
About Me
I am Lily, a home baker and mom who has been creating family desserts for more than 12 years. My kitchen priorities are flavor, simplicity, and moments together. I test recipes on kids, grandparents, and friends to make sure they taste great and are easy to follow.
My recipes focus on approachable technique and clear steps so you can relax and enjoy the process. I do a lot of make-ahead tricks and kid-friendly swaps to help you feel ready and proud when you bring dessert to the table.
Conclusion
Thank you for making these little gnome mini cheesecakes part of your kitchen story. If you want a festive variation for a different holiday, I like the playful twist in the Grinch Mini Cheesecakes recipe for a fun theme. For another cute gnome treat using brownies, check the Easy Brownie Bite Gnomes tutorial to expand your holiday baking ideas.
May your kitchen be full of warm smells, helpful hands, and goûts of laughter. Keep these minis in your recipe rotation and enjoy how they bring people together.
Gnome Mini Cheesecakes
Ingredients
For the filling
- 8 oz cream cheese, softened Let it sit at room temperature for about 30 minutes.
- 1/2 cup powdered sugar Sift if you notice any clumps.
- 1 teaspoon vanilla extract Use pure vanilla if you have it.
- 1 cup whipped cream Use stabilized whipped cream for better texture.
For the crust
- 1/2 cup graham cracker crumbs Pulse whole crackers in a food processor.
- 2 tablespoons unsalted butter, melted Warm slightly to mix fully with crumbs.
For decoration
- red food coloring Gel coloring gives brighter color.
- chocolate wafers or cookies For decoration as gnome eyes.
- miniature gnome figures Optional for presentation.
Instructions
Preparation
- In a mixing bowl, beat the softened cream cheese until smooth.
- Gradually add powdered sugar and vanilla extract, mixing until well combined.
- Gently fold in the whipped cream with a spatula.
- In another bowl, combine graham cracker crumbs and melted butter; press this mixture into the bottom of small dessert cups.
- Spoon the cream cheese mixture over the crusts and smooth the tops.
Decoration
- For decoration, add drops of red food coloring for a gnome hat design on top.
- Decorate with chocolate wafers or cookies.
Chilling
- Chill in the refrigerator for at least 2 hours before serving.