The kitchen smells like warm vanilla and a hint of buttered crumbs. You can hear little feet padding across the floor and the soft clink of plastic pails on the counter. That mix of noise and scent tells me we are about to make a memory.
These Mini Sand Pail Pudding Cups are simple and joyful. They are the kind of recipe that brings kids into the kitchen, keeps things tidy, and delivers a smile at a family party. Today I will walk you through each step so you can feel confident, even if you are making this for the first time.
Why this works
This recipe works because it balances ease with delight. The instant pudding sets quickly, so you get tasty results without a lot of hands-on time. Kids can help with the fun parts, like layering crumbs and placing gummy worms.
It saves time on busy afternoons. You mix, chill a little, assemble, and you are done. The small pails keep portions under control and add a playful touch to any gathering.
Family-style servings and single-serve cups both shine here. Prepare a big bowl of pudding and a tray of pails, and let everyone assemble or finish their own. It makes cleanup easier and lets little ones feel proud of their creations.
Process Overview
“This is where the magic happens—when the aroma fills the kitchen.”
Start by preparing the pudding. Chill it briefly so it sets a bit before you layer it. The ready-made crumbs make an instant beach, and the gummy worms do the rest.
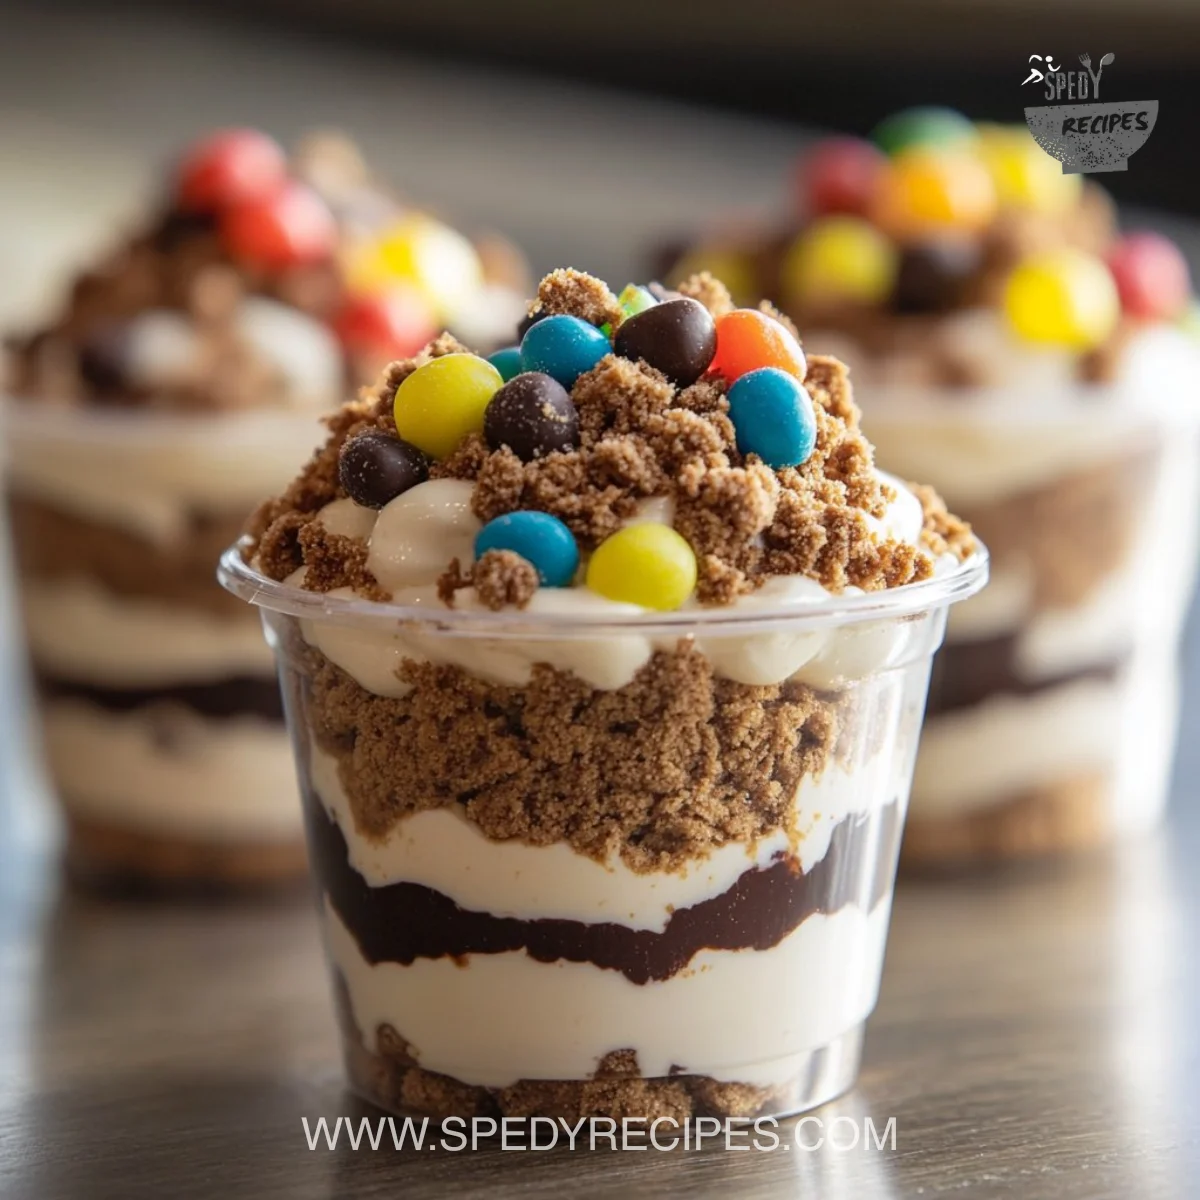
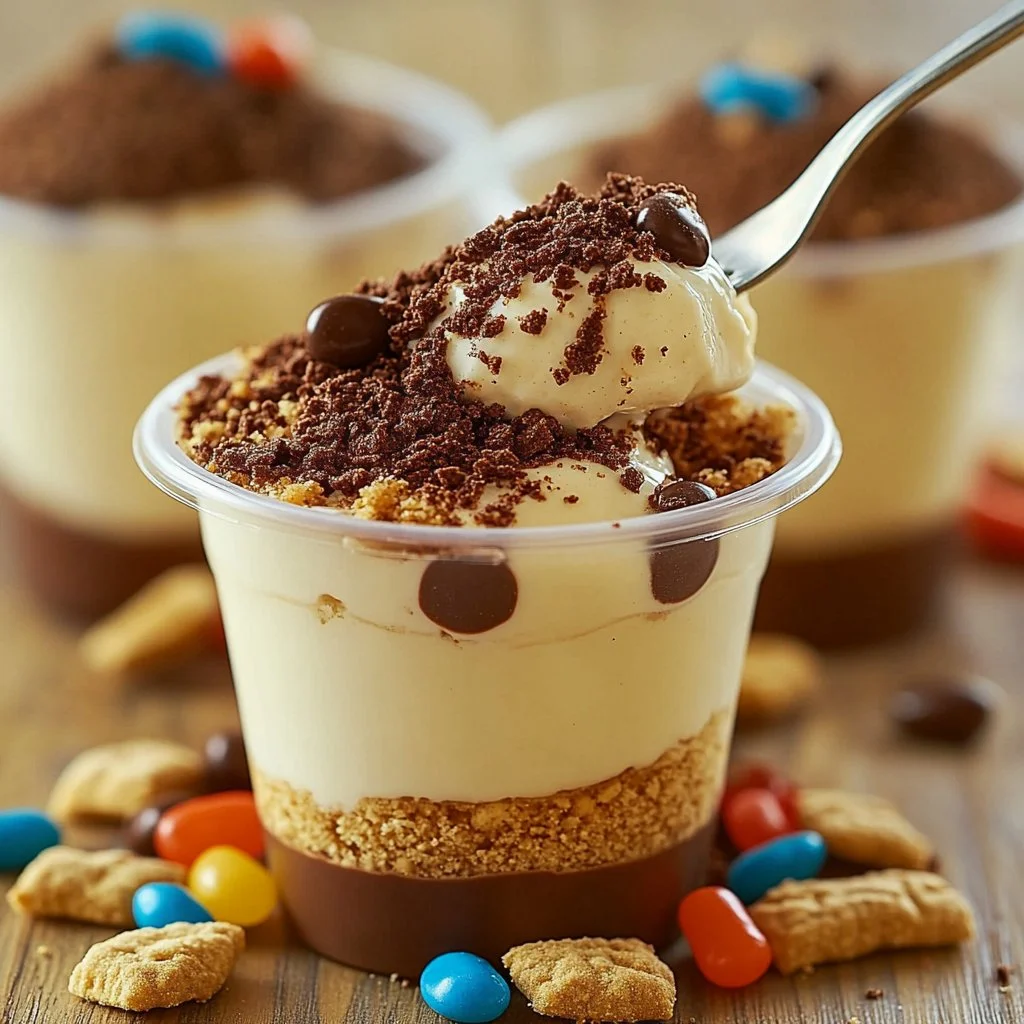
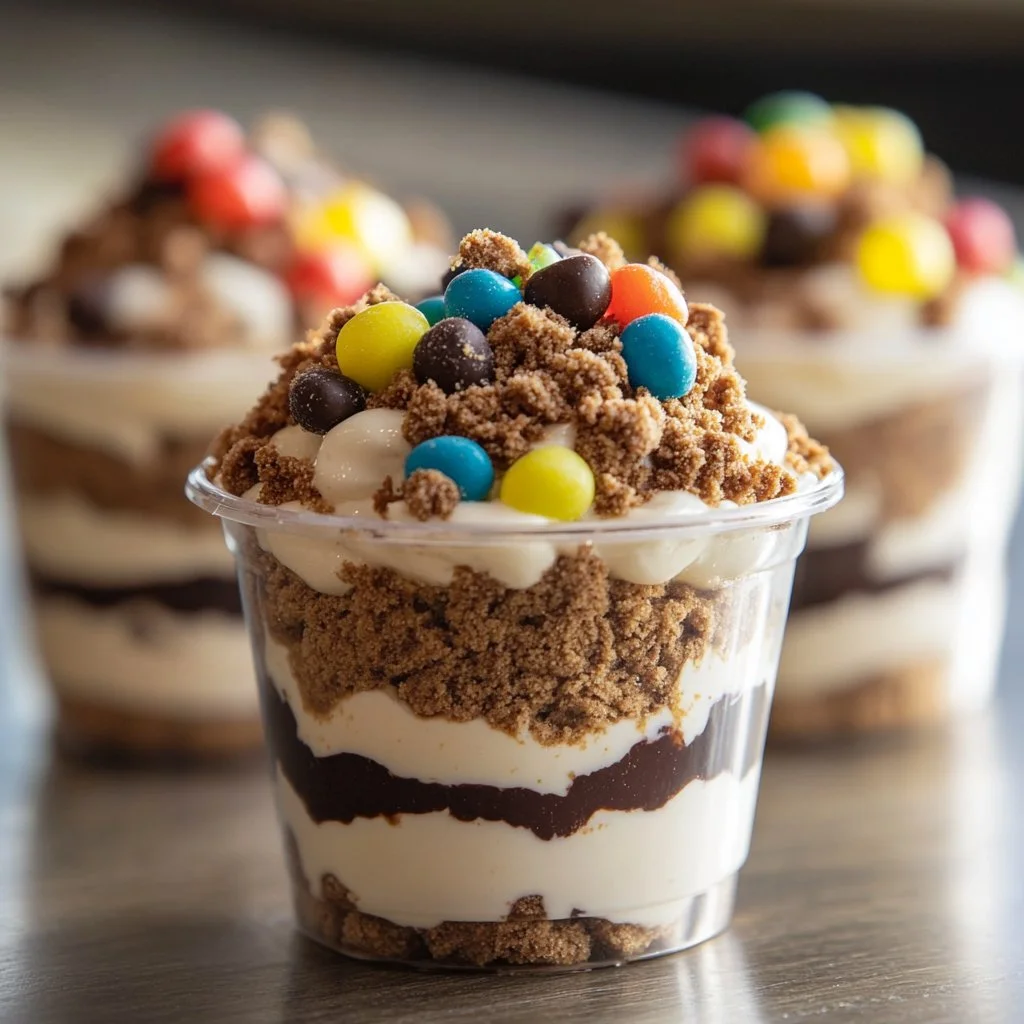
Assembly is fun and forgiving. There is no perfect technique. Thin layers of crumbs, followed by pudding, repeat until the pail looks like a little shore. Finish with chocolate sand for contrast and a candy worm to bring a smile.
This is a recipe that scales easily. Make a few for a small family picnic or a dozen for a birthday party. Either way, it stays simple and cheerful.
Ingredients
- 1 package instant pudding mix (vanilla or chocolate)
- Lily tip: Pick vanilla for a classic sand look or chocolate for a richer cup. Both are kid favorites.
- 2 cups milk
- Lily tip: Use whole milk for creamier pudding. For a lighter option, low-fat milk works fine too.
- Crushed graham crackers
- Lily tip: Pulse whole crackers in a food processor for uniform crumbs. Add a little melted butter for a firmer base if you like.
- Chocolate sand (crushed cookies or chocolate crumbs)
- Lily tip: Use chocolate sandwich cookies or chocolate wafer cookies. Crush them finely so they mimic sand well.
- Small plastic beach pails
- Lily tip: Choose sturdy pails that are food-safe. Rinse them well before using and place on a baking tray for easy transport.
- Gummy worms or other candy for decoration
- Lily tip: Try gummy fish, colorful sprinkles, or little cookie stars for variety. Keep allergies in mind and offer alternatives.
Lily’s Personal Notes on Ingredients
I keep extra graham crackers on hand and a small bag of chocolate cookies. They store well and let me whip this up on short notice. I also recommend buying a pack of pails that match your party theme. They are inexpensive and make the dessert feel special.
Directions
- In a mixing bowl, whisk together the pudding mix and milk until smooth.
- Encouragement: Whisk briskly so you have a lump-free, silky pudding. Kids can help with stirring under supervision.
- Refrigerate for about 5 minutes until it thickens.
- Encouragement: Use this short chill to prep your crumbs and decorations. This pause keeps things calm and organized.
- In small plastic beach pails, layer the pudding mixture with crushed graham crackers to create a ‘sand’ effect.
- Encouragement: Start simple. A thin base of crumbs keeps the pudding from sliding, and it adds great texture.
- Start with a thin layer of crumbs, then a dollop of pudding, and repeat.
- Encouragement: Build 2 to 3 layers depending on pail size. It looks great when you alternate colors or textures.
- Top with chocolate sand and add gummy worms for decoration.
- Encouragement: Be playful. A worm peeking out of the sand will get giggles every time.
- Serve chilled and enjoy at your beach-themed party!
- Encouragement: Keep them chilled until serving for the best texture. Hand one to each child and watch the smiles.
These numbered steps keep assembly quick and organized. If you make a tray of cups, arrange them in the fridge so they stay cool until guests arrive.
Serving
Serve these mini pails family-style or individually. If you are serving a larger group, place pails on a large tray with extra cookies and gummy candies on the side. Let guests add their own finishing touches.
For families, set a small station at the table. Offer spoons, napkins, and a small bowl of extra crumbs. Little hands love to top their own cups, and it becomes an activity as much as a dessert.
If you plan to take these to a picnic, keep them chilled in a cooler and serve right from the pails. The plastic pails are portable and prevent spills during transport.
Storage
Refrigerate leftover pudding cups in an airtight container or cover the pails with plastic wrap. They keep well for up to 2 days.
If the crumbs soften over time, refresh the top layer with a few extra crushed cookies before serving. That gives back some crunch.
Do not freeze the assembled cups. Pudding changes texture when frozen and will not be as creamy after thawing.
If you make pudding ahead of time, store it in the fridge for up to 24 hours before assembly. Give it a quick whisk before layering to restore smoothness.
For transport, place the pails on a flat tray and keep them chilled in a cooler with ice packs. This keeps the pudding set and the candies intact.
Kitchen Notes
- Use a hand whisk or electric mixer to make the pudding extra smooth and quick.
- Crush graham crackers in a zip-top bag with a rolling pin if you do not have a food processor.
- Make the pudding up to a day ahead and store in the fridge to save party prep time.
- Use disposable pails for easy cleanup when hosting a large group.
- Keep extra gummy candies and cookie crumbs in a small bowl for topping at the table.
Variations
- For picky eaters: Make half the cups with vanilla pudding and the other half with chocolate. Label them with stickers so kids can pick their favorite.
- Dairy-free option: Use instant pudding mix marked dairy-free and substitute with a plant-based milk. Check labels carefully.
- Healthier twist: Use low-sugar pudding mix and crushed whole grain crackers. Add fresh fruit skewers instead of candies for decoration.
- Oreo sand: Swap chocolate sandwich cookies for the chocolate crumbs and use cream-colored candies as shells for contrast.
- Adult version: Add a layer of coffee-soaked ladyfingers between crumbs and pudding for a grown-up flavor.
FAQ
Q: Can I make the pudding from scratch instead of using instant pudding?
A: Yes. You can make homemade pudding. Allow it to cool to room temperature and then chill briefly before assembling the cups. Keep in mind scratch pudding needs more hands-on time.
Q: How many mini pails does this recipe make?
A: It depends on pail size. For small 6-ounce pails, one package of instant pudding and 2 cups milk will fill about 6 to 8 cups. For larger pails, plan on more pudding.
Q: Can I prepare everything the night before?
A: You can prepare the pudding and crumbs the night before. Do final assembly the next day for the best texture. Wait to add gummy candies until just before serving.
Q: Are the plastic beach pails reusable?
A: Many pails are reusable. If they are food-safe and washable, you can clean and reuse them. Rinse well and wash in warm soapy water between uses.
Q: What if a child has a candy allergy?
A: Offer allergy-safe alternatives like fresh fruit, yogurt chips, or small cookie shapes. Always check labels and communicate with parents ahead of time if you are serving at a group event.
Conclusion
I hope this recipe becomes one your family asks for again and again. It is a simple, playful dessert that brings together busy schedules and joyful moments.
If you want a version that uses Golden Oreos and has detailed photos, see Golden Oreo Sand Pudding (easy summer dessert cups) for another take on the idea.
For an inspiration-filled step-by-step guide that includes a slightly different crumb technique, check out Beach Sand Pudding Dessert – Mostly Homemade Mom.
Thank you for spending this time with me in the kitchen. Gather the family, hand out little pails, and enjoy the sounds, smells, and laughter that come with making these together.
Mini Sand Pail Pudding Cups
Ingredients
Pudding Base
- 1 package instant pudding mix (vanilla or chocolate) Pick vanilla for a classic sand look or chocolate for a richer cup.
- 2 cups milk Use whole milk for creamier pudding or low-fat milk for a lighter option.
Crust and Toppings
- 2 cups crushed graham crackers Pulse whole crackers in a food processor for uniform crumbs. Add a little melted butter for a firmer base if you like.
- 1 cup chocolate sand (crushed cookies or chocolate crumbs) Use chocolate sandwich cookies or chocolate wafer cookies. Crush them finely.
- 6 pieces small plastic beach pails Choose sturdy pails that are food-safe.
- 1 cup gummy worms or other candy for decoration Consider using alternatives for allergies.
Instructions
Preparation
- In a mixing bowl, whisk together the pudding mix and milk until smooth.
- Refrigerate for about 5 minutes until it thickens.
Assembly
- In small plastic beach pails, layer the pudding mixture with crushed graham crackers to create a 'sand' effect.
- Start with a thin layer of crumbs, then a dollop of pudding, and repeat.
- Top with chocolate sand and add gummy worms for decoration.
- Serve chilled and enjoy at your beach-themed party!