Strawberry shortcake baking day feels like a warm hug. The smell of butter and sugar melting together fills the kitchen. When the oven timer ticks, the whole house leans in and listens.
I love the soft hiss of strawberries releasing their juices as they bake. It brings back summer afternoons and little hands reaching for crumbs. This recipe makes a pan of bars that travel easily to picnics, school events, and family dessert tables.
If you want a few quick ideas to pair with these bars, I sometimes reach for simple sides from easy Trader Joe’s meal ideas to keep the meal relaxed and kid friendly.
Why this works
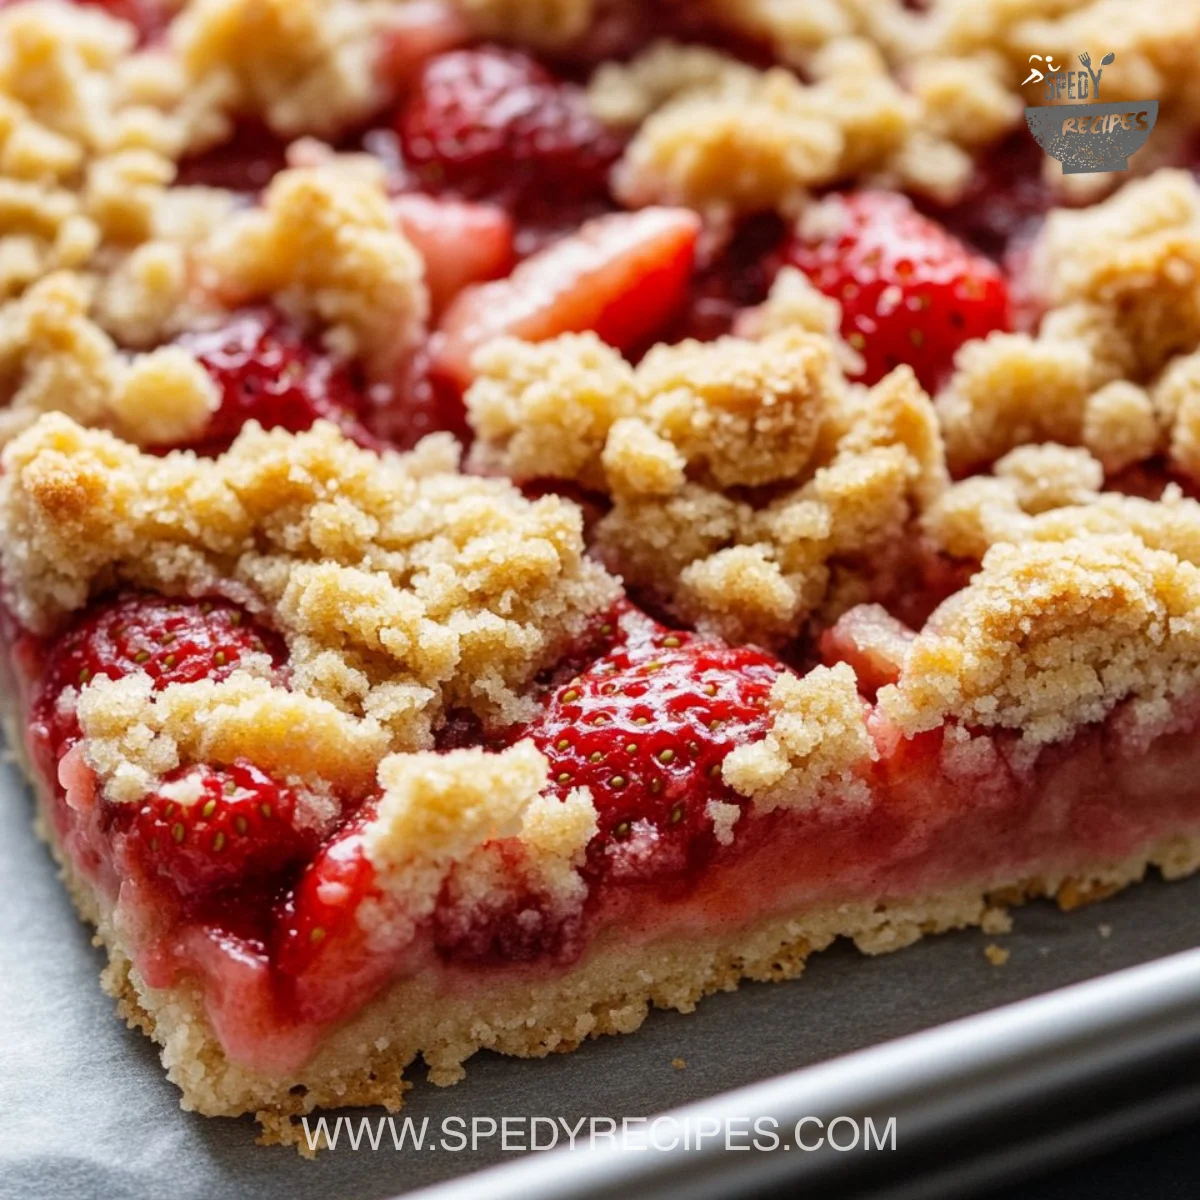
These strawberry shortcake bars hit the sweet spot between fresh fruit and buttery crumble. The base bakes into a sturdy yet tender crust. The fruit layer stays bright and juicy. The crumb topping gives you crunchy bites between soft strawberries.
This recipe saves time without sacrificing flavor. Instead of piping layers and whipping heavy creams, you make one pan. That one-pan approach makes serving easier and cleanup faster. It is a great choice for busy weeknights and large family gatherings.
For families, the bars are forgiving. Little ones can help chop strawberries or sprinkle the crumb topping. The recipe is reliable whether you bake for a crowd or for a quiet family dessert. I also like pairing this dessert with simple drinks and sides like some refreshing juice ideas from refreshing juice recipes when I want a lighter finish to a meal.
Process Overview
“This is where the magic happens—when the aroma fills the kitchen.”
The process is straightforward and broken into three parts. First, you make a buttery crumb base and bake it just until it sets. Second, you toss fresh strawberries with a touch of sugar and a little flour to thicken the juices. Third, you add the fruit, crumble the remaining dough on top, and bake until golden.
Timing is gentle. The first bake firms the crust so it holds the fruit. The second bake gives the berries time to soften and bubble, but not turn to jam. The final glaze is optional and quick, so you can add a pretty finish without more baking.
If you enjoy learning from different kinds of prep work, I often compare careful fruit handling to techniques in seafood recipes like baby squid cooking and nutrition recipes where gentle treatment keeps texture intact.
Ingredients
-
1 ¾ cups (250g) all-purpose flour
Tip: Spoon the flour into your measuring cup and level it. If you weigh, 250g is exact and more consistent. -
⅓ cup (65g) granulated sugar
Tip: Use fine granulated sugar so it dissolves well in the shortbread base. -
3 tablespoon (45g) packed light brown sugar
Tip: Pack the brown sugar into the tablespoon so the bars get that caramel hint. If the brown sugar is hard, break it up with a fork before measuring. -
¾ cup (170g) salted butter, melted (or add a pinch of salt if using unsalted butter)
Tip: If you use unsalted butter, add 1/8 teaspoon salt. Melt the butter and cool slightly so it blends easily with the dry ingredients. -
1 teaspoon (5ml) pure vanilla extract
Tip: Use a good quality vanilla. It lifts the whole flavor profile even in small amounts. -
3 cups (400g) chopped fresh strawberries (each strawberry quartered then halved to yield about 8 pieces per strawberry)
Tip: Choose ripe but firm berries. Overripe strawberries will make the filling too watery. -
2 tablespoon (25g) granulated sugar
Tip: Toss the fruit in this sugar and let it sit 10 minutes to draw out juices. That step enhances the flavor. -
1 tablespoon (9g) all-purpose flour
Tip: The flour helps thicken the strawberry juices so the bars slice neatly. -
½ cup (60g) powdered sugar
Tip: Sift powdered sugar if it clumps. It makes a smooth glaze. -
1 tablespoon (15ml) light or heavy whipping cream
Tip: Use heavy cream for a richer glaze. Light cream works fine for a thinner finish. -
¼ teaspoon pure vanilla extract
Tip: Add this at the end to brighten the glaze. Taste and adjust by a tiny pinch if you like it more aromatic.
For tips on measuring and texture balance similar to other baked treats, I keep a reference like my banana pumpkin muffins recipe notes nearby when experimenting.
Directions
-
Preheat the oven to 350°F (175°C). Line an 8×8-inch square baking pan with parchment paper, leaving about a 2-inch overhang on each side for easy removal.
Encouragement: Taking this little step now makes removing the bars later so much easier. You will be glad you did. -
In a medium bowl, combine the all-purpose flour, granulated sugar, brown sugar, and salt (if using unsalted butter). Mix thoroughly to eliminate any lumps, especially of brown sugar. Add the melted salted butter and vanilla extract to the dry ingredients and stir with a spoon until they start to come together, then use your fingertips to toss and form large crumbs. Take about two-thirds of this crumb mixture and press it evenly into the bottom of your prepared pan using floured hands and an offset spatula to smooth the surface. Bake for 15-20 minutes until the crust is lightly golden and set aside to cool slightly.
Encouragement: The crust won’t look finished yet, and that is perfect. Press gently and evenly for a solid base. -
In another bowl, mix together the chopped strawberries, granulated sugar, and all-purpose flour carefully to coat the fruit evenly. Spoon this strawberry mixture evenly over the slightly cooled baked crust layer in the pan.
Encouragement: Be gentle when spreading the berries so you keep the crumbs intact. This is a forgiving step. -
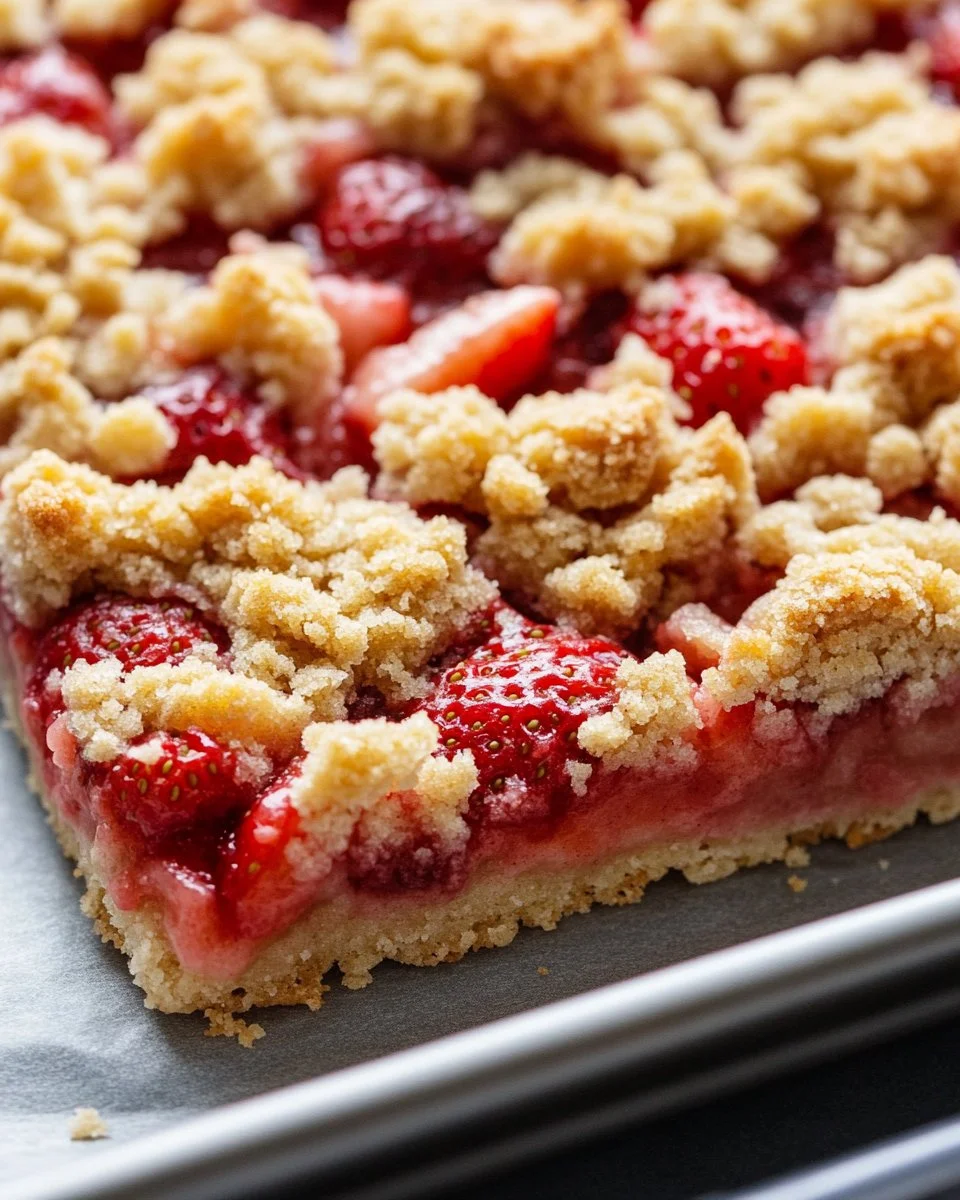
Crumble the remaining one-third of the crust mixture evenly on top of the strawberry layer. The strawberries will remain visible between crumbs. Bake again for 30-35 minutes until the strawberry juices are bubbling and the crumb topping turns golden brown. Remove from oven and let the bars cool completely in the pan.
Encouragement: Cooling is when the bars set. If you are impatient, a full hour at room temperature makes slicing much neater. -
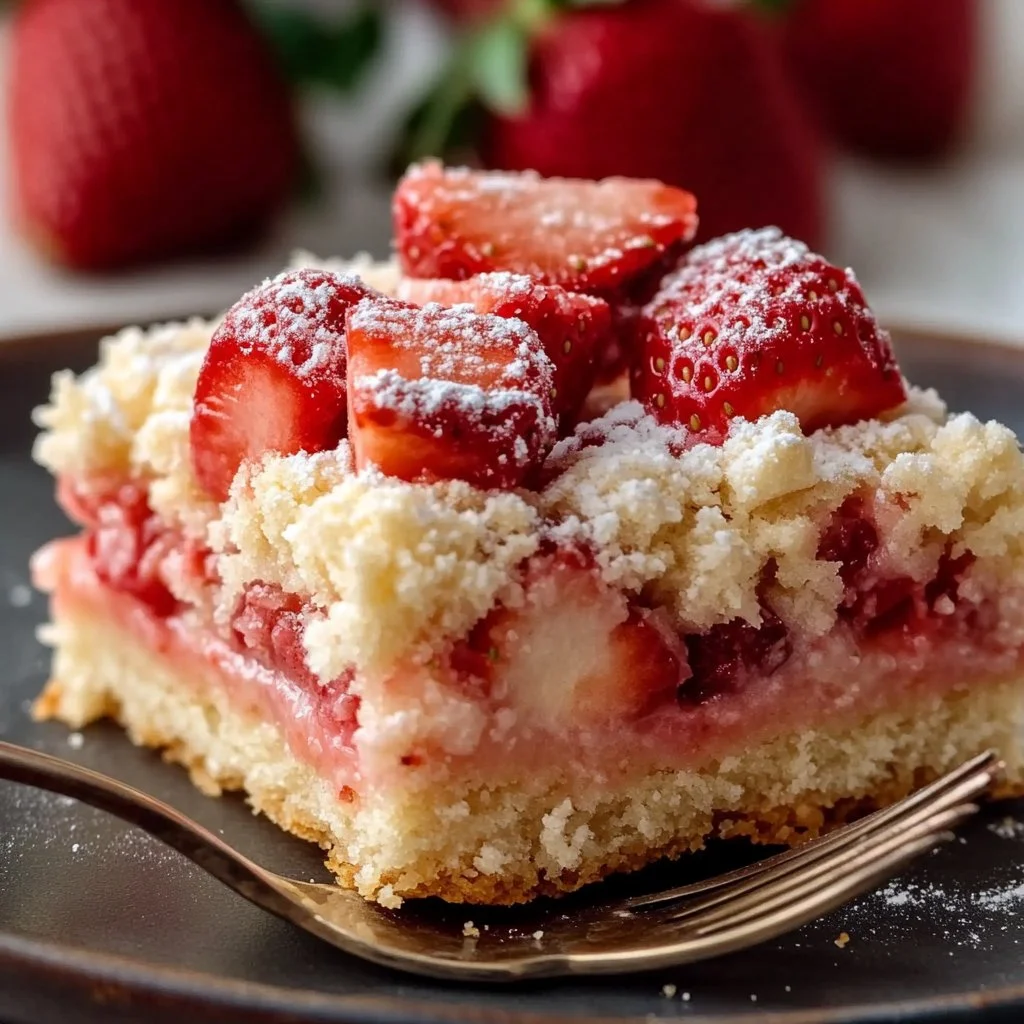
In a small bowl, whisk together the powdered sugar, cream, and vanilla extract until smooth. Drizzle this vanilla glaze evenly over the cooled bars. Once glazed, cut into 12 bars and serve.
Encouragement: The glaze is optional but it adds a pretty finish and a touch of sweetness that kids and grandparents love.
If you want extra tips on working with fruit fillings and thickening, I often consult my guide for canned fruit and filling techniques like the canned apple pie filling guide to compare thickening approaches. This helps especially when your berries are on the juicier side.
Serving
Serve these bars family-style on a large board or a big platter. Keep the parchment overhang to lift the whole batch from the pan. Cut into 12 bars and arrange them in a single layer so everyone can reach.
For a dessert buffet, place small bowls of whipped cream, vanilla ice cream, and extra fresh berries nearby. Let family members dress their bar how they like. Kids love adding a dollop of cream. Adults often prefer a scoop of vanilla ice cream to balance the buttery crumb.
These bars travel well. Wrap individual bars in parchment or wax paper for a picnic or potluck. They hold up better than layered cakes and stay moist for longer.
Storage
Room temperature: Keep bars covered at room temperature for up to 24 hours. They are best the same day they are baked.
Refrigerator: Store in an airtight container for 3 to 4 days. If you glaze them, the glaze helps keep the top from getting sticky in the fridge.
Freezer: Wrap bars individually and freeze for up to 2 months. Thaw in the fridge overnight and bring to room temperature before serving.
Reheat tips: Warm a bar in a 300°F oven for 6 to 8 minutes if you want that just-baked feeling. A quick microwave zap of 10 to 15 seconds brightens flavors, but do not overheat or the crumb may get chewy.
Food safety note: If your kitchen is warm, refrigerate after two hours. Fresh berries can attract bacteria if left too long at room temperature.
Kitchen Notes
Shortcuts and smart swaps
- Use frozen strawberries that have been thawed and excess liquid drained if fresh berries are not available. Pat them gently dry.
- Make the crumb base ahead and freeze it for future use. Thaw in the fridge, then press and bake.
- Swap light brown sugar with dark brown sugar for a deeper molasses note. Reduce granulated sugar by a teaspoon if you like less sweetness.
- Use a hand masher to press crumbs into the pan evenly if you do not have an offset spatula.
- Prep the strawberries while the crust bakes. That saves hands-on time and keeps the workflow calm.
These notes come from baking these bars many summers. Small habits like pre-measuring and prepping fruit make the whole experience smoother for busy families.
Variations
- Lemon-Infused: Add 1 teaspoon lemon zest to the crumb base and 1 teaspoon to the glaze for a zesty lift. This brightens the strawberries beautifully.
- Berry Mix: Substitute half the strawberries with raspberries or blueberries for mixed berry bars. Watch for smaller berries to add extra flour to thicken juices.
- Gluten-Free: Use a cup-for-cup gluten-free flour blend and add 1/4 teaspoon xanthan gum if your blend lacks structure. The texture will be slightly different but still delicious.
- Lower Sugar: Reduce granulated sugar in the base by 1 tablespoon and skip the glaze. Let sweet toppings like a light whipped cream add the extra sweetness.
- Vegan Option: Use vegan butter in place of dairy butter and coconut cream instead of dairy cream in the glaze. Chill the mixture if needed to achieve the right consistency.
These tweaks help you tailor the recipe for picky eaters, special diets, or just to try something new.
FAQ
Q: Can I use frozen strawberries?
A: Yes. Thaw them first and drain excess liquid by pressing gently in a sieve. Pat dry with paper towels before tossing with sugar and flour. This prevents a soggy base.
Q: Why did my bars become soggy?
A: Overripe berries or too much sugar can release extra juice. Let berries sit after tossing with sugar so they macerate, then drain any excess liquid before adding to the crust. Also, ensure the crust is baked long enough in the first stage.
Q: Can I skip the glaze?
A: Absolutely. The glaze adds a sweet finish and nice presentation, but the bars are tasty without it. For a dairy-free version, skip or use a plant-based drizzle.
Q: How do I get neat slices?
A: Chill the bars for an hour before slicing. Use a sharp knife warmed under hot water and wiped dry between cuts. This gives clean edges.
Q: Can I double the recipe?
A: Yes. Use a 9×13-inch pan for a doubled batch, but watch bake times carefully. You may need additional minutes for the center to set. Start checking at the lower end of suggested bake time.
Conclusion
Thank you for baking with me today. I hope these strawberry shortcake bars become a go-to treat for your family picnic or cozy dessert night. When the oven warms the house and the berries bubble, you will know you made something simple and special.
If you want another take on a crunchy shortcake style, I like this version from EASY Strawberry Shortcake Bars – Scientifically Sweet for comparison. For a fun, crunchy twist, see the inspiration behind these flavors at Strawberry Shortcake Crunch Bars | The Domestic Rebel.
Happy baking and warm summer memories,
Lily

Strawberry Shortcake Bars
Ingredients
For the Crust
- 1.75 cups all-purpose flour Spoon the flour into your measuring cup and level it.
- ⅓ cup granulated sugar Use fine granulated sugar to dissolve well in the shortbread base.
- 3 tablespoon packed light brown sugar Pack brown sugar into tablespoon for caramel hint.
- ¾ cup salted butter, melted If using unsalted butter, add 1/8 teaspoon salt.
- 1 teaspoon pure vanilla extract Using good quality vanilla lifts the flavor.
For the Strawberry Filling
- 3 cups chopped fresh strawberries Choose ripe but firm berries.
- 2 tablespoon granulated sugar Toss the fruit in this sugar to draw out juices.
- 1 tablespoon all-purpose flour Helps thicken the strawberry juices.
For the Glaze
- ½ cup powdered sugar Sift if clumps appear for smooth glaze.
- 1 tablespoon light or heavy whipping cream Use heavy cream for a richer glaze.
- ¼ teaspoon pure vanilla extract Add this at the end to brighten the glaze.
Instructions
Preparation
- Preheat the oven to 350°F (175°C). Line an 8×8-inch square baking pan with parchment paper.
- In a medium bowl, combine flour, granulated sugar, brown sugar, and salt. Mix thoroughly.
- Add melted butter and vanilla extract, mixing until crumbs form.
- Press about two-thirds of the mixture into the bottom of the prepared pan. Bake for 15-20 minutes until lightly golden.
Making the Filling
- In another bowl, mix chopped strawberries, granulated sugar, and flour until fruit is coated.
- Spoon this strawberry mixture over the slightly cooled crust.
Baking
- Crumble the remaining crust mixture over the strawberries. Bake again for 30-35 minutes until juices bubble and topping is golden.
- Remove from the oven and let cool completely in the pan.
Adding the Glaze
- Whisk together powdered sugar, cream, and vanilla in a small bowl until smooth.
- Drizzle the glaze over cooled bars, then cut into 12 bars and serve.