
There’s nothing quite like the sound of laughter echoing through the house, mingling with the sweet scent of apples and spices baking in the oven. It reminds me of childhood weekends spent in my grandmother’s kitchen, where we would often gather as a family. The joy of cooking together was palpable, and the warm, inviting aroma of her famous pies always had a way of bringing us to the table. Today, I want to share a recipe that captures this sense of comfort and togetherness—Mini Apple Pies. These little wonders are perfect for busy weeknights but feel special enough for gatherings. So, let’s dive into this delightful recipe that every home cook can master.
Why This Mini Apple Pies Feels Like Home
Mini Apple Pies are more than just a dessert; they carry the warmth of home and family. Each tiny pie is a perfect bite of nostalgic flavor that takes you back to cherished moments. They come together quickly, allowing us to indulge in that cozy feeling without spending hours in the kitchen.
What’s magical about these mini pies is their ability to please everyone. From the youngest in the family to the most discerning foodies, there’s something delightful about biting into a warm, flaky crust filled with sweet, spiced apples. It’s the perfect blend of comfort and joy, and it carries the essence of family connection right to your dinner table.
Savoring these pies at the end of a meal feels like being wrapped in a warm hug. The combination of sweet and tart apples surrounded by buttery crust reminds me of times shared with loved ones. And if you have kids, they’ll love helping to fill and crimp the edges of these adorable pies, making it a delightful cooking experience together.
How to Make Mini Apple Pies, The Heartwarming Way
Making Mini Apple Pies is a simple process that will have your kitchen filled with delightful smells. You don’t have to be a master chef to create this comforting treat, and I promise it’s easier than it looks. The process incorporates simple steps that allow you to create something beautiful and delicious—with a lot less stress than you might imagine.
When you start to prep, one of the best cues that everything is on track is the aroma wafting through the kitchen. Apples caramelizing, spices mingling—it’s a sensory experience that brings everyone in for a taste test.
Let’s break down the ingredients and steps to help you create the mini apple pie magic at home.
Ingredients You’ll Need
Gather these straightforward, flavorful essentials for your Mini Apple Pies:
- 2 medium-sized Apples (peeled, cored, and diced)
- ⅓ cup Brown Sugar
- 1 tsp Ground Cinnamon
- ¼ tsp Ground Nutmeg
- ¼ tsp Allspice
- ¼ tsp Ground Ginger
- Pinch of Salt
- 1 tbsp Unsalted Butter
- 1 tsp Vanilla Extract
- 1 tbsp Cornstarch Slurry
- 1 Package of Premade Pie Dough (contains 2 crusts)
- All-purpose Flour (for dusting)
- 1 Beaten Egg (for egg wash)
- 1 tbsp Milk, Cream, or Water (for egg wash)
- Additional Coarse Brown Sugar (for sprinkling)
Feel free to experiment with what you have on hand. If you’re short on an ingredient, don’t stress! This is about creativity, not perfection.
Step-by-Step Directions
Let’s get those mini pies into the oven! Follow these easy steps, and you’ll have delicious treats in no time.
Preheat Your Oven: Start by preheating your oven to 375°F (190°C). The right temperature is crucial for that perfect golden crust.
Prepare the Filling: In a large bowl, combine the diced apples, brown sugar, cinnamon, nutmeg, allspice, ginger, and salt. Toss everything until the apples are well-coated. This is where the magic begins—let the spices work their wonders!
Add Butter and Vanilla: Melt the unsalted butter in a small pan over low heat, then stir in the vanilla extract. Mix this melted goodness into your apples. The butter adds a richness that brings all the flavors together beautifully.
Thicken Your Filling: Stir in the cornstarch slurry. This helps to thicken the filling as it cooks, ensuring that your pies don’t get too runny.
Roll Out the Dough: On a lightly floured surface, roll out your premade pie dough. This is the fun part where you can involve the kids. Let them help with the rolling and cutting.
Cut the Dough: Use a round cutter or any glass to cut out circles in the dough. You’ll want these to be small enough to fit into your muffin tin. Aim for about 4 inches in diameter.
Fill the Cups: Grease a muffin tin and place the dough circles into the cups, leaving enough room for the mixture. Fill each cup generously with the apple mixture—don’t be shy!
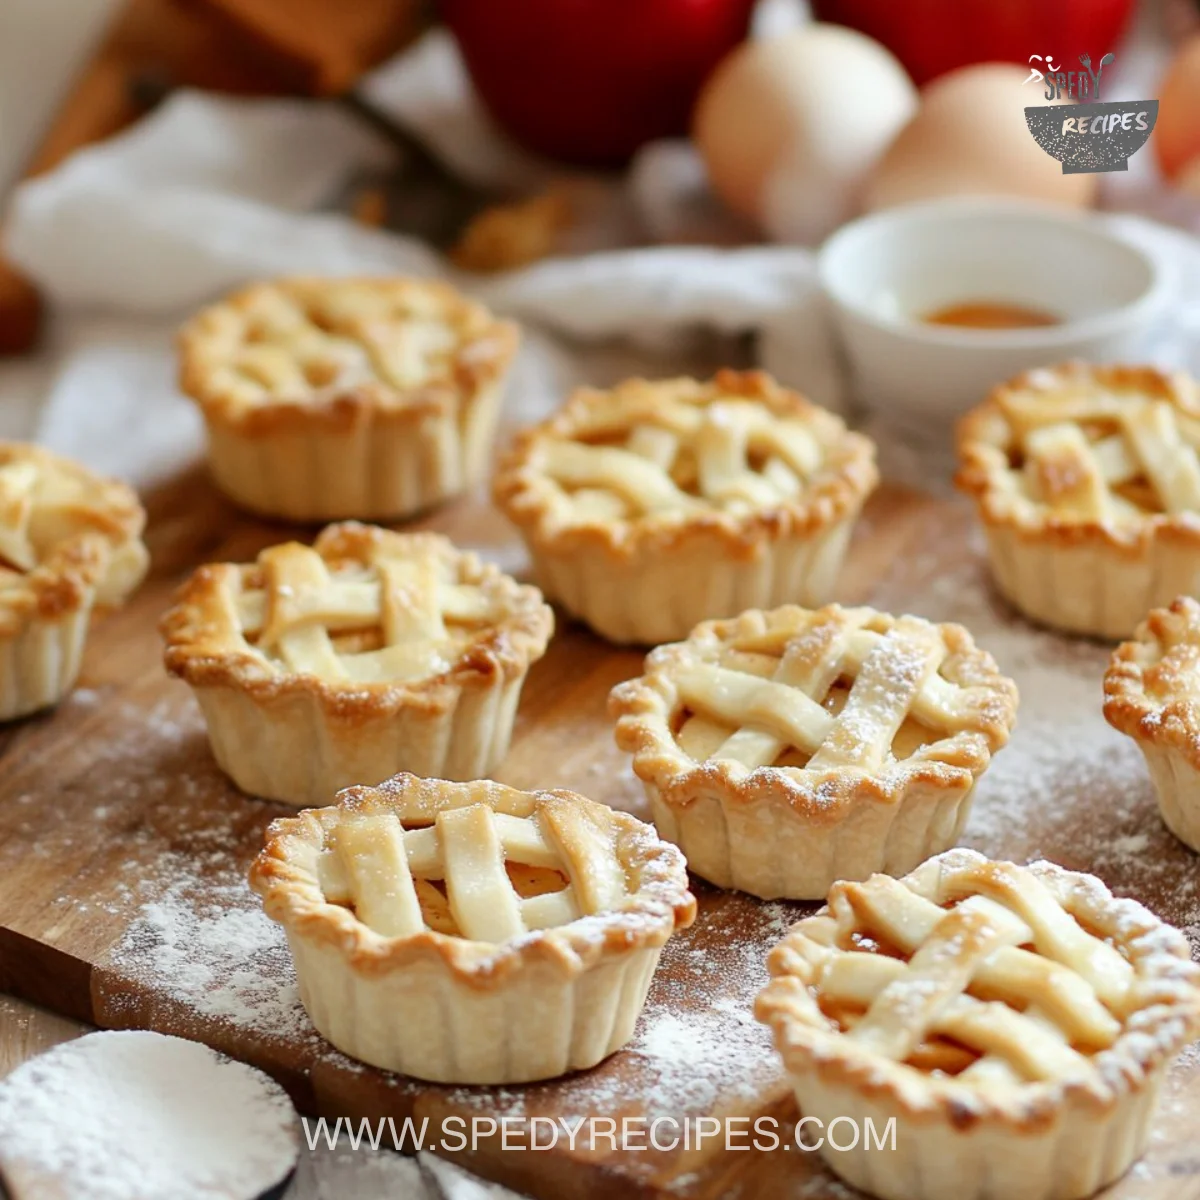
Top with Dough: Roll out another portion of dough and cut smaller circles or strips for the tops. You can crimp the edges or create a decorative lattice if you’re feeling fancy.
Egg Wash: Mix the beaten egg with milk, cream, or water to create an egg wash. Brush this over the tops of your pies to get a beautiful golden color while baking.
Sprinkle with Sugar: Finish with a sprinkle of coarse brown sugar on top to add a touch of sweetness and extra crunch.
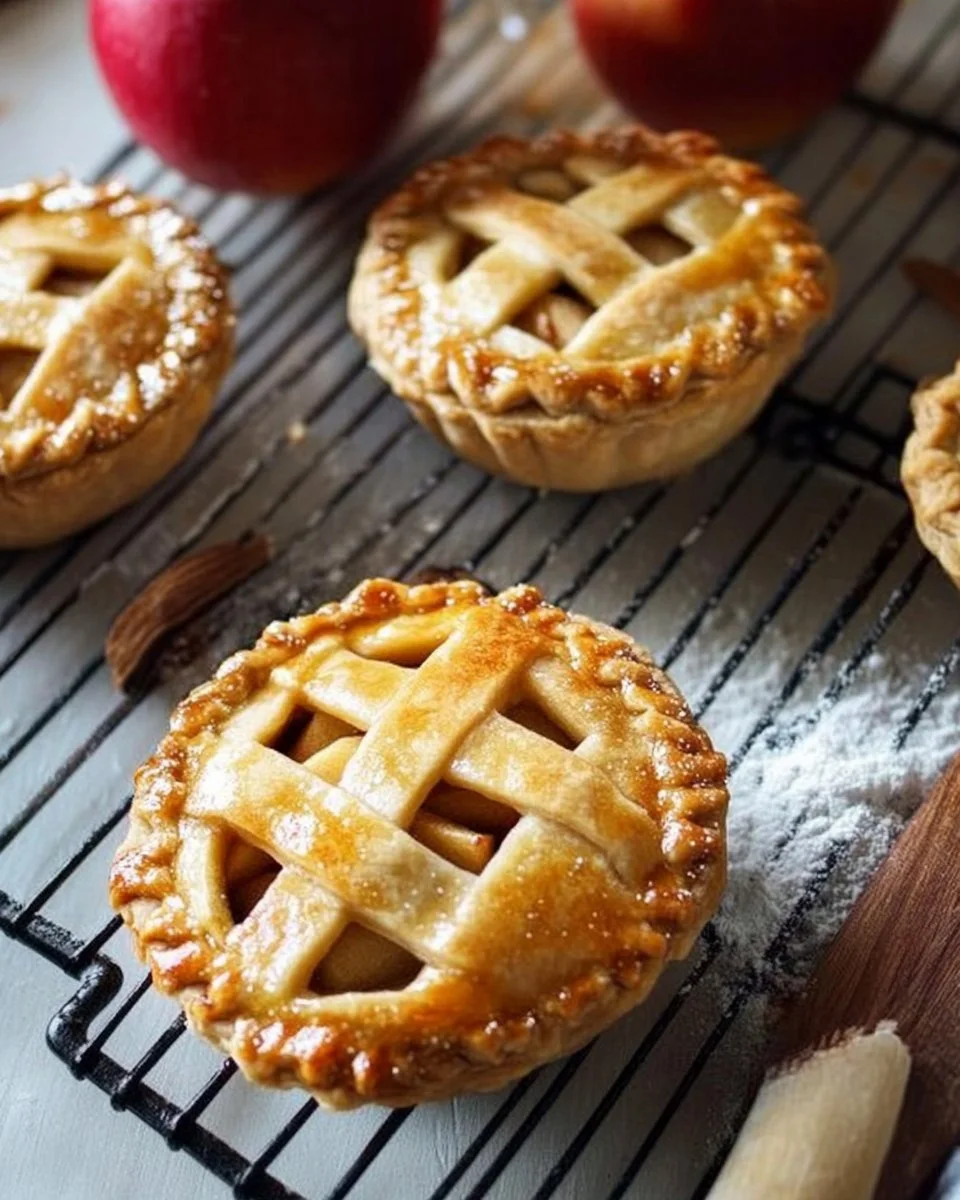
Bake: Place your muffin tin in the preheated oven and bake for about 20-25 minutes, or until the crust is golden brown and the filling is bubbling. Keep an eye on them—they’re harder to resist than you think!
Cool & Enjoy: Let the pies cool in the tin for a few minutes before transferring to a wire rack. This step allows the filling to set a little more, and you get that satisfying crunch when you take a bite.
Once cooled, you can enjoy these delicious bites just as they are or with a scoop of vanilla ice cream.
Serving Mini Apple Pies with Love
When it comes to serving Mini Apple Pies, I love to present them on a large platter at the center of our dining table. This creates a welcoming atmosphere where everyone can grab a pie and share their thoughts with one another.
If we’re feeling adventurous, I often serve them alongside whipped cream or a scoop of vanilla ice cream, which complements the warmth of the pie perfectly. My family loves adding a drizzle of caramel sauce or a dusting of powdered sugar for an extra touch of indulgence.
Every family member has their favorite way to enjoy these little treats. My youngest prefers them plain, while my partner loves the ice cream edition. The best part is watching the kids express their excitement as they dig in.

We often share stories at the table, recalling our favorite moments from earlier baking sessions or just enjoying the buzz of everyday life together. That connection—fueled by these delightful Mini Apple Pies—is what makes our meals truly special.
Storage & Reheat Tips
If you happen to have leftover Mini Apple Pies (though I doubt it!), storing them is easy and practical. Place them in an airtight container in the refrigerator for up to three days. If you want to save them for a later date, they also freeze beautifully. Just wrap each pie snugly in plastic wrap and store them in freezer-safe bags.
When you’re ready to enjoy them again, the microwave works for a quick snack, but if you want that fresh-out-of-the-oven warmth, preheat your oven to 350°F (175°C) and bake them for 10-15 minutes. The crusts will regain their flaky texture, and the filling will get all warm and bubbly again.
My Kitchen Notes & Shortcuts
Here are a few tips I’ve learned from making Mini Apple Pies over the years:
- Apple Variety: Use a mix of sweet and tart apples, such as Honeycrisp and Granny Smith, for added depth in flavor.
- Make a Double Batch: If you’re going through the effort of making these sweet treats, consider doubling the batch. They freeze so well and make for quick desserts later.
- Involve the Kids: Get your children involved in stirring the filling and decorating the pies. It’s a great kitchen activity that strengthens family bonds.
- Experiment with Spices: Don’t be afraid to venture beyond traditional spices. A pinch of cardamom or a splash of lemon juice can add a wonderful twist to the filling.
- Crust Alternative: If you’re short on time, consider using phyllo dough instead of pie crust for a lighter, flaky version.
Family-Friendly Variations
The beauty of Mini Apple Pies is how flexible they are. Here are a few twists you might want to try:
- Berry Apple Mix: Add in a handful of fresh or frozen berries for a fun and colorful variation.
- Cinnamon Sugar Crust: Before baking, sprinkle cinnamon sugar on the crust for an extra layer of flavor.
- Nutty Crunch: Chop walnuts or pecans into the filling for a satisfying crunch.
- Lighter Version: Swap out the brown sugar for honey or maple syrup for a lighter sweetening option.
These variations help create a dish that reflects your family’s tastes while maintaining the traditional heart of apple pie.
FAQs About Mini Apple Pies
Can I make this ahead for a busy week?
Absolutely! Making these mini pies ahead of time is a great idea. Prepare the filling and the crust and store them separately in the fridge. You can assemble them right before baking.
What if I don’t have all the spices?
No worries! If you don’t have every spice, feel free to use what you have. A simple combination of cinnamon and sugar will still yield delightful pies.
Can these be made gluten-free?
Yes! You can use gluten-free pie dough available at most supermarkets, and that will work wonderfully in this recipe.
What to do if the filling is too runny?
If your filling turns out too runny, you can always add a bit more cornstarch to help thicken it. Just dissolve the cornstarch in a small amount of water before adding it to your mixture.
How do I make the crust from scratch?
If you’re feeling adventurous, you can whip up a simple pie crust at home using flour, cold butter, salt, and water. It’s a great way to personalize your Mini Apple Pies further!
A Last Pinch of Love
I hope these Mini Apple Pies find their way into your family’s laughter and stories just like they did in mine. The joy of cooking together, the laughter shared around the table, and those sweet bites of comfort are what family meals are all about.
So, roll up your sleeves and give this recipe a try. You might just surprise yourself with how simple and rewarding it is. Until next time, happy cooking!

Mini Apple Pies
Ingredients
For the Apple Filling
- 2 medium Apples (peeled, cored, and diced) (Use a mix of sweet and tart apples like Honeycrisp and Granny Smith.)
- ⅓ cup Brown Sugar
- 1 tsp Ground Cinnamon
- ¼ tsp Ground Nutmeg
- ¼ tsp Allspice
- ¼ tsp Ground Ginger
- 1 pinch Salt
- 1 tbsp Unsalted Butter (Melted for the filling.)
- 1 tsp Vanilla Extract
- 1 tbsp Cornstarch Slurry (Helps to thicken the filling.)
For the Pie Crust
- 1 package Premade Pie Dough (contains 2 crusts)
- All-purpose Flour For dusting
- 1 beaten Egg (For egg wash.)
- 1 tbsp Milk, Cream, or Water (For egg wash.)
- Additional amount Coarse Brown Sugar (For sprinkling on top.)
Instructions
Preparation
- Preheat your oven to 375°F (190°C).
- In a large bowl, combine the diced apples, brown sugar, cinnamon, nutmeg, allspice, ginger, and salt. Toss until the apples are well-coated.
- Melt the unsalted butter in a small pan over low heat, then stir in the vanilla extract and mix into the apples.
- Stir in the cornstarch slurry.
- On a lightly floured surface, roll out your premade pie dough.
- Use a round cutter or a glass to cut out approximately 4-inch circles in the dough.
- Grease a muffin tin and place the dough circles into the cups, then fill each cup generously with the apple mixture.
- Roll out another portion of dough and cut smaller circles or strips for the tops.
- Mix the beaten egg with milk, cream, or water and brush it over the tops of the pies.
- Sprinkle coarse brown sugar on top.
Baking
- Place the muffin tin in the preheated oven and bake for about 20-25 minutes, or until the crust is golden brown and the filling is bubbling.
- Let the pies cool in the tin for a few minutes before transferring to a wire rack.