Author

Chef Emma

Browsing
Saidmj1 An Amateur Food Photo Taken With An Iphone 15 Pro Natur De66df01 54ee 43ff 8dec Ae2fe034d72a

Your new go-to for chicken dinner recipes on busy nights

There’s something magical about a sizzling pan of lemon garlic chicken filling your kitchen with bright, savory aromas after a long day. This dish is everything you want from chicken dinner recipes. It is cozy, nourishing, and incredibly simple to pull together. Juicy chicken, golden edges, and a fresh citrusy finish make it feel special without the stress. If you’re looking for recipes for dinner that balance comfort and nutrition, this one checks every box.

It’s the kind of easy dinner you’ll come back to again and again, especially when you need easy spring dinner recipes that feel light yet satisfying.

Serving Versatility

This dish is wonderfully flexible. Serve it over fluffy rice, toss it with noodles, wrap it in warm flatbread, or enjoy it on its own with roasted veggies for a low carb option. It fits seamlessly into all kinds of easy dinner recipes and adapts to whatever you have on hand.

Full Recipe Section

Ingredients

  • 2 large chicken breasts sliced into cutlets
  • 3 cloves garlic minced
  • 2 tablespoons olive oil
  • Juice of 1 lemon
  • 1 teaspoon lemon zest
  • 1 teaspoon dried oregano
  • Salt and black pepper to taste
  • 1 cup spinach or green beans
  • Optional fresh parsley for garnish
Saidmj1 Flat Lay Of Fresh Ingredients For Lemon Garlic Chicken 07a6fd24 2f72 48c8 Be01 D8ad7c72c169

Instructions

  1. Heat olive oil in a large skillet over medium heat.
  2. Season chicken with salt, pepper, and oregano.
  3. Add chicken to the pan and cook for 5 to 6 minutes per side until golden and cooked through.
  4. Add garlic and sauté for 30 seconds until fragrant.
  5. Pour in lemon juice and add zest, letting it simmer for 2 minutes.
  6. Toss in spinach or green beans and cook until tender.
  7. Garnish with fresh parsley and serve warm.

Time & Nutrition

  • Prep Time: 10 minutes
  • Cook Time: 15 minutes
  • Total Time: 25 minutes
  • Servings: 4
  • Calories: 320 calories per serving

Why You’ll Love This Recipe

  • Ready in under 30 minutes which makes it perfect for easy dinner
  • Uses simple pantry staples and budget friendly ingredients
  • Bright, cozy flavor with garlic and lemon
  • Packed with protein and nutrients for a balanced meal
  • Easily customizable with your favorite veggies or spices

Cultural or Cooking Technique Note

This recipe uses a classic skillet searing method that locks in moisture while creating a golden crust. The addition of lemon juice at the end helps deglaze the pan, capturing all the flavorful bits and turning them into a light, silky sauce.

Serving Suggestions

  • Serve over steamed rice with extra lemon drizzle
  • Pair with buttered noodles for a comforting bowl
  • Wrap in pita bread with fresh veggies and yogurt sauce
  • Enjoy alongside roasted potatoes for a hearty meal

Pro Tips for Success

  • Slice chicken evenly so it cooks at the same rate
  • Do not overcrowd the pan to get a proper golden sear
  • Add garlic after the chicken cooks slightly to avoid burning
  • Use fresh lemon juice for the best flavor boost

Storage & Reheating

Store leftovers in an airtight container in the fridge for up to 3 days.
To reheat, warm gently in a skillet with a splash of water or broth to keep the chicken juicy. You can also microwave in short intervals, covered.

Closing Paragraph

If you’ve been searching for chicken recipes that are quick, healthy, and full of flavor, this one deserves a spot in your weekly rotation. It’s one of those easy dinner recipes that feels effortless but tastes like you spent hours in the kitchen. Try it your way, mix in your favorite veggies, and make it your own.

Don’t forget to share your version, leave a rating, and tell me how it turned out.

Saidmj1 Close Up Featured Shot Of Lemon Garlic Chicken On Rusti 29c06baa 6010 4de5 9d9e Ffd5bd9becab

Final Thoughts

This recipe reminds me that simple food can still feel special. A warm skillet, fresh ingredients, and a little time is all it takes to create something comforting and beautiful.

Follow me on Pinterest for more cozy, quick, and nostalgic recipes.
If you loved this recipe, don’t miss my creamy garlic chicken recipe for another comforting favorite.

Cozy Lemon Garlic Chicken Skillet

Prep Time 10 minutes
Cook Time 15 minutes
Total Time 25 minutes
Servings 4 servings
Calories 320
This cozy lemon garlic chicken skillet is a quick and nourishing dinner packed with bright citrus flavor and savory goodness. Perfect for busy nights, it delivers juicy chicken with a light, silky sauce and fresh greens in under 30 minutes.

Equipment

  • Large Skillet

Ingredients

Main Ingredients

  • 2 large chicken breasts (sliced into cutlets)
  • 3 cloves garlic (minced)
  • 2 tbsp olive oil
  • 1 lemon (juiced and zested)
  • 1 tsp lemon zest
  • 1 tsp dried oregano
  • salt (to taste)
  • black pepper (to taste)
  • 1 cup spinach or green beans
  • fresh parsley (optional garnish)

Instructions 

  • Heat olive oil in a large skillet over medium heat.
  • Season the chicken with salt, pepper, and oregano.
  • Add the chicken to the pan and cook for 5 to 6 minutes per side until golden and cooked through.
  • Add minced garlic and sauté for about 30 seconds until fragrant.
  • Pour in the lemon juice and add lemon zest. Let it simmer for 2 minutes to create a light sauce.
  • Add spinach or green beans and cook until tender.
  • Garnish with fresh parsley and serve warm.

Notes

This skillet recipe is highly adaptable. Swap spinach for other vegetables like zucchini or asparagus, or serve with rice, pasta, or flatbread for a complete meal.
Calories: 320kcal
Cost: budget-friendly
Course: Dinner
Cuisine: Mediterranean
Keyword: Chicken, Easy, Healthy, Skillet
Saidmj1 Close Up Serving Shot Of Lemon Garlic Chicken In Rustic 1323f938 0a2c 48f9 9ca2 E067f95394ec

A fresh and cozy take on easy spring dinner recipes

There is something magical about a bright, zesty plate of lemon garlic chicken paired with tender spring vegetables. This dish feels like sunshine on a plate, bursting with fresh flavors while still giving you that comforting, home-cooked warmth we all crave after a long day. If you are searching for easy spring dinner recipes that come together quickly but still feel nourishing and satisfying, this one checks every box.

It is the kind of easy dinner that feels light yet filling, perfect for busy weeknights when you want something wholesome without spending hours in the kitchen.

Serving Versatility

One of my favorite things about this recipe is how flexible it is. You can serve it over fluffy rice, toss it with noodles, wrap it in warm flatbread, or enjoy it as a low carb bowl on its own. It fits beautifully into so many recipes for dinner depending on your mood.

🍽 Full Recipe Section

Ingredients

  • 2 boneless skinless chicken breasts
  • 1 cup asparagus, trimmed
  • 1 cup cherry tomatoes
  • 1 zucchini, sliced
  • 3 cloves garlic, minced
  • 2 tablespoons olive oil
  • Juice of 1 lemon
  • 1 teaspoon dried oregano
  • Salt and pepper to taste
  • Fresh parsley for garnish
Saidmj1 Step By Step Cooking Process Of Lemon Garlic Chicken Cl 413628a3 E131 4a13 Ad56 5ff503f45adf

Instructions

  1. Season the chicken with salt, pepper, and oregano.
  2. Heat olive oil in a large pan over medium heat.
  3. Cook the chicken for 5 to 6 minutes per side until golden and cooked through. Remove and set aside.
  4. In the same pan, add garlic and sauté for about 30 seconds.
  5. Toss in asparagus, zucchini, and tomatoes. Cook for 4 to 5 minutes until tender crisp.
  6. Squeeze fresh lemon juice over the vegetables and stir.
  7. Slice the chicken and return it to the pan. Toss everything together.
  8. Garnish with fresh parsley and serve warm.

Time and Servings

  • Prep time: 10 minutes
  • Cook time: 15 minutes
  • Total time: 25 minutes
  • Servings: 2 to 3
  • Calories: 320

💛 Why You’ll Love This Recipe

  • Quick and perfect for an easy dinner after a busy day
  • Uses simple and budget friendly ingredients
  • Bright, cozy, and full of fresh spring flavor
  • Packed with protein and nutritious vegetables
  • Easy to customize with your favorite veggies or spices

🌿 Cultural or Cooking Technique Note

This dish uses a simple sauté technique that locks in flavor while keeping everything light and fresh. Cooking the chicken first and then using the same pan for the vegetables builds a natural depth of flavor without extra effort, a classic trick in many chicken dinner recipes.

🍴 Serving Suggestions

  • Serve over steamed rice for a comforting bowl
  • Toss with pasta for a quick spring pasta dish
  • Wrap in warm pita bread for a handheld meal
  • Enjoy as is for a light and healthy easy dinner

🔥 Pro Tips for Success

  • Do not overcrowd the pan to get a nice golden sear on the chicken
  • Cut vegetables evenly so they cook at the same rate
  • Add lemon juice at the end to keep the flavor fresh and vibrant
  • Let the chicken rest before slicing to keep it juicy

🥡 Storage and Reheating

Store leftovers in an airtight container in the fridge for up to 3 days.
To reheat, warm gently in a pan over low heat or microwave in short intervals to avoid drying out the chicken.
You can also freeze it for up to one month, though fresh is always best for texture.

🌟 Closing Paragraph

If you are looking for easy dinner recipes that feel fresh, healthy, and satisfying, this lemon garlic chicken is one you will come back to again and again. It is simple, adaptable, and full of flavor, making it a perfect addition to your collection of go to recipes for dinner. Give it a try and make it your own with your favorite seasonal veggies.

Do not forget to share your version, leave a comment, and rate the recipe if you loved it.

Saidmj1 Close Up Featured Shot Of Lemon Garlic Chicken On Rusti D9642f87 9c26 4615 A6a5 D0df12883403

Final Thoughts

This recipe always reminds me how little things like fresh lemon and simple herbs can completely transform a meal. It is cozy, light, and just right for spring evenings when you want something comforting but not heavy.

Follow me on Pinterest for more cozy, quick, and nostalgic recipes.
If you loved this recipe, do not miss my creamy garlic chicken skillet for another comforting favorite.

Lemon Garlic Chicken with Spring Veggies

Prep Time 10 minutes
Cook Time 15 minutes
Total Time 25 minutes
Servings 2 servings
Calories 320
A fresh and cozy take on easy spring dinner recipes, this lemon garlic chicken is bright, zesty, and full of nourishing flavor. Perfect for busy weeknights, it delivers a comforting yet light meal with minimal effort.

Equipment

  • Large Pan

Ingredients

Main Ingredients

  • 2 boneless skinless chicken breasts
  • 1 cup asparagus (trimmed)
  • 1 cup cherry tomatoes
  • 1 zucchini (sliced)
  • 3 cloves garlic (minced)
  • 2 tbsp olive oil
  • 1 lemon (juiced)
  • 1 tsp dried oregano
  • salt (to taste)
  • pepper (to taste)
  • fresh parsley (for garnish)

Instructions 

  • Season the chicken with salt, pepper, and oregano.
  • Heat olive oil in a large pan over medium heat.
  • Cook the chicken for 5 to 6 minutes per side until golden and cooked through. Remove and set aside.
  • In the same pan, add garlic and sauté for about 30 seconds.
  • Add asparagus, zucchini, and cherry tomatoes. Cook for 4 to 5 minutes until tender-crisp.
  • Squeeze fresh lemon juice over the vegetables and stir well.
  • Slice the chicken and return it to the pan. Toss everything together until well combined.
  • Garnish with fresh parsley and serve warm.

Notes

This dish is highly versatile. Serve it over rice, pasta, or enjoy it as a low-carb meal. Add your favorite seasonal vegetables to customize the flavor.
Calories: 320kcal
Cost: budget-friendly
Course: Dinner
Cuisine: Mediterranean
Keyword: Chicken, Easy, Healthy, Spring
Saidmj1 An Amateur Food Photo Taken With An Iphone 15 Pro Natur 22a987df D59a 45a5 851d Cb3ce0022d67

Bang Bang Chicken Skewers Recipe

The kitchen smells like warm spice and charred citrus. I can hear the sizzle as chicken hits the hot grill and the family starts to gather around the counter. That simple sound means good food and good company are on the way.

This Bang Bang Chicken Skewers recipe is one of those weeknight heroes. It fills the house fast and gives you a sauce that everyone reaches for. If you like building meals around easy, reliable bones of flavor, try pairing it with a rich homemade chicken bone broth recipe for a cozy starter.

Why this works

Bang Bang Chicken Skewers Recipe

This recipe is built for families who want big flavor without extra fuss. The chicken cooks quickly in bite-size pieces, so dinner comes together while you set the table or help with homework.

The Bang Bang sauce combines creamy mayo with sweet chili and sriracha. It gives spicy, sweet, and tangy notes in one spoonful. That balance keeps picky eaters happy and adventurous eaters smiling.

Grilling on skewers speeds things up and keeps portions even. You can grill a big batch on a Sunday and reheat for lunches or quick dinners. If you prefer a light side, try my simple 4-ingredient chicken salad for a fresh complement.

Process Overview

“This is where the magic happens—when the aroma fills the kitchen.”

First you season the chicken, then thread it, and then grill. The sauce comes together in a minute while the chicken cooks. That keeps everything hot and fresh when you serve.

I like to set up an assembly line: cut chicken, mix sauce, soak skewers, then thread. This saves time and keeps the kids involved. For quick inspiration on handy pantry swaps, you might enjoy browsing this collection of Trader Joe’s recipe ideas that can pair nicely with these skewers.

Ingredients

  • 1 1/2 pounds boneless, skinless chicken breasts (cut into 1-inch pieces)

    • Tip: Cut evenly so every piece cooks at the same rate. I often chill the chicken for 15 minutes before slicing. That helps make clean, even cuts.
  • 2 tablespoons olive oil

    • Tip: Use extra virgin for flavor when grilling. It helps the spices stick and promotes a pretty char.
  • 1/2 teaspoon garlic powder

    • Tip: If your family loves fresh garlic, swap 1 clove minced instead. Garlic powder is great for steady seasoning.
  • 1/2 teaspoon smoked paprika

    • Tip: Smoked paprika gives a subtle campfire flavor without adding heat. It pairs beautifully with the sweet chili sauce.
  • Salt and black pepper to taste

    • Tip: I use a light hand with salt at first and adjust after grilling. Sea salt works well for finishing.
  • Wooden or metal skewers

    • Tip: Use metal skewers for a faster grill time. If using wooden skewers, remember to soak them so they do not burn.
  • 1/2 cup mayonnaise

    • Tip: Full fat mayo makes the best saucy texture. For a lighter version, try half Greek yogurt and half mayo.
  • 2 tablespoons sweet chili sauce

    • Tip: Sweet chili gives sweetness and a touch of texture. Taste your bottle first; some are spicier than others.
  • 1 tablespoon sriracha

    • Tip: Sriracha adds heat and garlic notes. Reduce to 1/2 tablespoon for mild palates or add more for extra kick.
  • 1 tablespoon honey

    • Tip: Honey smooths and balances heat. Use a mild floral honey for the easiest flavor profile for kids.
  • 1 tablespoon lime juice

    • Tip: Fresh lime brightens everything. If you do not have fresh lime, use 3/4 tablespoon bottled juice and a pinch of zest.

If your pantry is short a few items, you can still make a tasty version with simple swaps. For more ideas on flexible recipes and creative pantry meals, check this helpful guide to healthy recipe planning to inspire your weekly menu.

Directions

  1. Preheat your grill or grill pan to medium-high heat.

    • Encouraging note: Get your grill hot and ready. A well-heated surface gives you that lovely sear and shortens cook time.
  2. In a large bowl, toss the chicken pieces with olive oil, garlic powder, smoked paprika, salt, and black pepper until the pieces are evenly coated.

    • Encouraging note: Coat each piece thoroughly so every bite has flavor. Take a moment to taste a small raw piece of the spice mix on a spoon before adding to the chicken so you can adjust.
  3. If using wooden skewers, soak them in water for at least 30 minutes beforehand to prevent burning.

    • Encouraging note: This is a great step to start while you cut the chicken. It is a small effort that prevents a lot of smoke and worry.
  4. Thread the marinated chicken pieces onto the skewers evenly.

    • Encouraging note: Leave a little space between pieces for air to circulate. If kids want to help, this is a safe, fun job for them.
  5. Place the skewers on the heated grill and cook for 10 to 12 minutes, turning occasionally to ensure even cooking. Grill until the chicken is cooked through and has a nice char.

    • Encouraging note: Turn them gently every few minutes. Peek inside the thickest piece to make sure juices run clear before you pull them off.
  6. While the chicken is grilling, whisk together mayonnaise, sweet chili sauce, sriracha, honey, and lime juice in a small bowl until well combined.

    • Encouraging note: Whisking while the chicken cooks gets the sauce ready hot and fresh. Taste and tweak the sauce gently to suit your family.
  7. Once cooked, brush or drizzle the Bang Bang sauce over the chicken skewers or serve it on the side for dipping. Enjoy immediately.

    • Encouraging note: Serve right away for the best texture. The warm chicken and cool sauce are a lovely contrast. If you want a crisp finish, give the skewers one quick high-heat pass on the grill after saucing.

For more adventurous steps and pairing ideas, I sometimes add quick grilled vegetables alongside the skewers for a one-pan family meal. If you enjoy seafood nights, my friends and I compare notes with recipes like this baby squid cooking guide for variety on the table.

Serving

Bang Bang Chicken Skewers Recipe

Serve these skewers family-style on a big platter. Lay them over a bed of fluffy rice or inside warm tortillas for a hand-held meal. Add chopped scallions, cilantro, and a wedge of lime to brighten each plate.

You can also offer extra sauce in a shallow bowl for dipping. Kids love dipping, and adults love the control to add more sauce. Round the meal out with a simple cucumber salad or a crunchy slaw to balance the richness.

For a picnic or party, line a tray with parchment and place skewers in a single layer. They make great finger food and travel well when kept warm in an insulated carrier.

Storage

Refrigerate leftovers in an airtight container within two hours of cooking. The skewers will keep for 3 to 4 days in the fridge.

To reheat, place skewers on a rimmed baking sheet and warm in a 350°F oven for about 10 minutes, or until heated through. You can also reheat in a skillet over medium heat with a splash of oil to refresh the char.

If you expect to keep them longer, remove chicken from skewers and freeze in a freezer-safe container for up to 3 months. Thaw in the refrigerator overnight before reheating. Keep the sauce separate in the fridge and add after reheating to preserve texture.

Kitchen Notes

  • Use metal skewers when you want faster prep and no soaking. They conduct heat and help cook the chicken from the inside.
  • For even faster weeknight cooking, cut chicken into 3/4-inch pieces and reduce grill time by a couple of minutes.
  • Make the Bang Bang sauce a day ahead. It keeps well and helps dinner feel stress-free.
  • If you do not have a grill, a cast iron grill pan gives great marks and flavor indoors.
  • Clean your grill grates while they are warm. It saves time and keeps the next batch of chicken from sticking.

Variations

  • For picky eaters: Reduce sriracha to 1/2 tablespoon and add an extra tablespoon of honey. Serve sauce on the side so everyone can control heat.
  • For low-carb: Skip rice or tortillas and serve over a big green salad with avocado and cucumber.
  • For gluten-free: Most sweet chili sauces are gluten-free, but check labels. Use gluten-free sriracha if needed.
  • For dairy-free: The mayo in the sauce is often egg-based and naturally dairy-free. Use a vegan mayo to make the sauce fully plant-friendly.
  • For meal prep: Double the batch and portion into lunch containers with rice and roasted veggies for quick weekday meals.

FAQ

Q: Can I use chicken thighs instead of breasts?
A: Yes. Boneless skinless thighs add more fat and stay moist. Cut them into 1-inch pieces like the breasts and watch cooking time; thighs may cook a bit faster.

Q: What temperature should the chicken reach?
A: The safe internal temperature for cooked chicken is 165°F. Use an instant read thermometer in the thickest piece to be sure.

Q: Can I bake these instead of grilling?
A: Absolutely. Bake on a rimmed sheet at 425°F for 12 to 15 minutes. Finish under the broiler for a minute to get a bit of char.

Q: How spicy is this sauce?
A: Moderate. Sriracha provides heat but the honey and sweet chili sauce balance it. Reduce sriracha for a mild family-friendly version.

Q: Can I make this vegetarian?
A: Yes. Use firm tofu, tempeh, or large mushroom caps cut into 1-inch pieces. Press tofu first and follow the same steps. Grill until you get a pleasant char.

Conclusion

I hope this Bang Bang Chicken Skewers recipe becomes a busy weeknight favorite in your home. It is forgiving, fast, and full of flavor. For another take on this dish, I like to compare notes with this helpful Bang Bang Chicken Skewers – I Am Homesteader version to see different sauce tricks and presentation ideas. If you want another tested recipe for family gatherings, check out the Bang Bang Chicken Skewers Recipe – Cooked & Loved for more serving inspiration.

Thank you for cooking along with me. May your kitchen be filled with good smells and happy chatter tonight.

Garlic Parmesan Chicken Skewers Recipe

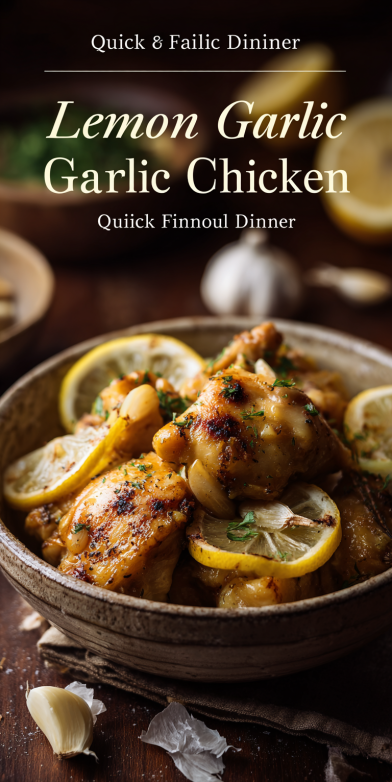
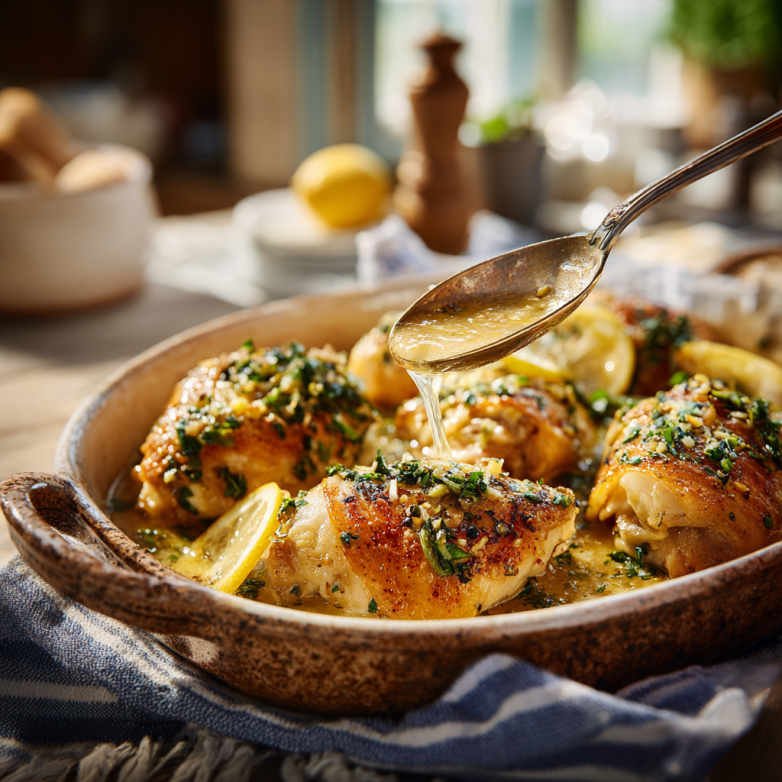
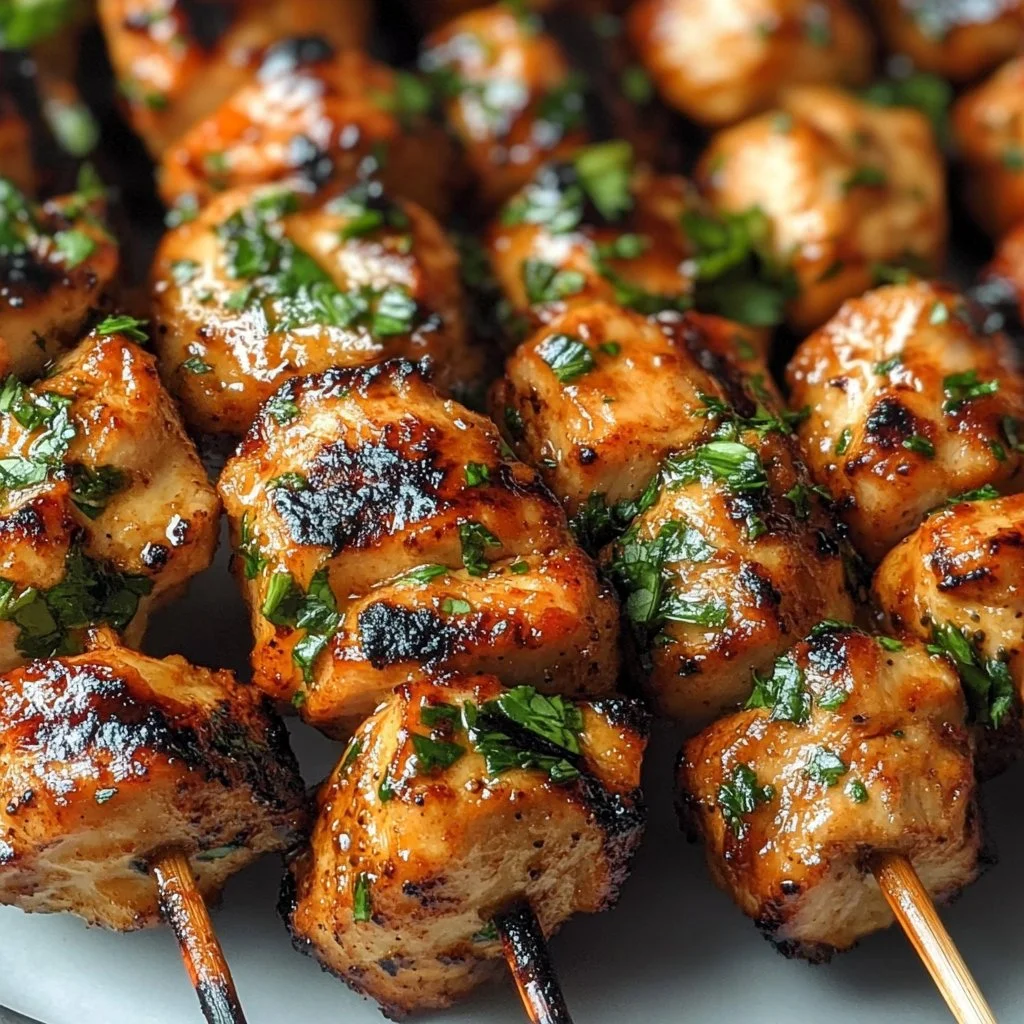
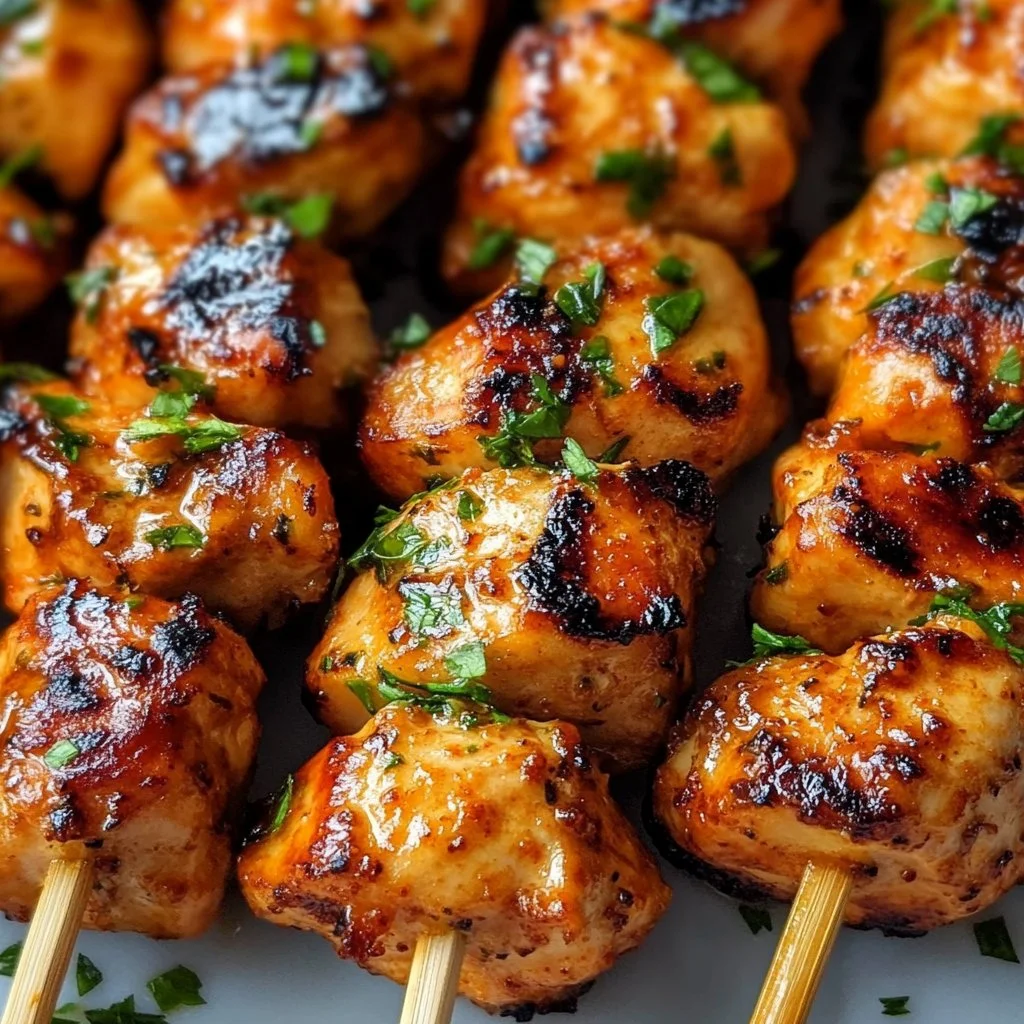
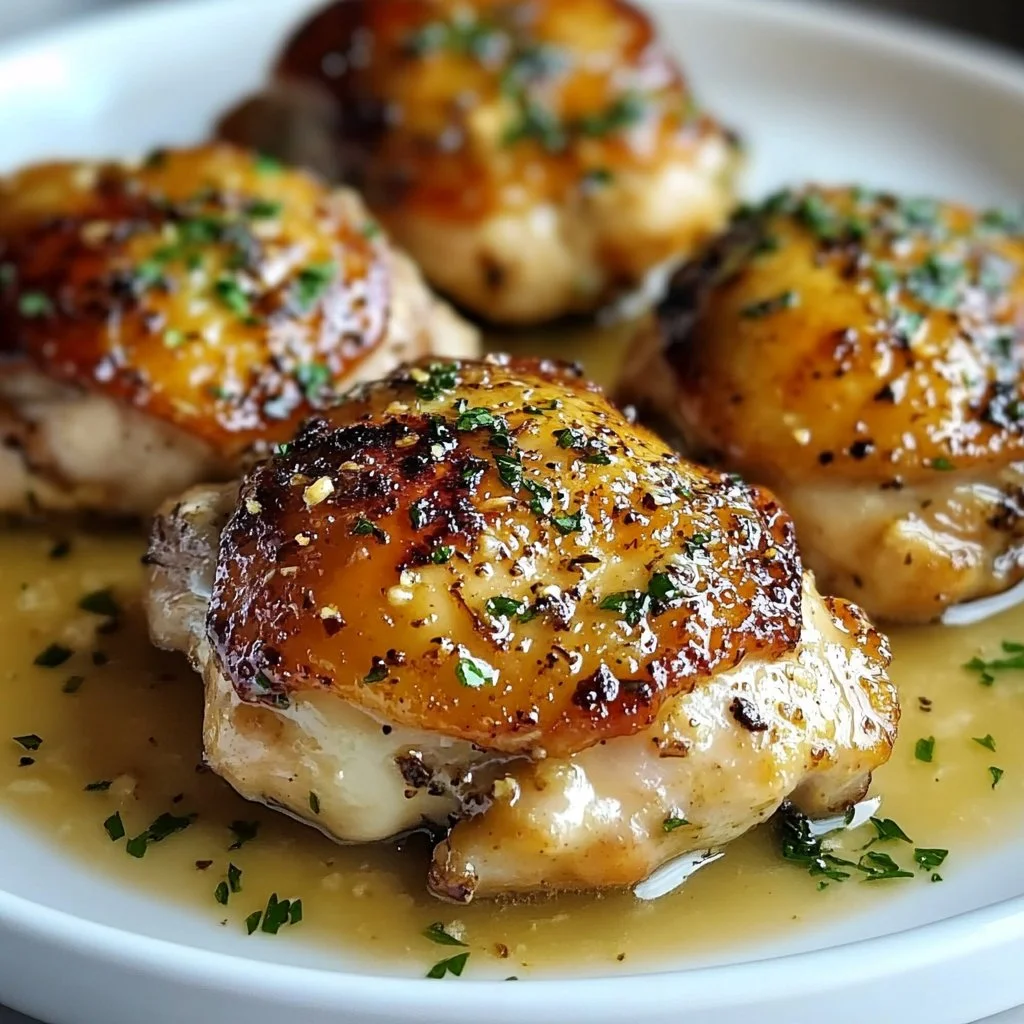
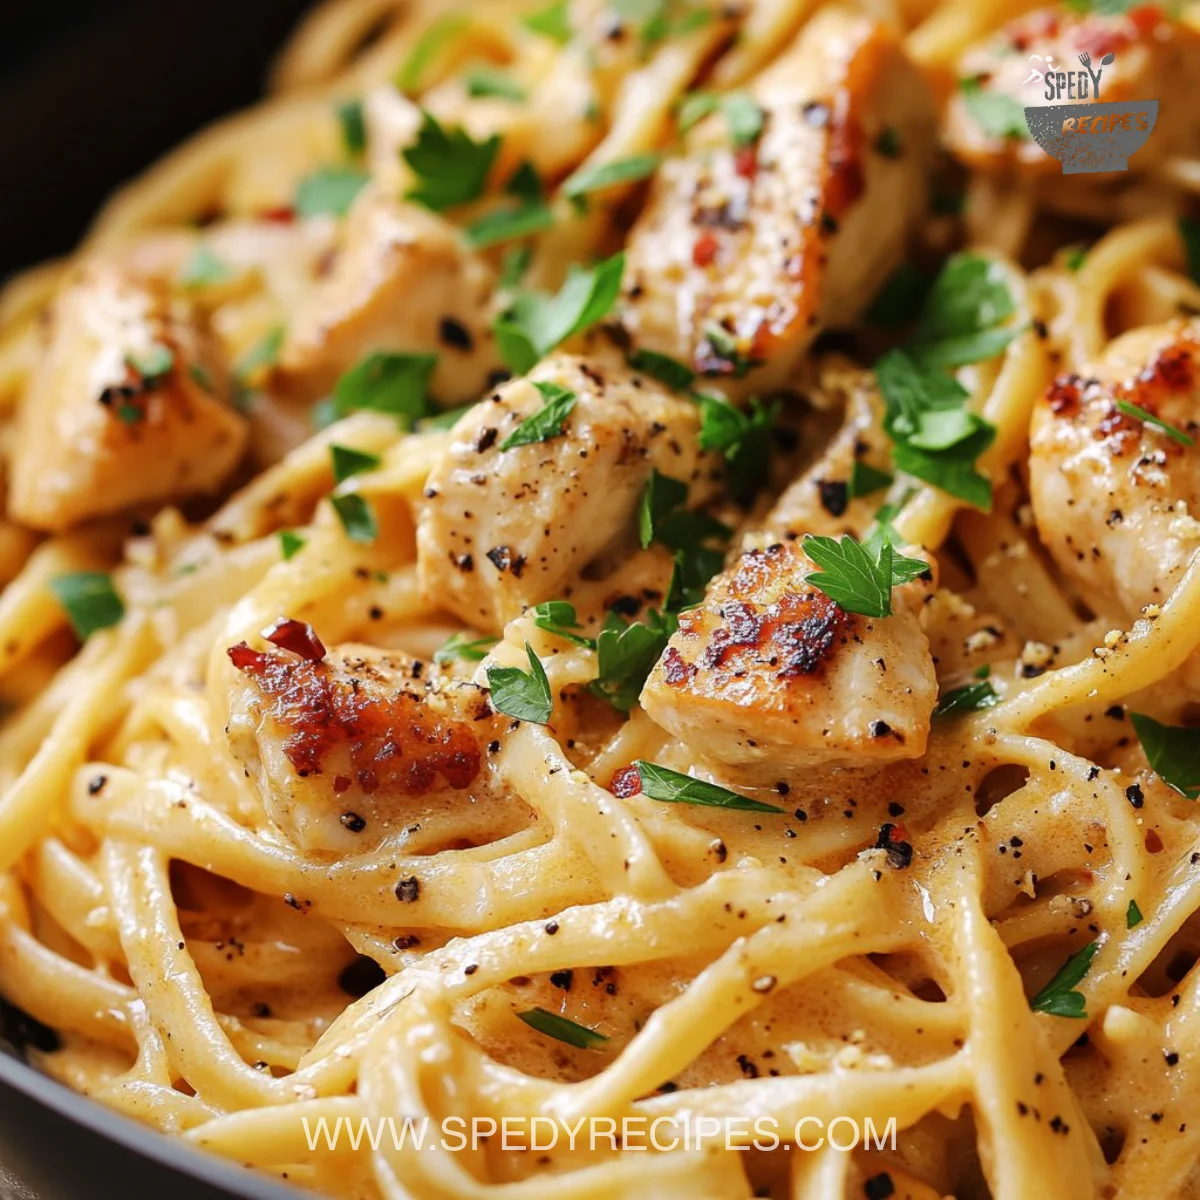
I love the smell of garlic sizzling in a hot pan. The kitchen hums with family chatter and the soft clink of skewers. When I take the first bite of these Garlic Parmesan Chicken Skewers, I close my eyes and savor the warm, savory blend of cheese, herbs, and garlic.

This recipe is one of those weeknight heroes. It cooks quickly, pleases picky eaters, and gives you more time to sit at the table together. If you are building a simple dinner rotation, try pairing this with a light chicken salad for another easy option like my favorite 4-ingredient chicken salad.

Why this works

Garlic Parmesan Chicken Skewers Recipe

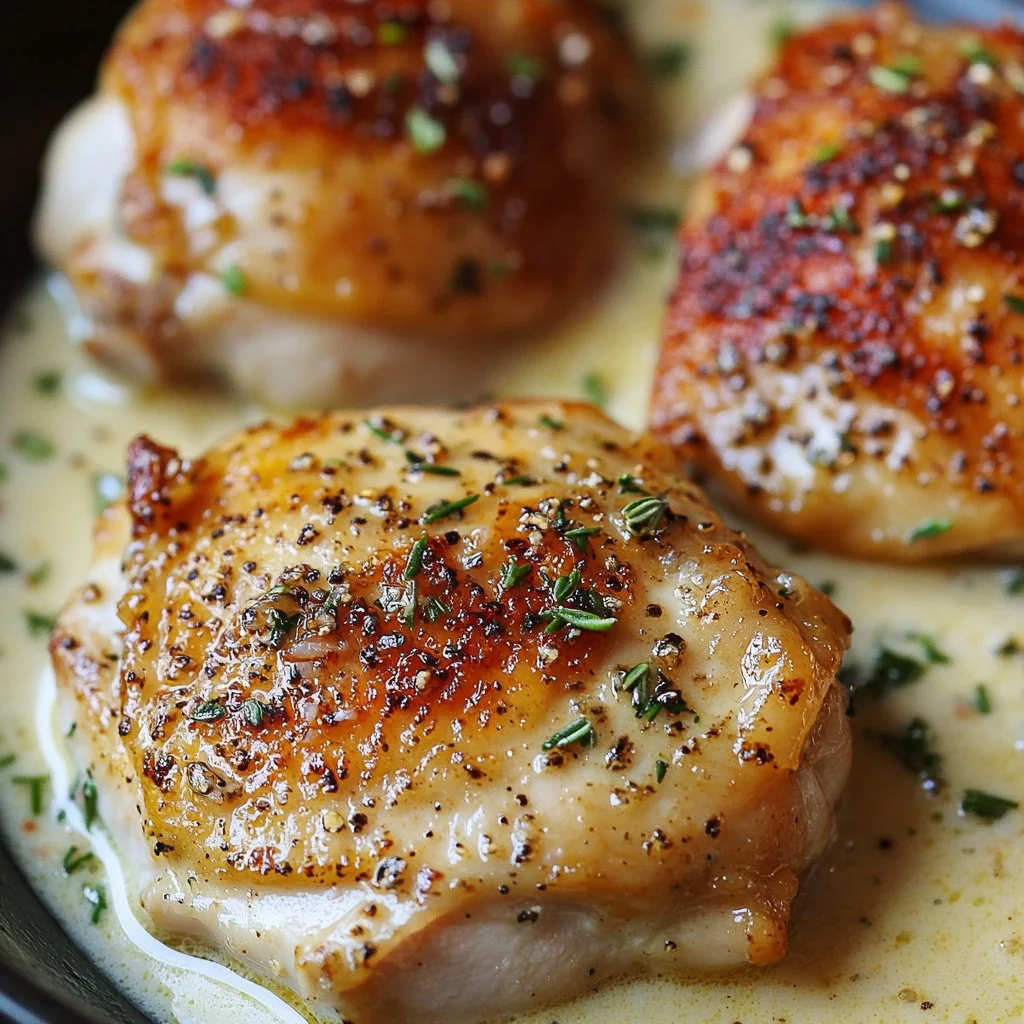
There is a reason my family asks for these skewers again and again. The flavors are compact and bold. The Parmesan coats the chicken, locking in moisture while adding a salty, nutty finish. Garlic adds bright savory notes that kids and adults both enjoy.

This recipe saves time. Marinate and thread ahead for a quick grill later. Skewers allow even cooking and easy portioning for families. For a stress-free shopping list and pantry shortcuts, I often turn to simple grocery-friendly ideas from my go-to roundups like 50 easy Trader Joe’s recipes. That helps me plan meals and keep dinner on the table.

Family and time-saving tips

Make the marinade the night before and store the chicken in the refrigerator. Thread on skewers just before grilling. If you have young helpers, let them thread the pieces for an extra helping hand at dinner time.
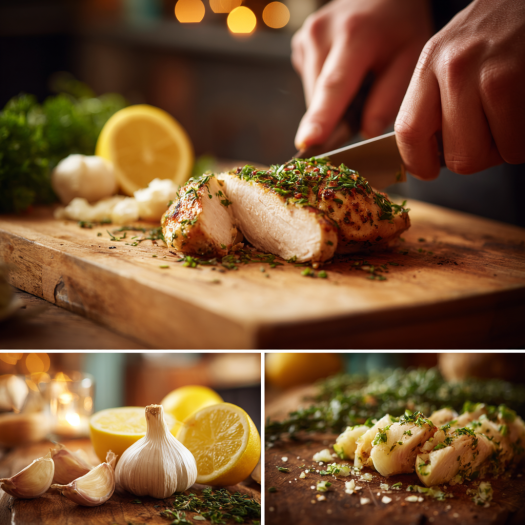
Process Overview

“This is where the magic happens—when the aroma fills the kitchen.”

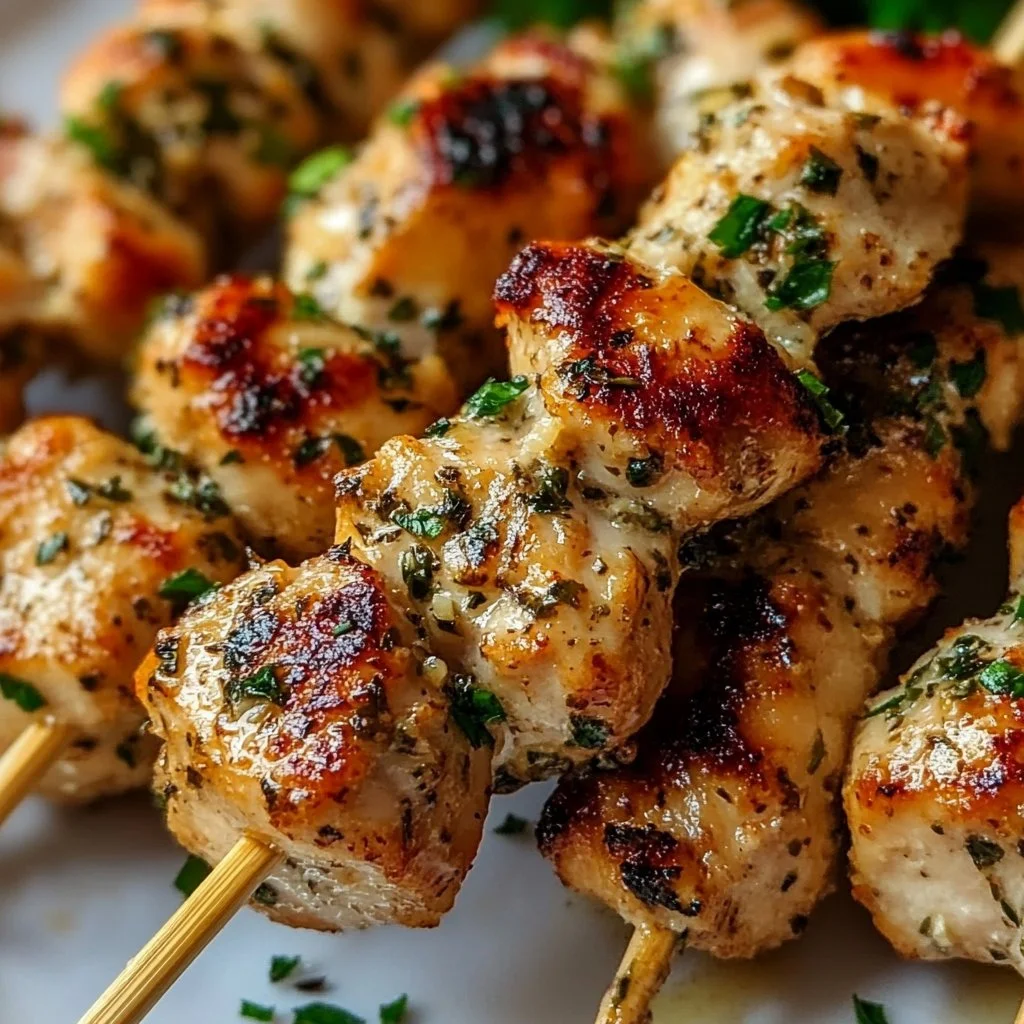
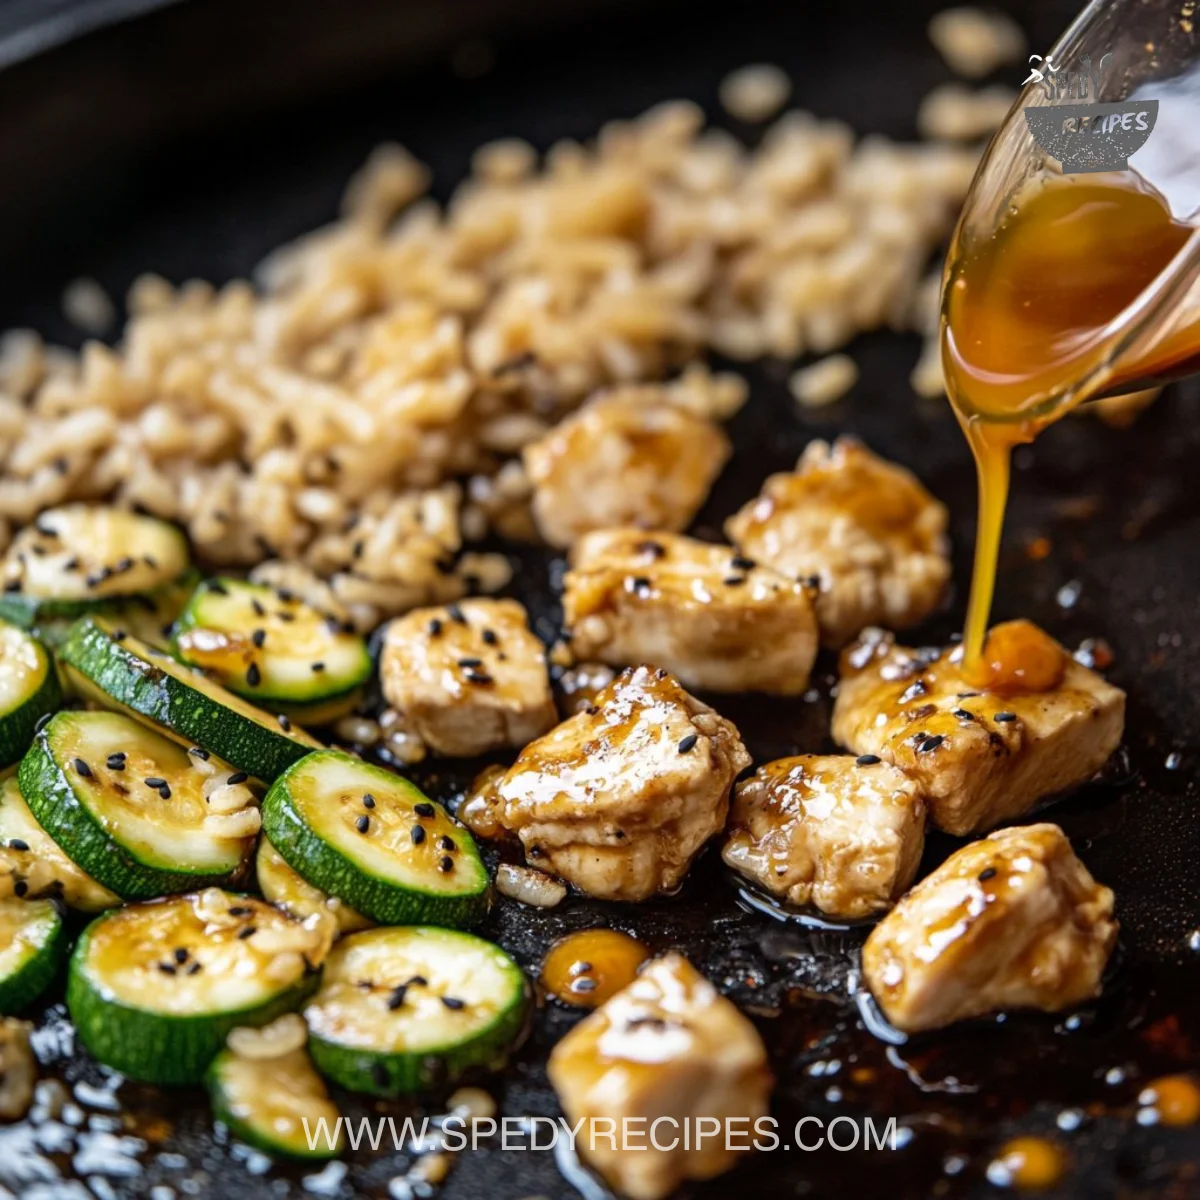
The steps are straightforward so you can focus on family time. The chicken marinates quickly in a simple mix of garlic, olive oil, and Parmesan. A hot grill gives you that satisfying char without drying the meat.

If you need to plan a full week of meals, pairing this recipe with a light cleanse or refresh can be practical; I sometimes coordinate it with my meal planning resources like a seven-day juice plan for a balanced week.
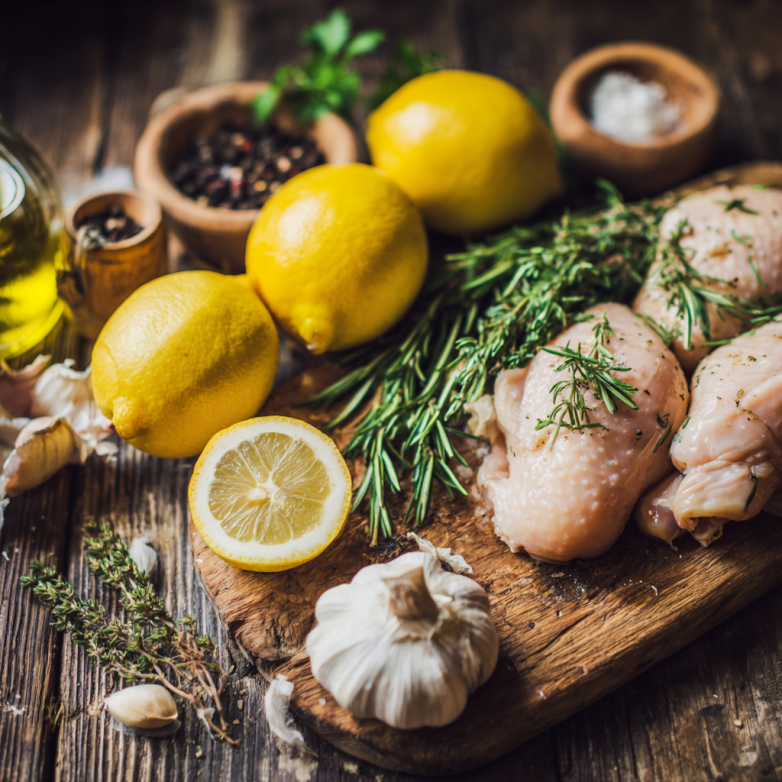
Ingredients

  • 1 1/2 pounds boneless, skinless chicken breasts or thighs, cut into 1.5-inch cubes
    • Tip: Use thighs if you want juicier results. Trim excess fat and pat pieces dry so the marinade clings well.
  • 2 tablespoons olive oil
    • Tip: Use extra virgin olive oil for flavor but regular olive oil works fine for high-heat grilling.
  • 4 cloves garlic, minced
    • Tip: Fresh garlic gives the best aroma. Mince finely so it distributes throughout the chicken.
  • 1/2 teaspoon salt
    • Tip: Start with 1/2 teaspoon and taste a small cooked piece; add more if needed.
  • 1/4 teaspoon black pepper
    • Tip: Freshly ground pepper gives a brighter flavor than pre-ground.
  • 1/2 teaspoon Italian seasoning
    • Tip: If you have fresh herbs like oregano and basil, use a pinch of each for a fresher flavor.
  • 1/3 cup grated Parmesan cheese, plus more for garnish
    • Tip: Use freshly grated Parmesan for the best melt and flavor. Pre-grated is OK in a pinch.
  • 2 tablespoons fresh parsley, chopped
    • Tip: Parsley brightens the dish. Add at the end for color and fresh taste.
  • Wooden or metal skewers (if wooden, soak in water for 30 minutes)
    • Tip: Soak wooden skewers to prevent burning. Use metal for convenience and reuse.

For alternative marinades or if you do not have Parmesan on hand, a splash of chicken broth works as a binder. I sometimes keep a small container of homemade broth in the freezer; if you do too, check my method for making a simple bone broth that doubles as a flavor booster at homemade chicken bone broth.

Directions

  1. Heat your grill or grill pan to medium-high heat, ensuring it reaches an optimal temperature for cooking the chicken evenly and achieving a nice char.

    • Encouragement: A hot grill gives you a quicker cook time and better color. Take a deep breath and enjoy the sizzle.
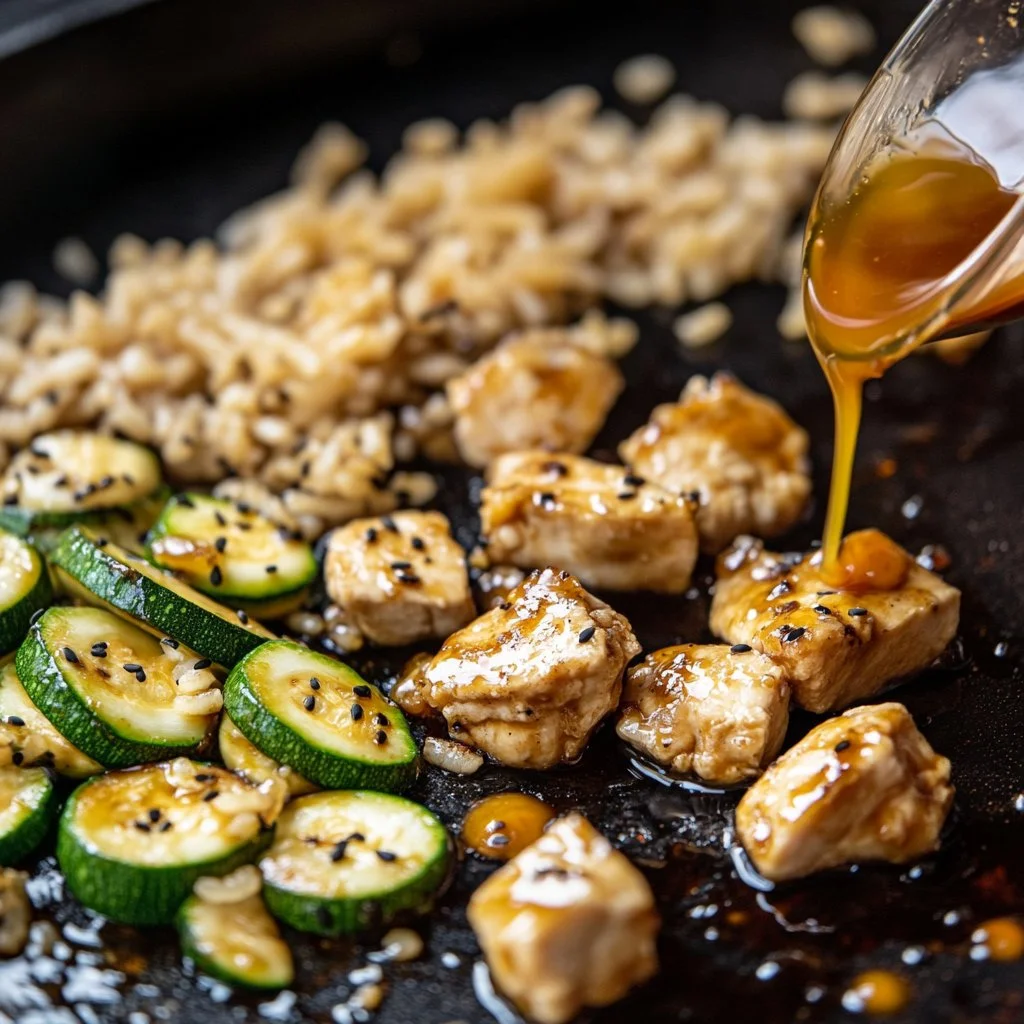
  2. In a large bowl, toss the chicken cubes with olive oil, minced garlic, salt, black pepper, and Italian seasoning until the pieces are evenly coated. Stir in the grated Parmesan cheese and mix thoroughly to combine all the flavors.

    • Encouragement: Make sure every piece gets coated. This is where the taste builds, and you are doing great.
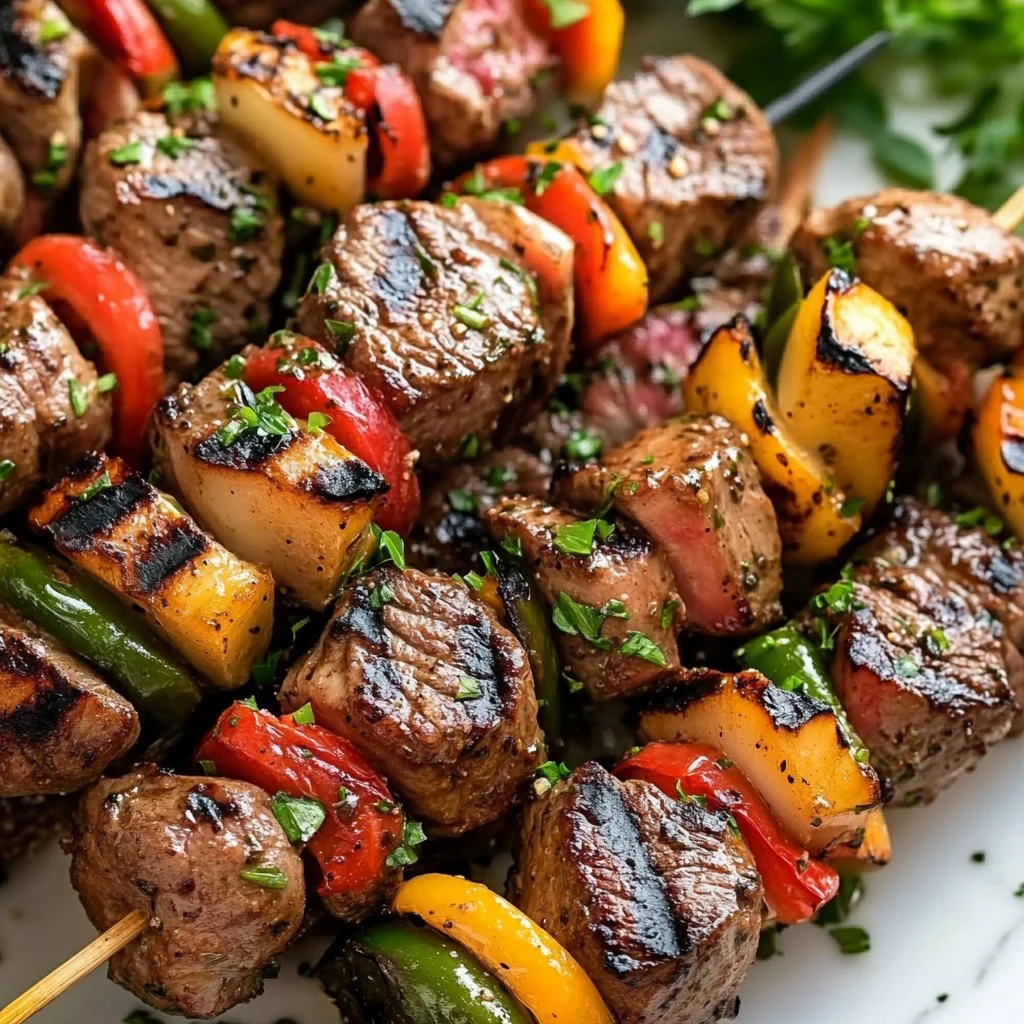
  3. Carefully thread the marinated chicken pieces onto the skewers, leaving a small gap between each piece to allow for even cooking and proper heat circulation.

    • Encouragement: Leave space on the skewers so heat circulates. This keeps the centers juicy and cooks faster.
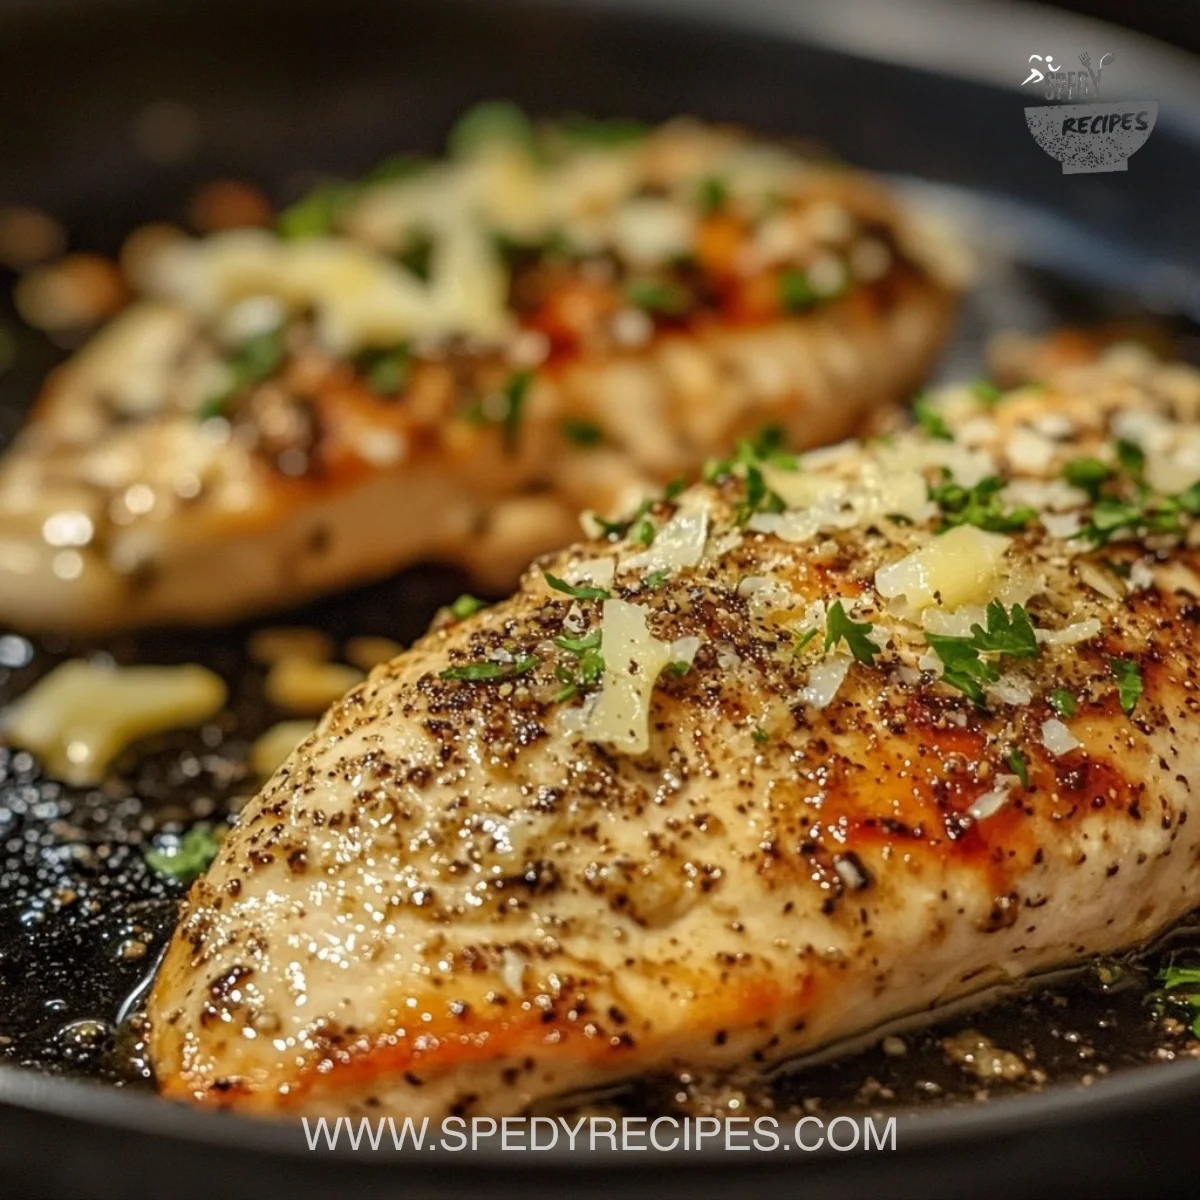
  4. Place the chicken skewers on the preheated grill and cook for 10 to 12 minutes, turning occasionally to ensure all sides become golden brown and the chicken is cooked through. Use a meat thermometer to confirm the internal temperature has reached 165°F (74°C).

    • Encouragement: Turn the skewers gently and watch for that golden color. A thermometer gives you confidence and keeps everyone safe.
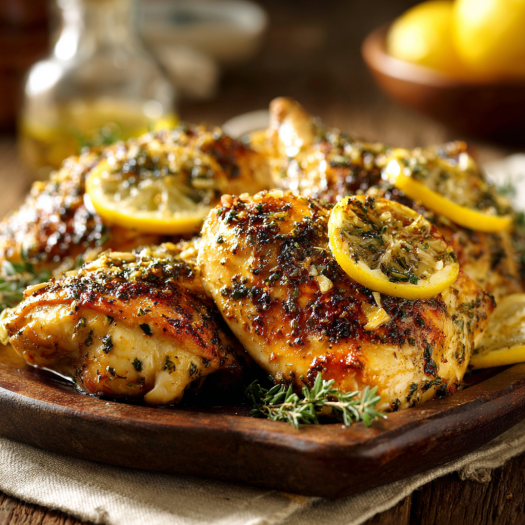
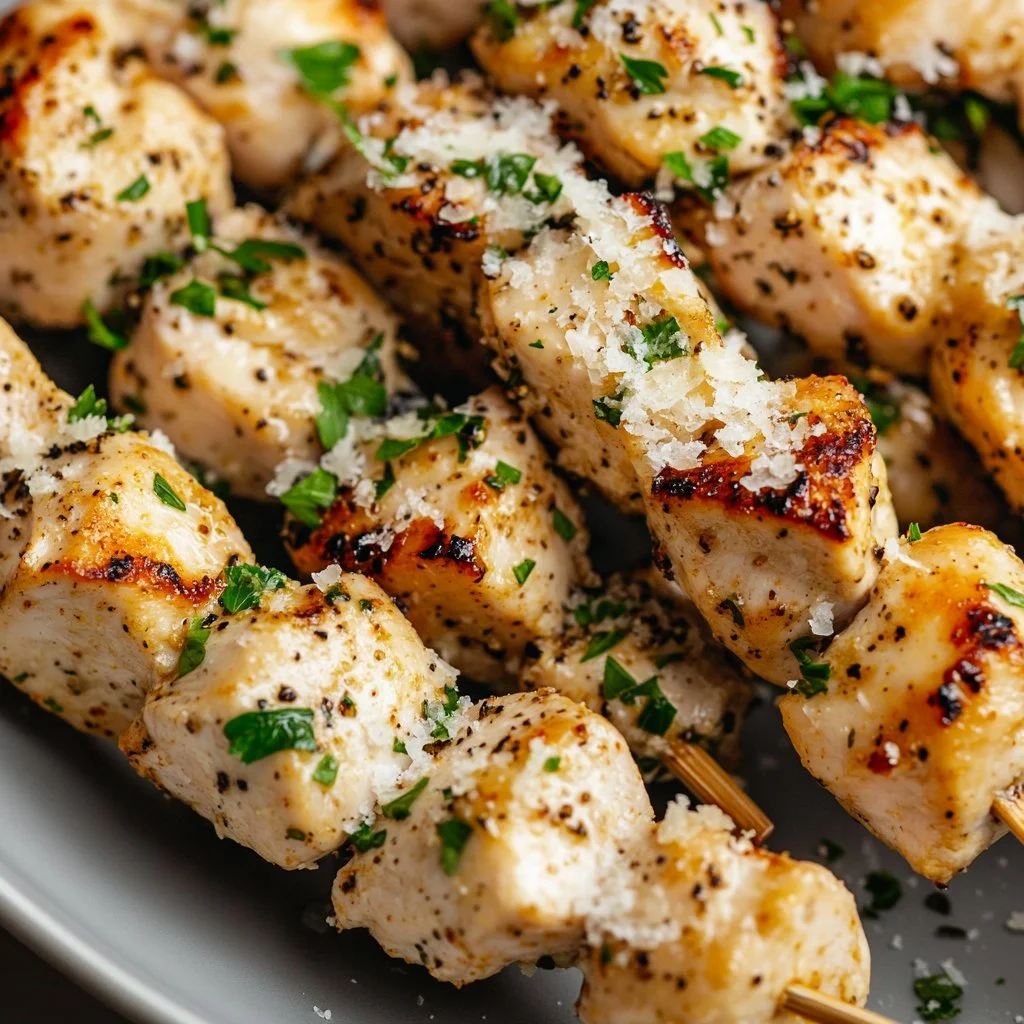
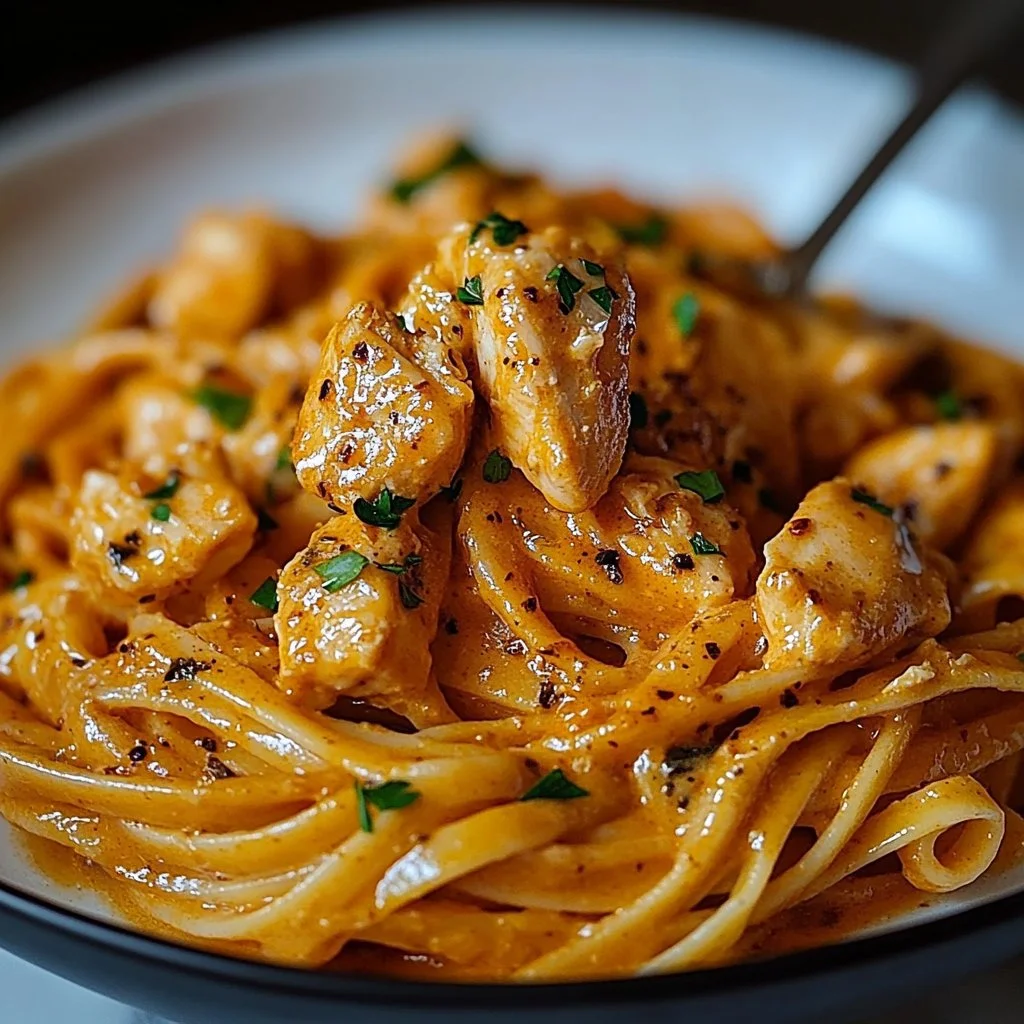
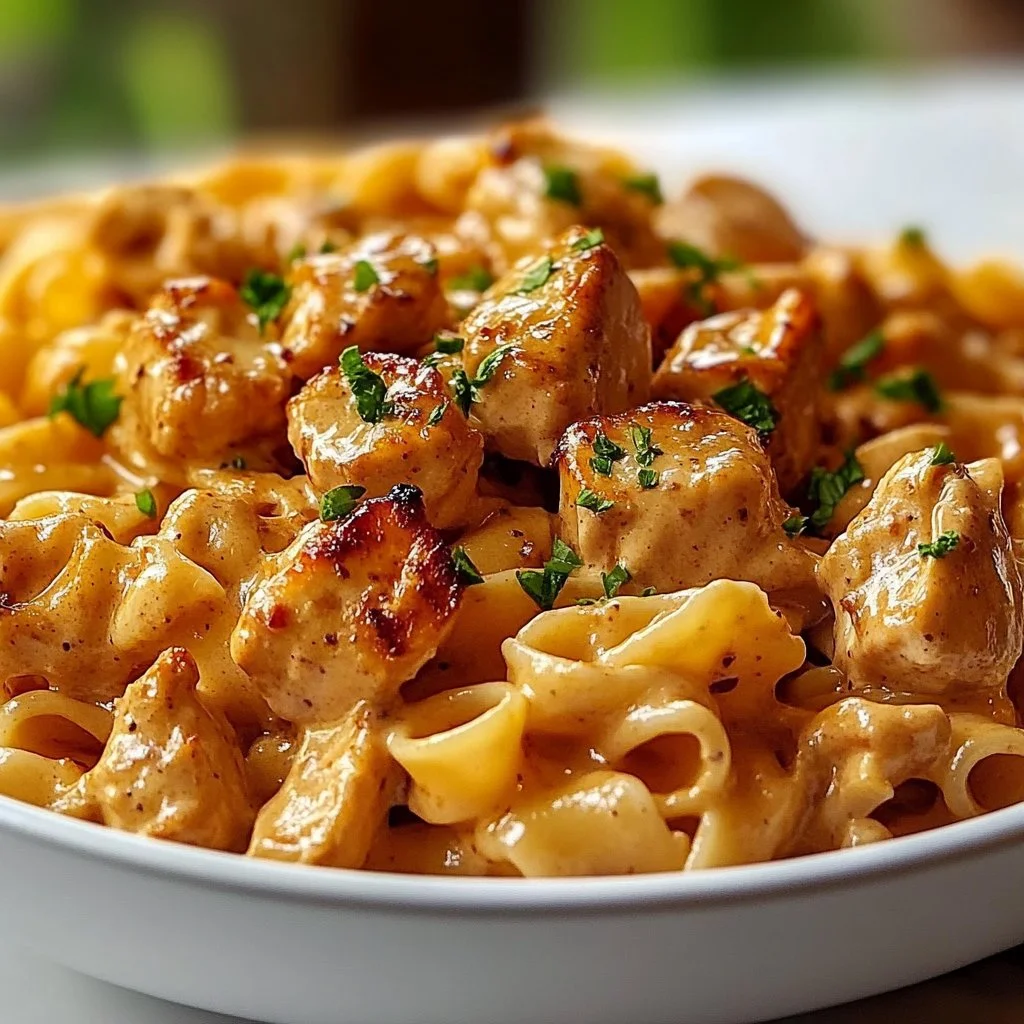
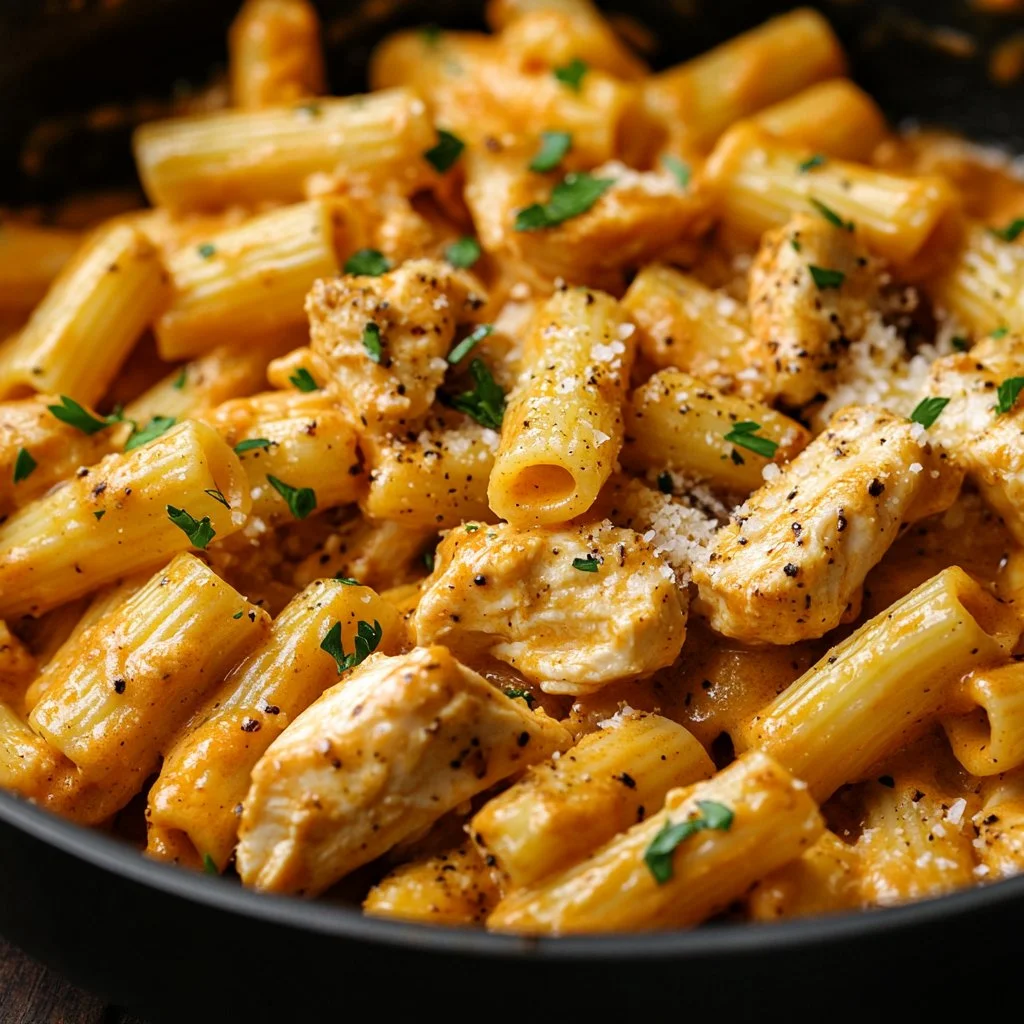
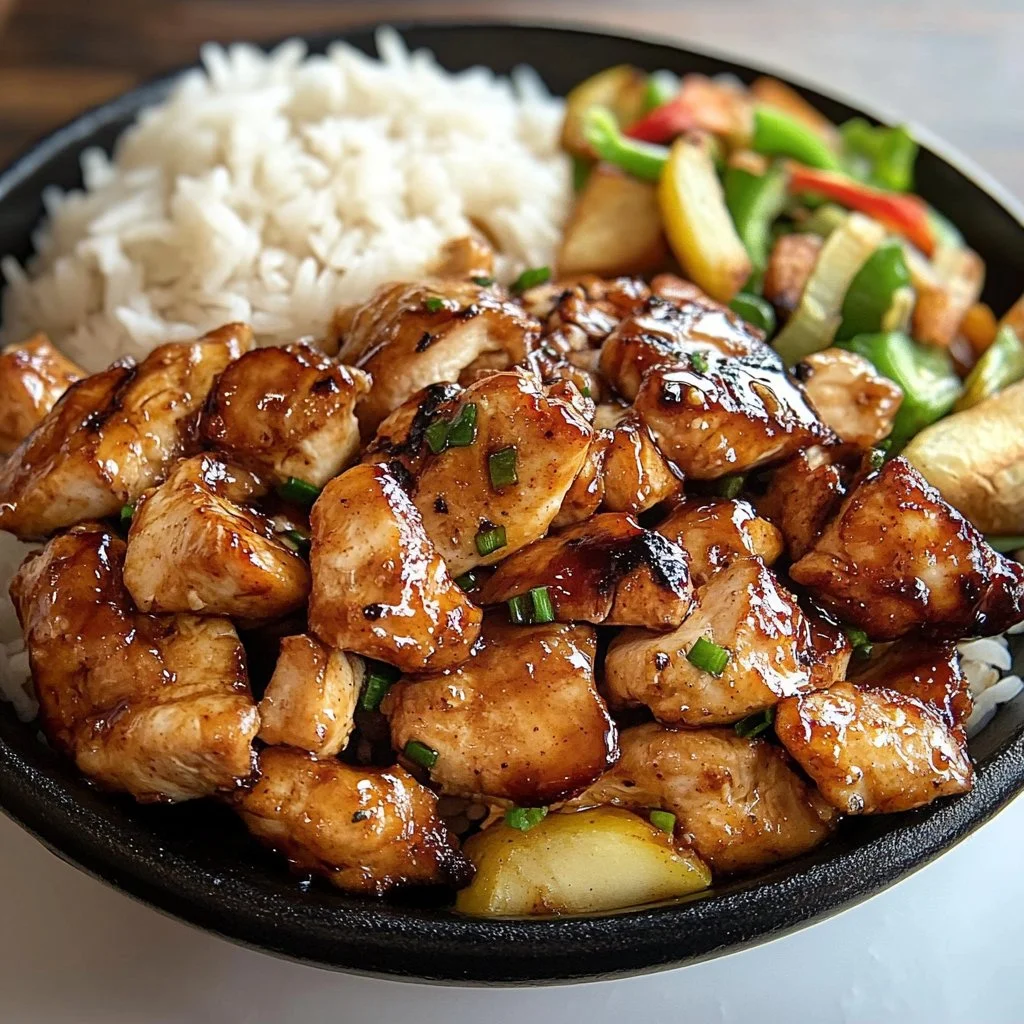
  5. Remove the skewers from the grill and sprinkle extra grated Parmesan and fresh chopped parsley over them before serving. Pair with garlic butter rice, pasta, or a fresh salad for a complete meal.

    • Encouragement: The finishing touch of Parmesan and parsley makes the dish feel special. Invite everyone to the table and dig in.

If you enjoy seafood skewers too, this method adapts well; I sometimes make a mixed grill night that includes squid for variety. For tips on grilling smaller seafood portions, check my baby squid guide at baby squid recipes and cooking notes.

Serving

Garlic Parmesan Chicken Skewers Recipe

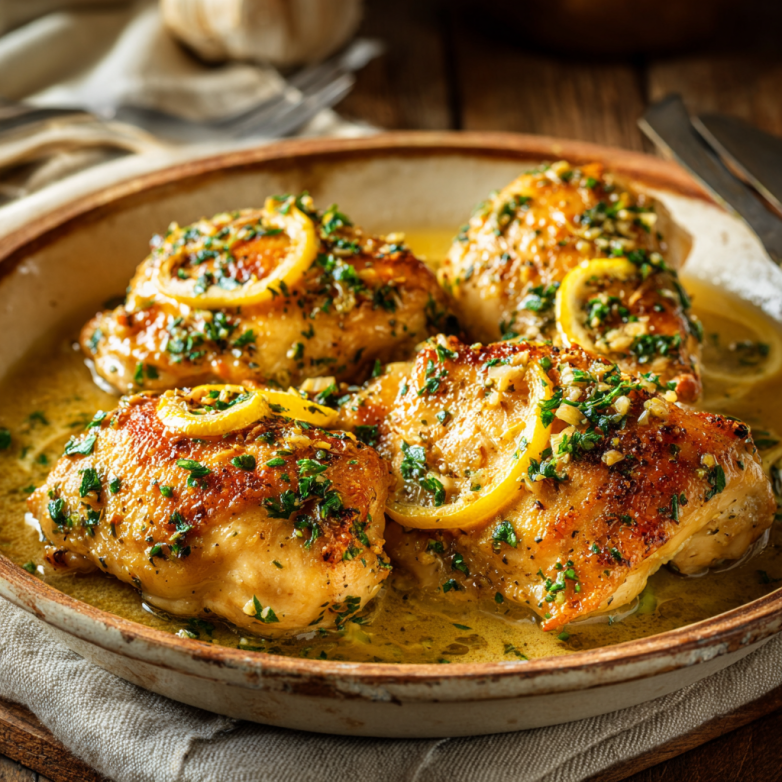
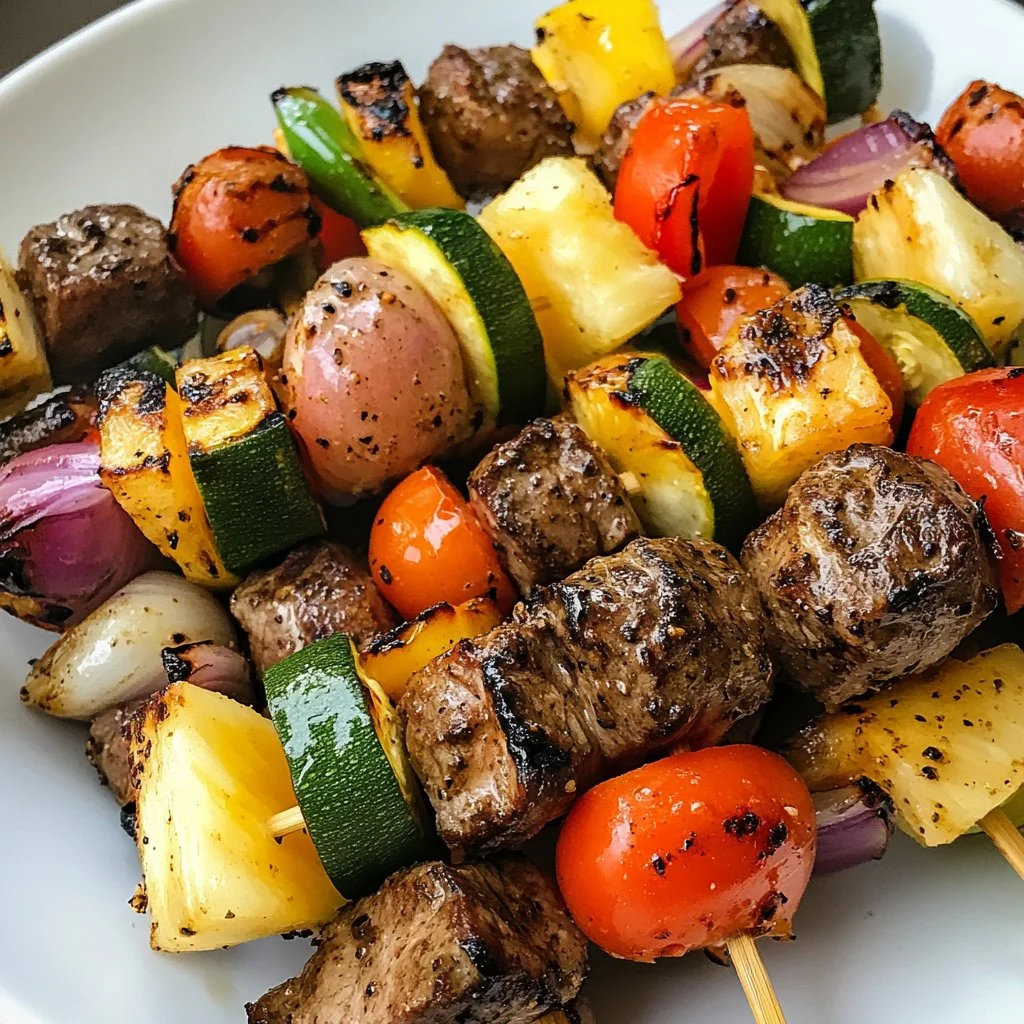
Serve these skewers family-style on a large platter. Lay the skewers across a bed of garlic butter rice or seasonal salad greens. Add lemon wedges for a bright finish and extra grated Parmesan in a small bowl for anyone who wants more.

For a casual weeknight, pair with roasted vegetables and crusty bread. For a weekend barbecue, set out sides in bowls and let everyone build their plate. My kids love dipping the chicken in a little extra olive oil and lemon, or a mild yogurt dip for extra creaminess.

Presentation tips

Remove the chicken from skewers before serving to younger children to avoid accidents. Use colorful plates to make the meal feel festive. A sprinkle of fresh parsley makes a big visual difference.

Storage

Refrigerator: Place cooled skewers in an airtight container or transfer the chicken pieces to a shallow container and cover tightly. Store for up to 3 days.

Freezer: Remove chicken from skewers, lay pieces on a parchment-lined tray until firm, then transfer to a freezer bag. Freeze for up to 2 months. Thaw overnight in the refrigerator before reheating.

Reheating: Reheat gently in a 350°F oven for 8 to 10 minutes until warmed through. You can also reheat on a medium-low grill for a few minutes per side to revive a bit of char. Avoid high heat, which will dry the meat.

Leftover ideas: Chop warmed chicken into pasta, toss into a salad, or fold into a warm grain bowl with roasted vegetables.

Kitchen Notes

  • Shortcut: Use pre-minced garlic in a pinch, but I recommend fresh for the best aroma.
  • Shortcut: Prepare the marinade in a zip-top bag and add the chicken to save dishes.
  • Shortcut: Swap olive oil for avocado oil if you need a higher smoke point on a very hot grill.
  • Shortcut: Use a grill pan indoors when weather prevents outdoor cooking.
  • Shortcut: Double the recipe and freeze half for an easy weeknight meal later.

Variations

  • For picky eaters: Leave out the Italian seasoning and add a pinch of smoked paprika for a mild sweet flavor. Serve plain with a small bowl of grated Parmesan on the side.
  • Low-carb option: Serve over cauliflower rice or a bed of mixed greens instead of pasta or grains.
  • Keto-friendly: Use olive oil and extra Parmesan; skip sugary glazes and pair with a buttery vegetable like sautéed zucchini.
  • Mediterranean twist: Add a squeeze of lemon and a sprinkle of oregano. Swap parsley for fresh mint for a bright finish.
  • Dairy-free: Omit the Parmesan and use a teaspoon of nutritional yeast plus a little extra salt for a cheesy note.

FAQ

Can I make these ahead of time?

Yes. Marinate the chicken for up to 24 hours. Thread the skewers right before grilling to keep things hygienic. If you need full make-ahead, assemble and refrigerate for a few hours, then grill when ready.

Are chicken breasts or thighs better?

Both work well. Breasts cook leaner and quicker. Thighs stay juicier and are more forgiving on the grill. I often use thighs when I want extra tenderness for leftovers.

How do I prevent the chicken from sticking to the grill?

Oil the grates lightly and brush the chicken with olive oil. Make sure the grill is hot before adding the skewers. If using wooden skewers, soak them in water for at least 30 minutes so they do not burn.

Can I use a broiler instead of a grill?

Yes. Place the skewers on a broiler pan about 6 inches from the heat. Broil for 5 to 6 minutes per side, watching closely to avoid burning. Use a thermometer to reach 165°F.

How do I know when the chicken is done?

Use an instant-read thermometer inserted into the center of a piece. The safe internal temperature is 165°F (74°C). The juices should run clear and the meat should feel firm, not rubbery.

Conclusion

I hope these Garlic Parmesan Chicken Skewers become a regular at your family table. They are simple, comforting, and quick to prepare. The combination of garlic, Parmesan, and a light herb blend creates a dinner that feels special without extra fuss.

If you want another take on this classic, try the slightly different approach at Garlic Parmesan Chicken Skewers – Bad Batch Baking for more inspiration. For another family-friendly version, see Garlic Parmesan Chicken Skewers – Sailor Bailey to compare techniques and ideas.

Warmly,
Lily

Bobby Flay Chicken Thighs in Creamy Garlic Bliss

The kitchen smells like butter and garlic, and I can hear the gentle sizzle of chicken as it hits the hot pan. The sound makes everyone poke their head in, asking if dinner is ready. That warm, homey noise means a family meal is coming, one that will fill the table and the conversation.

I have been cooking for my family for years, and simple dinners that feel special are my favorite. If you like dependable weeknight meals, you might also enjoy my 4-ingredient chicken salad for nights when you want something even quicker.

Why this works

Bobby Flay Chicken Thighs in Creamy Garlic Bliss

This recipe takes a few high-impact steps and turns ordinary chicken thighs into something memorable. The sear locks in flavor, the shallot and fresh garlic build deep aroma, and the heavy cream and lemon juice balance richness and brightness.

It is family-friendly and time-saving. You can have the whole dish ready in under an hour, which makes it perfect for busy weeknights or a relaxed Sunday dinner. If you want another family-friendly option to feed a crowd, I sometimes pair this with a quick 10-inch pizza for a fun mix of comfort foods.

This is a reliable recipe you can trust to deliver texture and flavor that kids and adults both enjoy. I tested it multiple times to keep the steps straightforward and forgiving.

Process Overview

“This is where the magic happens—when the aroma fills the kitchen.”

The basic flow is simple: season and sear the thighs, remove them, create a pan sauce with shallot, garlic, broth, and lemon, finish with cream and herbs, and return the chicken to the sauce to finish cooking. The technique is a classic restaurant move that concentrates flavor without adding fuss.

I also experiment with this sauce on other proteins and seafood, and you can find ideas in my notes about baby squid cooking and nutrition when you want to swap in something different.

Ingredients

  • 4 pieces Boneless Chicken Thighs (Ensure even cooking.)
    • Tip: Choose thighs that are similar in size. If one is much thicker, butterfly or gently pound it so all four cook evenly.
  • 2 tablespoons Olive Oil (For searing.)
    • Tip: Use a high-quality olive oil for flavor and a neutral oil if your skillet is extremely hot.
  • 1 teaspoon Garlic Powder (For flavor.)
    • Tip: Garlic powder gives an even base garlic note. Sprinkle lightly and rub into the chicken before searing.
  • 1 teaspoon Onion Powder (Adds sweetness.)
    • Tip: Onion powder helps round the savory profile without adding texture.
  • 1 teaspoon Paprika (Optional for heat.)
    • Tip: Smoked paprika gives a deeper flavor. Use sweet paprika if you prefer no heat.
  • 1 teaspoon Kosher Salt (To taste.)
    • Tip: I use kosher salt because it seasons predictably. Taste the sauce and adjust at the end if needed.
  • 1 teaspoon Black Pepper (To taste.)
    • Tip: Freshly ground black pepper adds brightness. Add more if you like a peppery finish.
  • 2 tablespoons Butter (For richness.)
    • Tip: Finish the sauce with a pat of butter for silky texture and shine.
  • 1 piece Shallot (Finely chopped.)
    • Tip: Shallot melts into the sauce and gives a subtler onion flavor than yellow onion.
  • 3 cloves Fresh Garlic (Minced for flavor.)
    • Tip: Use fresh garlic for aroma. Mince small so it cooks quickly and evenly.
  • 1 cup Chicken Broth (Low-sodium recommended.)
    • Tip: Low-sodium broth lets you control salt. Homemade broth adds extra depth if you have it.
  • 2 tablespoons Fresh Lemon Juice (Brightens the sauce.)
    • Tip: Fresh lemon juice lifts the cream and prevents the sauce from feeling too heavy.
  • 1 teaspoon Fresh Thyme (Prefer fresh.)
    • Tip: Use fresh thyme sprigs while cooking, then strip the leaves for better texture.
  • 1/2 teaspoon Crushed Red Pepper Flakes (Add for heat.)
    • Tip: Add less for kids or skip entirely. You can always sprinkle at the table.
  • 1 cup Heavy Cream (For creamy consistency.)
    • Tip: Heavy cream gives a silky sauce. For a lighter version, use half-and-half but the sauce will be thinner.

I like to assemble all ingredients at the start. It makes the cooking flow calm and efficient, especially when kids are asking about dinner.

Directions

  1. Prepare the chicken and season.

    • Pat the chicken thighs dry with paper towels and season both sides with kosher salt, black pepper, garlic powder, onion powder, and paprika.
    • Encouraging note: Drying the chicken helps it sear beautifully. This little step gives you a big payoff.
  2. Heat the pan and sear the thighs.

    • Heat a large skillet over medium-high heat. Add the olive oil. Once shimmering, place the thighs skin-side down and sear 4 to 5 minutes per side until golden brown.
    • Encouraging note: Resist the urge to move the chicken too soon. Let it develop a crust. The smell will tell you when it is ready.
  3. Remove the chicken and rest briefly.

    • Transfer the seared thighs to a plate and tent loosely with foil.
    • Encouraging note: Resting keeps the meat juicy. You can use this time to chop the shallot and garlic.
  4. Build the sauce base with aromatics.

    • Lower the heat to medium. Add the butter to the hot pan and when it foams, add the finely chopped shallot. Sauté 2 to 3 minutes until translucent. Add the minced garlic and cook 30 to 45 seconds until fragrant.
    • Encouraging note: Keep stirring so the garlic does not burn. This is the scent that pulls everyone back to the kitchen.
  5. Deglaze with chicken broth.

    • Pour in the chicken broth and use a wooden spoon to scrape any browned bits from the pan. Let the broth reduce by about one-third, roughly 3 to 4 minutes.
    • Encouraging note: Those browned bits carry flavor. Scrape them and let the broth concentrate for a more flavorful sauce.
  6. Add lemon, thyme, and red pepper flakes.

    • Stir in the fresh lemon juice, fresh thyme leaves, and crushed red pepper flakes. Taste and adjust salt and pepper.
    • Encouraging note: The lemon brightens the sauce and keeps it from feeling heavy. A little heat wakes up the flavors.
  7. Finish with heavy cream.

    • Pour in the heavy cream and simmer gently until the sauce thickens slightly, about 3 to 5 minutes.
    • Encouraging note: Simmer gently to avoid breaking the cream. The sauce should coat the back of a spoon.
  8. Return the chicken and finish cooking.

    • Nestle the seared thighs back into the sauce. Spoon sauce over the meat and simmer on low until the internal temperature reaches 165°F, about 6 to 8 minutes depending on thickness.
    • Encouraging note: Use an instant-read thermometer for confidence. This step lets the chicken finish cooking in the sauce, keeping it tender and moist.
  9. Final touch and rest.

    • Turn off the heat and stir in a small pat of butter if you like, for extra gloss. Let the pan sit for 3 minutes to let flavors marry.
    • Encouraging note: The rest time lets the sauce thicken a touch more and brings the flavors together like a gentle hug.
  10. Serve and enjoy.

  • Spoon the creamy garlic sauce over the thighs and garnish with extra thyme or chopped parsley.
  • Encouraging note: Don’t forget to taste and adjust at the table. A squeeze of fresh lemon can brighten a serving.

If you want to learn more about high-heat searing and faster cooking techniques for meats, I often refer to fast-cooking meat tips to refine timing and temperature choices.

Serving

Bobby Flay Chicken Thighs in Creamy Garlic Bliss

Serve this dish family-style in the center of the table so everyone can help themselves. I love placing a big platter of the thighs beside a bowl of buttery mashed potatoes or rice for soaking up the sauce.

For a complete weeknight dinner, add a simple green salad or roasted vegetables. If you want a sweet finish, try one of my favorites for dessert like the banana pumpkin muffins which pair nicely with this kind of comforting, creamy meal.

Encourage everyone to spoon extra sauce on their plates. Kids especially love dipping rolls into the sauce, and it makes for a relaxed, communal dinner.

Storage

  • Refrigerating: Cool to room temperature, cover tightly, and store in the refrigerator up to 3 to 4 days.

    • Tip: Store chicken and sauce together so the flavors stay combined.
  • Freezing: I do not recommend freezing cream-based sauces. If necessary, freeze the cooked chicken without the cream sauce for up to 2 months. Reheat and make a fresh sauce when thawed.

    • Tip: Freeze the chicken in single layers on a sheet tray first, then transfer to a bag to prevent sticking.
  • Reheating: Reheat gently on the stove over low heat. Add a splash of chicken broth to revive the sauce if it thickens too much. Avoid rapid high heat to prevent the cream from separating.

    • Tip: Use a low simmer and stir frequently until warmed through.

Follow these steps to keep texture and flavor intact for leftovers. Reheated chicken in this sauce still makes a great lunch.

Kitchen Notes

  • Use an instant-read thermometer to ensure chicken hits 165°F for safety and perfect juiciness.
  • If you prefer fewer dishes, sear in an ovenproof skillet and finish in a 375°F oven for 8 to 12 minutes.
  • Swap the thyme for rosemary for a woodsy variation, but use it sparingly.
  • For an extra glossy sauce, swirl in 1 tablespoon of cold butter off heat before serving.
  • If kids are sensitive to heat, leave out the red pepper flakes and serve them on the side.

These shortcuts help on busy nights and let you keep the flavor without complicating the process.

Variations

  • Kid-Friendly: Omit crushed red pepper flakes and reduce lemon to 1 tablespoon. Serve over plain rice or buttered pasta.
  • Lighter: Use half-and-half instead of heavy cream and reduce butter to 1 tablespoon. The sauce will be thinner but still tasty.
  • Paleo-Friendly: Swap the heavy cream for full-fat coconut milk and use ghee instead of butter.
  • Gluten-Free: Ensure your chicken broth is labeled gluten-free and follow the recipe as written.
  • Herb Swap: Replace fresh thyme with fresh oregano or parsley for a different herbal profile.

These adjustments keep the core technique intact while letting you adapt to dietary needs and preferences. Small tweaks can make this recipe feel brand new.

FAQ

Q: Can I use bone-in chicken thighs instead?
A: Yes. Bone-in thighs add flavor but require longer cooking. After searing, finish in the oven at 375°F for 20 to 25 minutes until the internal temperature near the bone reaches 165°F.

Q: What if my sauce separates?
A: If the sauce looks curdled, remove from heat and whisk in a small amount of warm broth slowly to bring it back together. Simmer gently; avoid boiling cream.

Q: Can I make this ahead for a dinner party?
A: You can sear the chicken and make the sauce up to a day ahead. Reheat gently and finish with fresh lemon juice and butter just before serving to freshen flavors.

Q: Is heavy cream necessary?
A: Heavy cream gives the best texture. If you need a lighter sauce, use half-and-half, but expect a thinner consistency.

Q: How can I thicken the sauce more?
A: Simmer to reduce further. For more body, whisk a small slurry of 1 teaspoon cornstarch with 1 tablespoon cold water and stir into the simmering sauce until it thickens.

Conclusion

Thank you for bringing this cozy, flavorful dinner to your table. If you want to compare a classic version from another home cook, try the Easy Bobby Flay Chicken Thighs with Creamy Garlic Sauce for another take on a similar recipe. For a different kind of flavor pairing or to explore bright dressings, I also recommend checking out Red Chile Peanut Dressing – Andie Mitchell for inspiration.

I hope this dish becomes one of your weeknight heroes. Gather at the table, pass the sauce, and enjoy the little conversations that make family meals so special. — Lily

Shish Kabob Marinade for Chicken and Steak

Nothing brings a family together quite like the warm aroma of grilled shish kabobs wafting through the kitchen. The sizzle of marinated chicken and steak on a hot grill, the sound of laughter and conversation—it’s a delightful symphony that transforms a simple meal into cherished family memories. With just the right marinade, you can elevate your kabobs to a whole new level of flavor that everyone will love. Let’s dive into this fantastic recipe that will not only save you time but also create that perfect family dining experience.

Why This Works

Shish Kabob Marinade for Chicken and Steak

This shish kabob marinade is a game changer for busy families. It combines flavorful ingredients that enhance the natural taste of chicken and steak, making them juicy and tender. You can marinate the meat in advance, which is a huge time-saver on busy weeknights or special occasions. Plus, kabobs are perfect for customizing to each family member’s taste. Whether you prefer steak, chicken, or a mix of both, this marinade has you covered.

Process Overview

“This is where the magic happens—when the aroma fills the kitchen.”

The process of making these shish kabobs is both easy and enjoyable. First, you’ll whisk together the marinade, then allow the chicken and steak to soak up all the delicious flavors. While the meat is marinating, chop your veggies and prepare the skewers for grilling. The whole family can pitch in, making prepping for dinner a fun activity. You’ll love the moments spent together in the kitchen, and the end result will have everyone asking for seconds.

Ingredients

To whip up this amazing marinated shish kabob, gather the following ingredients:

  • 2 cloves garlic (crushed and rough chopped)
  • 1 cup vegetable oil (I used avocado oil; any oil will work)
  • ¼ cup soy sauce (I prefer Bragg’s or Tamari)
  • ¼ cup Worcestershire sauce (use Lee & Perrin’s if gluten-free)
  • ¼ cup Dijon mustard
  • ¼ cup lemon juice (fresh)
  • Pinch kosher salt
  • 1-2 teaspoons ground pepper
  • 2 ½ lbs sirloin (or New York Strip steak, cut into cubes)
  • 2 ½ lbs chicken breast (cut into cubes)
  • 1-2 onions (such as Walla-Walla, Vidalia, or red onions)
  • 1-2 bell peppers (variety of colors, cut into cubes)
  • 1 lb mushrooms (optional)
  • ½ fresh pineapple (cut into large chunks)
  • 1-2 zucchini (sliced ½ inch discs, or summer squash)
  • 1 carton grape tomatoes

These ingredients hold the key to creating a marinade that sings with flavor. Each component contributes to the overall taste, so feel free to personalize them a bit.

Directions

  1. In a medium bowl, whisk together all marinade ingredients and set aside. This will be the secret sauce that boosts all your flavors.

  2. Cut beef and/or chicken into 1 ½ inch cubes and place them in a shallow dish or container. If marinating for longer than 4 hours, keep the meats separate.

  3. Pour marinade over the meat(s) and stir to coat all sides. This step is crucial, as you want every piece of meat to soak up that flavorful goodness.

  4. Marinate in the fridge for 4-6 hours, or overnight if you have time. Stir occasionally to ensure even marination. This is where the magic happens—the longer the meat sits, the better.

  5. Prepare veggies and pineapple for skewers by cutting them into large chunks. Encourage your kids to help with chopping veggies to get them involved in the cooking process.

  6. Once the meat has marinated the required amount of time, it’s time to assemble the kabobs! Allow each guest to add their preferred ingredients to their skewer, alternating colors and meat(s) for visual appeal. Kids love personalizing their meals, and this makes it fun!

  7. Reserve some marinade for basting. Grill over medium-high heat for 4-5 minutes per side, turning and basting with the reserved marinade.

  8. Remove from the grill and cover with foil, allowing them to rest for 1-2 minutes.

  9. Carefully remove from the skewer and serve over rice or with your favorite salad. This is where you’ll want to bring everyone together again for the grand feast!

Serving

Shish Kabob Marinade for Chicken and Steak

Serving shish kabobs family-style is a heartwarming experience. Lay out a big platter filled with your grilled kabobs, rice, and an array of fresh salads. Encourage everyone to help themselves and share stories from their day. The vibrant colors of the grilled veggies and meat will surely capture everyone’s attention and appetites. This communal style of dining fosters connection and conversation, making your meal even more special.

Storage

What if you have leftovers? No need to worry. Allow the kabobs to cool down completely before placing them in an airtight container. They can be stored in the fridge for up to three days. Reheat in a microwave or on a skillet over medium heat until warmed through. This makes for a quick lunch or a second dinner, giving you even more value from that delicious meal.

Kitchen Notes

Here are some kitchen shortcuts to simplify your kabob-making experience:

  • Prep Ahead: Make the marinade the night before and let the meat soak overnight.
  • Use Skewers: If you’re using wooden skewers, soak them in water beforehand to prevent burning.
  • Mix and Match: Try different proteins such as shrimp or tofu for veggie friends.
  • Frozen Veggies: Use frozen veggies for a quick option, just thaw beforehand.
  • Kabob Kits: Consider purchasing pre-cut kabob kits from the grocery store for extra convenience.

Variations

Every family has its unique tastes, and you can easily tweak this recipe to accommodate different preferences or dietary needs:

  • Picky Eaters: If someone is not a fan of a particular vegetable, you can simply leave it out. The marinade still works wonders on the meat.
  • Low-carb: Skip the bread and rice; serve the kabobs over a fresh mixed salad for a light meal.
  • Vegan Option: Substitute the meat for chunks of tofu or tempeh, and stick to the veggies for a hearty plant-based option.
  • Spicy Kick: Add a teaspoon of chili powder or cayenne pepper to the marinade for a little heat.
  • Herb Infusion: Mix in fresh herbs like parsley or cilantro into the marinade for an extra layer of flavor.

FAQ

  1. Can I use frozen meat?

    • Yes, just make sure to thaw it completely before marinating.
  2. How long can I marinate the meat?

    • Marinate for a minimum of 4 hours, but it can safely sit overnight for best flavor.
  3. What if I don’t have all the ingredients?

    • Feel free to substitute similar ingredients you have on hand. Cooking is all about flexibility.
  4. Can I grill these kabobs indoors?

    • Yes, using a grill pan on the stove works perfectly for indoor grilling.
  5. Are these keto-friendly?

    • Yes, you can make them keto by serving over a salad instead of rice.

In conclusion, these shish kabobs are more than just a meal. They bring everyone together around the table, creating moments that linger long after the last bite is gone. Cooking is a journey of flavors, and I hope you find as much joy in this recipe as I do. Enjoy the process, savor the results, and most importantly, cherish the time spent with your loved ones around the table. Happy grilling!

Cowboy Butter Chicken Linguine

There’s something magical about entering the kitchen and being welcomed by the warm aroma of something delicious cooking. As you gather your ingredients, the sizzle of chicken in the pan fills the air, and you can almost taste the creamy butter sauce that will soon envelop your pasta. This is the essence of Cowboy Butter Chicken Linguine, a dish that’s not only easy to prepare but packed with flavor.

Why This Works

Cowboy Butter Chicken Linguine

This Cowboy Butter Chicken Linguine is perfect for busy families. With simple ingredients and quick preparation, you can have a hearty meal on the table in no time. It’s a dish that encourages togetherness around the dinner table. The rich butter and garlic sauce will delight your taste buds, while the tender chicken provides protein to keep everyone satisfied. It’s about bringing the family together while saving precious time in the kitchen, all without sacrificing flavor.

Process Overview

“This is where the magic happens—when the aroma fills the kitchen.”

Imagine the smile on your loved ones’ faces as they gather around the table, all eager to dig into this delicious linguine. The process is simple and straightforward, yet the end result feels like a treat. You can whip this up while chatting with your family or catching up on the day’s events. Let’s dive into the ingredients and get started.

Ingredients

Here’s what you’ll need for this mouthwatering dish:

  • 8 oz linguine
  • 2 chicken breasts, diced
  • 4 tablespoons butter
  • 4 cloves garlic, minced
  • 2 tablespoons Dijon mustard
  • 1 tablespoon lemon juice
  • 1/2 teaspoon red pepper flakes
  • Salt and pepper to taste
  • Fresh parsley for garnish

Lily’s Tips:

  • Linguine: This pasta shape holds sauce beautifully, making every bite a delight.
  • Chicken breasts: Boneless, skinless chicken is best for even cooking and an easy bite.
  • Butter: Use unsalted butter to control the salt levels for your taste.
  • Garlic: Freshly minced garlic offers a stronger, more aromatic flavor compared to pre-minced alternatives.
  • Dijon mustard: This adds a tangy kick that beautifully complements the butter sauce.
  • Lemon juice: Fresh lemon juice brightens the dish and balances the richness.
  • Red pepper flakes: Adjust the amount based on your family’s preference for spice.
  • Fresh parsley: Not only does it add a pop of color, but it also brings freshness to the dish.

Directions

Now, let’s get cooking! Follow these easy steps, and soon you’ll be enjoying a delightful dinner.

  1. Cook the linguine according to package instructions; drain and set aside.

    • Cooking your pasta al dente ensures it holds up in the sauce and adds a nice texture.
  2. In a large skillet, melt the butter over medium heat. Add the diced chicken and season with salt and pepper. Cook until the chicken is no longer pink, about 5-7 minutes.

    • Make sure to toss the chicken occasionally for even cooking. The aroma will start to fill the kitchen!
  3. Add the minced garlic and red pepper flakes to the skillet and sauté for another 1-2 minutes until fragrant.

    • This step is where the kitchen really starts to smell amazing. Just don’t burn the garlic!
  4. Stir in the Dijon mustard and lemon juice, mixing well to combine.

    • The mixture should start to thicken slightly, creating a luscious sauce for your pasta.
  5. Add the cooked linguine to the skillet and toss to coat the pasta in the creamy sauce.

    • This is the fun part, so get in there and mix! Make sure every noodle is coated.
  6. Serve immediately, garnished with fresh parsley.

    • A sprinkle of fresh parsley not only adds color but also an extra layer of flavor.

Serving

Cowboy Butter Chicken Linguine

For a family-style serving, place the linguine in the center of the table in a large bowl. Encourage everyone to help themselves, making it a communal experience. Pair this dish with a simple green salad and a crusty loaf of bread for a complete meal. The warmth of the setting makes this dish even more enjoyable, bringing back memories of family dinners.

Storage

Leftovers? No worries! Cowboy Butter Chicken Linguine can be stored in an airtight container in the fridge for up to three days. To reheat, simply pop it in the microwave for a quick meal. You can also warm it up on the stovetop over low heat, adding a splash of chicken broth or a touch more butter for creaminess.

Kitchen Notes

Here are some shortcuts to make your cooking even easier:

  • Use rotisserie chicken: Save time by using store-bought rotisserie chicken instead of cooking from scratch.
  • Minced garlic jars: Keep pre-minced garlic on hand for a quick and easy option.
  • Frozen linguine: Some brands offer frozen linguine that cooks in just a few minutes. Perfect for busy nights!
  • Prep beforehand: Chop the chicken and garlic ahead of time to make cooking a breeze.
  • Add veggies: Throw in some spinach or cherry tomatoes for a health boost and extra flavor.

Variations

Not everyone likes the same things. Here are some tweaks to accommodate different preferences:

  • For picky eaters: Leave out the red pepper flakes for a milder flavor, or serve the sauce on the side.
  • Gluten-free: Substitute regular linguine with gluten-free pasta.
  • For a dairy-free version: Use a vegan butter alternative, and replace Dijon mustard with a dairy-free variety.
  • Vegetarian option: Swap the chicken for sautéed mushrooms or zucchini for a delicious plant-based meal.

FAQ

1. Can I use a different type of pasta?
Absolutely! Any pasta shape will work, but keep in mind that cooking times may vary.

2. How can I make this dish spicier?
You can increase the amount of red pepper flakes or add sliced jalapeños during cooking.

3. Can I double this recipe?
Yes, just make sure you have a large enough skillet or cook in batches for even cooking.

4. What can I serve this with?
A light salad and garlic bread pair beautifully with the rich flavors of the dish.

5. Is it kid-friendly?
Definitely! Its creamy texture and mild flavor make it appealing to children.

In conclusion, Cowboy Butter Chicken Linguine is a heartwarming dish that brings families together. Its combination of rich flavors, quick preparation, and the joy of sharing a meal makes it an instant favorite. I hope you gather your loved ones around the table and enjoy every bite of this delightful dish. Happy cooking!

Cowboy Butter Chicken Pasta Recipe

There’s something intoxicating about the sounds and smells that waft through the kitchen while cooking. The sizzling of chicken in butter, the fragrant garlic softening in the pan, and the creamy sauce slowly coming together—it all creates a cozy atmosphere that feels like home. The moment you take that first bite of Cowboy Butter Chicken Pasta, you’ll find the rich flavors embracing your senses. It’s food for the soul, perfect for family gatherings or a comforting weeknight dinner.

Why This Works

Cowboy Butter Chicken Pasta Recipe

This Cowboy Butter Chicken Pasta recipe is a blend of simple ingredients that come together effortlessly. It’s designed for busy families who want a delicious meal without spending hours in the kitchen. In about 30 minutes, you can have a delightful dish that will satisfy even the pickiest eaters. The creamy sauce, tender chicken, and perfectly cooked pasta create a comforting harmony on the plate.

This recipe rarely takes long to prepare, making it ideal for those evenings when time is precious but you still want to enjoy a home-cooked meal. Plus, it’s easy to customize, so you can make it fit your family’s taste preferences. Your kids will love it, and you will too!

Process Overview

“This is where the magic happens—when the aroma fills the kitchen.”

Cooking this pasta dish is straightforward and enjoyable. Start by boiling the pasta while you sauté the chicken. As everything cooks, the kitchen fills with warm, inviting scents that signal something delicious is on the way. Each step is simple and allows you to focus on enjoying the process rather than feeling rushed.

Ingredients

Here’s what you’ll need for this recipe:

  • 8 oz pasta of choice (I prefer penne or fettuccine)
  • 1 lb chicken breast, diced (boneless, skinless works best)
  • 1/2 cup unsalted butter (adds richness)
  • 4 cloves garlic, minced (fresh is key for flavor)
  • 1 tsp smoked paprika (adds a depth of flavor)
  • 1/2 tsp cayenne pepper (for a little kick)
  • 1/2 cup heavy cream (for creaminess)
  • 1/2 cup grated Parmesan cheese (for that cheesy goodness)
  • Salt and pepper to taste (essential for balancing flavors)
  • Fresh parsley, chopped for garnish (adds color and freshness)

Lily’s Tips:

  • For pasta, choose a type that holds sauce well.
  • Dice the chicken into even pieces for uniform cooking.
  • Use fresh minced garlic for the best flavor.
  • Adjust the cayenne pepper according to your spice preference.
  • Grate your Parmesan cheese fresh for a smoother sauce.

Directions

  1. Cook the pasta according to package instructions. Drain and set aside.

    • Remember to reserve a little pasta water in case you need to loosen the sauce later.
  2. In a large skillet, melt the butter over medium heat.

    • Keep an eye on it; you want it to melt without browning.
  3. Add the diced chicken and cook until browned and cooked through.

    • Stir occasionally for even cooking; the chicken should be golden and juicy.
  4. Stir in the minced garlic, smoked paprika, and cayenne pepper; cook for 1-2 minutes.

    • Let the garlic become fragrant—it signals that it’s ready for the next step.
  5. Pour in the heavy cream and bring to a simmer.

    • Watch the sauce bubble gently; if it thickens too much, add a splash of reserved pasta water.
  6. Stir in the Parmesan cheese until melted and smooth.

    • This is where the magic sets in; the sauce should be creamy and cheesy.
  7. Add the cooked pasta to the skillet and toss to coat in the sauce.

    • Make sure every piece of pasta gets that delicious creamy coating.
  8. Season with salt and pepper to taste.

    • Always taste your dish before serving to ensure the flavors are balanced.
  9. Garnish with fresh parsley before serving.

    • A sprinkle of parsley not only adds flavor but also a lovely pop of color.

Serving

Cowboy Butter Chicken Pasta Recipe

This dish is perfect for serving family-style. Place it in a large serving bowl and gather everyone around the table. Offer some crusty bread or a simple green salad as a side, and watch as your family digs into this comforting meal. Encourage sharing and seconds, as this Cowboy Butter Chicken Pasta truly feels like a warm hug on a plate.

Storage

If you have leftovers, store them in an airtight container in the refrigerator. They’ll keep for about three days. To reheat, simply microwave in a bowl, adding a splash of water or more cream to loosen the sauce if needed. Stir it well to ensure even warming!

Kitchen Notes

Here are some shortcuts to make your cooking even smoother:

  • Pre-cook the chicken: Season and grill or bake chicken ahead of time.
  • Use rotisserie chicken: It saves time and adds great flavor.
  • Prep the garlic and onions in advance: Keep them in the fridge for quick access.
  • Choose a short cooking pasta: It cooks faster and saves time on prep.
  • Double the recipe: Making extra means easy lunches for the week.

Variations

Don’t hesitate to tweak this recipe to suit your family’s tastes. Here are some ideas:

  • Picky Eaters: Leave out the cayenne and reduce the garlic for a milder flavor.
  • Vegetarian Option: Replace chicken with sautéed vegetables like bell peppers, zucchini, or mushrooms.
  • Gluten-Free: Use gluten-free pasta for a suitable alternative.
  • Dairy-Free: Substitute butter with olive oil and use coconut cream instead of heavy cream.
  • Add Veggies: Toss in some spinach or broccoli for added nutrition.

FAQ

1. Can I use frozen chicken?
Yes, you can. Just make sure to cook it longer until fully thawed and browned.

2. How spicy is this dish?
The spice level can be adjusted. Reduce or eliminate the cayenne pepper if you prefer less heat.

3. What’s the best way to reheat leftovers?
The microwave is quick and easy; add a splash of water or cream when reheating to keep it creamy.

4. Can I make this vegan?
You can substitute chicken with grilled tofu, use vegan butter, and a plant-based cream alternative.

5. How does the sauce stay creamy?
The butter and heavy cream emulsify beautifully, creating a rich sauce that clings to the pasta.

In closing, Cowboy Butter Chicken Pasta is more than just a meal; it’s an invitation to gather around the table and connect with loved ones. The comforting flavors and simple preparation make it a go-to recipe for families everywhere. As you savor each bite, remember that good food nurtures not just the body but also the heart. Enjoy cooking and creating wonderful memories in your kitchen!

Blackstone Griddle Hibachi Chicken Dinner

There is nothing quite like the sound of sizzling chicken and vegetables cooking on a griddle. The aroma fills the kitchen, awakening everyone’s appetite. The anticipation builds as you gather around the table, ready to enjoy a homemade feast. Today, we’re diving into a delicious Blackstone Griddle Hibachi Chicken Dinner that the whole family will love. This meal is not only satisfying; it brings back memories of classic hibachi restaurants while saving you time in the kitchen.

Why This Works

Blackstone Griddle Hibachi Chicken Dinner

This Hibachi Chicken Dinner is perfect for families on the go. You can prepare the entire meal on the griddle, cutting down on cooking time and cleanup. The vibrant colors of the zucchini, onions, and chicken create a feast for the eyes, while the delicious combination of flavors will have everyone coming back for seconds.

One of the best things about cooking hibachi at home is that you can customize it to suit your family’s tastes. If someone prefers extra veggies or a different protein, you have the freedom to make it your own. Plus, cooking together can turn dinner into a fun family activity, creating bonds and memories.

Process Overview

“This is where the magic happens—when the aroma fills the kitchen.”

Gather your ingredients and get ready to bring the restaurant experience to your home. The good news is that preparing this meal is straightforward and rewarding. Let’s walk through the key ingredients and the easy steps to create this delightful dinner.

Ingredients

For the fried rice:

  • 2 cups cooked rice (preferably leftover)
  • 1 tablespoon soy sauce
  • 1 tablespoon butter
  • 1 egg (optional)
  • 1/4 cup peas and carrots (frozen works well)
  • Salt and pepper (to taste)

For the hibachi chicken and vegetables:

  • 2 medium zucchini (sliced into spears)
  • 1/2 medium onion (sliced)
  • 1 tablespoon butter
  • 1 tablespoon avocado oil (or your favorite cooking oil)
  • 1 teaspoon garlic powder
  • 1-2 tablespoons soy sauce
  • Salt and pepper (to taste)
  • 1½ pounds boneless skinless chicken breast (cut into cubes)
  • 2 tablespoons butter
  • ¼ cup soy sauce
  • 2 tablespoons minced garlic
  • 1 teaspoon minced ginger (squeeze bottle ginger preferred)
  • 3 tablespoons honey
  • 3 tablespoons brown sugar (loosely packed)
  • Yum yum sauce and/or sriracha (for serving)

Lily’s Tips:

  • Use leftover rice for the best texture in fried rice.
  • If you don’t have fresh ginger, the squeeze bottle version works perfectly.

Directions

  1. Preheat your griddle on low or medium-low. This is the perfect time to get excited about your meal!

  2. Start by preparing the fried rice recipe on the griddle. Melt 1 tablespoon of butter and add the cooked rice, soy sauce, peas, and carrots. If you like, scramble in an egg for extra protein and richness. Mix everything until heated through and lightly browned. Set it aside on the cooler side of the griddle.

  3. While the fried rice is cooking, prepare the hibachi sauce for the chicken. In a medium bowl, whisk together the soy sauce, minced garlic, minced ginger, honey, and brown sugar. This sauce packs a flavor punch, adding depth to the dish. Set it aside.

  4. Once the fried rice is almost done, move it to the cooler side of the griddle. This will make room to cook the veggies. Add 1 tablespoon of butter and 1 tablespoon of avocado oil to the hotter zone of the griddle and spread it around with your spatula. Add zucchini and onions, then sauté them, adding garlic powder, soy sauce, salt, and pepper. Stir to combine, cooking until tender.

  5. Add another tablespoon of avocado oil to the hot area of the griddle. Once heated, add the cubed chicken breast. Ensure the pieces are separated to get a good sear. Resist the urge to stir too soon – let them sear for about 2 minutes.

  6. Add 2 tablespoons of butter to the chicken and toss to combine. Keep sautéing until the chicken is almost cooked through.

  7. Pour the hibachi sauce over the chicken, tossing to combine. Keep cooking until the chicken is cooked through and the sauce thickens slightly. This should only take about 2 minutes.

  8. Transfer all cooked dishes (fried rice, teriyaki chicken, zucchini, and onions) to a large plate and serve immediately. Offer yum yum sauce or sriracha on the side for everyone to customize their plates.

Encouraging Note: Cooking is a fantastic way to spend time with family and can be a learning experience for kids. Let them help with simple tasks and watch their confidence grow.

Serving

Blackstone Griddle Hibachi Chicken Dinner

When it’s time to serve the meal, think family-style. Place all the vibrant, delicious food in the center of the table. Encourage everyone to help themselves. Serving your meal this way creates a warm environment, allowing for conversation and laughter over plates of delectable food.

Feel free to double up on your favorite components or add more sauces for dipping. The beauty of hibachi is how customizable it is, and everyone can tweak their plates just how they like them.

Storage

Leftovers are a great bonus of this meal. Store any uneaten hibachi chicken and fried rice in airtight containers in the fridge. They’ll be good for 3-4 days. When you want to reheat, simply place them in the microwave or reheat on the griddle for a couple of minutes to bring back that fantastic texture.

To prevent the rice from drying out, you might want to add a splash of water to it before reheating. This helps to maintain moisture and keeping flavors intact.

Kitchen Notes

  • Use a griddle mat to make cleanup even easier.
  • Cook chicken to an internal temperature of 165°F for safety.
  • Pre-chop your vegetables earlier in the day or even the night before for quick prep.
  • Feel free to mix in some bean sprouts or broccoli for added nutrition.
  • Don’t hesitate to switch the chicken for shrimp or tofu, depending on your family’s preferences.

Variations

If you have picky eaters at home, fear not! There are many ways to adjust this recipe:

  • For veggie lovers, add more colorful bell peppers or broccoli to the griddle.
  • If someone prefers steak, swap the chicken for sirloin steak cut into cubes.
  • Going meatless? Use firm tofu or tempeh instead and marinate it in the same sauce.

If dietary restrictions exist, you can easily switch out soy sauce for a gluten-free tamari. The honey can also be substituted with maple syrup for a vegan option.

FAQ

1. Can I use frozen chicken for this recipe?
Yes, but it’s best to thaw the chicken completely before cooking. This will help it cook evenly and prevent it from being rubbery.

2. How can I make this dish spicier?
Add more sriracha to the serving sauces or incorporate diced fresh chili peppers while sautéing the chicken.

3. Is it necessary to use a griddle?
While a griddle creates that nice, seared flavor, you can use a large skillet instead. Just make sure it is large enough to accommodate all ingredients.

4. Can leftovers be frozen?
Yes, leftovers can be frozen, but it’s best to eat them fresh for optimal texture and flavor. If you freeze, keep in mind that rice can become mushy upon reheating.

5. How do I know when the chicken is cooked thoroughly?
Using a meat thermometer, check that the internal temperature reaches 165°F. Additionally, the chicken should be white with no pink inside.

Conclusion

Cooking up a Blackstone Griddle Hibachi Chicken Dinner is not just about the meal. It’s about the laughter, the memories, and the quality time spent with those you love. It’s a wonderful way to transform an ordinary evening into a culinary adventure. So gather your family, fire up the griddle, and create not only a delicious dinner but also lasting memories. Enjoy every bite!

Blackstone Garlic Parmesan Chicken

There’s something magical about the sounds and smells that fill the kitchen when you’re cooking a family meal. The sizzling sound of chicken on a hot griddle mixes with the aromatic garlic, creating an irresistible invitation for everyone to gather around. It’s in these moments that we share laughter and stories, creating memories that last a lifetime.

Why This Works

Blackstone Garlic Parmesan Chicken

This Blackstone Garlic Parmesan Chicken recipe is a fantastic choice for busy families. With just a handful of ingredients and a quick cooking time, you can serve up a wholesome meal that everyone will love. The combination of garlic, parmesan, and the crispness of the chicken creates a flavor explosion that is comforting yet satisfying. Plus, cooking on the Blackstone griddle saves you time on cleanup, allowing you to spend more of it with your loved ones.

Process Overview

“This is where the magic happens—when the aroma fills the kitchen.”

This recipe is as simple as it is delicious. You’ll marinate the chicken for maximum flavor and then let the Blackstone do its work. In less than an hour, you can have a restaurant-quality meal right at home, making it perfect for a weeknight dinner or a weekend feast.

Ingredients

For this delightful recipe, you will need:

  • 4 boneless, skinless chicken breasts (about 1.5 lbs): Look for breasts that are uniform in size for even cooking.

  • 4 cloves fresh garlic, minced: Fresh garlic is a must for the best flavor.

  • 1 cup grated parmesan cheese: Choose a high-quality parmesan for a richer taste.

  • 2 tablespoons olive oil: Extra virgin olive oil adds a wonderful depth.

  • 2 teaspoons Italian seasoning: This mix will enhance the overall flavor.

  • Salt and pepper to taste: Adjust according to your family’s preference.

  • Juice of 1 lemon: Fresh lemon juice brightens the dish.

  • 2 tablespoons butter: Use unsalted butter so you can control the saltiness.

Directions

  1. In a bowl, combine olive oil, minced garlic, Italian seasoning, salt, pepper, and lemon juice. Add chicken breasts and coat evenly. Let marinate for at least 30 minutes.
    Tip: If you have time, letting the chicken marinate longer will deepen the flavors.

  2. Preheat your Blackstone griddle to medium-high heat (375°F).
    Encouragement: Preheating is crucial for that perfect sear!

  3. Place marinated chicken on the griddle, searing each side for about 5-7 minutes until golden brown and cooked through. The internal temperature should reach 165°F.
    Tip: Using a meat thermometer will ensure your chicken is perfectly cooked.

  4. In a small saucepan over medium-low heat, melt butter and stir in additional minced garlic until fragrant (about 1 minute). Pour this mixture over cooked chicken along with grated parmesan.
    Encouragement: Your kitchen will start to smell amazing at this point.

  5. Serve hot with your favorite sides.
    Note: This chicken goes beautifully with roasted vegetables or a fresh salad.

Serving

Blackstone Garlic Parmesan Chicken

Serving this Blackstone Garlic Parmesan Chicken family-style is a lovely way to bring everyone together. Place the chicken on a large platter, and sprinkle some extra parmesan on top for a restaurant-style presentation. Pair it with sides that your family loves, such as garlic bread, mashed potatoes, or a colorful salad. This create-your-own plate experience encourages everyone to enjoy their meal just the way they like it.

Storage

If you have leftovers (though that’s unlikely!), store the chicken in an airtight container in the fridge. It will last for about 3-4 days. To reheat, place it back on the griddle for a few minutes or in the microwave. Just be careful not to dry it out—moisture is key!

Kitchen Notes

  • Quick Marination: If you’re short on time, marinating for just 15 minutes will still provide great flavor.
  • Cook Efficiently: Cook multiple batches of chicken at once if you have a busy family or guests over.
  • Make Extra: Double the recipe and save some chicken for salads or wraps the next day.
  • Season Freely: Don’t shy away from adding your favorite spices; they can make the dish unique.
  • Clean as You Go: Keep your workspace organized to make cleanup easier.

Variations

  • For Picky Eaters: If someone in your family doesn’t like garlic, you can simply reduce the amount or leave it out altogether.
  • Gluten-free: This recipe is naturally gluten-free, so it can easily accommodate any dietary needs.
  • Low-carb: Serve the chicken over a bed of sautéed zucchini noodles for a delicious low-carb option.
  • Different Cheeses: Swap out parmesan for cheddar or mozzarella for a different flavor profile.

FAQ

  1. Can I use chicken thighs instead of breasts?
    Yes, chicken thighs will work well; they may need a few extra minutes to cook through.

  2. What’s the best way to tell when the chicken is done?
    Use a meat thermometer. The internal temperature should reach 165°F.

  3. Can I make this dish ahead of time?
    Yes, you can marinate the chicken a day in advance, but cook it fresh for the best results.

  4. What should I serve with this dish?
    It pairs wonderfully with rice, pasta, or any green vegetable.

  5. Is it safe to reheat chicken?
    Yes, as long as it’s stored properly and reheated to at least 165°F.

As you gather around the table to share this delightful dish, remember that cooking and sharing meals is all about connection and love. Each recipe is an opportunity to create wonderful moments with those who matter most. This Blackstone Garlic Parmesan Chicken is more than just a meal; it’s a vessel for family bonds. Enjoy the process, the flavors, and the joy of being together.