As the summer sun blazes down, there’s nothing quite like the zesty freshness of lemon to cool off and elevate my spirits. I’ve curated a collection of my favorite lemon desserts and drinks that not only brighten up hot days but also tantalize the taste buds with their vibrant flavors. From tangy Lemon Raspberry Cookies to a refreshing Egyptian Mint Lemonade that will leave you craving more, each recipe is a delightful journey into summer. Join me as I share these easy-to-follow recipes and tutorials that promise to impress at any gathering while providing the perfect balance of sweetness and citrusy zing!
1. Lemon Raspberry Cookies


There’s something magical about family kitchens. It’s where the warmth of love mingles with the aroma of delicious food, weaving stories with each bite. Picture this: the sound of playful laughter as your kids set the table, and the fragrant scent of something sweet wafting from the oven. That familiar smell makes you think of cozy afternoons and family gatherings, each moment sprinkled with memories. Now, imagine sharing Lemon Raspberry Cookies, a delightful treat that captures that very essence of comfort and joy.
Why This Lemon Raspberry Cookies Feels Like Home
In our family, cooking and baking are communal activities, a bridge connecting generations. Lemon Raspberry Cookies have become a favorite, often requested for family gatherings or just because. The zesty lemon balances perfectly with the tart berries, creating a blend that feels like a warm hug. It’s these small moments spent together, baking and sharing stories, that make this recipe special.
Every bite of these cookies whispers of family traditions. With a hint of citrus and a burst of berries, they remind us that food is not just about nourishment but about creating memories. Whether enjoyed with a cup of tea or as a sweet treat after dinner, these cookies embody comfort and joy, making them a staple in our home.
The Simple Magic Behind Lemon Raspberry Cookies
Making Lemon Raspberry Cookies is straightforward yet feels magical. The joy lies in blending bright flavors that come together effortlessly. This delightful recipe creates cookies with crispy edges and soft, chewy centers—perfect for your afternoon tea or a sweet surprise at dessert.
Not only do they taste heavenly, but they also bring comfort. I remember the first time my kids tried these cookies; their eyes lit up with excitement. That moment echoed what my grandmother used to say, “A cookie is not just for eating; it’s about the love baked into it.” They soon became our family favorite, spawning little traditions around baking them together.
Why Lemon Raspberry Cookies is Our New Family Favorite
One reason Lemon Raspberry Cookies have become our go-to dessert is their adaptability. They come together quickly, perfect for those busy weeknights when everyone is buzzing about their day. Just gather your ingredients, and you’ll have them ready in no time, making them perfect for busy schedules.
Cooking together can provide immense joy and a welcome break from the daily grind. Watching the cookies rise in the oven is a mini celebration of togetherness, sparking stories from each other’s day. Plus, everyone can get involved—my kids often take turns stirring or scooping dough. As they say, teamwork makes the dream work, especially in the kitchen.
How to Make Lemon Raspberry Cookies, The Heartwarming Way
Now that I’ve whetted your appetite, let’s dive into the most heartwarming part: the cooking process! Don’t worry, it’s easier than it looks. In just a few steps, you’ll be on your way to baking cookies that smell fantastic and taste even better.
“This is where the magic happens—when the aroma fills the kitchen and my kids come running in, asking ‘Is it ready yet?’”
Step-by-Step Overview: Keeping It Simple
- Preheat the oven to 350°F (175°C) and line baking sheets with parchment paper.
- Get your kitchen warm and cozy. The parchment paper will make transferring your cookies a breeze, preventing any sticking.
- Rub the granulated sugar and lemon zest together until fragrant.
- This is one of my favorite steps. Rubbing the sugar with lemon zest releases its aromatic oils, infusing sweetness with zesty goodness.
- Cream in the butter and brown sugar on medium-high speed for 3–4 minutes until light and fluffy.
- This is where you create a fluffy cloud of deliciousness. It’s the base for your cookies, and getting it right is crucial.
- Mix in the egg yolk, lemon juice, and vanilla extract.
- The lemon juice gives a fresh tang, while the vanilla adds warmth. This mixture is pouring in a burst of flavor.
- Add salt, baking powder, baking soda, and flour gradually, mixing until just combined.
- Don’t overmix! You just want everything to come together so that your cookies will be soft and melt-in-your-mouth.
- Fold in the frozen chopped raspberries gently.
- This is where the color comes alive! Each raspberry will burst in your mouth with every bite, giving a sweet tang that pairs beautifully with lemon.
- Scoop the dough into 3-tablespoon balls, placing 5 on each baking sheet, and sprinkle with flaked salt.
- Scoop and drop. This also means easier cleanup—always a bonus in my kitchen.
- Bake for 12–15 minutes until edges begin to turn golden. Let cool on the baking sheet to finish baking.
- Timing is essential here. When those edges start turning golden, they will taste even better when they cool down a touch.
Now that you have made these delicious cookies, the anticipation of taste is a thrill on its own.

Serving Lemon Raspberry Cookies with Love
In our family, we like to serve our cookies family-style, with everyone lending a hand. There’s something enticing about digging into a platter of Lemon Raspberry Cookies right from the center of the table.
I often pair them with a simple cup of tea or a scoop of vanilla ice cream, creating a delightful contrast. The vibrant lemon flavor brings out the sweetness of the ice cream, while the raspberries add a burst of tartness. It’s wonderful to sit together, sharing stories over sweet bites.
Kids particularly love this scene. My daughter has her go-to story about how we made these cookies one rainy afternoon, and my son typically talks about how they are perfect for sharing with friends.
Storage & Reheat Tips (Keeping the Goodness)
So, how do we keep those Lemon Raspberry Cookies fresh? Here are my go-to storage tips. Keeping them stored thoughtfully will preserve that fresh-baked goodness.
- Let them cool completely before you store them. This prevents humidity from making them soggy.
- Store them in an airtight container at room temperature for up to a week. They disappear quickly in our house, but the flavor remains.
- For longer storage, consider freezing them. Place cooled cookies in a single layer on a baking sheet, freeze until solid, then transfer to a freezer bag. They can last up to three months. When you’re ready, simply thaw and enjoy that fresh taste!
- Reheat in the oven at 300°F (150°C) for a few minutes to bring back that warm feel—a quick trick my grandmother taught me!
My Kitchen Notes & Shortcuts
The beauty of Lemon Raspberry Cookies lies not only in their taste but also in their simplicity. Here are some of my personal notes and shortcuts that make the process even smoother:
- Room temperature butter is key for creaming; it incorporates air and makes those cookies fluffy.
- Frozen raspberries are just fine; they add the same flavor without losing any joy. Plus, you can keep them on hand year-round.
- Zest the lemon before juicing it; it makes zesting easier, and you’ll get the most out of your fruit.
- Making the dough ahead of time is handy. You can prepare it, refrigerate for up to 24 hours, shape into balls, then bake as needed. This can be a lifesaver on busy days.
- Involving the kids makes it fun! Let them stir or mash the raspberries; it’s a great way to create lasting memories.
Family-Friendly Variations
One of the best things about cooking is the freedom to adapt recipes. Here are a few ways to make these Lemon Raspberry Cookies your very own:
- Swap out raspberries for blueberries or strawberries. Each berry brings its unique flavor profile and will turn your cookies into something fresh!
- For a nutty twist, consider adding chopped walnuts or ground almonds for an unexpected crunch.
- To lighten them up, use low-fat butter or a butter substitute—just be mindful of the texture, which might be slightly different.
Encouraging creativity in the kitchen allows each family to put its stamp on a recipe. Leave space for your story and let these cookies evolve into something that belongs to you.
FAQs About Lemon Raspberry Cookies
Can I make this ahead for a busy week?
Absolutely! In fact, letting the dough sit for an hour allows the flavors to deepen, almost like an old family recipe getting better with time.
What if I don’t have fresh raspberries?
Frozen raspberries work beautifully! They maintain their flavour and are often more accessible.
Can I use regular sugar instead of brown sugar?
Sure thing! Brown sugar adds a hint of caramel flavor, but regular sugar will do just fine, giving you a sweeter cookie.
How do I avoid overbaking my cookies?
Watch for the edges turning golden and set a timer. When they look just right, take them out even if they feel underdone. They’ll firm up as they cool.
Can I double the recipe?
Of course! These cookies are perfect for sharing, so making a double batch is always a good idea when feeding a crowd.
One Final Thought from My Kitchen
I hope Lemon Raspberry Cookies find their way into your kitchen, filling it with warmth, laughter, and sweet aromas. Sharing food isn’t just about eating; it’s about creating memories that linger long after the meal is enjoyed.
Until next time, happy cooking! May your kitchen be filled with joy, love, and plenty of scrumptious aromas. If you embrace these moments just like I do, I promise you’ll find your family’s laughter is just as delightful as it was when the cookies first came out of the oven.
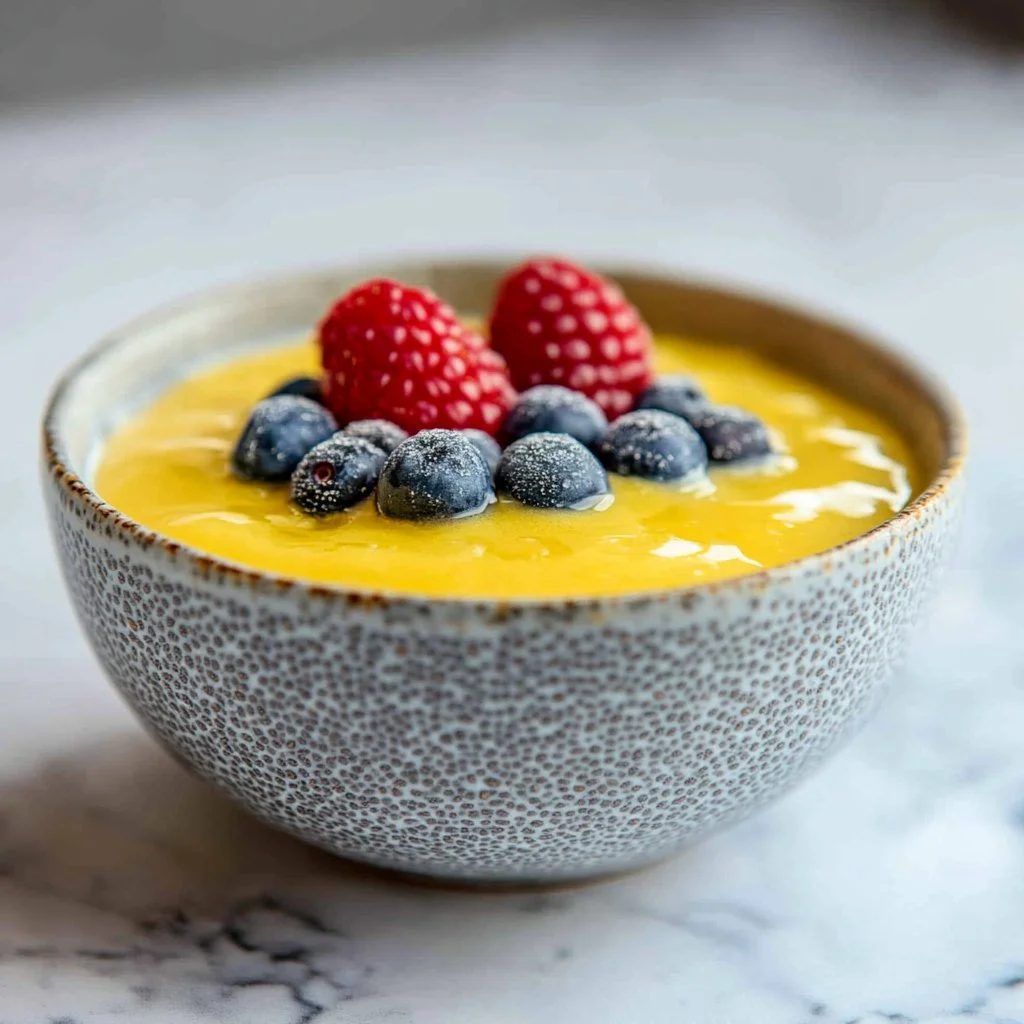
2. Lemon Curd Chia Pudding

There’s something truly special about the sounds and smells that fill a family kitchen, isn’t there? Picture this: the cheerful chaos of kids setting the table while the comforting scent of lemon mingles with the sweet aroma of a dessert coming together. It instantly transports me back to sunny afternoons spent with my grandmother, learning her secrets for the perfect lemon curd. Today, I’m excited to share a delightful recipe that beautifully marries those memories with modern simplicity—Lemon Curd Chia Pudding. Whether it’s a busy weeknight or a relaxed weekend brunch, this dish brings flavor and connection to the table.
Why This Lemon Curd Chia Pudding Feels Like Home
The beauty of Lemon Curd Chia Pudding is its effortless charm. It reminds me of those lazy summer days when we would savor every bite, each spoonful bursting with bright flavor and creamy texture. This recipe is not just about filling bellies; it’s about creating moments. It’s a dish that fits seamlessly into any family gathering, whether it’s a cozy breakfast or an elegant dessert.
What I love the most is how simple it is. A little bit of preparation means that I can spend more time laughing and catching up with loved ones instead of slaving away in the kitchen. In a world where busy schedules pull us in every direction, this dish feels like a warm hug, inviting everyone to slow down and indulge together.
Why Lemon Curd Chia Pudding is Our New Family Favorite
This lovely pudding has won a special place in our hearts. It quickly became a favorite because it’s not only delicious but also versatile. The creamy texture of the chia pudding pairs wonderfully with the zesty lemon curd, making it both refreshing and indulgent. It pleases everyone in my family, from my citrus-loving kids to my partner, who has a sweet tooth but appreciates healthier options.
You can whip it up in no time, and it requires minimal dishes, making the cleanup a breeze. Plus, this pudding can be made ahead of time, so when it’s time to eat, all you have to do is serve. It satisfies cravings while also being a delightful treat that feels special—ideal for our busy, joyful nights.

How to Make Lemon Curd Chia Pudding, The Heartwarming Way
Making Lemon Curd Chia Pudding is an experience that fills the kitchen with anticipation. It’s all about getting the right mix and allowing the magic to happen. First, you’ll see the chia seeds glisten with almond milk, which starts to thicken and create that irresistible creamy consistency. It’s one of those dishes that genuinely feels gratifying to create.
“This is where the magic happens—when the aroma fills the kitchen and my kids come running in, asking ‘Is it ready yet?’”
This recipe is perfect for those moments. The colors are vibrant, and the aroma of lemon zest can fill the air, wrapping around you like a warm blanket. Let’s dive into the simple process of bringing this heartwarming dish to life.
Ingredients You’ll Need
Gathering your ingredients is the first step in creating this chia pudding masterpiece. Here is what you’ll need:
- 1/4 cup chia seeds
- 1 cup almond milk (or your choice of plant-based milk)
- 1/4 cup lemon curd
- 2 tablespoons maple syrup (optional, depending on your sweetness preference)
- 1 teaspoon vanilla extract
- Fresh berries for topping (totally optional, but they bring a beautiful splash of color)
Don’t hesitate to make it your own and use what you have. Got some leftover yogurt? Swap a bit in for creaminess. No fresh berries? Sprinkle on toasted coconut for a twist. Cooking is about creativity and personal touches.
Step-by-Step Directions
Let’s walk through the steps to prepare Lemon Curd Chia Pudding. Trust me; it’s simpler than you think!
- In a bowl, combine chia seeds, almond milk, lemon curd, maple syrup, and vanilla extract.
- Mix well until the chia seeds are evenly distributed throughout the liquid.
- Let it sit for 10-15 minutes to allow the chia seeds to absorb the liquid and thicken—don’t rush this part; it’s essential.
- Stir again and refrigerate for at least 1 hour or overnight for the best texture.
- Serve chilled, topped with fresh berries if desired—this adds a lovely contrast to the creamy pudding!
A little note here: letting it chill overnight will make the flavors even more vibrant. Your patience will be rewarded.
Serving Lemon Curd Chia Pudding with Love
The way we serve Lemon Curd Chia Pudding is just as important as making it. I like to dish it out family-style, right in the center of the table, allowing everyone to help themselves. This creates an inviting atmosphere, where everyone can dig in and share their favorite toppings or ideas.
We often serve it with some granola sprinkled on top for a lovely crunch, adding interesting textures that everyone enjoys. My kids love to be in charge of the berries; it’s a fun way for them to express themselves, colorful plates becoming a canvas as they showcase their creativity.
The laughter that echoes when the whole family gathers around the table is what makes each meal special. Food is more than nourishment; it’s that connective thread that brings us closer.
Storage & Reheat Tips (Keeping the Goodness)
Once you’ve made the Lemon Curd Chia Pudding, you might wonder how to store leftovers. The good news is it keeps beautifully in the refrigerator. Just transfer any leftovers into an airtight container and they will stay fresh for up to three days.
If you decide to reheat it, I recommend warming it slightly in the microwave. Just a quick 30 seconds will do the trick. If you want that fresh-out-of-the-fridge chill, just serve it cold with more fresh berries on top.
My Kitchen Notes & Shortcuts
After making this recipe so many times, I’ve picked up a few tips to streamline the process:
- If you’re short on time, prepare this pudding in the morning for a grab-and-go breakfast later in the day.
- Experiment with different nut milk if almond isn’t quite your thing. Cashew or coconut milk can provide delightful variations.
- Get the kids involved! Let them help measure ingredients or stir. It can be a fun family activity that blends together learning and cooking.
Family-Friendly Variations
One of the best things about Lemon Curd Chia Pudding is that it’s so flexible. Here are a few variations we’ve loved:
- Swap the lemon curd for orange or lime curd to give your pudding a citrusy twist.
- For a tropical flair, add some diced mango or shredded coconut as toppings.
- Play with the pudding’s texture by blending some of it to create a smooth consistency while leaving some whole chia seeds for that delightful crunch.
These variations not only keep the dish exciting but also add to our family’s story. Each new ingredient brings a stage for gathering together and sharing.
FAQs About Lemon Curd Chia Pudding
Is Lemon Curd Chia Pudding healthy?
Absolutely! It’s rich in Omega-3s from the chia seeds and packed with vitamins from the lemon curd.
Can I make this ahead for a busy week?
Of course! It tastes even better after a night in the fridge, so it’s perfect for meal prep.
How can I make this vegan?
Simply ensure your lemon curd is dairy-free, or use a plant-based alternative that suits your needs.
One Final Thought from My Kitchen
As we wrap up this delicious journey, I hope that Lemon Curd Chia Pudding finds its way to your table. There’s a certain magic in sharing food with those we love, and I hope this recipe brings you joy and connection. Until next time, happy cooking! Let the laughter and love flow, just as they do in my kitchen.
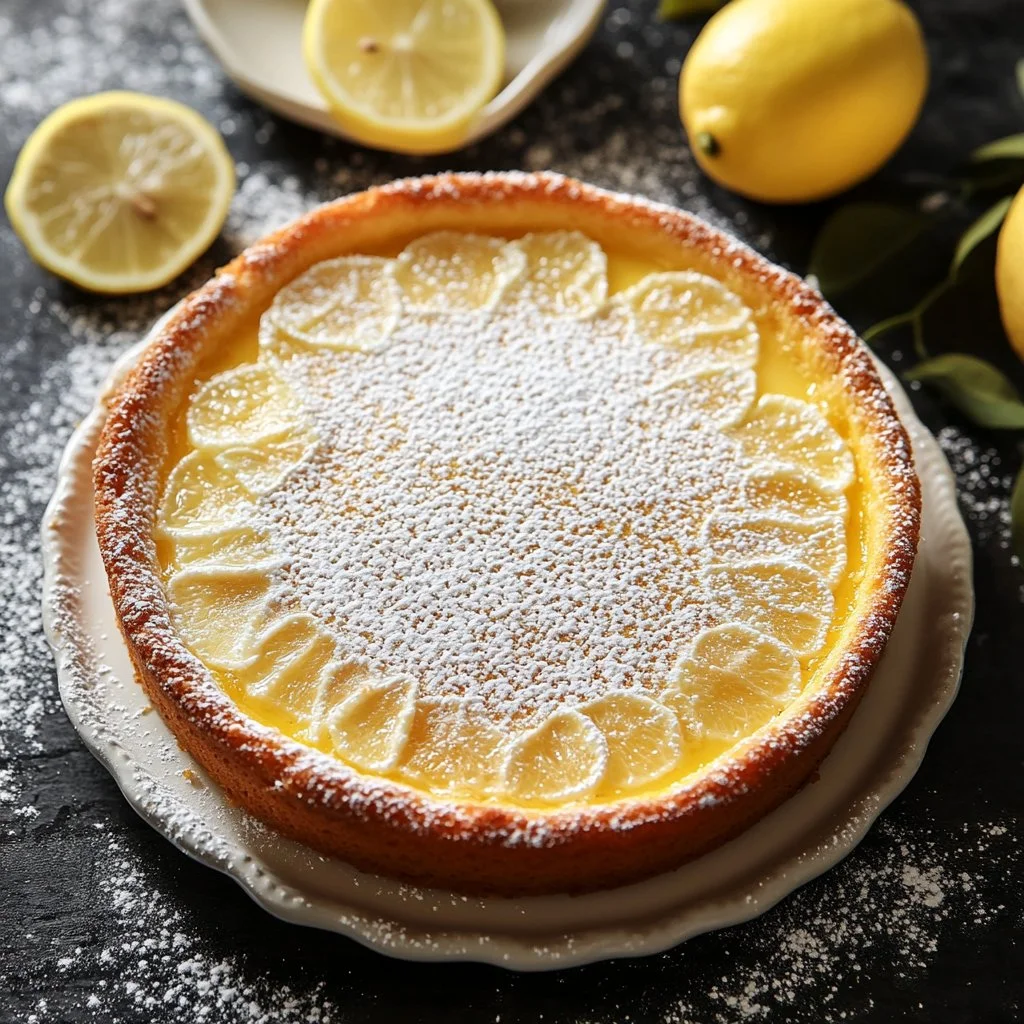
3. Lemon Custard Cake

There’s something truly magical about a family kitchen filled with laughter and love. Maybe it’s the sound of my kids setting the table, their little voices rising in excitement. Or perhaps it’s the comforting aroma drifting from the oven, reminiscent of my grandmother’s house. The moment you hear that familiar “ding” from the oven while the sun sets, the joyful energy in the room reminds me that cooking isn’t just about the food; it’s about the connections we create. Today, I am excited to share a delightful dessert that has quickly become a family favorite: Lemon Custard Cake.
Why This Lemon Custard Cake Feels Like Home
When I think about the desserts that make our family gatherings extra special, Lemon Custard Cake tops the list. It embodies everything I cherish about cooking: comfort, connection, and a sprinkle of joy. This is not just any dessert; it feels like a warm hug, with a flavor that dances on your palate. The zesty brightness of the lemon combined with the luscious custard-like texture makes it so inviting.
This cake is perfect for any occasion, whether it’s a casual weeknight dinner or a celebratory family gathering. My kids love how light and tangy it is, and it’s always a hit with our extended family. It never fails to brighten up our table, serving as the centerpiece of sweet togetherness.
While we’re all busy with life’s chaotic rhythms, this cake surprises you with its ease. It comes together so quickly that you might find yourself shaking your head in disbelief. The fuss-free preparation means less time in the kitchen and more time enjoying those cherished connections with family. Just wait until you taste it – I promise, it will become a part of your family traditions too.
The Simple Magic Behind Lemon Custard Cake
At its core, lemon custard cake embodies the idea of effortless, yet special cooking. This recipe is deceptively simple but delivers a stunningly delicious outcome. The magic lies in the harmony of the flavors and textures, creating a cake that feels fancy but is wonderfully attainable.
The creamy custard base contrasts beautifully with the bright citrus notes, which makes a cake that is sweet, yet refreshing. This balance creates a dessert that feels both indulgent and light, perfect for any day of the week. With just a few ingredients, you’ll find that it’s about the quality of what you use instead of complicated techniques.
There’s something comforting about knowing that you can whip up this dessert anytime, satisfying those sweet cravings without the stress. Whether it’s for a family gathering or a quiet evening at home, Lemon Custard Cake has a way of feeling right at home.
Why This Recipe Works for Our Busy, Joyful Nights
Let’s face it: we all have busy nights. Balancing work, extracurricular activities, and family time can be overwhelming. That’s why recipes like this Lemon Custard Cake are such a blessing in our homes. It simplifies dessert without sacrificing joy or flavor.
In about 40 minutes, you can be serving your family a warm, aromatic cake that feels like it took hours to prepare. The minimal clean-up means less stress after a long day. I often enlist my kids to help with the mixing – it brings a delightful sense of involvement. Cooking together is where the real storytelling happens, and I cherish that time spent in the kitchen.
Go ahead, give it a try. I promise you’ll surprise yourself with how easy it is to bring a little magic into your home with this cake.
How to Make Lemon Custard Cake, The Heartwarming Way
Cooking is an art, and with this recipe, the process is as joyful as the outcome. The first step is preheating the oven, where the journey begins. As the oven warms up, you can feel the anticipation in the air. Make sure to choose a good quality lemon; its zest will shine through in the flavor, reminding me of sunny days spent picking fresh fruit.
“This is where the magic happens—when the aroma fills the kitchen and my kids come running in, asking ‘Is it ready yet?’”
The soft, sweet scent of the cake baking will create a cozy atmosphere in your home, drawing your loved ones, eager to taste what lies ahead.
Step-by-Step Overview: Keeping It Simple
- Preheat the oven to 350°F (175°C). Grease a 9-inch round cake pan.
- Get that oven ready; the warm air will be our best friend. While the oven heats up, this is the perfect time to gather everything you need.
- In a mixing bowl, cream together the sugar and butter until light and fluffy.
- This part feels like magic. Watch the sugar and butter transform into a luscious golden mixture — that’s your cue for something divine to come!
- Add the eggs one at a time, mixing well after each addition.
- It’s important to incorporate them fully. Each egg adds richness, and the process is so satisfying, just like my grandmother taught me.
- Stir in lemon zest and lemon juice.
- This is where the cake truly begins to shine. The fresh zest and juice make it bright and zesty. Let the citrus flavor permeate your kitchen.
- In another bowl, blend the flour, salt, and baking powder. Gradually add this dry mixture to the wet ingredients, alternating with the milk, starting and ending with the flour mixture.
- You’re building a fantastic batter here. The combination is light yet rich, making for a heavenly cake. Don’t rush this step; the mixing creates texture.
- Pour the batter into the prepared pan.
- Get ready to marvel at the gorgeous mixture you’ve created.
- Bake for 30-35 minutes or until the top is golden and a toothpick inserted in the center comes out clean.
- Watch it rise. The golden color means it’s getting closer. I like to check with a toothpick — a clean pick is your golden ticket.
- Let it cool for a few minutes in the pan before transferring to a wire rack.
- Allowing it to rest makes the moving process easier and helps the layers settle.
- Dust with powdered sugar before serving, if desired.
- A sprinkle of powdered sugar feels like a little party on top. Such a simple step makes it look special.
Serving Lemon Custard Cake with Love
When it comes to serving Lemon Custard Cake, I love to keep it simple and heartfelt. We bring it to the table family-style, and everyone helps themselves. It feels like a celebration of togetherness.
Often, you’ll find us pairing it with some fresh berries or a dollop of whipped cream to enhance the tartness of the cake. My kids love the extra color and flavor, and it turns into a delightful, enjoyable ritual.
Every slice is an invitation to share stories, laughter, and a warm moment together. Remember how I mentioned that joyous aroma filling the kitchen? It becomes even more vivid when everyone gathers around the table, ready to dig in. I cherish those moments; they are what life is all about.
Storage & Reheat Tips (Keeping the Goodness)
After indulging in that delicious cake, you might have some leftovers. Fear not, for this dessert stores beautifully.
To keep the cake fresh, cover it with plastic wrap or store it in an airtight container. This helps maintain the moisture and flavor. If you think the family will devour it first, I won’t judge!
For reheating, I recommend using the oven to bring back that just-out-of-the-oven warmth. Preheat your oven to 350°F (175°C), place the cake on a baking sheet, and let it warm through for about 10 minutes. The microwave is useful too, but the oven will give you that delightful texture, just like when it was first baked.
My Kitchen Notes & Shortcuts
Over the years, I’ve picked up a few handy tricks that make making Lemon Custard Cake even more enjoyable:
- Prep Ahead: Make the batter the day before and let it rest in the fridge overnight (just don’t bake it). The flavors deepen, and it will still rise beautifully.
- Zest Storage: If you have leftover lemon zest, store it in a small container in the freezer. It’s ready for your next baking adventure and saves time!
- Kid Involvement: Let your children help with mixing and pouring; it makes the experience more fun and helps create lasting memories.
- Flavor Boost: For an extra punch, try adding a splash of vanilla extract, or mix in some dried lavender for a sophisticated twist.
- Taste Testing: Don’t forget to sample the batter! It’s a family tradition in our kitchen, and it brings smiles before the cake is even baked.
Family-Friendly Variations
One of the best parts about cooking is making a recipe your own. Here are a few ways to add a twist to this classic Lemon Custard Cake:
- Gluten-Free Option: Substitute all-purpose flour with a 1:1 gluten-free blend. The cake still holds its deliciousness and gives everyone a chance to enjoy it.
- Fruit Variations: Swap out lemon for orange or even key lime for a different flavor profile. This keeps it fresh and exciting.
- Add-Ins: Toss in some blueberries or raspberries for a fruity explosion. They can create delightful little surprises in every bite.
These adjustments speak to our creativity in the kitchen, inviting your family traditions into the mix.
FAQs About Lemon Custard Cake
Can I make this ahead for a busy week?
Absolutely! In fact, letting it sit for an hour allows the flavors to deepen, making it taste even better.
How do I keep the cake moist?
Cover it tightly after it cools, and try to eat it within a few days for the best flavor.
Is it possible to freeze Lemon Custard Cake?
Yes! You can freeze it, but make sure it’s wrapped well. It’ll keep for about a month—enjoy it on a rainy day when you need a little sunshine!
What do I serve with Lemon Custard Cake?
Fresh fruit, whipped cream, or a scoop of vanilla ice cream are all lovely companions. Each brings a fresh twist that complements the cake’s flavor beautifully.
One Final Thought from My Kitchen
As I wrap up this delicious journey, I hope that every slice of Lemon Custard Cake finds its way into your family’s laughter and stories. Creating memories filled with love is what nourishes us the most.
Until next time, happy cooking! May your kitchen be filled with warmth, joy, and a sprinkle of zesty love.
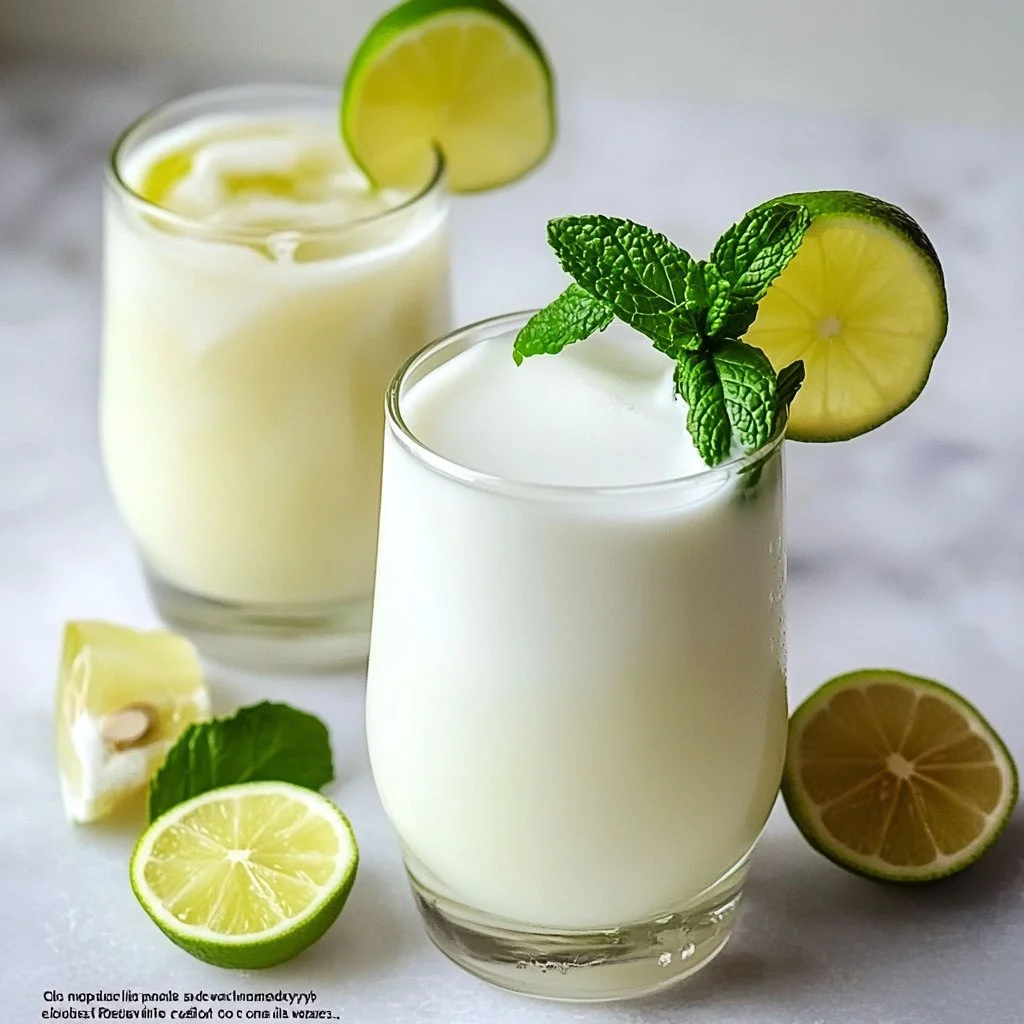
4. Lori’s – Creamy Lemonade/Limeade Drinks 1. Egyptian Mint Lemonade Ingredients: 6 medium limes sliced 3 cups whole milk (optional) 1 cup cold water 1 cup gra… | Smoothie drink recipes, Nonalcoholic drink recipes, Lemonade drinks


As the sun begins to dip beneath the horizon, filling the kitchen with a warm golden hue, I can hear the fridge door opening and closing, the chaotic sounds of my kids rummaging for their favorite cups. This is the moment I cherish most—the sound of family gathering, ready for a treat that will brighten our day. That’s when I reach for my recipe for Lori’s Creamy Lemonade, a simple yet delightful drink that instantly transports me back to summers spent with my grandmother, who always had a pitcher of her icy mint lemonade at the ready.
Why This Lori’s – Creamy Lemonade/Limeade Drinks Feels Like Home
Lori’s Creamy Lemonade is more than just a refreshing drink—it’s a tradition wrapped in zesty flavors and icy comfort. The blend of fresh limes, rich whole milk, and crisp mint fills the air with a nostalgic aroma that speaks of leisurely gatherings, neighborhood barbecues, and that indescribable feeling of home. Each sip carries the tang of lime, tempered by the creaminess of milk, resonating with almost every memory I hold dear.
What makes this lemonade special is not just the taste but its ability to draw family together. It evokes laughter and shared stories, a soothing balm on hot summer days, or a tasty refreshment during family game nights. You don’t just make this lemonade; you create an experience—one made to be shared.
Why Lori’s – Creamy Lemonade/Limeade Drinks is Our New Family Favorite
The charm of Lori’s Creamy Lemonade lies in its simplicity and its joyful accessibility. With just a handful of ingredients, you have the power to craft something that feels special without nearly any effort. As a busy parent, I’m all too familiar with the strain of juggling family commitments, practices, and late-night homework sessions. Lori’s recipe provides not just a drink, but a connection point for my family amidst the busyness of our lives.
Imagine the kids sitting around the table after a long day, asking for a refreshing drink that is both healthy and comforting. This recipe lets me say yes without a tinge of guilt. It’s a delightful treat that brings a breath of fresh air into our routine and creates wonderful bonding moments. Plus, it’s an adaptable base, so we can adjust it based on our current mood or whatever ingredients we have on hand.
The Simple Magic Behind Lori’s – Creamy Lemonade/Limeade Drinks
At the heart of this recipe is its delightful balance of flavors. The limes’ tartness marries beautifully with the rich creaminess of milk. That little bit of mint adds a touch of freshness that brightens every sip. As I prepare this drink, I can already feel the anticipation bubbling among my kids—those familiar pleas of “Can I help?” make the kitchen an inviting space.
The great thing about Lori’s Creamy Lemonade is its nature of elevating a simple gathering. The bright limes promise a refreshing zing, while the milk turns what could be a refreshing beverage into a creamy, comforting delight, loved by both grown-ups and kids alike. And trust me, it’s easier than it looks!
Why This Recipe Works for Our Busy, Joyful Nights
This recipe is the epitome of effortless yet special cooking. When my family gathers around for some quality time, I want a drink that can come together in minutes. Lori’s Creamy Lemonade checks all the boxes; it takes hardly any time to whip up—perfect for those bustling weeknights when preparation is key.
You only need to gather some simple ingredients and in under ten minutes, you have a pitcher of pure joy. What I love most is how I can make it my own by adding unexpected twists or leaving some elements out based on my family’s tastes.
How to Make Lori’s – Creamy Lemonade/Limeade Drinks The Heartwarming Way
To prepare Lori’s Creamy Lemonade, let’s keep it straightforward. This is a dish that welcomes you into the kitchen without fuss.
“This is where the magic happens—when the aroma fills the kitchen and my kids come running in, asking ‘Is it ready yet?’”
The steps are easy and the results are spectacular. As the bright yellow color of the lemonade catches your eye, you can almost hear the happy stomachs rumbling in anticipation. The best part is hearing the clinking of glasses as we serve it around the table. Let’s get started!
Ingredients You’ll Need
Gather these simple ingredients for our delightful recipe:
- 6 medium limes, sliced
- 3 cups whole milk (optional for a creamy texture)
- 1 cup cold water
- A cup of fresh mint (don’t skip the fresh herbs—they’re the soul of the drink)
- Sweetener to taste (honey or sugar work like a charm)
Remember, this is about getting creative! Don’t hesitate to adjust based on what you have in your fridge; fresh mint isn’t a hard requirement but definitely adds a refreshing flair.
Step-by-Step Directions
- Prepare the limes: Start by washing them and cutting them into thin slices. The vibrant green amidst the yellow liquid will brighten up any gathering.
- Muddle the mint: In a pitcher, place the mint leaves at the bottom and gently muddle them to release their oils. It doesn’t need to be perfect—a few gentle presses will do. My kids love this part!
- Add the limes: Toss in the lime slices with the muddled mint. You’ll notice the beautiful minty aroma filling the air.
- Mix in water and sweetener: Pour in the cold water and stir. This is where you can have a little fun. Test the sweetness and add honey or sugar until it’s just right for your taste.
- Stir in the milk: To take it up a notch, add the whole milk. This makes the lemonade creamy and delicious, but feel free to skip this if you prefer a lighter version.
- Chill it: Let it sit in the fridge for about 30 minutes, allowing the flavors to blend. The wait is worth it!
- Serve and enjoy: Pour the lemonade over ice in your favorite cups, garnish with mint leaves, and get ready for smiles all around.
Serving Lori’s – Creamy Lemonade/Limeade Drinks with Love
When it comes to serving Lori’s Creamy Lemonade, I love to present it family-style, with everyone gathering around the table and helping themselves. I find this approach not only encourages conversation but also creates a relaxed atmosphere, especially on those hot summer evenings.
Serve it in a large pitcher or bowl, accompanied by fun, colorful straws or sturdy glasses for a picnic vibe. Sometimes, I’ll set out additional lime slices or sprigs of mint for those who want a little extra kick. It’s basically a little lemonade bar, and kids love customizing their drinks.
Storage & Reheat Tips (Keeping the Goodness)
Occasionally, you might end up with some leftovers. No worries! Store any excess lemonade in an airtight container in the fridge. It will last for about a week. However, the texture and flavor are best enjoyed fresh, especially if it has milk in it.
If you’re taking a break from the busy week, you can remaking the drink fresh will infuse that homemade flavor once more. The sweetness will fade a little, but a splash of fresh lime juice before serving can breathe new life into it.
Even if you’re tempted to use the microwave for a quick warm-up, I suggest serving it cold over ice. It’s meant to be refreshing!
My Kitchen Notes & Shortcuts
Here are a few kitchen tips I’ve picked up along the way:
- Taste as you go: Adjust sweetness according to your family’s preference. A little experimentation makes everyone happy.
- Chill glasses beforehand: If you have a few minutes, chill your glasses in the freezer before serving for a frosty touch.
- Make it ahead: Try preparing this a few hours in advance. Letting it chill allows the flavors to meld beautifully.
- Involve the kids: Give them jobs like measuring, pouring, or stirring. This turns making lemonade into a fun family bonding opportunity.
Family-Friendly Variations
This lemonade is versatile! You can make it your own and tweak it based on family preferences. Here are some of our favorite variations:
- Berry Blast: Add your favorite berries like strawberries or blueberries for a fruity twist. It’s colorful and fun!
- Minty Ginger: Incorporate a little freshly grated ginger to elevate the drink and provide a bit of spice.
- Coconut Cream: Switch out the whole milk for coconut milk for a tropical flair that is also dairy-free. Imagine sipping on this on a warm beach day!
FAQs About Lori’s – Creamy Lemonade/Limeade Drinks
Can I make this ahead for a busy week?
Absolutely! In fact, allowing it to sit for a few hours—even overnight—lets the flavors mingle wonderfully.
Is the milk necessary?
Not at all! You can omit it for a pure lemonade. The mint and lime combination is delicious on its own without cream.
Can I freeze it?
Yes, you can freeze the lemonade in ice cube trays. Use them in other drinks or blend them into smoothies for a refreshing treat.
What sweeteners can I use?
Honey, agave, or even stevia work beautifully. Adjust according to your preference for sweetness.
What if I want it less tart?
You can play around with the amount of sweetener to tone down the tartness. Add a touch more lemon or some sugar until it’s just right!
One Final Thought from My Kitchen
I hope this dish finds its way into your family’s laughter and stories. If it does, my grandmother’s kitchen is smiling. Until next time, happy cooking!
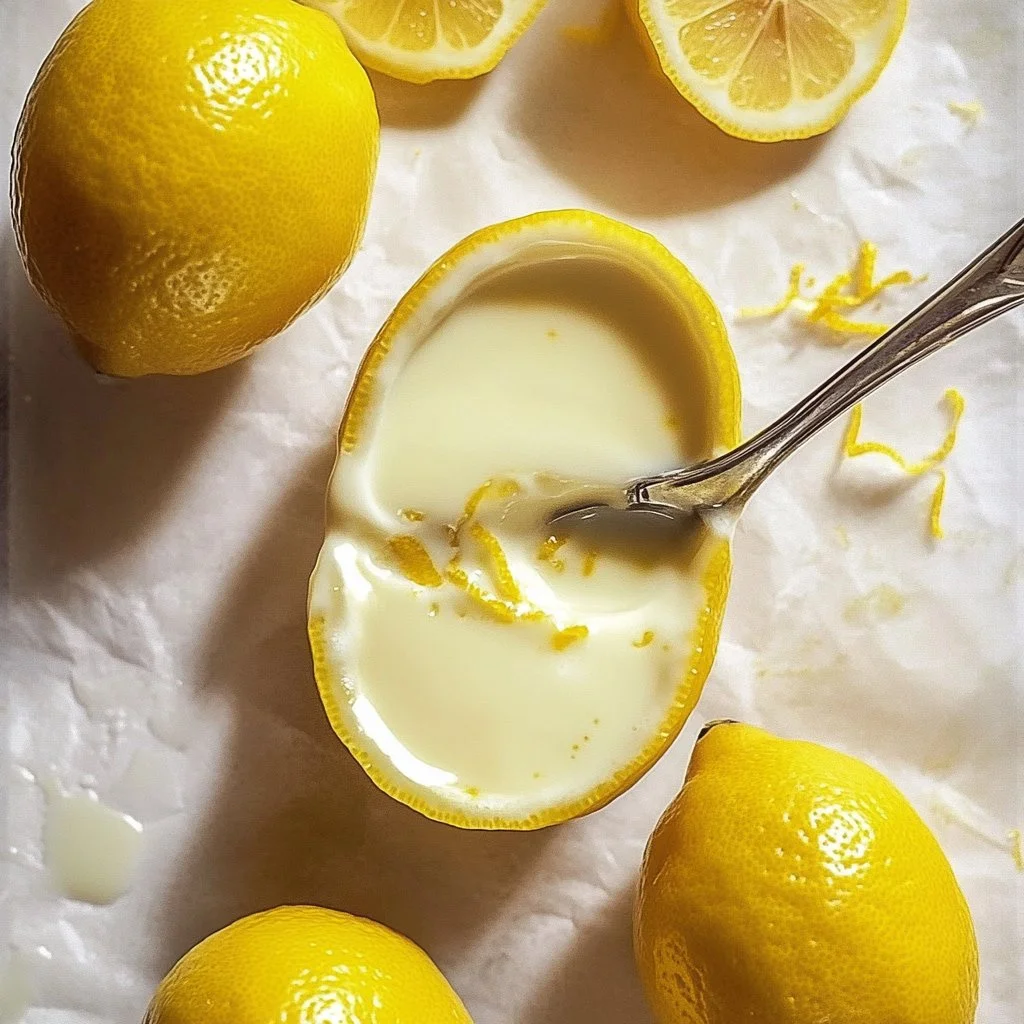
5. Lemon Posset


There’s something magical about the sound of laughter echoing through a home. The gentle clatter of forks and spoons as kids set the table, the comforting scent that drifts from the kitchen, teasing everyone’s taste buds. It reminds me of my grandmother’s house by the river, where the laughter and love were just as abundant as the delicious food that filled the table. Cooking should bring us closer, turning everyday moments into cherished memories, and that is exactly how I feel about making Lemon Posset. This dessert is easy to whip up, deliciously rich, and feels like a cozy hug from a loved one.
Why This Lemon Posset Feels Like Home
Lemon Posset feels like home for many reasons. First, it’s simple yet elegant, a dessert that works its charm without overwhelming you in the kitchen. Imagine serving this creamy delight to your family, their eyes lighting up with anticipation as they dig in. The fresh lemon flavor sparkles on the palate, making it a refreshing end to any meal.
But beyond the taste, it brings people together. On busy nights, when schedules clash, and everyone is tired, this dessert is a little beacon of joy. It’s not just about making something delicious; it’s about creating moments. This Lemon Posset is perfect for any occasion, from family dinners to special celebrations. Once everyone gathers around the table, you can feel the love, laughter, and connection in the air, making it worth every stirring, whisking, and chilling moment.
The Simple Magic Behind Lemon Posset
The beauty of Lemon Posset lies in its simplicity. With only a handful of ingredients, this dessert emerges as a culinary hero on busy weeknights. It doesn’t require fancy techniques or culinary expertise. Anyone can make it—yes, even you. The creaminess combined with the zesty lemon flavor transforms this easy treat into a spotlight dish.
You might think it’s complicated, but let me assure you, it’s easier than it looks. Just like when my grandmother used to say, “Cooking should be joyful, not stressful.” It’s about finding that balance between effort and relaxation, letting the flavors mingle beautifully while you focus on what matters—the smiles around your table.
Why This Recipe Works for Our Busy, Joyful Nights
In our fast-paced lives, we often seek comfort food that can also impress. That’s where Lemon Posset shines. It comes together quickly, requires minimal dishes, and satisfies that craving for something sweet and refreshing. It gives the impression of having spent hours in the kitchen while only taking a fraction of that time.
Imagine wanting a sweet treat after dinner, but dreading the hours it takes to prepare. This recipe makes it easy. Simply prepare it in the morning or even the night before, and you’ll have a luscious dessert waiting to be enjoyed post-dinner. The culmination of flavors after allowing it to sit for a few hours is genuinely delightful. This Lemon Posset isn’t just a dessert; it’s a moment captured in time, shared amidst the clanging of dishes and bubbling laughter.
How to Make Lemon Posset, The Heartwarming Way
Now, I am excited to share how easy it is to make Lemon Posset. Trust me when I say, this is where the magic happens—when the aroma fills the kitchen and my kids come running in, asking, “Is it ready yet?” It’s all about the process, gathering the ingredients, and creating something beautiful with your own two hands. Here’s a quick overview of how we get there:
- Gather your ingredients: It starts with fresh lemons, heavy cream, sugar, kosher salt, and vanilla extract.
- Zest and juice: You’ll zest those lemons, releasing their fragrant oils, then juice them for that bright burst of acidity.
- Heat and mix: Gently simmer the cream and sugar, then mix in the lemon juice and zest.
- Chill and pour: Pour the mixture into lemon halves, cover, and chill. The waiting is the hardest part but oh-so-worth it.
As the transition from warm cream to silky posset happens, you’ll know you’re on the right track when the mixture thickens and your kitchen fills with a sweet lemon fragrance.
Ingredients You’ll Need
Here’s a list of the simple yet flavorful ingredients that come together to create this beautiful Lemon Posset:
- 3 large lemons
- 1 cup heavy cream
- ⅓ cup sugar
- ¼ teaspoon kosher salt
- ½ tablespoon lemon zest
- 2½ tablespoons lemon juice
- 1 teaspoon vanilla extract
Don’t shy away from experimenting here. Use what’s fresh and available. For instance, if you have limes or even oranges, they can bring a delightful twist to the flavor profile.
Step-by-Step Directions
Making Lemon Posset is straightforward and enjoyable. Ready? Let’s dive into the steps:
- Zest the lemons: Grate ½ tablespoon of zest from one lemon. This will add a burst of flavor to your dessert.
- Juice the lemons: Slice the remaining lemons in half lengthwise. Use a spoon to remove the insides and juice them through a fine-mesh sieve. Measure out 2½ tablespoons of lemon juice and reserve the rest for a refreshing lemonade or a salad dressing.
- Heat the cream: In a small saucepan, combine the heavy cream, sugar, kosher salt, and lemon zest. Bring it to a gentle simmer over medium-low heat. This step infuses the flavor into the cream. Remember, keep an eye on it—no one wants burnt cream.
- Simmer and whisk: Continue to simmer while whisking occasionally for about 5 minutes. If you see tiny bubbles forming, that’s perfect. It means the flavors are melding beautifully.
- Add lemon juice and vanilla: Whisk in the lemon juice and vanilla extract, then strain the mixture through a fine-mesh sieve into another bowl. This will create a silky texture and remove the zest.
- Portion into lemon halves: Evenly divide the mixture into the harvested lemon halves. It’s a fun way to serve and presents beautifully.
- Chill: Cover with plastic wrap and refrigerate for at least 4 hours. This allows the posset to set. Trust the process; it will be worth it.
- Serve: A few minutes before serving, let it sit at room temperature for 5 to 10 minutes. This will make it smoother when it’s time to dig in.
Cooking with your kids can be fun and a fabulous way to bond. Get them involved in measuring, stirring, or even juicing the lemons. They’ll treasure these moments as much as the dessert itself.
Serving Lemon Posset with Love
When we gather around the dinner table, dessert is always a moment of excitement. In our home, we like to serve Lemon Posset family-style. I place a platter in the center, and everyone helps themselves to the elegant little lemon bowls. The joy of sharing this dessert makes it even sweeter.
Each person has their favorite way to enjoy it. Some love to add a sprinkle of fresh mint on top, creating a beautiful contrast of colors. Others prefer a drizzle of honey or a few berries to complement that zesty freshness. The laughter and stories that flow during these moments create memories that linger long after the last spoonful is gone.
Storage & Reheat Tips
If you find yourself with leftovers (though it rarely happens), storing Lemon Posset is quite simple. Cover each lemon half with plastic wrap and keep them in the fridge. This dessert really shines when served chilled, so it’s perfect for leftovers.
If you’re considering reheating it, the microwave is fine for a quick treat. However, nothing can quite replicate that freshly made warmth. Therefore, if you want a more delightful experience, consider allowing it to sit out for a bit before serving again. The flavor will bloom, and the texture will be even creamier.
My Kitchen Notes & Shortcuts
Over the years, I’ve learned a few tricks that make making Lemon Posset even more enjoyable:
- When zesting lemons, use a microplane; it’s quick and gives you finely grated zest that mixes beautifully with the cream.
- For an extra touch of flavor, consider infusing the cream with a few sprigs of fresh thyme while it simmers.
- Don’t toss the extra lemon juice you have left over—it’s perfect for dressing salads or even making lemonade!
- Allow the kids to decorate their Lemon Posset bowls with berries. They love being involved and get a kick out of personalizing their dessert.
- This dish can be made a day ahead, giving the flavors time to meld beautifully.
Family-Friendly Variations
One of the lovely things about Lemon Posset is how you can tweak it to create a new family favorite. Here are a few variations to consider:
- Berry Bliss: Fold in fresh berries like raspberries or blueberries before pouring the mixture into the lemon halves. Their sweetness perfectly balances the tartness of lemon.
- Coconut Twist: Substitute half of the heavy cream with coconut milk. The gentle coconut flavor adds a wonderful tropical touch to this dessert.
- Herbal Infusion: Try adding a few sprigs of fresh basil or mint during the simmering process for a refreshing herbal flavor that brightens up the dish.
- Chocolate Drizzle: If you have a chocolate lover at home, drizzle some melted chocolate over the top when serving for a decadent twist.
Feel free to experiment with whatever ingredients you have on hand. The goal is to create something that reflects your family’s tastes and traditions.
FAQs About Lemon Posset
Can I make this ahead for a busy week?
Absolutely. In fact, letting it sit for a few hours helps the flavors blend beautifully, just like an old family recipe.
What if I don’t have fresh lemons?
If fresh lemons are not available, you can use bottled lemon juice. Just make sure it’s 100% lemon juice for the best flavor.
Can I use a different type of cream?
You can use light cream or half-and-half for a lighter version, but the texture may vary slightly. Heavy cream gives the best results.
How can I make this dessert dairy-free?
Replacing the heavy cream with alternatives like coconut cream can create a beautifully rich version without dairy.
Can I freeze Lemon Posset?
While I wouldn’t recommend freezing it, you can store it in the fridge for up to three days. It sets beautifully when chilled.
One Final Thought from My Kitchen
I hope this Lemon Posset recipe finds its way into your kitchen and becomes a part of your family’s laughter and shared stories. It’s one of those desserts that takes little effort but pays off with delightful flavors and moments to cherish. Cooking is all about connection, and I hope this dish adds warmth to your table, bringing with it the joy of gathered loved ones just as my grandmother’s recipes did for us. Until next time, happy cooking!
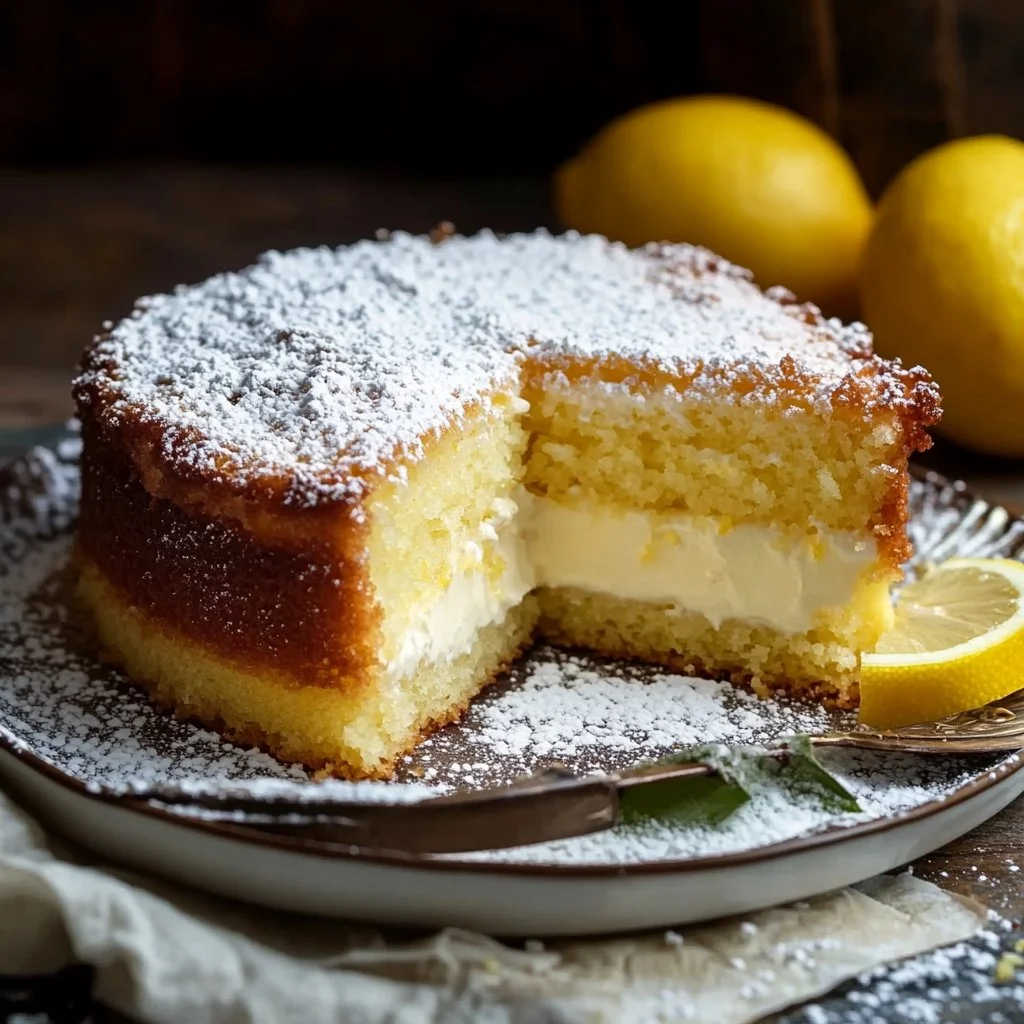
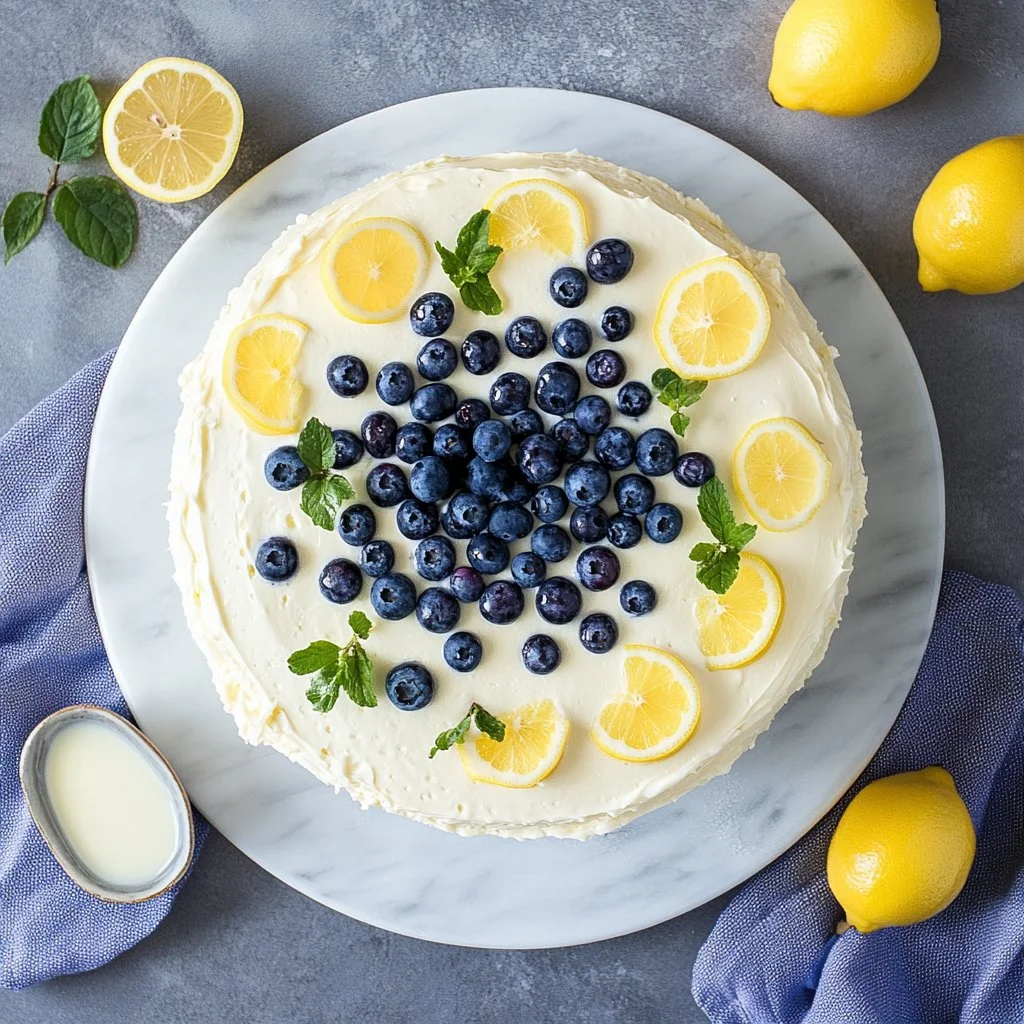
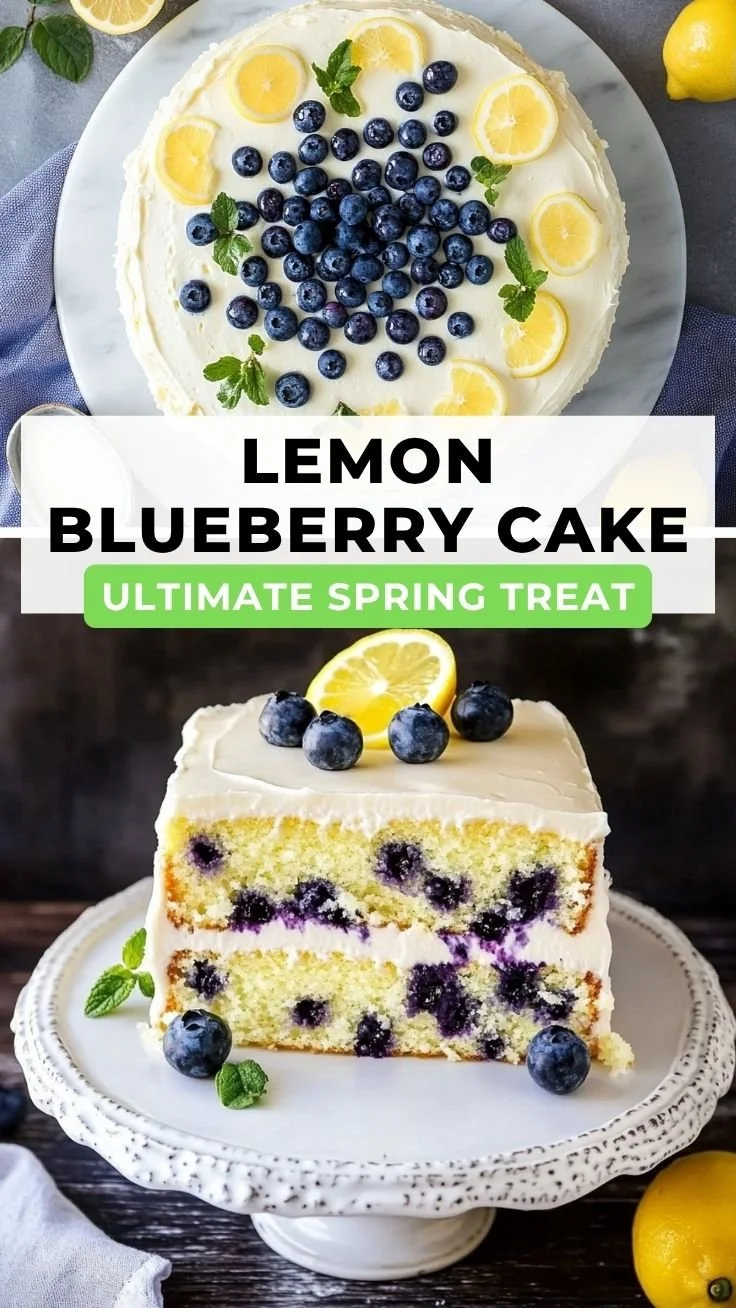
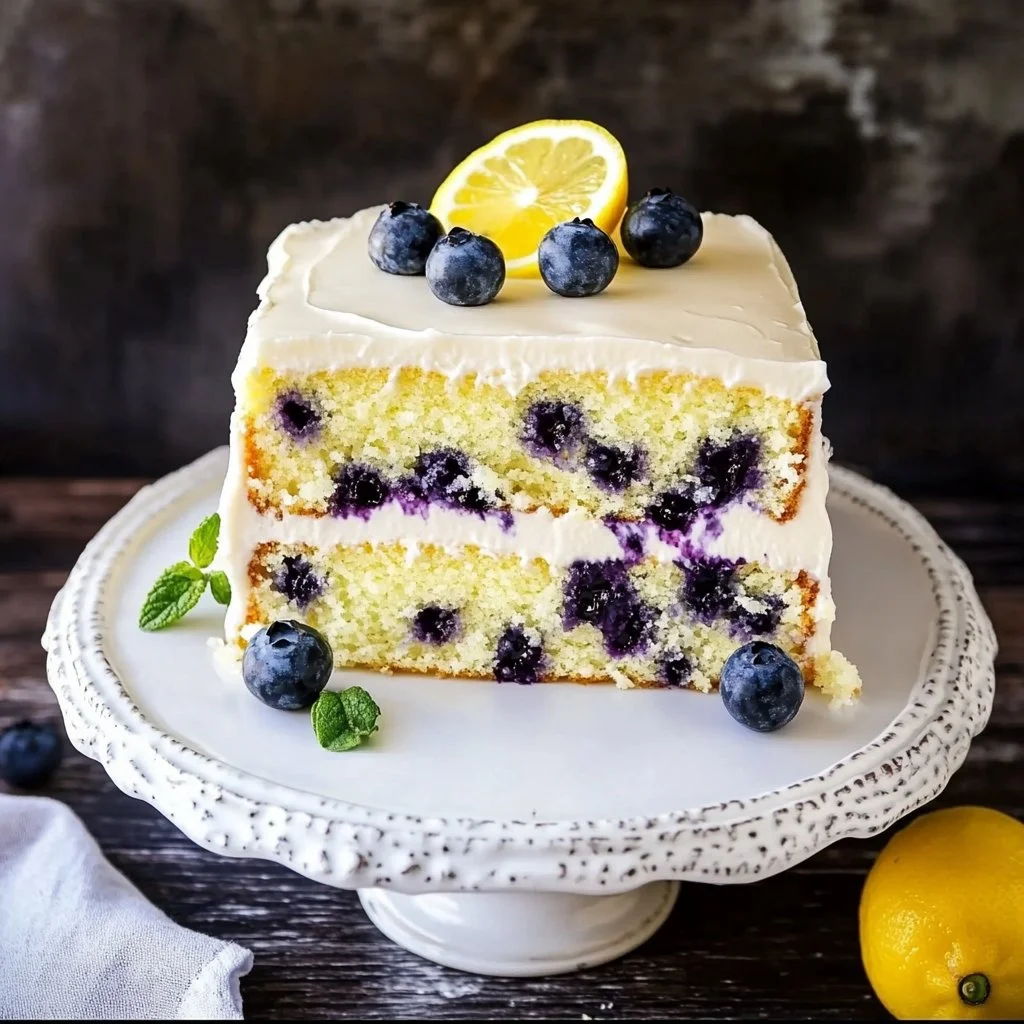
6. Lemon Blueberry Cake
There’s something special about the buzz of a kitchen filled with laughter and the scent of something sweet baking in the oven. Picture this: the kids are setting the table, their voices mingling with the sounds of pans clattering and the gentle hum of the oven warming up. In the corner, a bowl filled with bright blueberries waits, glossy and tempting. As the cake bakes, the aroma of lemon envelops the room, a promise of the deliciousness to come. This is where family connections deepen, and joy ignites around shared moments. Today, we’re diving into a Lemon Blueberry Cake that is more than just dessert; it’s a creation filled with love, memories, and a sprinkle of kitchen magic.
Why This Lemon Blueberry Cake Feels Like Home
Lemon Blueberry Cake is a staple in our home, embodying everything we value about food: warmth, comfort, and the magic of shared experiences. Each bite offers a burst of citrusy brightness followed by the sweet juiciness of blueberries. It tastes like a sunny afternoon spent laughing with family, and that’s why it has become our go-to recipe.
This cake is incredibly versatile. It’s perfect for celebrations, weekday dinners, or those quiet weekends when you just need a little something sweet. As it bakes, the kitchen transforms; a blend of lemon and berries fills the air, inviting everyone to congregate and find out what’s happening. When I serve it, I see smiles light up our table, and that makes every effort worthwhile.
Why Lemon Blueberry Cake is Our New Family Favorite
Why has this Lemon Blueberry Cake captured our hearts? It strikes a lovely balance—rich yet bright, sweet yet slightly tart. Plus, it creates a beautiful centerpiece for any gathering.
With its dense yet moist texture, this cake slices beautifully, making it a hit at brunches or celebrations. Honestly, it feels like a hug from a loved one, nourishing not just the stomach but also the spirit. Whether you’re celebrating a birthday or simply enjoying a Thursday night, this cake brings joy.
The Simple Magic Behind Lemon Blueberry Cake
One of the wonderful things about this recipe is that it doesn’t require any special skills or ingredients. It unfolds like a cozy story in your kitchen, making it perfect for both novice bakers and seasoned pros.
The base of the cake is a simple batter enhanced with fresh blueberries and zesty lemon. Each forkful reveals the lovely contrast between the creamy frosting and the tart berries. It truly does feel magical because it’s so straightforward yet tastes so exquisite.
Why This Recipe Works for Our Busy, Joyful Nights
In the hustle of life, finding time to whip up something delightful can be a challenge. This Lemon Blueberry Cake comes together easily, allowing you to spend time on what truly matters.
With minimal prep and only one bowl needed for mixing, it’s less about fuss and more about flavor. This recipe is a lifesaver on busy evenings or for impromptu gatherings. Once the cake is out of the oven, it quickly becomes a family favorite, leaving behind smiles and joyous chatter.
How to Make Lemon Blueberry Cake, The Heartwarming Way
Now that we’ve set the scene and shared some backstory, let’s dive into the heart of the matter. Making a Lemon Blueberry Cake is both straightforward and fun. Just follow these step-by-step instructions, and I promise you’ll feel the joy in every mix and fold.
“This is where the magic happens—when the aroma fills the kitchen and my kids come running in, asking ‘Is it ready yet?’”
Step-by-Step Overview: Keeping It Simple
- Preheat the Oven: Begin by preheating your oven to 350F (180C) degrees. This ensures that the cake bakes evenly.
- Prepare Your Cake Pan: Grease and flour a 9×13 inch cake pan. If you want a layer cake, line the bottoms of the pans with parchment paper and grease the sides as well.
- Mix Dry Ingredients: In a medium bowl, sift together the cake flour, baking powder, baking soda, and salt. Whisk to combine and set aside.
- Combine Wet Ingredients: In a small bowl, whisk the buttermilk and freshly squeezed lemon juice together. Set aside to thicken slightly.
- Make the Batter: In a large bowl, beat together the softened butter, granulated sugar, and lemon zest until fluffy, about 2-3 minutes. This is where you’ll start to feel that joyful anticipation.
- Add Eggs and Vanilla: Mix in the vanilla extract, then add the eggs one at a time. Be sure to scrape down the sides of the bowl after each addition.
- Mixing it Together: With the mixer on low speed, alternate adding the dry and wet ingredients. Start with one-third of the flour mixture, then mix in half the buttermilk mixture. Repeat until all ingredients are combined. Remember, don’t overmix—just enough until it’s blended.
- Fold in Blueberries: Toss the blueberries with the reserved 2 teaspoons of flour. Gently fold them into the batter, taking care not to break them apart.
- Bake the Cake: Pour the batter into your prepared pan and bake for 30-35 minutes for a 9×13 inch pan, or about 25-30 minutes for layers. The cake is done when a toothpick comes out clean and feels firm to the touch.
- Cool the Cake: Allow the cakes to cool in the pan before gently transferring them to a wire rack, especially if making layers. Patience is key here.
Cream Cheese Frosting
- Prepare the Frosting: In a bowl, mix together the softened cream cheese and unsalted butter until smooth.
- Add Lemon Juice and Sugar: Stir in the lemon juice and begin adding the powdered sugar gradually. Keep mixing until it reaches your desired consistency.
- Finishing Touches: If needed, add a tablespoon of whipping cream to smooth it out. This frosting will be velvety and rich, complementing the cake’s flavors beautifully.
Decorating Your Cake
- Layer or Top: If you made a layer cake, simply spread frosting between the layers and on top. For a sheet cake, spread an even layer over the top.
- Add Fresh Blueberries: Top the frosted cake with fresh blueberries for a pop of color and extra flavor. This simple touch elevates the cake, making it look as beautiful as it tastes.
Serving Lemon Blueberry Cake with Love
In our home, Lemon Blueberry Cake is served family-style, right in the middle of the table. Everyone can help themselves, making it a vibrant focal point for dessert. I love to pair it with fresh whipped cream or a scoop of vanilla ice cream for an extra layer of indulgence.
As we gather around, you can feel the excitement in the air. Each slice sparks conversations and laughter, as everyone shares what they love about it. It’s these moments that make the kitchen feel alive.
Storage & Reheat Tips
Once the cake is ready, it can easily find a spot in your fridge. Store any leftovers in an airtight container to keep its moistness. I find it stays fresh for about three days, but I dare say it rarely lasts that long!
When it’s time to enjoy those leftovers, the oven works wonders to restore that fresh-baked feel. Preheat it to 350F (180C) and pop a piece in for a few minutes. The microwave is great for a quick slice, but there’s something magical about warming it in the oven.
My Kitchen Notes & Shortcuts
As a busy home cook, I always look for ways to simplify my approach without sacrificing flavor. Here are a few tips:
- Make Ahead: The cake can be baked a day ahead and stored in the refrigerator. It just gets better as the flavors mingle.
- Mix-Ins: Try adding nuts or swapping some blueberries for raspberries for a twist.
- Get the Kids Involved: Let them measure ingredients or mix the batter. It’s a fun way to bond and create memories.
- Freezer Friendly: Slice the cake and freeze portions for busy days. Just thaw and enjoy when you need a sweet pick-me-up.
- Use Fresh Ingredients: Fresh blueberries and real lemon juice make all the difference in flavor.
Family-Friendly Variations
Finding ways to customize this Lemon Blueberry Cake is easy. Consider these variations to make it your own:
- Gluten-Free Version: Substitute cake flour with a 1:1 gluten-free baking blend to keep the texture delightful.
- Lower Sugar Option: You can cut back on the sugar slightly or substitute it with honey for a different sweetness.
- Fruity Additions: Experiment with different berries or even add in some chopped strawberries.
- Vegan Adaptation: Replace eggs with flaxseed meal and use non-dairy butter and milk alternatives.
Invite creativity into your kitchen with these alterations; that’s what makes a recipe truly special.
FAQs About Lemon Blueberry Cake
Can I make this ahead for a busy week?
Absolutely! In fact, letting it sit for a while lets the flavors get to know each other, just like an old family recipe.
What if I don’t have buttermilk?
No worries. Mix regular milk with a tablespoon of vinegar or lemon juice and let it sit for about 5 minutes. You have a quick buttermilk substitute!
Can I freeze the cake?
Yes! Wrap slices tightly in plastic wrap and store them in a freezer bag. They’ll stay fresh for several months. Just thaw at room temperature when you’re ready to enjoy.
Is it okay to use frozen blueberries?
You can! Just toss them in a bit of flour to help prevent them from sinking to the bottom of the batter.
How can I make it more lemony?
Add an extra tablespoon of lemon zest or a splash of lemon extract for more zing.
One Final Thought from My Kitchen
As we wrap up this delightful journey into the world of Lemon Blueberry Cake, I hope this recipe finds its way into your family’s laughter and stories. Cooking should be as joyful as eating, and this cake embodies that spirit.
Every time you whip it up, you’re creating more than just a dessert; you’re planting the seeds for memories, bringing family together, and adding a touch of sweetness to everyday life. Until next time, happy cooking!