The kitchen smells like warm sugar and butter. I can hear the soft crackle when a spatula nudges the glossy marshmallow mixture. Little feet patter in the next room and someone asks, "Are they ready yet?"
These are the moments I live for. In under 15 minutes you can make a pan of classic Rice Krispie treats that tastes like childhood, and feels like a hug. They melt in your mouth, hold up for sharing, and never need an oven. Today I will walk you through an easy, one-bowl, no-bake recipe that your family will ask for again and again.
Why this works

Family life moves fast. School runs, playdates, and homework fill the calendar. This recipe is built for days when you want something homemade without a long prep time.
The method uses one pan and one saucepan. Fewer dishes means less cleanup and more time to sit with a cup of tea while the kids set the table. The simplicity also makes this recipe forgiving. Slightly over-melted marshmallows or a quick press into the pan still give you chewy, sweet squares that everyone will love.
I have made these for bake sales, late-night cravings, and rainy afternoons. Every time they come out consistent because the ratios are straightforward and the steps are short. That kind of reliability is what busy families need.
Process Overview
“This is where the magic happens—when the aroma fills the kitchen.”
Short steps, quick heat, and a gentle stir turn marshmallows and cereal into something nostalgic. The butter melts, the marshmallows gloss, and the cereal folds in. It is simple chemistry, but the result feels like a special occasion.
Why one-bowl matters
Using one main pan and one saucepan keeps the prep manageable. Kids can help press the mixture into the pan. That small job gives them ownership and spreads joy. When a recipe invites participation, it becomes a family memory, not just food.
Ingredients
- 3 tablespoons unsalted butter
- 1 bag (10 ounces) mini marshmallows, or about 6 cups large marshmallows melted
- 6 cups Rice Krispies cereal
- 1/2 teaspoon vanilla extract (optional but lovely)
- Pinch of fine salt (balances the sweetness)
Optional mix-ins:
- 1/2 cup chocolate chips
- Lily’s tip: Fold in semi-sweet chips after the mixture cools for 1 minute so the chips soften but do not fully melt. For a ripple of chocolate, sprinkle on top and press lightly.
- 1/3 cup peanut butter
- Lily’s tip: Stir the peanut butter in with the melted marshmallows on low heat. Use creamy peanut butter for a smooth texture. If allergies are a concern, leave this out or substitute with sunflower seed butter.
- 1/4 cup chopped nuts
- Lily’s tip: Toast nuts lightly in a dry skillet for a minute to deepen their flavor. Chop them fine enough that they do not make the bars hard to press.
- A few tablespoons of rainbow sprinkles
- Lily’s tip: Add sprinkles on top right after pressing the mixture into the pan. They brighten the bars visually and stay colorful if applied before the marshmallows fully set.
These ingredients are pantry-friendly. You can swap the Rice Krispies for another puffed rice cereal if needed, but the texture will be slightly different.
Directions
Line an 8×8-inch pan with parchment paper and lightly butter the paper.
- Encouraging note: A parchment sling makes lifting the squares easy. If your kids want to help, this is a safe job for them to do.
In a large saucepan, melt the butter over low heat until foamy.
- Encouraging note: Low heat keeps the butter from browning. Take a moment to smell the warm butter. It already feels cozy.
Add marshmallows to the pan and stir until fully melted and glossy, about 2-3 minutes. Add vanilla and salt if using.
- Encouraging note: Stir gently and steadily. When the marshmallows are glossy and smooth, you know you are on the right track. Keep the heat low to avoid burning.
Remove from heat and stir in the Rice Krispies cereal gently.
- Encouraging note: Use a spatula and fold the cereal in to coat each piece. Think of folding as a gentle hug for the cereal so nothing breaks.
Transfer the mixture to the prepared pan and press down lightly with a spatula.
- Encouraging note: Press just enough so the top is even. I like to place a sheet of parchment over the mixture and press with a flat-bottomed cup to get a smooth finish without sticking.
Let the pan sit at room temperature for 20-30 minutes to set, or refrigerate for 15 minutes.
- Encouraging note: If you are in a hurry, pop the pan in the fridge. If you want chewier bars, let them rest at room temperature. Either way, patience makes cutting easier.
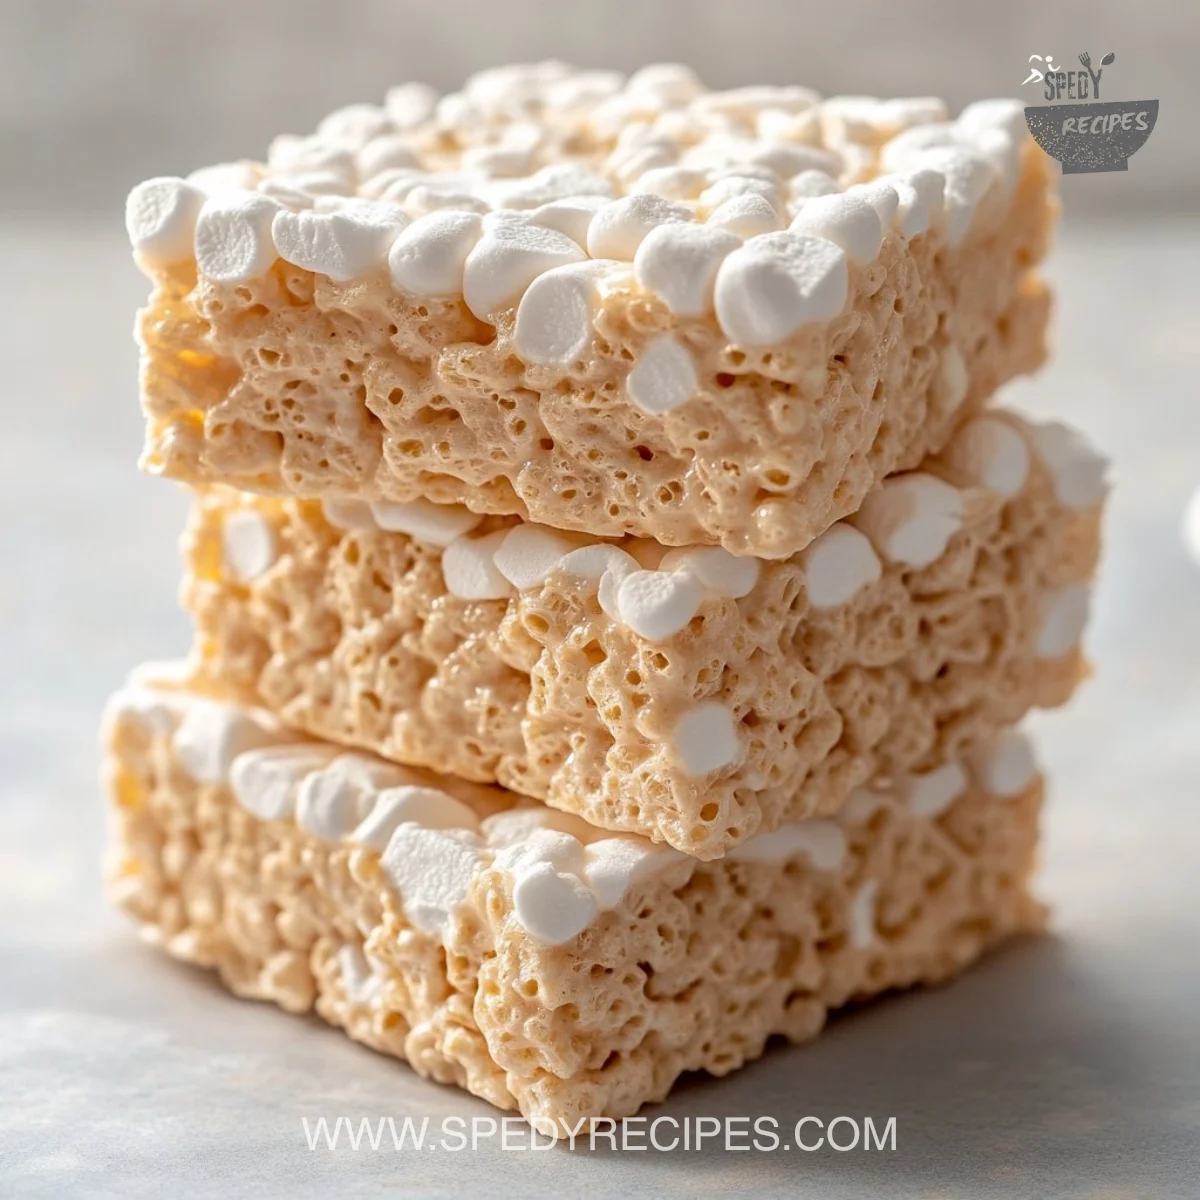
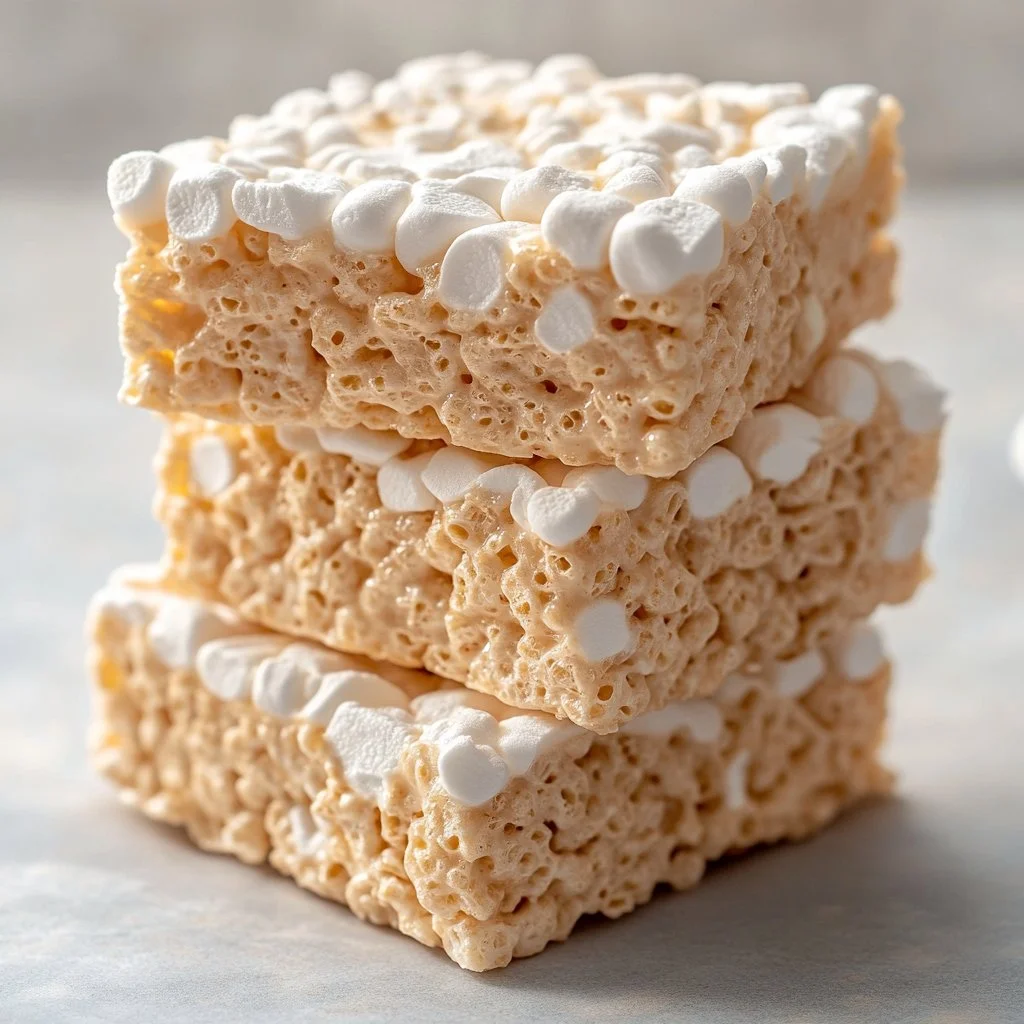
Cut into squares and serve.
- Encouraging note: Use a sharp knife or bench scraper for clean edges. Wipe the knife between cuts for neat slices. Share with a big smile.
These directions are quick but effective. The keys are low heat, a gentle fold of the cereal, and a light press into the pan.
Serving
Serve these Rice Krispie treats family-style on a large platter. Stack a few squares in the center and place napkins around the edges. Kids love to grab their own square, and adults appreciate the simplicity.
For gatherings, arrange them in two neat rows and add a small bowl of extra sprinkles or chopped nuts on the side so guests can customize their plate. Pair the squares with cold milk, a warm cup of tea, or a small scoop of vanilla ice cream for a nostalgic dessert plate.
If you are bringing them to school or a party, cut the squares into bite-size pieces and arrange them in a pretty tin lined with parchment. They travel well and rarely last long.
Storage
Store the treats in an airtight container at room temperature for up to three days. I find the texture is best on day one and day two.
If your home is very warm, keep them in the refrigerator for up to a week. Note that refrigeration can make them firmer. To soften chilled bars, let them sit at room temperature for 10 minutes before serving.
To freeze, wrap individual squares in plastic wrap and place them in a freezer-safe container for up to one month. Thaw at room temperature for 30 minutes before enjoying.
Reheating tip: If you like a softer, just-made texture, microwave a square for 7 to 10 seconds. It will puff slightly and feel freshly made.
Kitchen Notes
- Use low heat. Marshmallows scorch quickly, so patience matters.
- Measure the cereal by gently filling the cup. Do not compress it tightly.
- If the mixture becomes too sticky to press, wet your spatula or hands slightly to smooth the top.
- For uniform squares, use a ruler to score cuts lightly before slicing fully.
- If you add chocolate chips, do so off the heat to prevent them from melting into a single layer.
These small shortcuts save time and keep the texture just right. Over the years I have learned that a little caution with heat makes a big difference.
Variations
- Chocolate layer: Press half the mixture into the pan, melt 1/2 cup chocolate chips with 1 tablespoon butter, spread over the first layer, then top with remaining mixture. Chill to set.
- Peanut butter swirl: Stir 1/3 cup peanut butter into the melted marshmallows for a rich, nutty bar.
- Allergy friendly: Use soy or sunflower seed butter and dairy-free margarine. Check marshmallow ingredients for gelatin if vegetarian options are needed.
- Fruity twist: Fold in 1/2 cup freeze-dried fruit pieces at the end for chew and color.
- Mini cookies: Press mixture into mini muffin tins for single-serve shapes. No cutting required and they are perfect for lunch boxes.
These tweaks fit picky eaters and different diets. Test small batches when trying new flavors so you can adjust sweetness or texture.
FAQ
Q: Can I use a different cereal?
A: Yes. Puffed rice or similar cereals work well. Some cereals with flavor coatings may change the taste and texture. When in doubt, use a plain puffed rice for the classic result.
Q: Can I make these without butter?
A: You can try a non-dairy margarine or coconut oil. Butter gives richness and helps the marshmallows melt smoothly. If you use coconut oil, expect a hint of coconut flavor.
Q: How do I get clean edges when cutting?
A: Chill the pan slightly, then use a sharp knife warmed under hot water and dried between cuts. This helps the knife glide through cleanly.
Q: Why did my bars turn out hard?
A: Overheating the marshmallows or pressing the mixture too firmly can create a denser bar. Use low heat and press lightly for chewier results.
Q: Can kids help make these?
A: Absolutely. Kids can measure the cereal, press the mixture into the pan, and sprinkle toppings. Keep them away from the hot saucepan, but give them safe tasks for involvement.
Conclusion
I hope these simple, no-bake Rice Krispie treats bring a little extra joy to your kitchen. They are quick, forgiving, and perfect for busy families who still want something homemade and memorable.
For another quick, sweet snack idea you can keep in your back pocket, check out Blue Bowl’s classic puppy chow recipe which is a 15-minute favorite. If you want a rich chocolate and peanut butter twist inspired by a similar treat, take a look at The Salted Cookie’s Chocolate Peanut Butter Rice Krispie Treats for more ideas.
Make a pan, call the family, and enjoy the small, sweet moments. From my kitchen to yours, happy baking.

Classic Rice Krispie Treats
Ingredients
Main Ingredients
- 3 tablespoons unsalted butter (Keep over low heat to avoid browning.)
- 10 ounces mini marshmallows (Can also use about 6 cups of large marshmallows.)
- 6 cups Rice Krispies cereal (Alternative puffed rice cereals can be used.)
- 1/2 teaspoon vanilla extract (Optional, but adds flavor.)
- 1 pinch fine salt (Balancing sweetness.)
Optional Mix-ins
- 1/2 cup chocolate chips (Fold in after mixture cools slightly.)
- 1/3 cup peanut butter (Stir into marshmallows on low heat for rich flavor.)
- 1/4 cup chopped nuts (Toast lightly for added flavor.)
- a few tablespoons rainbow sprinkles (Add on top after pressing mixture into the pan.)
Instructions
Preparation
- Line an 8x8-inch pan with parchment paper and lightly butter the paper.
- In a large saucepan, melt the butter over low heat until foamy.
- Add marshmallows to the pan and stir until fully melted and glossy, about 2-3 minutes.
- Remove from heat and stir in the Rice Krispies cereal gently.
- Transfer the mixture to the prepared pan and press down lightly with a spatula.
- Let the pan sit at room temperature for 20-30 minutes to set, or refrigerate for 15 minutes.
- Cut into squares and serve.