

I remember the first time I made these Garlic Parmesan Chicken Skewers for my family. The kitchen smelled like warm garlic and Parmesan. The sizzle on the grill felt like music. My kids ran in from the backyard just to see what was cooking.
This recipe is simple, fast, and made for busy weeknights and weekend gatherings. It uses basic pantry ingredients and gives you juicy chicken with a crunchy, cheesy finish. I often pair these skewers with a quick salad and some warm bread. If you love quick chicken dinners, you might also enjoy my take on a simple chicken salad that the whole family eats up right here.
Why this works
These skewers are all about balance. The olive oil and garlic give rich, savory flavor. The dried herbs add a familiar, comforting note. The Parmesan creates a golden, slightly crisp coating that keeps the chicken moist and flavorful.
This recipe saves time. You can marinate briefly at room temperature when you are pressed for time, or let it sit longer in the fridge for deeper flavor. That makes it perfect for weeknights or when you need a fast meal after practice, work, and all the errands.
My family loves how easy these are to make and eat. You can grill outdoors or use an indoor grill pan. I sometimes use leftovers in wraps, salads, or as a protein for a bowl. If you want an extra layer of nourishing flavor, I often make a pot of bone broth on the weekend and use the warm comfort for soups alongside the skewers like this bone broth.
Process Overview
“This is where the magic happens—when the aroma fills the kitchen.”
Before you begin, make sure your skewers are ready. If you are using wooden skewers, soak them now so they do not burn. Prep your chicken, whisk the marinade, and set a timer. This keeps the process calm and organized.
I like to set everything out on the counter: chicken, bowl for the marinade, a tray for skewering, and a plate to rest cooked skewers. This little bit of prep saves time and keeps the kitchen running smoothly. For a hands-off option, you can get dinner started in the morning and finish it on the grill in the evening with little fuss. If you love slow-cooker comfort, try this easy crockpot chicken recipe for another family favorite here.
Ingredients
1.5 lbs boneless, skinless chicken breasts or thighs (cut into 1-inch cubes)
Lily’s tip: Thighs stay juicier, breasts cook a bit faster. If your family prefers white meat, use breasts. For more forgiving cooking, pick thighs.1/4 cup olive oil
Lily’s tip: Use extra virgin for flavor. If you need a neutral oil for high heat, light olive oil works too.4 cloves garlic (minced)
Lily’s tip: Fresh garlic makes a big difference. If you are in a hurry, use 1 1/2 teaspoons of good garlic paste.1/2 teaspoon dried oregano
Lily’s tip: Oregano adds a warm herbal note. If you only have Italian seasoning, that works fine.1/2 teaspoon dried basil
Lily’s tip: Basil brightens the mix. Crumble it between your fingers to release more aroma before adding.1/4 teaspoon black pepper
Lily’s tip: Freshly ground black pepper tastes best. Adjust to your family’s spice preference.1/4 teaspoon salt
Lily’s tip: I use a pinch more if the chicken is especially thick. Taste the marinade with a drop of oil on a cracker to check.1/2 cup grated Parmesan cheese
Lily’s tip: Freshly grated Parmesan melts and browns better than pre-shredded versions.2 tablespoons chopped fresh parsley (for garnish)
Lily’s tip: Parsley adds color and freshness. Cilantro also works if you prefer its bright taste.Wooden or metal skewers (if using wooden, soak in water for at least 30 minutes)
Lily’s tip: Metal skewers heat up and help cook the center. Wooden skewers need soaking to protect them on the grill.
I find that a short list like this fits easily into most kitchens. Swap a few items as needed, and the dish will still shine.
Ingredient prep tips
- Cut the chicken into even 1-inch cubes so they cook uniformly.
- Mince garlic finely so it infuses the oil without burning.
- Grate the Parmesan from a block for a better melt and crunch.
Directions
In a medium bowl, combine the olive oil, minced garlic, dried oregano, dried basil, black pepper, and salt. Stir well to create your flavorful marinade.
Encouragement: Take a moment to smell the mixture. It already smells like dinner. The garlic and herbs will carry through to every bite.Add the cubed chicken to the bowl, ensuring each piece is well-coated. Cover the bowl and let it marinate for at least 15 minutes at room temperature, or up to 2 hours in the refrigerator for a more intense flavor. If refrigerating, bring the chicken back to room temperature for about 15-20 minutes before skewering.
Encouragement: Even a short 15-minute rest helps. If you plan ahead, the 2-hour chill will pay off in depth of flavor.If you are using wooden skewers, make sure they have been soaked in water. This prevents them from burning on the grill.
Encouragement: Soaking takes a half hour, but you can do this while you wash up or prep a side dish. It is an easy step that saves worry.Thread the marinated chicken pieces onto the skewers, leaving a small space between each cube. Don’t pack them too tightly, as this will help ensure they cook evenly. Aim for about 3-4 pieces of chicken per skewer, depending on your skewer length.
Encouragement: Give each piece some breathing room for even browning. This little spacing trick makes a big difference.Preheat your outdoor grill or indoor grill pan to medium-high heat. If using an outdoor grill, lightly oil the grates to prevent the chicken from sticking.
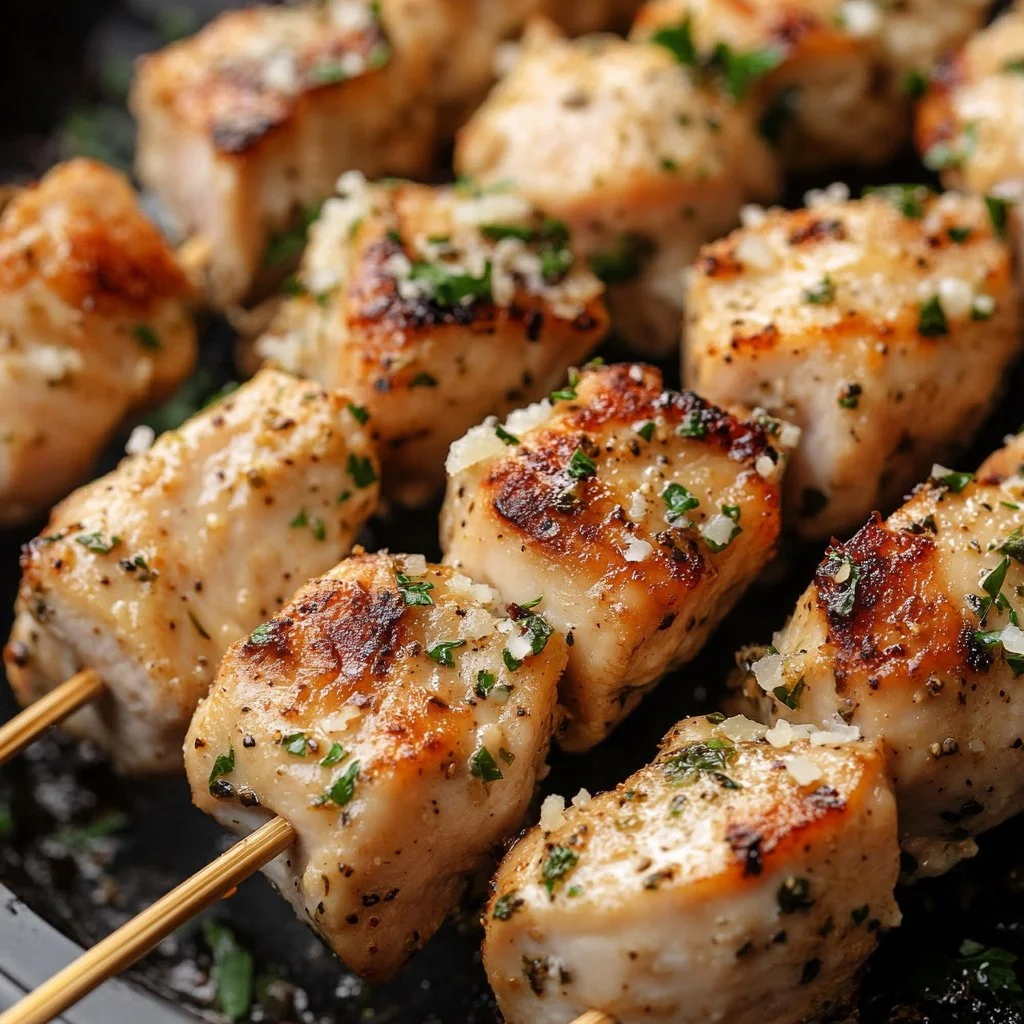
Encouragement: A hot grill gives those lovely grill marks and seals in juices. It only takes a few minutes to heat up.Place the assembled chicken skewers onto the preheated grill. Cook for 4-6 minutes per side, or until the chicken is cooked through and has nice grill marks. The internal temperature of the chicken should reach 165°F (74°C). Avoid overcooking, which can lead to dry chicken.
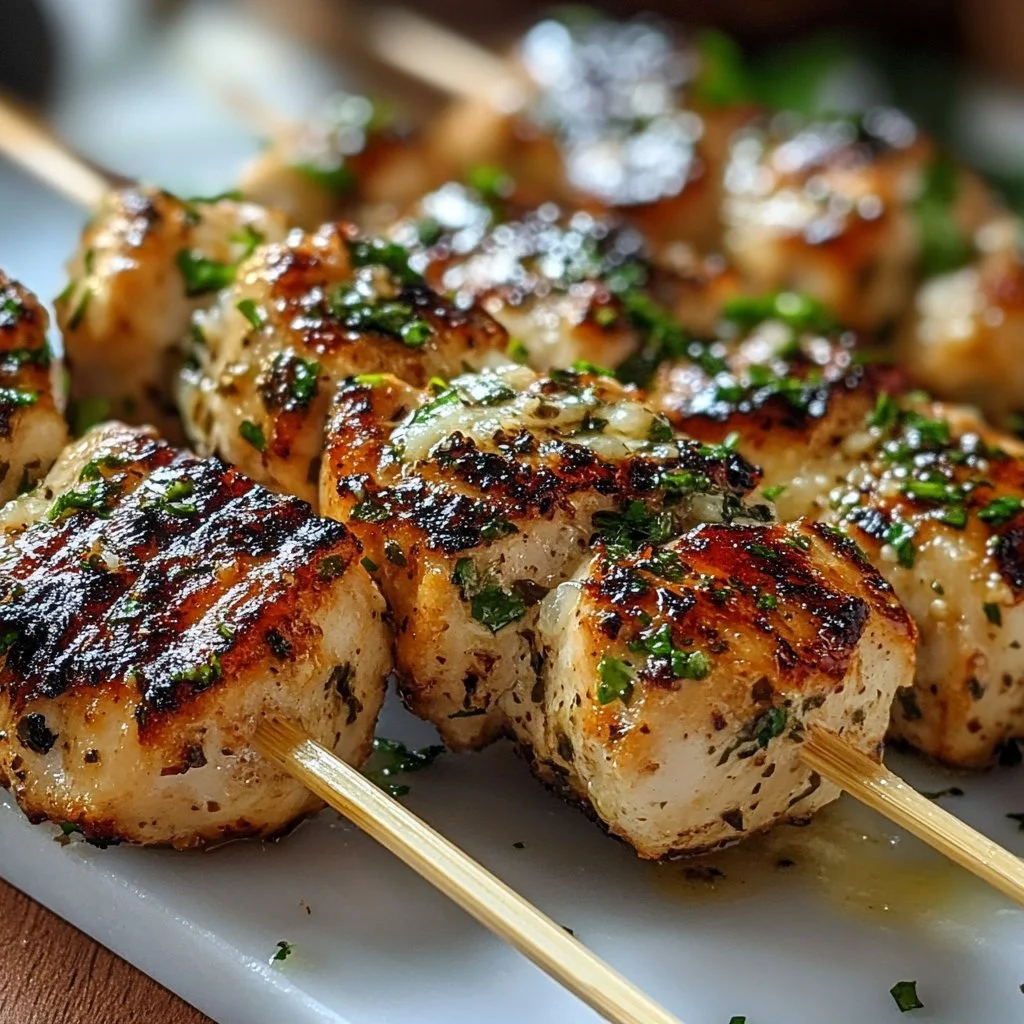
Encouragement: Use an instant-read thermometer to check doneness. A quick poke and read keeps the chicken tender and safe.During the last 1-2 minutes of grilling, sprinkle the grated Parmesan cheese generously over the chicken skewers. Allow the cheese to melt and become slightly golden and crispy. This step adds a wonderfully savory and cheesy element that truly elevates these skewers.
Encouragement: Watch the cheese closely. It goes from melted to golden fast, and that crisp edge is worth the attention.Once the chicken is cooked and the Parmesan is melted, carefully remove the skewers from the grill. Arrange them on a serving platter. Garnish with freshly chopped parsley for a pop of color and freshness. Serve immediately and enjoy the delicious aroma!
Encouragement: Serve warm and watch the smiles. These skewers are best fresh from the grill while the cheese is still soft and fragrant.
These steps are straightforward and forgiving. If you are nervous about grilling, use a grill pan indoors for more control.
Serving
Serve these skewers family-style on a large platter. Lay them next to lemon wedges, a bowl of tzatziki or ranch, and a fresh salad. I like to add a pan of roasted vegetables for an easy, balanced meal.
For a kid-friendly plate, slide the chicken off the skewers and serve with small bowls of sauces. Adults appreciate the simple charm of a plate with mixed greens, crusty bread, and a little extra Parmesan on the side.
If you love hearty, comforting sides, serve with mashed potatoes or rice. For a lighter meal, pair with a crisp cucumber and tomato salad. My family sometimes builds small bowls with rice, sliced chicken, a dollop of sauce, and a sprinkle of parsley. If you like bold flavors, my garlic butter beef recipe makes a great companion for another night of easy grilling you can find here.
Storage
Refrigerator: Store leftover skewers in an airtight container for up to 3 days. Remove the chicken from wooden skewers before storing.
Freezer: Cooked chicken skewers freeze well for up to 2 months. Wrap tightly and place in a freezer-safe container.
Reheating: Reheat gently in a 350°F oven for 8-10 minutes, or until warmed through. You can also reheat in a skillet over medium heat with a splash of oil to refresh the crust. Avoid microwaving for long periods, which can make the chicken dry.
Make-ahead: Marinate the chicken up to 2 hours ahead. For busy days, marinate in the morning and grill in the evening. If you need a fully make-ahead option, grill the chicken and store it for a quick reheat.
Food safety tip: Always reheat to at least 165°F for leftovers. Use an instant-read thermometer for peace of mind.
Kitchen Notes
- Use metal skewers if you have them; they heat the center and help with even cooking.
- Cut chicken into same-size cubes to avoid undercooked or overcooked pieces.
- Taste the marinade before adding chicken. If it tastes flat, add a pinch more salt.
- If you want char without burning, move skewers to a cooler part of the grill after searing.
- For indoor cooking, a cast iron grill pan delivers great marks and flavor.
These shortcuts keep dinner achievable when time is tight.
Variations
- Kid-friendly: Omit black pepper and reduce garlic to 2 cloves. Serve with a mild dipping sauce.
- Low-carb: Serve over a bed of mixed greens with a high-fat dressing. Skip bread or rice.
- Gluten-free: All ingredients here are naturally gluten-free. Check Parmesan labels for additives if highly sensitive.
- Dairy-free: Omit the Parmesan or swap for a dairy-free cheese that melts well. Add extra herbs and a squeeze of lemon.
- Spicy: Add 1/2 teaspoon smoked paprika or a pinch of red pepper flakes to the marinade. Kids can have plain versions.
These changes let you adapt the recipe to your family’s tastes without losing the core flavors.
FAQ
Q: Can I use frozen chicken for this recipe?
A: Yes, but thaw it fully in the fridge first. Pat it dry before cutting and marinating. Partially frozen chicken will not absorb the marinade well.
Q: How long should I marinate the chicken for best flavor?
A: At least 15 minutes at room temperature works. For the best flavor, marinate up to 2 hours in the fridge. Bring to room temperature for 15-20 minutes before grilling.
Q: Can I bake these instead of grilling?
A: Yes. Bake at 400°F for 15-18 minutes, then broil for 1-2 minutes with the Parmesan to get a golden finish. Keep an eye on them under the broiler.
Q: How do I prevent the skewers from sticking to the grill?
A: Oil the grill grates lightly and brush the skewers with oil before placing them. Soaked wooden skewers will also help prevent burning and sticking.
Q: Is it safe to reheat chicken more than once?
A: It is best to reheat only what you will eat. Reheating multiple times increases safety risks and reduces quality.
Conclusion
Thank you for bringing this Garlic Parmesan Chicken Skewers recipe into your kitchen. I hope it becomes a go-to for busy nights and small celebrations alike. It has been a family favorite in my home for years, and I am always delighted when readers share their own variations.
If you want to compare notes or see another version of this recipe for inspiration, I recommend this helpful take on Garlic Parmesan Chicken Skewers from Garlic Parmesan Chicken Skewers – Bad Batch Baking. For another family-tested variation with great tips, check out this version on Garlic Parmesan Chicken Skewers – Sailor Bailey.
Happy grilling. Remember, the best meals are the ones shared around the table.