
There’s something magical about the kitchen on busy weeknights. The sounds of laughter intermingle with the clattering of dishes as my kids rush to set the table. The familiar, warm scent of melting butter and garlic fills the air, reminiscent of cozy dinners at my grandmother’s house. That moment when I see my family gather around the kitchen—hungry and chatting about their day—always pulls at my heartstrings. It’s within this fragrant embrace that my favorite dish comes to life: Baked Garlic Shrimp.
Why This Baked Garlic Shrimp Feels Like Home
Baked Garlic Shrimp feels like a warm hug on a plate. This recipe embodies everything that makes a meal truly special—flavor, comfort, and the joy of gathering together. When I’m hurriedly navigating a busy evening, this dish whisks me back to those moments spent in my grandmother’s kitchen. While it comes together in no time, the flavors are anything but rushed. It’s quick enough for weeknights but special enough to warrant a spot at any family gathering.
One of the best things about Baked Garlic Shrimp is that it requires only a handful of ingredients, yet it packs a punch when it comes to flavor. You really can get that "dinner party" feel with minimal effort. This recipe not only pleases the taste buds but also fosters connection—it’s easy to gather everyone around the table when you’ve made something delicious.
The Simple Magic Behind Baked Garlic Shrimp
This recipe shines for several reasons. First, the cooking method is straightforward: bake everything in one dish. This means fewer pots to wash later, which is a blessing after a long day. Secondly, shrimp cook so quickly, making this one of those meals that feels effortless while still showcasing fresh ingredients.
As you bake the shrimp, the aroma of garlic wafts through the house, inviting everyone in. The timing is forgiving—your meal will be ready in under 15 minutes if the shrimp are prepped, but if you’re running late, don’t worry too much. You’ll still have a show-stopping dinner on the table in no time.
Why This Recipe Works for Our Busy, Joyful Nights
In our busy home filled with after-school activities and scattered schedules, Baked Garlic Shrimp stands out as a go-to meal. It checks all the boxes: speedy preparation, simple cleanup, and family-friendly charm. The kids love helping me in the kitchen, and this dish is so simple that they can actually be part of the cooking process—whether it’s stirring the buttery garlic mixture or tossing in the shrimp.
I love how versatile this dish is too. You can serve it with any number of sides: a simple salad, crusty bread, or a plate of pasta. Each time, it feels like a new meal. This effortless yet impressive dish always warms our hearts and reminds us that good food is best enjoyed together.
How to Make Baked Garlic Shrimp, The Heartwarming Way
Cooking is a journey, and Baked Garlic Shrimp is one of those heartwarming recipes you’ll come back to again and again. Let’s walk through the process, so you can catch the joy in the kitchen.
“This is where the magic happens—when the aroma fills the kitchen and my kids come running in, asking ‘Is it ready yet?’”
Ingredients You’ll Need
Gathering the right ingredients shouldn’t feel like a chore. Here’s what you’ll need for this delightful dish:
- 1 pound shrimp, peeled and deveined
- 4 tablespoons butter
- 4 cloves garlic, minced
- 1 teaspoon paprika
- Salt and pepper to taste
- Fresh parsley, chopped (for garnish)
- Lemon wedges (for serving)
Don’t skip the fresh herbs; they’re the soul of the dish. You can also use what’s available in your fridge—this recipe adapts well, inviting a touch of your own creativity.
Step-by-Step Directions
Now let’s dive into the cooking process—it’s both simple and satisfying. Follow along with these easy steps:
-
Preheat the oven to 400°F (200°C). Make sure it’s hot enough to give your shrimp a nice finish.
-
In a large baking dish, melt the butter in the oven. Keep an eye on it so it doesn’t burn. This step is crucial—it’s where the flavor starts.
-
Once melted, add the minced garlic, paprika, salt, and pepper, and mix well. The aroma will hit you at this point; it’s heavenly.
-
Add the shrimp to the baking dish and toss to coat evenly with the butter and garlic mixture. Let your kids help here; it’s the fun part!
-
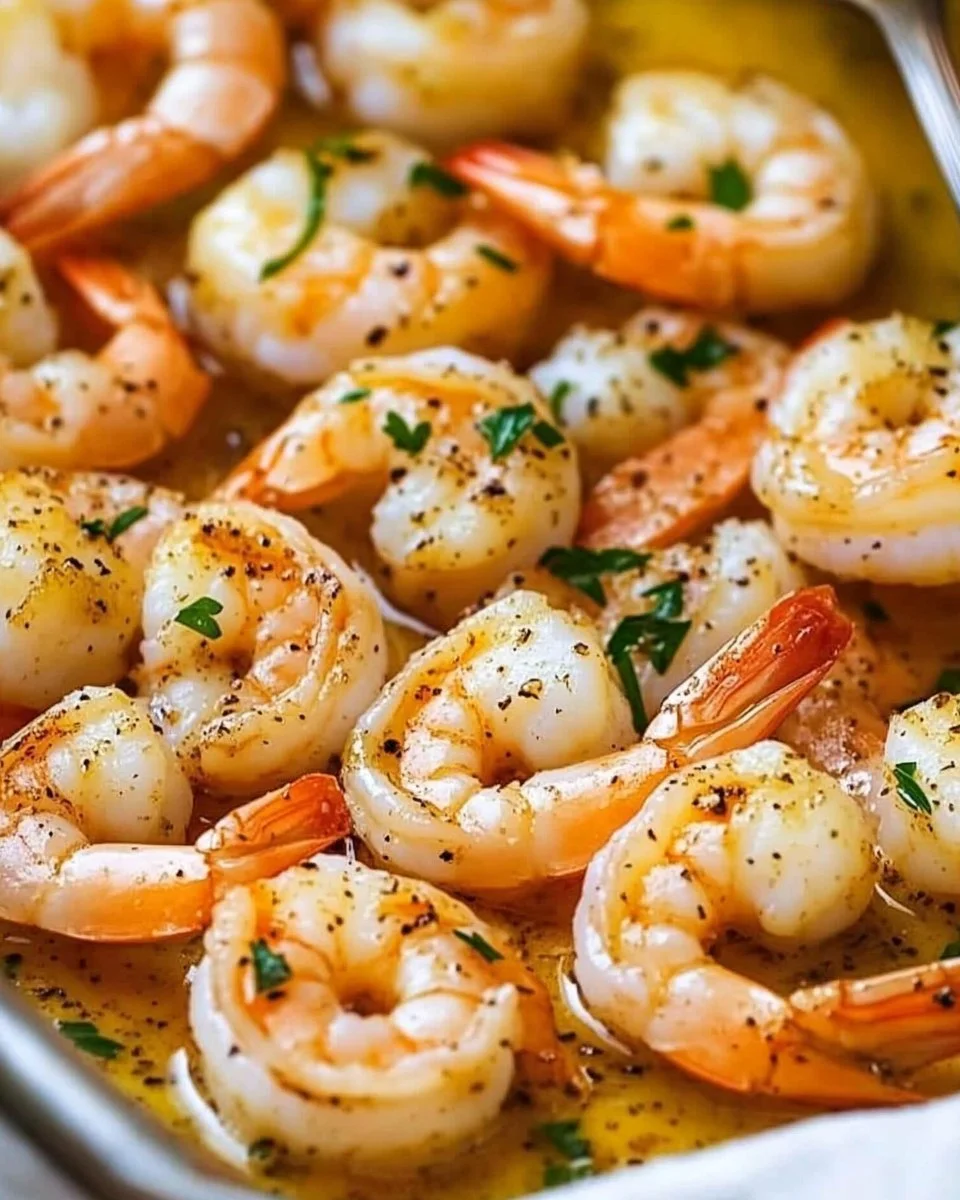
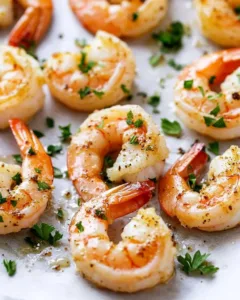
Bake in the preheated oven for about 8-10 minutes or until the shrimp are pink and cooked through. You’ll know they’re done when they curl up slightly—this is how you know they’re juicy and tender.
-
Garnish with fresh parsley and serve with lemon wedges. Trust me, a squeeze of lemon elevates the dish beautifully. Enjoy the magic of a homemade meal!

Serving Baked Garlic Shrimp with Love
When it comes to serving Baked Garlic Shrimp at our family table, we embrace a casual, family-style approach. The dish is presented right from the baking dish, allowing everyone to help themselves. We love to pile plates high with fluffy rice or creamy polenta (the perfect vehicle for those garlicky juices).
As everyone dishes out their serving, I usually sprinkle a bit of the reserved parsley on top. Our table isn’t complete without some crusty garlic bread for dipping and extra lemon wedges for those who love that zesty kick. Stories are shared just as much as food, with everyone connecting over their favorite bites and how they like their shrimp prepared.
Storage & Reheat Tips (Keeping the Goodness)
Sometimes there are leftovers, and it’s always a joy to enjoy Baked Garlic Shrimp a second time around. Storing it correctly is key to retaining that wonderful flavor.
To store, let the dish cool completely. Transfer any leftovers to an airtight container and refrigerate. The shrimp will last for about 2-3 days.
When it’s time to reheat, the oven does a better job of bringing back that freshly baked warmth than the microwave. Preheat the oven to 350°F (175°C), cover the dish loosely with foil, and warm it for about 10-15 minutes. Just keep an eye on it, and soon enough, you’ll be basking in that comforting aroma again.
My Kitchen Notes & Shortcuts
Cooking should be a joyful endeavor. Here are a few kitchen tips I’ve gathered from my many attempts with this recipe:
- Shrimp Alternatives: Don’t have shrimp on hand? Try substituting with scallops or chicken breast.
- Prep Ahead: You can prepare the butter and garlic mixture ahead of time—just store it in the fridge until you’re ready to cook.
- Family Involvement: Engage the little ones by letting them sprinkle in the spices or choose the sides. It makes for a fun conversation starter at dinner.
- Flavor Boost: Want to ramp up the flavor? Add a pinch of red pepper flakes to the garlic butter for a little heat.
- Make it a Meal: Double the recipe if you’re expecting guests. Leftovers make for a delightful lunch the next day.
Family-Friendly Variations
Baked Garlic Shrimp can easily become your canvas. Here are a few variations we love, each bringing its own twist to the dish:
- Add Veggies: Toss in some sliced bell peppers, zucchini, or cherry tomatoes for a colorful and nutrious addition.
- Pasta-Ready: Serve it over a bed of spaghetti for a pasta night twist. The garlic butter sauce pairs beautifully.
- Lighter Option: Use olive oil instead of butter for a lighter take—it will still taste amazing.
- Herb Mix: Experiment with different fresh herbs like basil or dill as a garnish to bring a new layer of flavor.
Encouraging personal touches is what makes cooking together so special—your family’s traditions can shine through in each serving.
FAQs About Baked Garlic Shrimp
Can I make this ahead for a busy week?
Absolutely! In fact, letting it sit for an hour allows the flavors to get to know each other, just like an old family recipe.
Is this recipe suitable for meal prep?
Yes! You can easily prepare Baked Garlic Shrimp for meal prep. Just divide portions into containers for quick lunches during the week.
What sides pair well with Baked Garlic Shrimp?
I recommend serving it with a fresh salad, garlic bread, or over rice or pasta. Each side brings a little something different, and they all work well together.
Can I freeze the leftovers?
While it’s best fresh, you can freeze the leftovers in an airtight container for up to 3 months. Just note that the texture may change a bit after freezing.
One Final Thought from My Kitchen
As you explore this Baked Garlic Shrimp recipe, I hope it becomes a dish that fills your home with warmth and laughter. These moments gathered around the dinner table are what create lasting memories.
If this dish brings your family together and fills your kitchen with joy, then my heart is happy knowing my family’s traditions continue in yours. Happy cooking until next time!
Baked Garlic Shrimp
Ingredients
Main Ingredients
- 1 pound shrimp, peeled and deveined
- 4 tablespoons butter Melt in the oven
- 4 cloves garlic, minced
- 1 teaspoon paprika
- to taste Salt and pepper
Garnish and Serving
- as needed Fresh parsley, chopped For garnish
- as needed Lemon wedges For serving
Instructions
Preparation
- Preheat the oven to 400°F (200°C).
- In a large baking dish, melt the butter in the oven.
- Once melted, add the minced garlic, paprika, salt, and pepper, and mix well.
- Add the shrimp to the baking dish and toss to coat evenly with the butter and garlic mixture.
Cooking
- Bake in the preheated oven for about 8-10 minutes or until the shrimp are pink and cooked through.
- Garnish with fresh parsley and serve with lemon wedges.