I can still hear the clatter of plates from last Tuesday while the grill skillet sizzled on the stove. My youngest was humming a tune as he tore lettuce for a quick salad and the warm, cheesy aroma from the burritos curled down the hallway. That smell has a way of gathering people the way my grandmother’s house used to, near the river, where food meant conversation and hands-full dinners. Tonight was the night for a Grilled Cheese Burrito, and watching everyone lean in as I pulled the skillet away felt like a little kitchen miracle.
Why This Grilled Cheese Burrito Feels Like Home
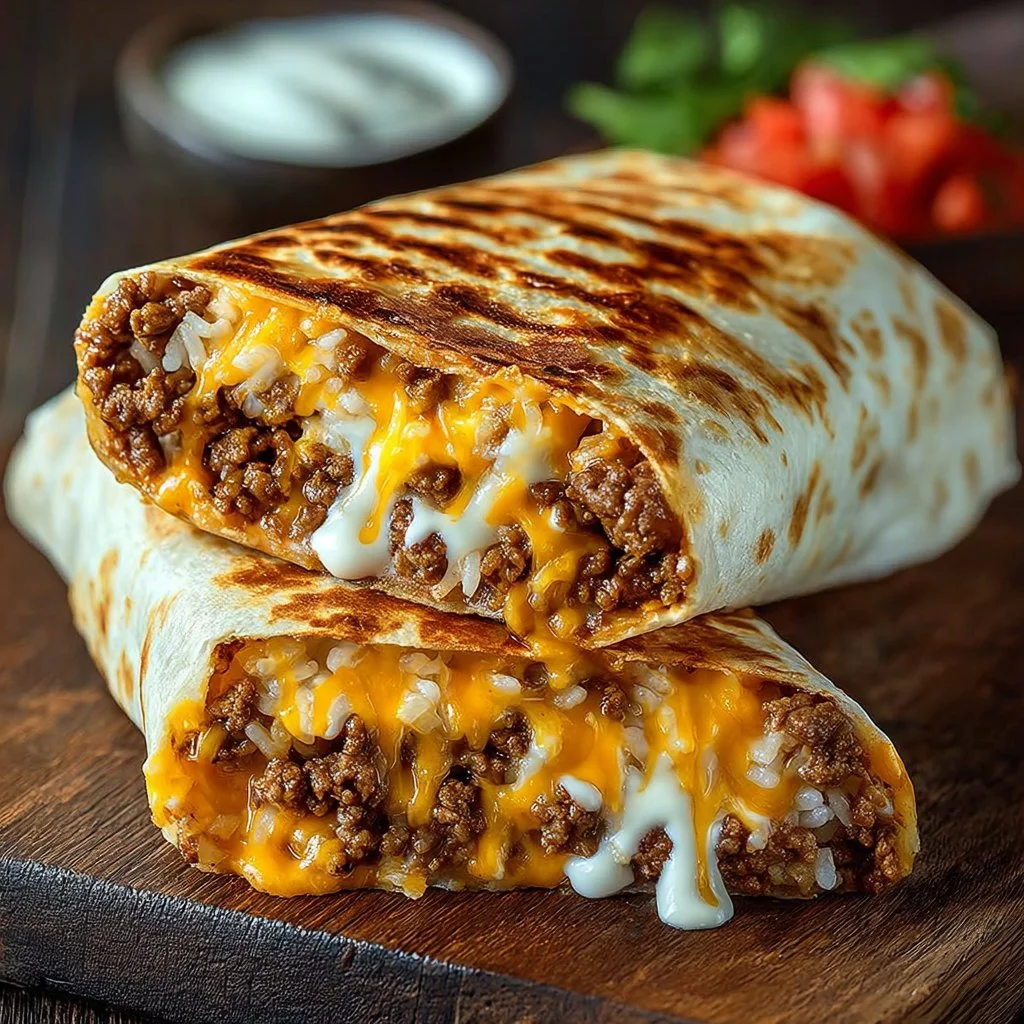
This Grilled Cheese Burrito is one of those small, loud wins in a weeknight kitchen. It is crunchy and buttery on the outside, and melty, spicy, and comforting inside. It comes together fast, uses pantry-friendly ingredients, and makes enough to feed a few hungry people with minimal fuss.
It also collapses the mood of a cozy sandwich and a hearty burrito into one handheld comfort food. That combination makes it a predictable favorite when I want to please both kids and grown ups without standing at the stove forever. Meanwhile, if you are thinking of what to serve alongside, I like to reach for simple sides or even a dessert like these caramel cheesecake cookies when the evening calls for something sweet after dinner.
Why This Recipe Works for Our Busy, Joyful Nights
This recipe matters because it saves time without skimping on flavor. You brown the beef, warm tortillas, assemble, and grill. That is it. No complicated steps, no long roasting. It also keeps cleanup light because most of the work happens in just one skillet.
Beyond speed, it is adaptable. The rice and shredded cheeses give you creaminess and stretch, so you can vary what you have on hand. My family treats this like a little ritual: someone makes the rice, someone else mixes the sauces, and the youngest wraps the tortillas. It becomes a shared task more than a chore. And if you love cheesy dinnertime classics, these tips tie into the same simple comforts you get from a great mac and cheese recipe like this one I use sometimes for sides: simple steps to master the best macaroni and cheese.
The Simple Magic Behind Grilled Cheese Burrito
“This is where the magic happens—when the aroma fills the kitchen and my kids come running in, asking ‘Is it ready yet?’”
At a glance, the process is very forgiving. You look for browned beef that has a bit of caramelized color and a fragrant taco seasoning lift. The tortillas should be warm and flexible; they are easier to fold and seal when they are soft. When grilling, you want that golden-brown crust and a couple of tablespoons of shredded cheese melted underneath the burrito, creating a crispy, cheesy edge that keeps the whole thing together.
Those cues — color, aroma, and the friendly tug of a warm tortilla — tell you you are on the right track. If your oven sidekick is busy, a hot skillet will do the heavy lifting.
Ingredients You’ll Need
1 lb ground beef
1 packet taco seasoning (or homemade blend)
1 cup cooked white rice
1/2 cup sour cream
1/2 cup nacho cheese sauce
1/4 cup chipotle sauce
1 cup shredded cheddar cheese
1 cup shredded mozzarella
4 large flour tortillas
Butter or oil for grilling
Friendly note: Don’t skip the shredded cheeses; they are the glue that creates that melty pull. If you want to swap cheeses, go for the same balance of sharp (cheddar) and stretchy (mozzarella). And remember, this is a flexible recipe — use what’s in your fridge. If you are curious about creamy fillings and how to build lush layers, check this guide about how to make cream cheese filling like a pro baker—it has techniques that translate to richer sauces here.
How to Make Grilled Cheese Burrito, The Heartwarming Way
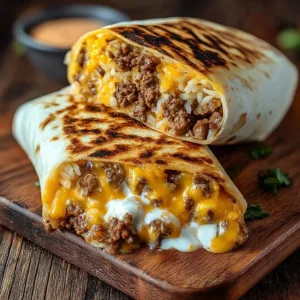
Step-by-step, this is joyful cooking. You brown the beef, warm tortillas, layer up rice and sauces, then grill the burrito until the outside is crisp and the inside is molten. The outside should be golden brown and the cheese inside should be visibly gooey when you slice in.
Think of texture contrasts: the buttery crisp exterior, the soft rice, the meaty chew of seasoned beef, and the creamy, spicy sauces all working together. That interaction is why this feels indulgent without being complicated.
Step-by-Step Overview: Keeping It Simple
-
Cook the Beef (8–10 mins)
Brown the ground beef in a skillet over medium heat. Break it up with a spoon so it cooks evenly and has good texture.
Drain excess grease, then add taco seasoning and 1/4 cup water. Stir and simmer for 5 minutes until well coated and slightly saucy. A little browning builds flavor, just like my grandmother showed me. -
Warm the Tortillas
Heat tortillas on a dry skillet for 10–20 seconds per side or microwave them for 20 seconds wrapped in a damp towel. Soft tortillas are easier to roll without tearing.
Warming also keeps the burrito warm longer after you grill it. -
Assemble the Burrito (5 mins)
Lay a tortilla flat and layer with rice, seasoned beef, nacho cheese, chipotle sauce, and sour cream. Start with a thin bed of rice to keep moisture balanced.
Top with shredded cheddar and mozzarella. Fold the ends over, then roll snugly to make a tight burrito. -
Grill the Burrito (3–4 mins per side)
Heat a clean skillet over medium and add a little butter or oil. Sprinkle 2 tbsp of shredded cheese into the pan where the burrito will sit.
Place the burrito seam-side down on the melting cheese so it acts like glue. Cook until cheese melts and forms a crispy crust, then flip and repeat on the other side. It creates a golden, crunchy shell and a melty ooze inside.
Quick encouragement: Let the kids help assemble — they love piling on the cheese. A gentle press with a spatula while grilling helps everything bind together.
Serving Grilled Cheese Burrito with Love
Serve these on a big platter in the center of the table so everyone can choose their portion and toppings. We like to cut them in half and place them standing up so the melted middle is visible and invites conversation about who wants a second helping.
I usually set out extra sour cream, salsa, a bowl of chopped cilantro, and pickled onions. A simple green salad on the side keeps things bright, and crunchy carrot sticks are a hit with the kids. Before you bring it out, I sometimes pick up a warm dessert idea or two from my recipe stash, but when the main is this cozy, everyone tends to linger over the table. 
The Best Way to Share This Meal
If you are serving a crowd, make the beef mixture ahead and keep it warm. Then let everyone assemble their own burritos at the table. That makes dinner interactive and gives each person a chance to make the burrito just the way they like it.
I remember a family night where everyone built their own — my teen loaded his with extra chipotle, while my mom went light on sauce and heavy on cheese. Those small choices make food feel personal.
Storage & Reheat Tips (Keeping the Goodness)
Store leftover grilled cheese burritos in an airtight container in the refrigerator for up to 3 days. If you want to freeze them, wrap each burrito tightly in foil and place in a freezer-safe bag for up to 2 months.
For reheating, the oven is best for texture. Preheat to 375°F, unwrap the burrito, and warm for 10–12 minutes until heated through and the crust is crisp again. The microwave works for a quick meal: heat on medium power for 60–90 seconds, then finish in a hot skillet for a minute per side to restore crunch.
Be honest about tradeoffs: the microwave is fast and fine for lunches, but the oven or skillet will bring back that freshly-made quality.
My Kitchen Notes & Shortcuts
- Make the beef the day before. It keeps flavor and frees you to assemble quickly on busy nights.
- Use rotisserie chicken instead of beef for a lighter, quicker option. It shaves off time and still tastes excellent.
- Swap white rice for brown or even cauliflower rice to suit your family’s preferences.
- Double the cheese on the assembly stage and sprinkle extra on the skillet for an even crispier edge.
- If you want an easy dessert after, plan a simple, store-bought sweet treat to keep things relaxed; or try this indulgent pistachio dessert for a special finish: heavenly pistachio white chocolate cheesecake.
Family-Friendly Variations
- Kid-Friendly: Leave out the chipotle sauce and use mild salsa. Add beans for extra protein.
- Lighter Version: Swap sour cream for Greek yogurt, and use less cheese inside with a sprinkle on the outside.
- Vegetarian: Replace the beef with seasoned plant-based crumbles or spiced sautéed mushrooms. Add a little smoked paprika for depth.
- Spicy Upgrade: Add pickled jalapeños and a dash of hot sauce to the assembly for those who love heat.
- Baja Style: Mix a little lime zest into the rice and top the finished burrito with shredded cabbage and a squeeze of lime.
FAQs About Grilled Cheese Burrito
Can I make this ahead for a busy week?
Absolutely. Make the beef and rice ahead and refrigerate. Keep sauces separate until assembly. Let the components cool, then store in airtight containers. When you reheat and assemble, the burritos taste freshly made.
Will the burritos fall apart when I grill them?
If you roll them tight and cook seam-side down first with a little cheese acting as glue, they hold together nicely. A gentle press with a spatula during grilling helps form a firm crust.
Can I freeze cooked burritos?
Yes. Wrap tightly in foil and freeze up to 2 months. Reheat from frozen in a 350°F oven for about 20–25 minutes, or until heated through, removing foil for the last 5 minutes to crisp.
What are good side dishes to serve?
Simple sides work best: a crisp salad, chips and salsa, or roasted vegetables. Leftover mac and cheese is always a comfort pairing if you have some ready from earlier in the week.
How do I prevent soggy tortillas?
Don’t overfill them and use a thin layer of rice as a moisture buffer. Also, ensure the beef mixture is not overly liquid. A quick drain after simmering helps.
One Final Thought from My Kitchen
I hope this Grilled Cheese Burrito finds a place at your table the way it has at ours. It’s simple, forgiving, and full of flavor, exactly the kind of meal that invites laughter and seconds. Give it a try—you might surprise yourself with how easily it becomes a family favorite.
Conclusion
Thanks for staying with me through this cozy recipe. If you want to compare different takes on this idea or see a professional version for inspiration, check out Taco Bell’s take on the Grilled Cheese Burrito and a home-cook-friendly version at Grilled Cheese Burrito – House of Yumm.
Grilled Cheese Burrito
Ingredients
For the Filling
- 1 lb ground beef Can substitute with rotisserie chicken for a lighter option.
- 1 packet taco seasoning Or use a homemade blend.
- 1 cup cooked white rice Can swap for brown or cauliflower rice.
- 1/2 cup sour cream Greek yogurt can be used as a lighter option.
- 1/2 cup nacho cheese sauce
- 1/4 cup chipotle sauce Leave out for kid-friendly version.
- 1 cup shredded cheddar cheese Necessary for the best melty texture.
- 1 cup shredded mozzarella Necessary for the best melty texture.
- 4 large flour tortillas Warm tortillas for better folding.
- 1 tbsp butter or oil For grilling.
Instructions
Cook the Beef
- Brown the ground beef in a skillet over medium heat. Break it up with a spoon so it cooks evenly.
- Drain excess grease, then add taco seasoning and 1/4 cup water. Stir and simmer for 5 minutes until well coated.
Warm the Tortillas
- Heat tortillas on a dry skillet for 10–20 seconds per side or microwave for 20 seconds wrapped in a damp towel.
Assemble the Burrito
- Lay a tortilla flat and layer with rice, seasoned beef, nacho cheese, chipotle sauce, and sour cream.
- Top with shredded cheddar and mozzarella. Fold the ends over, then roll snugly to make a tight burrito.
Grill the Burrito
- Heat a clean skillet over medium and add a little butter or oil.
- Sprinkle 2 tbsp of shredded cheese into the pan before placing the burrito seam-side down.
- Cook until the cheese melts and forms a crispy crust, then flip and repeat on the other side.