
The oven hums, peaches simmer, and the kitchen smells like late summer. I hear spoons tapping bowls and soft laughter from the table. Those little sounds make me slow down and enjoy every step.
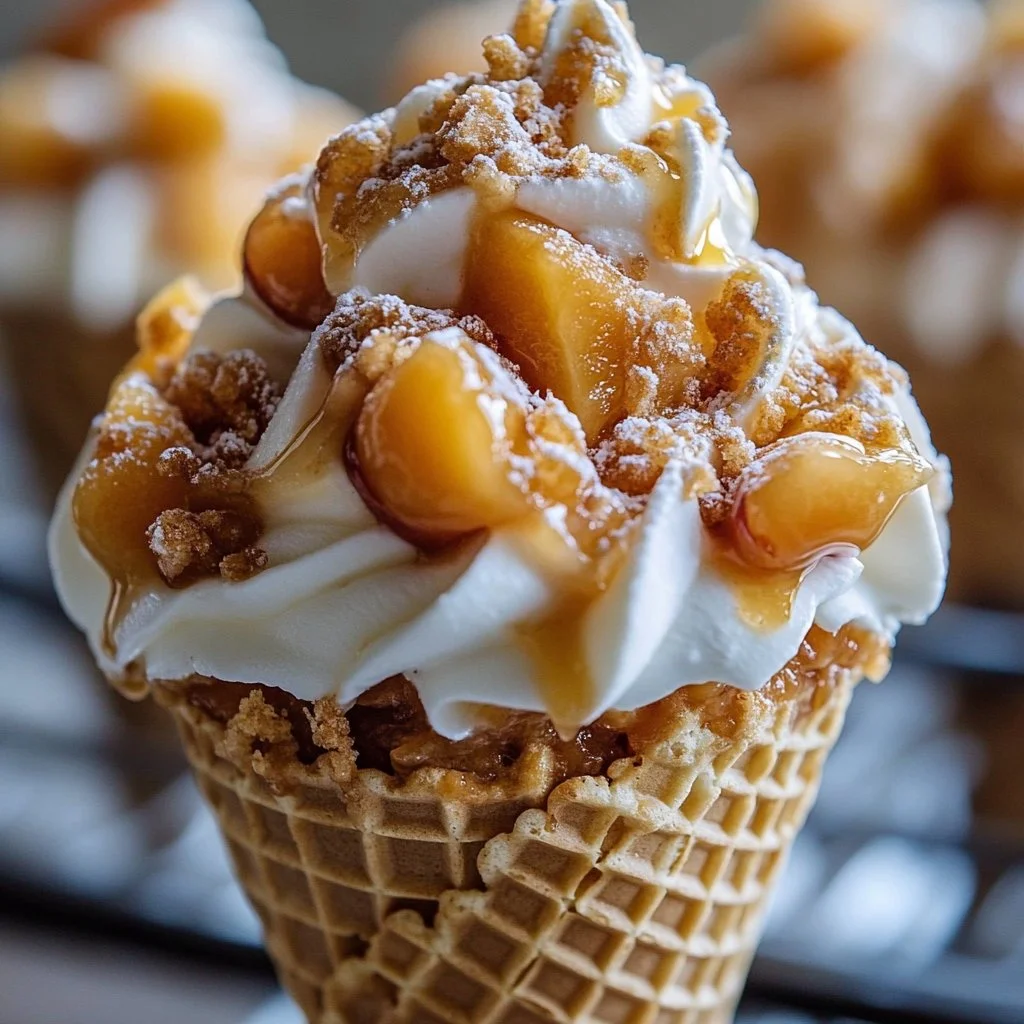
Today I want to share a family favorite that brings those moments together. These Peach Cobbler Cheesecake Cones are playful, portable, and full of creamy peach flavor. They are a perfect project to make with kids or to pack for a picnic.
If you love small treats that taste like a hug, you might also enjoy my take on other easy desserts like caramel cheesecake cookies. They are simple and comforting, just like these cones.
Why this works
This recipe shines because it balances three textures: crunchy cone, creamy cheesecake, and juicy peach filling. That combo makes every bite lively and satisfying.
It also saves time. You skip baking a whole dessert and make individual portions that look special. This makes them perfect for busy weeknights and weekend gatherings.
Families love these cones because kids can help. Let them spoon in crumbs, add peach filling, or decorate the tops. If you want another handheld cheesecake-style treat, try the silky white chocolate pistachio cheesecake for a different celebration dessert.
These cones travel well too. You can make them ahead for parties and keep them chilled until ready to serve. They cut down on dishes and keep everyone moving from the kitchen to the table with smiles.
Process Overview
“This is where the magic happens—when the aroma fills the kitchen.”
Start by making the creamy filling and assembling a few cones at a time. The trick is to keep the whipped cream light and fold it gently so the filling stays airy.
Layering matters. A thin base of graham cracker crumbs keeps the cone from getting soggy. Add peach filling, then the cheesecake mix, and finish with more peaches. The bright peach top gives each cone a fresh look.
If you want to speed things up, make the peach filling while the cream cheese softens. I often let kids mash the peaches with a fork while I beat the cream. It turns prep into a memory.
For more inspiration on no-fuss desserts, I sometimes use ideas from other easy handheld sweets like my favorite cheesecake cookies when I need a quick crowd-pleaser.
Ingredients
-
1 cup peach filling
Lily tip: Use fresh peaches when they are ripe, or a good-quality canned peach pie filling in a pinch. Warm the filling slightly for a softer spoonable texture. -
8 oz cream cheese, softened
Lily tip: Take it out of the fridge 30 minutes early. Room temperature cream cheese blends smoothly and keeps your filling lump-free. -
1/2 cup powdered sugar
Lily tip: Powdered sugar dissolves quickly into the cream cheese. Taste as you go if your peach filling is very sweet, and cut the sugar slightly if needed. -
1 tsp vanilla extract
Lily tip: Pure vanilla adds depth. If you have vanilla bean paste, a small dab makes the filling taste bakery-fresh. -
1 cup heavy cream
Lily tip: Chill the bowl and beaters ahead. Cold tools help the cream whip faster into stable peaks. -
Graham cracker crumbs
Lily tip: Pulse graham crackers in a bag with a rolling pin for quick crumbs. Mix a teaspoon of melted butter if you want a firmer base layer. -
Ice cream cones
Lily tip: Use waffle or sugar cones for extra crunch. Stand the cones in a narrow glass while you fill them to keep hands free and clean.
If you want to experiment, try a reduced-sugar filling for little ones or a gluten-free crumb base to suit dietary needs. A few simple swaps can make these cones work for everyone.
Directions
-
In a mixing bowl, beat the softened cream cheese, powdered sugar, and vanilla extract until smooth.
Encouraging note: Take your time here. Smooth cream cheese makes the filling luxurious. Use a hand mixer or whisk and scrape the bowl for even mixing. -
In another bowl, whip the heavy cream until stiff peaks form, then gently fold it into the cream cheese mixture.
Encouraging note: Fold gently to keep the mixture light and airy. A rubber spatula and slow, careful turns keep the texture fluffy. -
Take the ice cream cones and fill the bottom with a layer of graham cracker crumbs.
Encouraging note: A small spoon or funnel helps. This crumb layer acts like a little dam and keeps juices from making the cone soggy. -
Add a layer of peach filling on top of the crumbs.
Encouraging note: Use a small spoon to add a thin, even layer so each bite has a bright peach pop. Kids enjoy this step—let them swirl for fun. -
Spoon the cheesecake mixture into the cone until full, and top with additional peach filling.
Encouraging note: Pack it gently but completely so the cone holds the layers well. Finish with peach on top for a pretty and inviting look. -
Serve immediately or refrigerate until serving.
Encouraging note: If you refrigerate, cover loosely with plastic wrap or place cones upright in a container. Serve within a few hours for the best texture.
If you want extra flair, sprinkle a few chopped toasted pecans or a dusting of cinnamon on top before serving.
Serving

Serve these cones family-style on a large platter. Line the platter with a clean towel or parchment and stand the cones upright in a shallow row. Kids will love choosing their own cone.
For a crowd, set up a small topping station. Offer chopped nuts, extra peach filling, or a drizzle of honey. This invites everyone to customize their cone, and it makes the moment feel like a party.
These cones also travel well if you stack them in a container with paper cups holding each cone upright. Pack chilled with an ice pack for picnics or potlucks. The presentation is simple, but the result looks thoughtful and homemade.
Storage
Short-term storage: Cover the assembled cones loosely and refrigerate for up to 24 hours. The cheesecake filling stays creamy, and the cone retains most of its crunch for a little while.
Longer storage: If you need to save the filling, store it in an airtight container in the fridge for up to 3 days. Keep the cones separate and assemble before serving to protect crunch.
Reheating tips: These cones are best served cold or at room temperature. Avoid heating, as warm filling can make the cone soggy. If the cone softens slightly from refrigeration, let it sit 10 minutes at room temperature before serving for optimal texture.
Safety note: Because this recipe uses dairy, keep leftovers refrigerated and discard after 3 days. Always keep the cones chilled when serving outdoors in warm weather.
Kitchen Notes
- Use a chilled metal bowl for whipping cream to speed up the process. It makes the cream form firm peaks quickly.
- If cones break, crumble them into more graham crumbs and press into the bottom of other cones for a repair. No waste, more taste.
- Make the peach filling a day ahead and refrigerate. This frees up time on the serving day and deepens the flavor.
- For a festive touch, press a small mint leaf or a thin peach slice into the top of each cone before serving.
- To prep for a party, set cones upright in a muffin tin or small glasses while you fill them. It keeps hands free and lines stay neat.
Variations
- Kid-friendly: Swap the peach filling for strawberry or mixed berry jam if your kids prefer different fruit flavors. These swaps keep the same texture but change the color and taste.
- Lower sugar: Use a sugar-free peach compote and reduce powdered sugar to 1/4 cup. Taste as you go to balance sweetness.
- Vegan version: Use vegan cream cheese and full-fat coconut cream whipped until stiff. Choose dairy-free cones and coconut milk-based whipped cream for a plant-based treat.
- Nut-free: Skip any nut toppings and use extra graham crumbs or toasted coconut for crunch instead.
- Boozy adult twist: Stir one tablespoon of bourbon into the peach filling for a deeper flavor. Keep this version separate from kids’ servings.
These tweaks let you cater to picky eaters, dietary needs, and flavor preferences without losing the charm of the original recipe.
FAQ
Can I use canned peaches?
Yes. Use a good-quality canned peach pie filling or sliced peaches drained and chopped. Warm them slightly to make a spoonable layer. Homemade peaches are lovely, but canned works well for convenience.
How long can I store filled cones in the fridge?
Filled cones are best eaten within 24 hours. The cones may soften over time. If you need longer storage, keep the filling separate for up to 3 days and assemble before serving.
Can I freeze these cones?
I do not recommend freezing filled cones. Freezing changes the texture of the cream filling and can make the cone soggy. You can freeze the peach filling separately and thaw in the fridge before assembling.
Can I make the filling ahead of time?
Yes. Store the cheesecake filling in an airtight container in the fridge for up to 3 days. Whip it again briefly with a whisk if it loses some volume before spooning into cones.
What cones work best?
Waffle or sugar cones offer the best flavor and crunch. Standard cake cones are fine for a lighter bite, but waffle cones add a nice texture contrast with the creamy filling.
Conclusion
Thank you for spending a little kitchen time with me. These Peach Cobbler Cheesecake Cones are a simple way to bring family together and make dessert feel special without fuss. If you want another version of handheld peach treats, this Peach Cobbler Cheesecake Cone Recipe – The Foodie Affair offers a lovely take to compare. For more ideas on peaches in cones, you can also see the creative Homemade Peach Cobbler in a Cone – Sprinkle Bakes post.
I hope you try these with your family soon. Let the little hands help and enjoy the sounds of the kitchen. Goodbye for now, and happy baking.

Peach Cobbler Cheesecake Cones
Ingredients
For the cheesecake filling
- 8 oz cream cheese, softened Take it out of the fridge 30 minutes early for smooth blending.
- 1/2 cup powdered sugar Dissolves quickly; adjust based on peach filling sweetness.
- 1 tsp vanilla extract Pure vanilla adds depth. Vanilla bean paste also works.
- 1 cup heavy cream Chill bowl and beaters for faster whipping.
For the assembly
- 1 cup peach filling Use fresh or good-quality canned peach filling.
- Graham cracker crumbs Pulse crackers for quick crumbs; optional melted butter for firmer base.
- Ice cream cones Waffle or sugar cones provide extra crunch.
Instructions
Preparation
- In a mixing bowl, beat the softened cream cheese, powdered sugar, and vanilla extract until smooth.
- In another bowl, whip the heavy cream until stiff peaks form, then gently fold it into the cream cheese mixture.
Assembly
- Take the ice cream cones and fill the bottom with a layer of graham cracker crumbs.
- Add a layer of peach filling on top of the crumbs.
- Spoon the cheesecake mixture into the cone until full, and top with additional peach filling.
- Serve immediately or refrigerate until serving.