Pita pockets are more than just another type of bread—they’re a game-changer in the kitchen! Whether you’re whipping up a quick lunch, a hearty dinner, or even a sweet treat, pita pockets offer endless possibilities. Their unique hollow structure makes them perfect for stuffing with an array of delicious fillings, from classic Mediterranean ingredients to creative fusion dishes.
In this article, we’ll take a deep dive into the world of pita pockets—what they are, how they’re made, the best fillings, and even their health benefits. By the end, you’ll not only know how to craft the perfect pita pocket but also how to make them a staple in your everyday meals. Let’s get started!
Table of Contents
What Are Pita Pockets?
The Origins of Pita Pockets
The story of pita pockets dates back thousands of years to the Middle East, where they were a dietary staple among ancient civilizations. This flatbread, also known as “pocket bread,” was widely consumed in Mediterranean and Levantine cultures, thanks to its simple ingredients and ease of preparation.
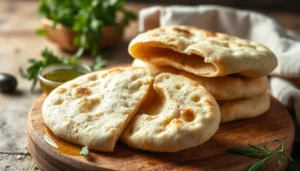
Traditionally baked in high-temperature ovens, pita bread puffs up as it cooks, forming a natural air pocket inside. This unique characteristic allows it to be sliced open and filled with meats, vegetables, and spreads, making it a favorite choice for quick and satisfying meals.
How Pita Pockets Differ from Regular Pita Bread
At first glance, pita bread and pita pockets may seem identical, but there’s a subtle distinction. Regular pita bread can be served whole or cut into wedges for dipping, while pita pockets refer specifically to pita bread that’s cut in half and stuffed with various ingredients.
This makes them an excellent alternative to traditional sandwiches, wraps, or tacos, as they conveniently hold fillings without the risk of everything spilling out. Plus, they’re sturdier than many other breads, ensuring a satisfying bite every time!
The Unique Structure: Why Pita Pockets Have a Pocket
Ever wondered why pita pockets have that perfect pocket inside? It all comes down to the baking process.
When pita dough is placed in an extremely hot oven—typically around 450–500°F—the heat causes moisture in the dough to turn into steam almost instantly. This rapid steam formation expands the dough, creating an internal cavity. Once cooled, the pita flattens again, but the hollow space remains, allowing you to cut it open and stuff it to your heart’s content.
However, not all pita breads develop this pocket. If the oven isn’t hot enough or the dough isn’t rolled evenly, the steam won’t distribute properly, leaving you with a flatbread instead of a pocket. But don’t worry—we’ll cover how to perfect your pita pockets in the next section!
How to Make Pita Pockets at Home
Essential Ingredients for Homemade Pita Bread
Making pita pockets from scratch might seem intimidating, but it’s surprisingly simple. With just a few pantry staples, you can create soft, fluffy pita that puffs up perfectly. Here’s what you’ll need:
- 3 ½ cups all-purpose or whole wheat flour
- 1 ½ teaspoons salt
- 1 packet (2 ¼ teaspoons) active dry yeast
- 1 ¼ cups warm water
- 1 tablespoon olive oil
- 1 teaspoon sugar (to activate the yeast)
Whole wheat flour creates a heartier, healthier pita, while all-purpose flour results in a softer texture. Experiment with a mix of both for the best of both worlds!
Step-by-Step Guide to Baking the Perfect Pita Pocket

- Activate the yeast – In a bowl, mix warm water, sugar, and yeast. Let it sit for 5–10 minutes until frothy.
- Mix and knead – Combine flour and salt, then slowly add the yeast mixture and olive oil. Knead the dough for 8–10 minutes until smooth.
- Let it rise – Cover the dough with a damp towel and let it rise in a warm place for 1–2 hours until doubled in size.
- Divide and roll – Punch down the dough and divide it into equal-sized balls. Roll each into a ¼-inch thick circle.
- Bake at high heat – Preheat the oven to 475°F (245°C) and place a baking stone or sheet inside. Bake each pita for 3–4 minutes until it puffs up.
- Cool and store – Let them cool slightly before slicing them open into pockets.
Common Mistakes and How to Fix Them
- Pita not puffing up? The oven needs to be super hot! Also, make sure you roll the dough evenly.
- Too dry? Brush the dough with a little water before baking.
- Too chewy? Don’t over-knead, and let the dough rest properly before baking.
Making pita pockets at home is not only fun but also gives you fresher, more flavorful bread than store-bought versions.
The Best Fillings for Pita Pockets
Classic Mediterranean Fillings
Nothing beats the traditional flavors of the Mediterranean. These fillings bring a taste of Greece, Turkey, and the Middle East straight to your table:
- Falafel & Hummus – Crispy falafel balls with creamy hummus, tomatoes, and cucumbers.
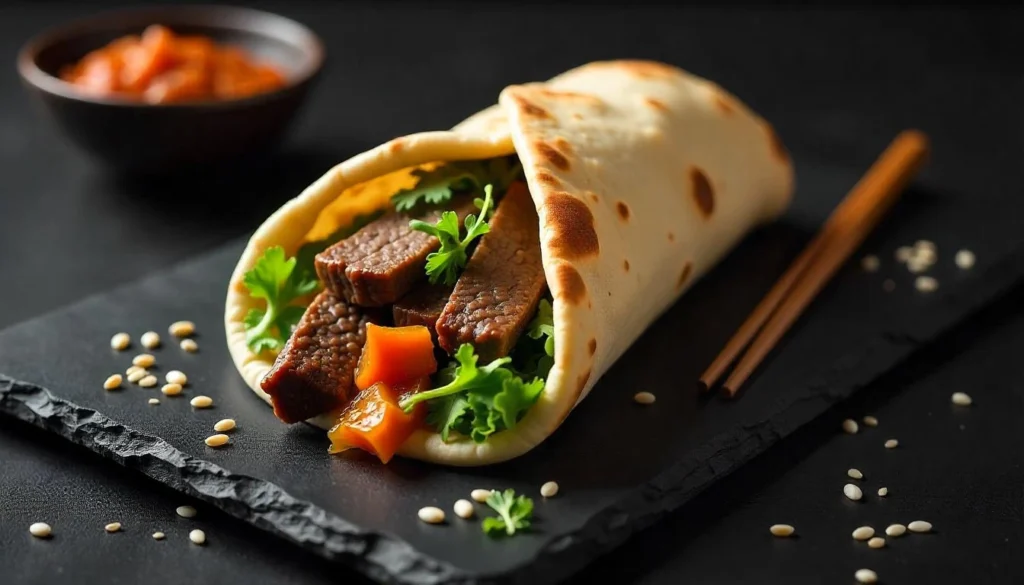
- Chicken Shawarma – Marinated chicken with garlic sauce, pickles, and tahini.
- Gyro Meat – Slices of seasoned lamb or beef with tzatziki sauce.
- Greek Salad Pocket – Feta cheese, olives, tomatoes, and onions with olive oil.
Healthy and Nutritious Vegetarian Options
Want something light and fresh? Try these nutrient-packed veggie combos:
- Roasted Veggies & Feta – Grilled zucchini, bell peppers, and eggplant with crumbled feta.
- Avocado & Chickpea Mash – A creamy, protein-rich blend with a sprinkle of lemon juice.
- Spinach & Ricotta – A Mediterranean take on a spinach pie, stuffed inside a pita pocket.
Protein-Packed Pita Pocket Fillings
If you’re looking to power up your meal, these high-protein fillings will do the trick:
- Grilled Steak & Chimichurri – Sliced steak with a tangy herb sauce.
- BBQ Pulled Chicken – Slow-cooked chicken in a smoky barbecue sauce.
- Tuna & Avocado Salad – A fresh mix of tuna, avocado, and Greek yogurt.
- Egg & Cheese Breakfast Pocket – Scrambled eggs with cheddar and spinach.
Creative and Unique Pita Pocket Fillings

Feeling adventurous? These fusion-style fillings will surprise your taste buds:
- Buffalo Chicken & Blue Cheese – Spicy shredded chicken with a cooling blue cheese dressing.
- Caprese Pocket – Mozzarella, tomatoes, and basil drizzled with balsamic glaze.
- Korean Bulgogi Beef – Marinated beef with kimchi for a spicy kick.
- Sweet Nutella & Banana – Who said pita pockets can’t be dessert?
With endless possibilities, pita pockets can suit any craving. Whether you’re going traditional or getting creative, there’s a perfect pocket for every meal.
How to Use Pita Pockets for Every Meal
Breakfast Pita Pocket Ideas
Mornings can be busy, but pita pockets make breakfast quick, delicious, and portable. Here are some great ways to start your day:
- Egg & Cheese Pocket – Scrambled eggs, melted cheddar, and fresh spinach for a protein-packed morning boost.
- Avocado & Tomato Pita – Creamy avocado with cherry tomatoes and a sprinkle of sea salt.
- Peanut Butter & Banana – A sweet and energizing combination perfect for kids and adults alike.
Pair these breakfast pita ideas with a smoothie or a cup of coffee for a complete meal.
Lunch and Dinner Pita Pocket Variations
Whether you’re craving something light or a hearty meal, pita pockets can handle it all. Try these tasty lunch and dinner ideas:
- Grilled Chicken Caesar Pocket – Juicy chicken breast, crisp romaine lettuce, parmesan, and creamy Caesar dressing.
- Tuna Salad Pita – A refreshing mix of tuna, Greek yogurt, diced celery, and lemon juice.
- Veggie Hummus Wrap – Loaded with cucumbers, bell peppers, shredded carrots, and hummus.
- BBQ Pulled Pork Pita – A smoky and savory delight with coleslaw for added crunch.
These pita pockets are easy to prepare ahead of time, making them great for meal prepping!
Sweet Pita Pocket Desserts
Yes, pita pockets can be dessert too! Their soft texture makes them perfect for sweet fillings:
- Nutella & Strawberry Pocket – A decadent combo of chocolate-hazelnut spread and fresh strawberries.
- Apple Cinnamon Pita – Warm spiced apples with a touch of honey and cinnamon.
- Greek Yogurt & Berries – A healthy and refreshing option with blueberries, raspberries, and honey.
Are Pita Pockets Healthy? Nutritional Insights
Macronutrient Breakdown: Calories, Carbs, and Protein
When it comes to nutrition, pita pockets can be a healthy choice—depending on how they’re made and what you put inside them.
- Calories – A standard pita pocket has around 165 calories.
- Carbs – Most pitas contain about 33g of carbohydrates, making them a good energy source.
- Protein – With around 5–6g of protein per serving, pita provides moderate protein.
Adding high-protein fillings like grilled chicken, hummus, or Greek yogurt can make pita pockets even more nutritious.
Health Benefits of Whole Wheat vs. White Pita Pockets
Choosing whole wheat pita over white pita offers extra fiber and nutrients. Whole wheat pita:
- Supports digestion – More fiber means better gut health.
- Keeps you fuller longer – Slower digestion helps control appetite.
- Has more vitamins – Whole grains provide B vitamins and minerals.
If you’re looking for a low-carb option, you can try almond flour or keto-friendly pita alternatives.
Best Store-Bought Pita Pockets for a Balanced Diet
If you don’t have time to make your own pita pockets, look for these healthier store-bought options:
- Whole wheat or sprouted grain pitas
- Low-sodium and preservative-free options
- Gluten-free pitas for those with dietary restrictions
Pairing pita pockets with lean proteins, fresh vegetables, and healthy fats can turn them into a well-rounded meal.
Common Questions About Pita Pockets (FAQs)
What is the difference between pita bread and pita pockets?
While the terms are often used interchangeably, there’s a key difference. Pita bread refers to the round, flat Middle Eastern bread that can be served whole or cut into wedges. Pita pockets, on the other hand, describe pita bread that has naturally puffed up during baking, creating an inner cavity perfect for stuffing with delicious fillings.
The pocket forms because of the high heat in the oven, which creates steam inside the bread. Once cooled, the pita flattens, but the hollow space remains, making it easy to cut open and fill.
Are pita pockets healthy?
Yes! Pita pockets can be a great addition to a healthy diet, especially if you choose whole wheat varieties. They are:
- Low in fat – Most pitas have minimal fat content.
- High in fiber – Whole wheat pitas help with digestion and keep you full.
- Versatile – You can fill them with lean proteins, fresh veggies, and healthy fats for a balanced meal.
However, store-bought versions can sometimes contain added preservatives or excess sodium. If possible, opt for homemade or minimally processed options.
Can you cut pita bread to make a pita pocket?
Absolutely! If your pita doesn’t naturally puff up during baking, you can still create a pocket by carefully slicing it open with a knife. Here’s how:
- Warm the pita slightly to make it more flexible.
- Use a sharp knife to cut the pita in half.
- Gently open the pocket with your fingers, being careful not to tear it.
If your pita is too thick or dense, it may not form a proper pocket. In that case, you can use it as a wrap instead!
Why does my pita not have a pocket?
Sometimes, pita pockets don’t puff up properly. Here’s why:
- Oven not hot enough – A high temperature (at least 475°F) is crucial for steam formation.
- Dough rolled too thin or unevenly – This prevents even steam distribution.
- Underproofed dough – If the dough hasn’t risen enough, it may not puff correctly.
Final Thoughts on Pita Pockets
Whether you enjoy them as a quick snack, a hearty meal, or even a dessert, pita pockets are one of the most versatile foods out there. Their unique hollow structure makes them perfect for stuffing with endless combinations of ingredients, from traditional Mediterranean fillings to modern fusion flavors.
Making your own pita pockets at home can be both fun and rewarding. With just a few simple ingredients and the right baking technique, you can create fresh, fluffy pitas that are far tastier than store-bought versions. Plus, knowing what goes into your food ensures you’re making healthier choices.
If you’re short on time, plenty of great store-bought options exist. Just look for whole wheat or minimally processed varieties to get the best nutritional benefits.
Suggested Internal Links for Enrichment
To enhance your reading and cooking experience, check out these related articles:
- How To Make Perfect Hoe Cakes Every Time.
- Is Avocado Oil A Seed Oil? The Truth About Its Benefits.
- Quick And Heartwarming Ditalini Pasta Recipes To Tryriendly meal ideas.
So next time you’re craving something delicious, grab a pita pocket, stuff it with your favorite fillings, and enjoy! 🚀
Homemade Pita Pockets
Equipment
- Mixing bowl
- Rolling Pin
- Baking stone or baking sheet
- Oven
Ingredients
- 3 1/2 cups all-purpose or whole wheat flour
- 1 1/2 tsp salt
- 1 packet active dry yeast 2 1/4 teaspoons
- 1 1/4 cups warm water not too hot, around 110°F
- 1 tbsp olive oil
- 1 tsp sugar to activate the yeast
Instructions
- In a bowl, mix warm water, sugar, and yeast. Let it sit for 5–10 minutes until frothy.
- In a large bowl, combine flour and salt. Slowly add the yeast mixture and olive oil. Stir until combined.
- Knead the dough on a floured surface for 8–10 minutes until smooth and elastic.
- Place the dough in a greased bowl, cover, and let it rise in a warm place for 1–2 hours until doubled in size.
- Punch down the dough and divide it into 8 equal portions. Roll each portion into a ¼-inch thick circle.
- Preheat the oven to 475°F (245°C) and place a baking stone or baking sheet inside.
- Bake each pita for 3–4 minutes until puffed up and lightly golden.
- Remove from the oven and let them cool slightly before slicing open into pockets.