Category

Red White & Blue

Category

This post contains affiliate links. As an Amazon Associate, I earn from qualifying purchases. This comes at no extra cost to you.

Mummy cheesecake stuffed strawberries

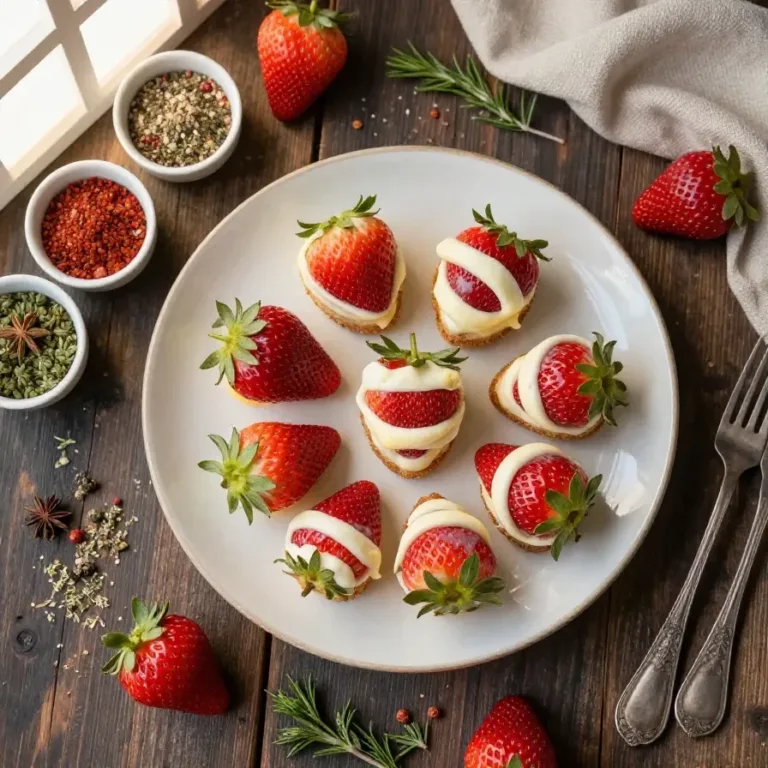
Mummy cheesecake stuffed strawberries is a festive treat made with fresh strawberries filled with a creamy mixture of softened cream cheese, powdered sugar, vanilla extract, lemon juice, and whipped cream, ready in just 20 minutes. This easy recipe yields 12 servings and is perfect for Halloween with its cute mummy design using chocolate and candy eyes. The juicy strawberries offer a delightful contrast with the smooth, sweet filling and the slight tang of lemon juice.

Creating these little mummies brought me and my niece, Lily, so much joy as we carefully added the candy eyes and chocolate decorations. They became the star at our recent family gathering, earning tons of compliments.

Table of Contents

Mummy Cheesecake Stuffed Strawberries are beloved for their unique look and delicious taste. They combine the freshness of strawberries with a creamy cheesecake filling, making them an ideal festive dessert.

  • Perfect for Halloween: These strawberries are dressed up as mummies, complete with chocolate bandages and candy eyes, offering a fun and tasty treat for the holiday.
  • Quick and Easy: With just 20 minutes of prep time, they are a hassle-free option for parties and gatherings.
  • Kid-Friendly: Kids adore these because they look adorable and taste even better. Involving them in the decoration process can be a fun activity.
  • Fresh and Creamy: The combination of juicy strawberries with a smooth cheesecake filling provides a delightful texture contrast.

What ingredients do you need for Mummy Cheesecake Stuffed Strawberries?

The key ingredients for making Mummy Cheesecake Stuffed Strawberries include fresh strawberries, cream cheese, powdered sugar, and chocolate for decoration. Here’s the full list with measurements:

The fresh strawberries and creamy cheesecake filling are key, bringing together sweetness and tang that makes each bite memorable.

How do you make Mummy Cheesecake Stuffed Strawberries step by step?

The process to make Mummy Cheesecake Stuffed Strawberries involves hollowing strawberries, mixing a cheesecake filling, and decorating. Follow these steps for success:

Step 1 — Prepare the Strawberries

Wash the strawberries thoroughly and pat them dry with a paper towel. Cut off the tops and hollow out the insides slightly, creating space for the filling.

You might also enjoy our cheesecake bites with strawberries.

Step 2 — Make the Cheesecake Filling

In a mixing bowl, combine the softened cream cheese, powdered sugar, vanilla extract, and lemon juice. Mix until smooth and creamy.

Step 3 — Incorporate the Whipped Cream

Fold in the whipped cream gently until well incorporated.

Delicious mummy cheesecake stuffed strawberries arranged on a plate

Step 4 — Fill the Strawberries

Using a piping bag or a small spoon, fill each hollowed strawberry with the cheesecake mixture, making sure to fill them generously.

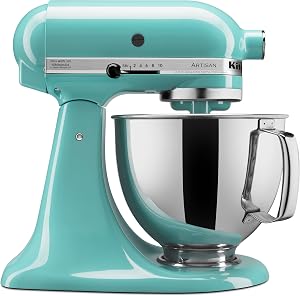
KitchenAid Artisan Stand Mixer

Kitchen ApplianceKitchenAid Artisan Stand Mixer

Makes mixing dough and batters effortless — a kitchen game-changer.

View on Amazon →

Pyrex Mixing Bowl Set

Essential CookwarePyrex Mixing Bowl Set

Essential for mixing your cheesecake filling and easy to clean.

View on Amazon →

Step 5 — Melt the Chocolate

Melt the chocolate melts or chocolate chips in a microwave-safe bowl, heating in 30-second intervals until fully melted and smooth.

For more ideas, check out our deviled strawberries (made with a.

Step 6 — Decorate the Strawberries

Dip each filled strawberry halfway into the melted chocolate, then place them on a parchment-lined tray to set. Once the chocolate has set slightly, use a toothpick or a piping bag to draw ‘bandage’ lines across the strawberries with the remaining melted chocolate.

Step 7 — Add the Final Touches

Place candy eyes on top of the chocolate bandages to create the mummy effect. Refrigerate the strawberries for at least 30 minutes before serving to allow the cheesecake filling to firm up.

Frequently Asked Questions About Mummy Cheesecake Stuffed Strawberries

Can I make them ahead of time?

Yes, you can prepare them the day before and store in the refrigerator to keep them fresh.

What if I don’t have candy eyes?

You can use small chocolate chips instead of candy eyes for a similar effect.

Looking for something similar? Try our pumpkin chocolate covered strawberries.

How long do they last?

Stored properly in the refrigerator, they can last up to 2 days.

Can I use frozen strawberries?

Fresh strawberries are recommended for the best texture, but thawed frozen ones may work in a pinch.

Is there an alternative to chocolate melts?

Yes, you can use dark or milk chocolate chips as a substitute for chocolate melts.

Mummy Cheesecake Stuffed Strawberries

Mummy Cheesecake Stuffed Strawberries

Instructions 

  • Wash the strawberries thoroughly and pat them dry with a paper towel. Cut off the tops and hollow out the insides slightly, creating space for the filling.
  • In a mixing bowl, combine the softened cream cheese, powdered sugar, vanilla extract, and lemon juice. Mix until smooth and creamy.
  • Fold in the whipped cream gently until well incorporated.
  • Using a piping bag or a small spoon, fill each hollowed strawberry with the cheesecake mixture, making sure to fill them generously.
  • Melt the chocolate melts or chocolate chips in a microwave-safe bowl, heating in 30-second intervals until fully melted and smooth.
  • Dip each filled strawberry halfway into the melted chocolate, then place them on a parchment-lined tray to set.
  • Once the chocolate has set slightly, use a toothpick or a piping bag to draw 'bandage' lines across the strawberries with the remaining melted chocolate.
  • Place candy eyes on top of the chocolate bandages to create the mummy effect.
  • Refrigerate the strawberries for at least 30 minutes before serving to allow the cheesecake filling to firm up.
Delicious mummy cheesecake stuffed strawberries arranged on a plate

Loved this recipe? Save it to your favorite Pinterest board so you can easily find it later! ✨
This post contains affiliate links. As an Amazon Associate, I earn from qualifying purchases. This comes at no extra cost to you.

Slimy jell-o worms is a playful treat made with apple and grape juices, agar-agar, and colorful food coloring, ready in just over four hours including chilling time. This easy recipe yields a batch of wiggly worms that are both fun and kid-friendly for any party. Robert and I had a blast crafting these spooky creatures for our Halloween gathering, creating an unforgettable display that captivated our young guests.

Table of Contents

Slimy Jell-O Worms captivate with their unique texture and visual appeal, making them a hit at themed events. These gelatinous treats offer playful creativity, especially during Halloween.

  • Visual Intrigue: Their vibrant colors and squiggly shapes are sure to grab attention and generate excitement among both kids and adults.
  • Flavor Fusion: The combination of apple and grape juice provides a sweet and slightly tart taste that complements the spooky look.
  • Simple Preparation: Crafted with common ingredients and a straightforward method, making them accessible for any home cook to try.
  • Decorative Fun: The option to add candy eyes allows for personalization, inviting everyone to get creative with their wormy designs.

What Ingredients Do You Need for Slimy Jell-O Worms?

To create Slimy Jell-O Worms, gather fruit juices, agar-agar, sugar, food coloring, and optional candy eyes for decorating. Each component plays a key role in achieving the desired taste and appearance.

The agar-agar powder is crucial for achieving the wiggle and jiggle characteristic of Jell-O worms, setting the mixture firm but flexible. Meanwhile, the combination of green and black food colorings provides that realistic, slimy appearance.

How Do You Make Slimy Jell-O Worms Step by Step?

Making Slimy Jell-O Worms involves mixing, boiling, coloring, and chilling the ingredients to create the perfect gelatinous consistency. Follow these simple steps:

Step 1 — Combine the Juices and Sugar

In a medium saucepan, combine the apple juice, grape juice, and sugar over medium heat.

Step 2 — Dissolve the Agar-Agar

Stir in the agar-agar powder and bring the mixture to a boil, whisking continuously until the agar-agar is fully dissolved.

Step 3 — Add Color and Flavor

Once boiling, reduce the heat and add the lemon juice and food coloring, mixing well to achieve a uniform color.

A close-up view of colorful slimy Jell-O worms on a plate

Step 4 — Cool and Mold

Remove the saucepan from heat and let the mixture cool for a few minutes. Using a funnel, pour the mixture into flexible worm-shaped molds (or any long, thin molds you have).

Silicone Worm Molds

Essential CookwareSilicone Worm Molds

Flexible silicone molds perfect for creating fun worm shapes for your jello worms.

View on Amazon →

Step 5 — Set and Serve

Refrigerate for at least 4 hours, or until fully set. Once set, gently remove the worms from the molds and place them on a serving platter. If desired, add candy eyes to the worms for a fun decoration before serving.

Frequently Asked Questions About Slimy Jell-O Worms

Can I use gelatin instead of agar-agar?

Yes, but agar-agar provides a firmer texture that holds shape better. Adjust the setting time as needed when using gelatin.

How can I store the worms?

Store them in an airtight container in the refrigerator for up to 3 days to maintain texture and freshness.

Can I use different juices?

Absolutely. Swap out apple or grape juice for other flavors like cherry or cranberry to experiment with taste and colors.

Are there any vegan substitutes?

Agar-agar is already vegan, making it an excellent gelatin alternative for plant-based diets.

Can I make them without molds?

Yes, pour the mixture into a shallow dish and cut it into strips once set for a similar effect.

What Are Some Easy Ingredient Swaps?

For a different flavor profile, replace grape juice with cranberry juice for a tart twist. Substitute green food coloring with blue for a vibrant oceanic look.

What Expert Tips Should I Know?

Here are some expert tips to ensure your jello worms turn out perfectly every time:

  • Ensure Full Dissolution: Agar-agar needs to be fully dissolved to set correctly. Whisk continuously to avoid clumps.
  • Mold Flexibility: Ensure your molds are flexible enough for easy worm removal to prevent breaking.
  • Chill Time: Allow enough time for chilling to guarantee the worms hold their shape when unmolded.

Slimy Jell-O Worms

Slimy Jell-O Worms

Instructions 

  • In a medium saucepan, combine the apple juice, grape juice, and sugar over medium heat.
  • Stir in the agar-agar powder and bring the mixture to a boil, whisking continuously until the agar-agar is fully dissolved.
  • Once boiling, reduce the heat and add the lemon juice and food coloring, mixing well to achieve a uniform color.
  • Remove the saucepan from heat and let the mixture cool for a few minutes.
  • Using a funnel, pour the mixture into flexible worm-shaped molds (or any long, thin molds you have).
  • Refrigerate for at least 4 hours, or until fully set.
  • Once set, gently remove the worms from the molds and place them on a serving platter.
  • If desired, add candy eyes to the worms for a fun decoration before serving.
A close-up view of colorful slimy Jell-O worms on a plate

Loved this recipe? Save it to your favorite Pinterest board so you can easily find it later! ✨
Ghost pretzels is a spooky seasonal treat crafted from crunchy large pretzel rods, dipped in smooth white chocolate, and decorated with candy eyes to create hauntingly adorable ghost faces. Ready in just 30-40 minutes including setting time, this easy recipe yields 12 ghost pretzels, perfect for Halloween parties or snack tables. The combination of sweet chocolate and salty pretzels makes it irresistible, while the whimsical ghost design adds festive charm.

As a trained pastry chef, I love how simple techniques like drizzling chocolate can turn basic ingredients into playful and memorable creations, making Ghost Pretzels a favorite in my house every Halloween.

Table of Contents

Why make Ghost Pretzels?

Ghost Pretzels are beloved for their unique blend of sweet and salty flavors, paired with a visually fun and festive appearance. This recipe is quick to prepare, customizable, and a perfect addition to any Halloween celebration.

  • Easy and quick: With just 10 minutes of prep time, they’re ready for the party in a flash.
  • Festive fun: The ghost-inspired design makes them a creative standout, especially for Halloween gatherings.
  • Family-friendly: Kids enjoy decorating each pretzel with candy eyes and chocolate; it’s a great bonding activity.
  • Gifting option: Wrap them in cellophane bags with a ribbon, and they become a charming seasonal gift.

What ingredients do you need for Ghost Pretzels?

To make Ghost Pretzels, you’ll need pretzels, white chocolate chips or white candy melts, candy eyes, and a few basic supplies. Here’s the full list:

  • 12 large pretzel rods
  • 1 1/2 cups white chocolate chips or white candy melts
  • Candy eyes
  • 1/2 teaspoon coconut oil (optional, for thinning the chocolate)
  • Wax paper or parchment paper

The candy eyes are the star of this recipe, adding a whimsical personality to every treat. For a creamier coating, use coconut oil to thin the melted chocolate.

How do you make Ghost Pretzels step by step?

Making ghost pretzels is simple and fun. You’ll melt, dip, and decorate pretzel rods, creating playful edible ghouls in no time.

Step 1 — Prepare your setup

Line a baking sheet with wax paper or parchment paper and set it aside. This prevents the pretzels from sticking to the surface as they set.

You might also enjoy our homemade soft pretzels.

Step 2 — Melt the chocolate

In a microwave-safe bowl, melt the white chocolate chips or candy melts in 20-second intervals. Stir between each interval until smooth. If the chocolate is too thick, stir in 1/2 teaspoon of coconut oil to thin it slightly.

Step 3 — Coat the pretzel rods

Dip each pretzel rod into the melted white chocolate, covering about two-thirds of its length. Use a spoon to help evenly coat the pretzels if necessary.

Step 4 — Remove excess chocolate

Gently tap off excess chocolate from the pretzels. Lay the coated pretzel rods on the prepared baking sheet.

Step 5 — Add the candy eyes

Before the chocolate sets, press two candy eyes near the top of each coated pretzel to create the ghost face.

For more ideas, check out our mozzarella stuffed rosemary parmesan soft.

White chocolate-covered pretzels shaped like ghosts on a wooden table.

Step 6 — Create a ghostly appearance

Using a spoon or fork, drizzle additional white chocolate back and forth across the coated pretzels for a wispy, ghostly look.

Step 7 — Set the chocolate

Let the pretzels set completely at room temperature, or refrigerate the baking sheet for 15-20 minutes to speed up the process.

Step 8 — Serve or store

Once the chocolate is firm, carefully remove the pretzels from the wax paper. Serve immediately or store in an airtight container at room temperature for up to three days.

Frequently Asked Questions About Ghost Pretzels

Can I use regular chocolate instead of white chocolate?

Yes, you can substitute milk or dark chocolate for white chocolate, but the ghostly effect will be lost.

Looking for something similar? Try our speedy white chocolate pretzels: grandma’s.

What can I use instead of candy eyes?

You can use small candies like mini M&M’s or tiny dots of dark chocolate to create eyes.

How long do Ghost Pretzels stay fresh?

Ghost pretzels can be stored in an airtight container at room temperature for up to three days.

Do I have to use coconut oil?

No, coconut oil is optional. It helps thin the chocolate for easier coating, but you can skip it if your chocolate is already smooth.

Can I make Ghost Pretzels ahead of time?

Yes, you can prepare Ghost Pretzels up to a day in advance and store them in an airtight container.

Expert Tips and Pro Shortcuts

  • Use good-quality white chocolate: Premium chocolate melts smoother and creates a shinier finish.
  • Chill pretzel rods before dipping: Cold pretzels help the chocolate set faster.
  • Decorating station: Set up candy eyes and wax paper ahead of time to streamline the process.
  • Reheat chocolate gently: If it thickens while dipping, microwave in 10-second intervals to restore its consistency.

Easy Ingredient Swaps and Substitutions

  • Swap candy eyes for chocolate chips: Use mini chocolate chips for a simple alternative.
  • Use dark chocolate instead: Skip the ghostly look but create elegant pretzel rods.
  • Choose sugar-free options: Look for sugar-free white chocolate for a lighter variation.

Serving Ideas for Ghost Pretzels

  • Party trays: Pair Ghost Pretzels with caramel apples and pumpkin spice cookies for a Halloween dessert platter.
  • Gift packs: Wrap pretzels individually in decorative cellophane bags tied with festive ribbons for Halloween goodie bags.
  • Movie night snacks: Serve Ghost Pretzels with popcorn and hot cocoa for a spooky movie marathon.
  • Milk pairing: Enjoy them with a cold glass of milk for a classic sweet-and-salty combination.

Common Mistakes to Avoid

  • Overheating chocolate: Melt white chocolate in short bursts to prevent burning and clumping.
  • Skipping parchment or wax paper: Always line the baking sheet to avoid sticking.
  • Waiting too long to add candy eyes: Press them on immediately before the chocolate hardens.

Ghost Pretzels

Prep Time 15 minutes
Total Time 15 minutes
Servings 12 pretzels
Calories 150
These spooky Ghost Pretzels are a fun and easy Halloween treat made with pretzel rods, white chocolate, and candy eyes.

Equipment

  • Microwave-safe bowl
  • Baking Sheet
  • wax paper
  • Spoon
  • Fork

Ingredients

Instructions 

  • Line a baking sheet with wax paper or parchment paper and set aside.
  • In a microwave-safe bowl, melt the white chocolate chips or candy melts in 20-second intervals, stirring between each interval, until completely smooth. If the chocolate is too thick, stir in 1/2 teaspoon of coconut oil to thin it slightly.
  • Dip each pretzel rod into the melted white chocolate, covering about two-thirds of its length. Use a spoon to help coat the pretzels evenly if needed.
  • Gently tap off any excess chocolate and lay the coated pretzel rods on the prepared baking sheet.
  • Before the chocolate sets, press two candy eyes near the top of each coated pretzel to create the 'ghost' face.
  • Using a spoon or fork, drizzle additional white chocolate back and forth across the coated pretzels to give them a wispy, ghostly appearance.
  • Allow the chocolate to set completely at room temperature or place the baking sheet in the refrigerator for about 15-20 minutes to speed up the process.
  • Once the chocolate is firm, carefully remove the pretzels from the wax paper. Serve immediately or store in an airtight container at room temperature for up to 3 days.

Notes

For best results, use candy melts for smoother coating. You can substitute candy eyes with mini chocolate chips or other small candies.
Calories: 150kcal
Cost: $8
Course: Dessert, Snack
Cuisine: American
Keyword: ghost pretzels, Halloween, White Chocolate
White chocolate-covered pretzels shaped like ghosts on a wooden table.

Loved this recipe? Save it to your favorite Pinterest board so you can easily find it later! ✨

This post contains affiliate links. As an Amazon Associate, I earn from qualifying purchases. This comes at no extra cost to you.

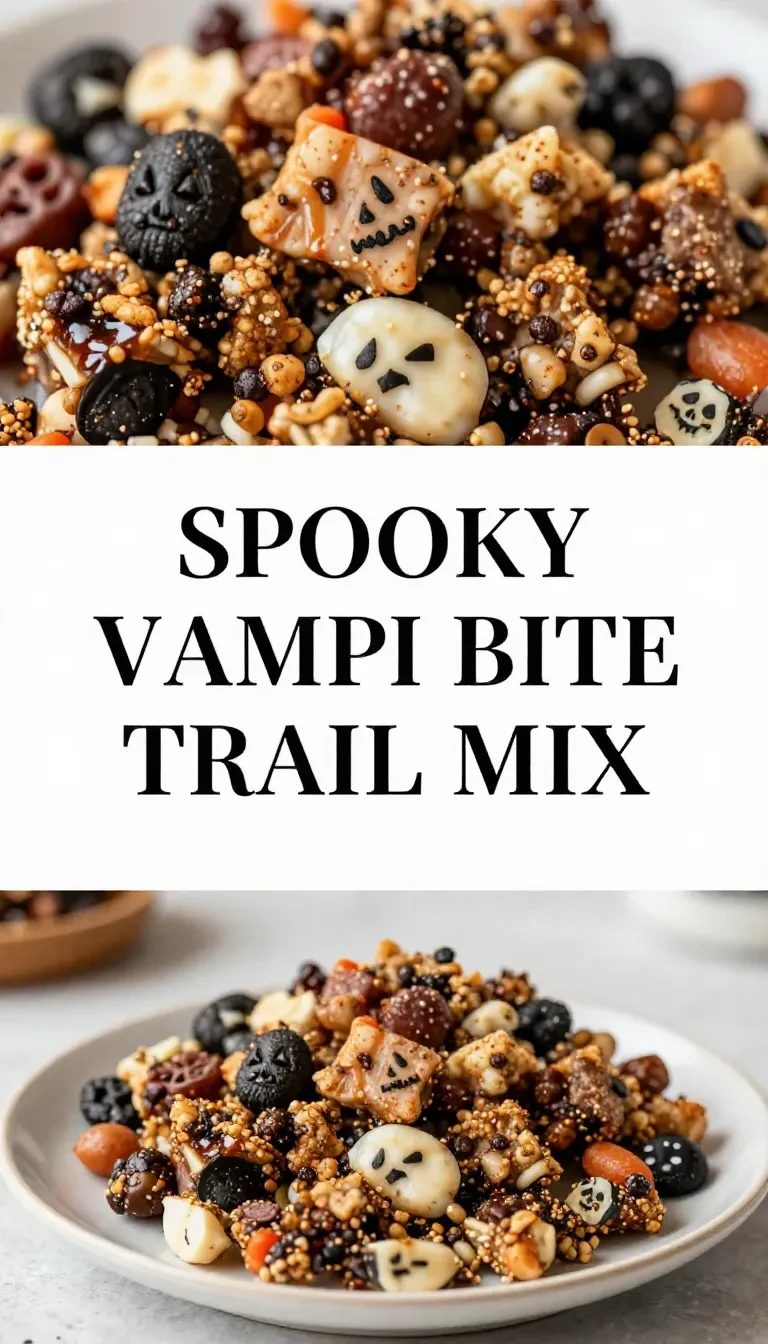
Vampire bite trail mix is a sweet-and-savory snack blend made with dried cranberries, chocolate chips, pretzels, and a touch of festive red candy pieces. This no-bake recipe is ready in just ten minutes and yields six cups of irresistible munch-worthy goodness. It’s perfect for Halloween parties, spooky movie nights, or themed gift bags.

My love for creating themed recipes started when I worked as a food critic for local publications, always spotting clever seasonal ideas like this mix. Now, I’m thrilled to share my twist on a hauntingly delightful snack.

Table of Contents

Why is Vampire Bite Trail Mix so popular?

Vampire bite trail mix is popular for its perfectly balanced texture and flavor, combining crunchy, chewy, sweet, and salty elements. It’s a festive, no-fuss recipe that’s perfect for Halloween and other fun occasions.

  • **Balanced flavors**: The salty crunch of pretzels contrasts beautifully with the sweetness of chocolate and dried cranberries.
  • **Quick preparation**: You can whip this up in under 10 minutes, making it ideal for last-minute party needs.
  • **Customizable**: Swap ingredients to match dietary needs or personal preferences while maintaining the spooky theme.
  • **Kid-friendly**: Its vibrant pops of red and chocolatey chunks are sure to win over younger snackers.

What ingredients do you need for Vampire Bite Trail Mix?

This recipe uses simple pantry staples with a spooky twist, combining sweet, salty, and tart flavors. Here’s everything you’ll need:

The dried cranberries bring a tart, juicy bite that pairs wonderfully with the chocolate chips, creating a “vampire bite” aesthetic with their bold red hue.

How do you make Vampire Bite Trail Mix step by step?

Making this mix is incredibly simple and requires no cooking. Just follow these quick steps:

Step 1 — Gather the ingredients

Measure all ingredients and have them ready in separate bowls for easy assembly.

Step 2 — Combine the base ingredients

In a large mixing bowl, toss together the mini pretzels, dried cranberries, and chocolate chips.

Step 3 — Add festive touches

Stir in the red candy-coated chocolates, pumpkin seeds, and shredded coconut for added flavor and texture.

Step 4 — Mix evenly

Using a wooden spoon or your hands, gently mix all the ingredients until evenly distributed. Be careful not to break the pretzels.

A bowl of Vampire Bite Trail Mix with red and dark-colored ingredients resembling a spooky Halloween theme.

Step 5 — Serve or store

Transfer the mix to an airtight container for storage or serve immediately in a large bowl for snacking.

Pyrex 4-Quart Mixing Bowl

Essential CookwarePyrex 4-Quart Mixing Bowl

A durable, versatile mixing bowl perfect for combining ingredients evenly.

View on Amazon →

Frequently Asked Questions About Vampire Bite Trail Mix

Can I make this recipe nut-free?

Yes, simply omit the roasted pumpkin seeds or replace them with sunflower seeds for a nut-free version.

How long does this trail mix stay fresh?

Stored in an airtight container, it will stay fresh for up to two weeks.

Can I add other ingredients?

Absolutely! Feel free to add popcorn, pretzel sticks, or candy eyeballs for extra flair.

Is this recipe gluten-free?

To make it gluten-free, use gluten-free pretzels and ensure all other ingredients are certified gluten-free.

Can I make this ahead of time?

Yes, you can prepare it a day or two in advance and store it in a sealed container until ready to use.

What is the history behind this spooky treat?

Halloween-inspired snacks like this trail mix stem from the American tradition of incorporating spooky elements into food during October. The “vampire bite” theme highlights the holiday’s fascination with mysterious, dark, and creepy characters like Dracula.

The red hues in the mix nod to the vibrant and eerie aesthetic of Halloween, making it a fun addition to any themed gathering.

What are common mistakes to avoid when making this mix?

Skipping fresh ingredients is a common mistake. Dried cranberries should be soft and pliable, not hard or stale.

Avoid overmixing as this can break the pretzels and crumble the chocolate chips, resulting in a less appealing mix.

Using an unbalanced ratio of sweet to savory ingredients can overpower the intended flavor harmony of the trail mix.

How do you serve and pair this snack?

This trail mix shines at Halloween parties, served in festive bowls or small treat bags for guests. It’s also perfect for snack bars at spooky-themed events.

Pair it with apple cider, hot chocolate, or even wine for a more adult-friendly gathering. It also complements themed desserts like our scarecrow crunch snack mix.

What are some easy swaps for this recipe?

Don’t have pumpkin seeds? Swap them for sunflower seeds or granola clusters for an added crunch.

Replace red candy-coated chocolates with dried cherries for a deeper tangy flavor that stays on the spooky theme.

For a nut-free option, omit the seeds and replace them with allergen-friendly alternatives like puffed rice or marshmallow pieces.

Vampire Bite Trail Mix

Vampire Bite Trail Mix
A bowl of Vampire Bite Trail Mix with red and dark-colored ingredients resembling a spooky Halloween theme.

Loved this recipe? Save it to your favorite Pinterest board so you can easily find it later! ✨

This post contains affiliate links. As an Amazon Associate, I earn from qualifying purchases. This comes at no extra cost to you.

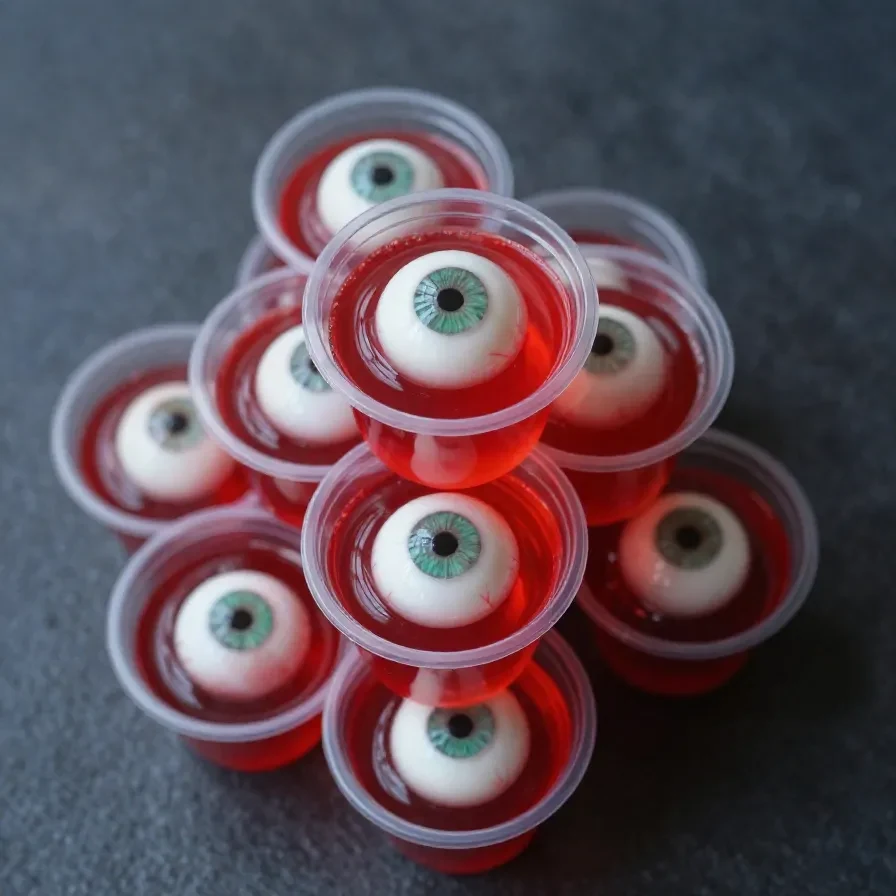
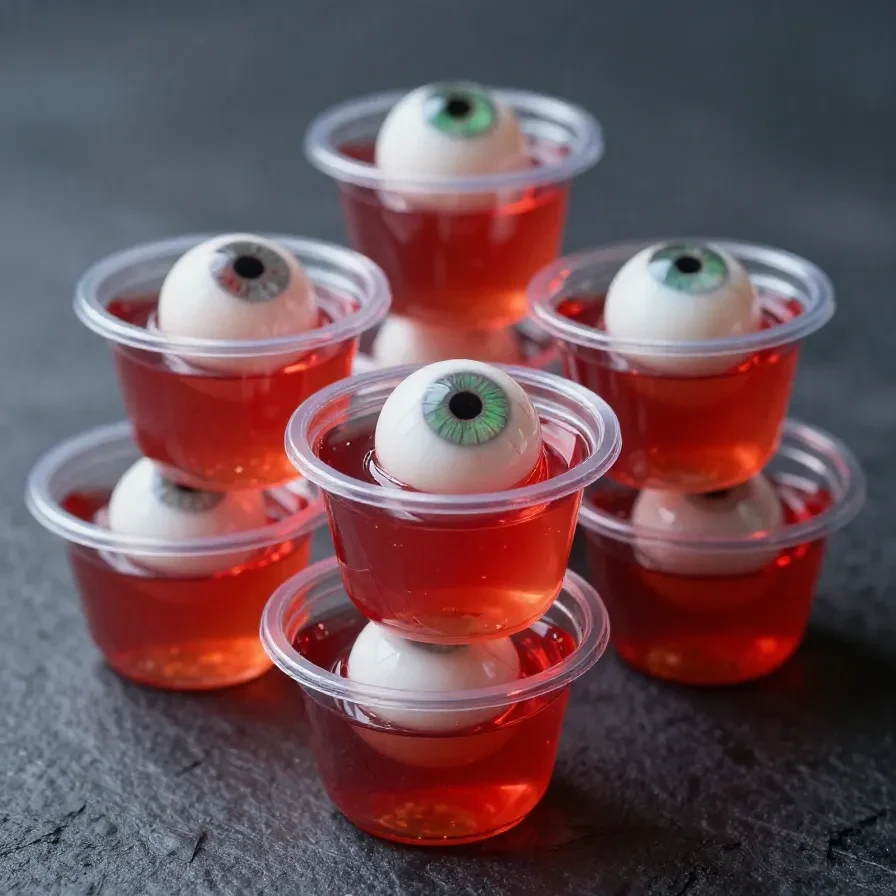
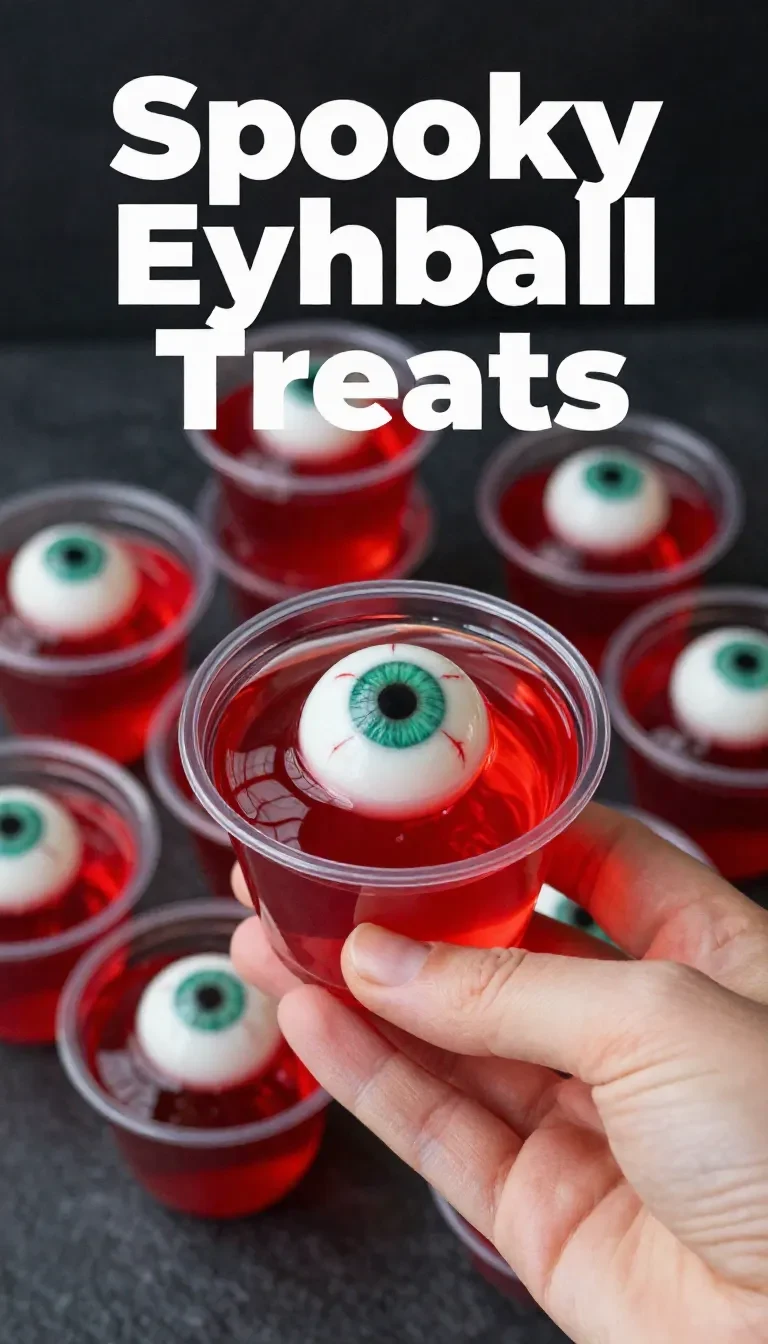
Bloody Eyeball Jello Cups

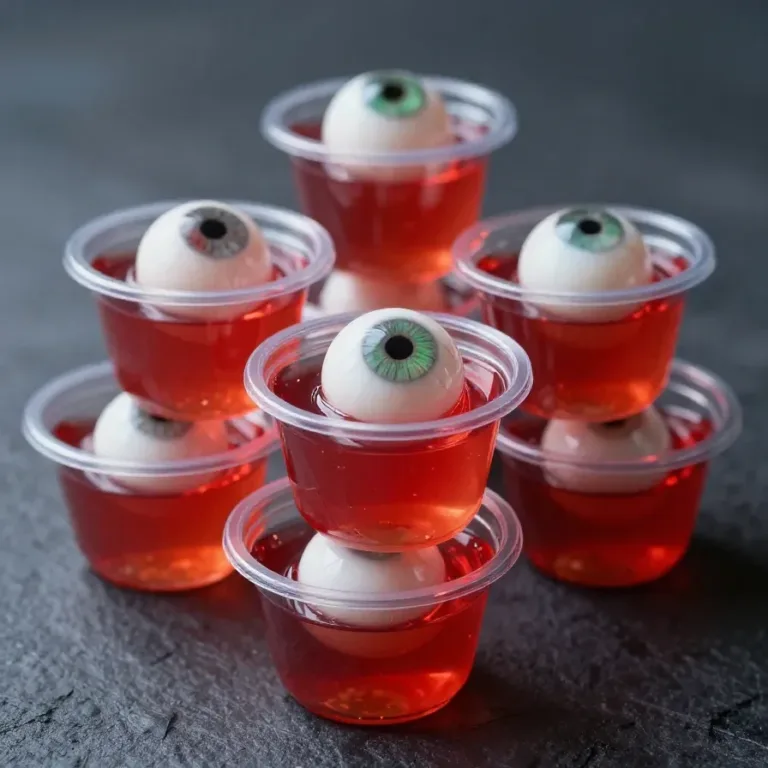
Bloody eyeball jello cups are a ghoulishly delightful dessert made with fruit-flavored jello, candy eyeballs, and a splash of whipped topping for texture. Ready in under an hour, this spooky Halloween treat is perfect for kids and adults alike. Its eerie appearance and fruity punch make it a fun centerpiece for your haunted bash.

During my years as a pastry chef, I’ve always loved creating playful desserts that captivate guests, and these jello cups never fail to steal the show at Halloween parties.

Table of Contents

Bloody eyeball jello cups are popular because they’re easy to make, visually striking, and perfect for Halloween parties. They combine spooky aesthetics with a delicious fruity flavor that appeals to all ages.

  • Visually captivating: The candy eyeballs floating in jello resemble spooky, bloodshot eyes.
  • Kid-friendly: These cups are non-alcoholic, making them a safe and fun treat for kids.
  • Customizable: Choose your favorite jello flavors and colors to match your Halloween theme.
  • Make-ahead friendly: Prepare these ahead of time so you can enjoy your party stress-free.

What Ingredients Do You Need for Bloody Eyeball Jello Cups?

To make Bloody Eyeball Jello Cups, you’ll need jello mix, candy eyeballs, and whipped topping. Here’s the complete list of ingredients with exact measurements:

The red jello creates the “bloody” backdrop, while the blue jello adds a contrasting layer. Candy eyeballs are the star ingredient that makes these spooky cups a hit.

How Do You Make Bloody Eyeball Jello Cups Step by Step?

Making Bloody Eyeball Jello Cups is as simple as layering jello with candy eyeballs. Follow these steps to create the perfect Halloween treat.

Step 1 — Prepare the Red Jello

Dissolve the red jello mix in 1 cup of boiling water, stirring until fully dissolved. Add 1 cup of cold water and mix well.

You might also enjoy our crispy hash brown avocado egg.

Step 2 — Pour the Red Jello Layer

Divide the red jello evenly among the 6 cups, filling each about halfway. Chill in the refrigerator for 20 minutes or until partially set.

Step 3 — Add Candy Eyeballs

Place 1-2 candy eyeballs into each cup, gently pressing them into the red jello. Chill for another 10 minutes to secure the eyeballs.

Step 4 — Prepare the Blue Jello

In a separate bowl, dissolve the blue jello mix with 1 cup of boiling water. Add 1 cup of cold water and stir until combined.

A close-up of a spooky Bloody Eyeball Jello Cup with a gelatin eyeball floating in red jello.

Step 5 — Pour the Blue Jello Layer

Gently pour the blue jello on top of the red layers, leaving space at the top of the cups. Refrigerate for 20 minutes until set.

Pyrex Glass Mixing Bowl Set

Essential CookwarePyrex Glass Mixing Bowl Set

Durable and versatile mixing bowls for preparing jello and other recipes.

View on Amazon →

For more ideas, check out our delicious mini taco cups recipe.

Step 6 — Add Whipped Topping

Top each cup with a dollop of whipped topping. Add an extra candy eyeball on top for a finishing touch.

Step 7 — Serve and Enjoy

Refrigerate the jello cups until ready to serve. They’re best enjoyed cold!

Frequently Asked Questions About Bloody Eyeball Jello Cups

Can I make this recipe ahead of time?

Yes, Bloody Eyeball Jello Cups can be made up to two days in advance. Store them covered in the refrigerator until ready to serve.

Where can I find candy eyeballs?

Candy eyeballs are typically available in the baking aisle of most grocery stores or online during the Halloween season.

Looking for something similar? Try our frozen yogurt granola cups with berries.

Can I use different jello flavors?

Absolutely! Feel free to experiment with different jello flavors, as long as they contrast for a spooky effect.

Why did my jello not set properly?

Jello may not set if the water ratio is incorrect or if it wasn’t chilled long enough. Make sure to follow the package instructions carefully.

Can I make these cups vegan?

Yes, substitute the jello mix with a vegan-friendly gelatin alternative and use dairy-free whipped topping.

Expert Tips for Perfect Bloody Eyeball Jello Cups

  • Use clear cups: Transparent cups highlight the layers for a dramatic effect.
  • Chill between layers: Ensure each layer sets slightly before adding the next to keep layers distinct.
  • Position the candy eyes: Use a toothpick to adjust the candy eyeballs for a spooky “floating” effect.
  • Serve cold: Keep the cups refrigerated until serving for the best texture and flavor.

How to Store Bloody Eyeball Jello Cups

To store Bloody Eyeball Jello Cups, cover each cup with plastic wrap or a lid to prevent drying out. Keep them refrigerated for up to three days.

If you need to freeze them, avoid adding the whipped topping and candy eyeball garnish until after they thaw. Freeze in airtight containers for up to one month.

Thaw frozen cups in the fridge overnight before serving. Add the final touches just before bringing them to the table.

Bloody Eyeball Jello Cups

Bloody Eyeball Jello Cups
A close-up of a spooky Bloody Eyeball Jello Cup with a gelatin eyeball floating in red jello.

Loved this recipe? Save it to your favorite Pinterest board so you can easily find it later! ✨

This post contains affiliate links. As an Amazon Associate, I earn from qualifying purchases. This comes at no extra cost to you.

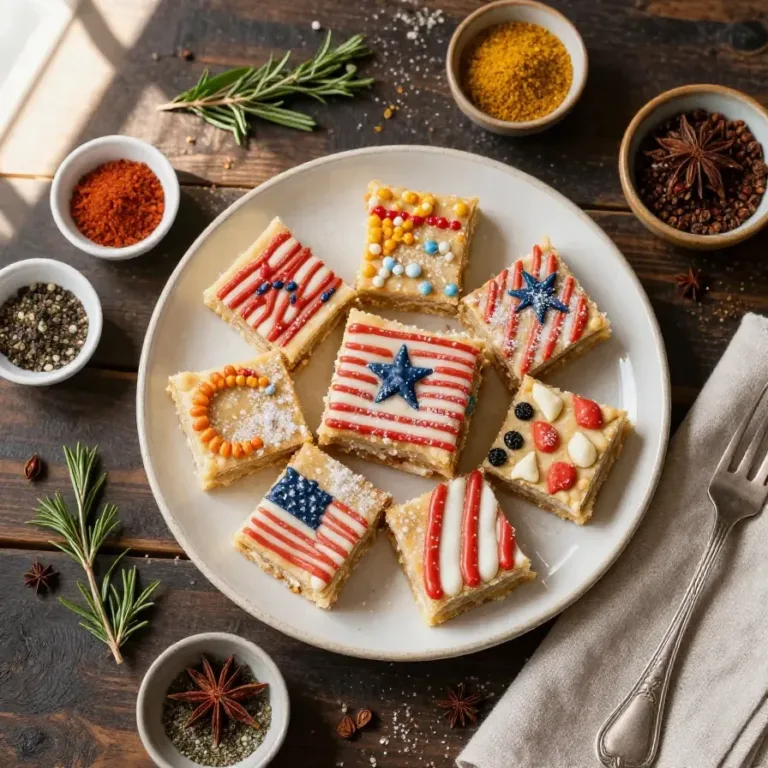
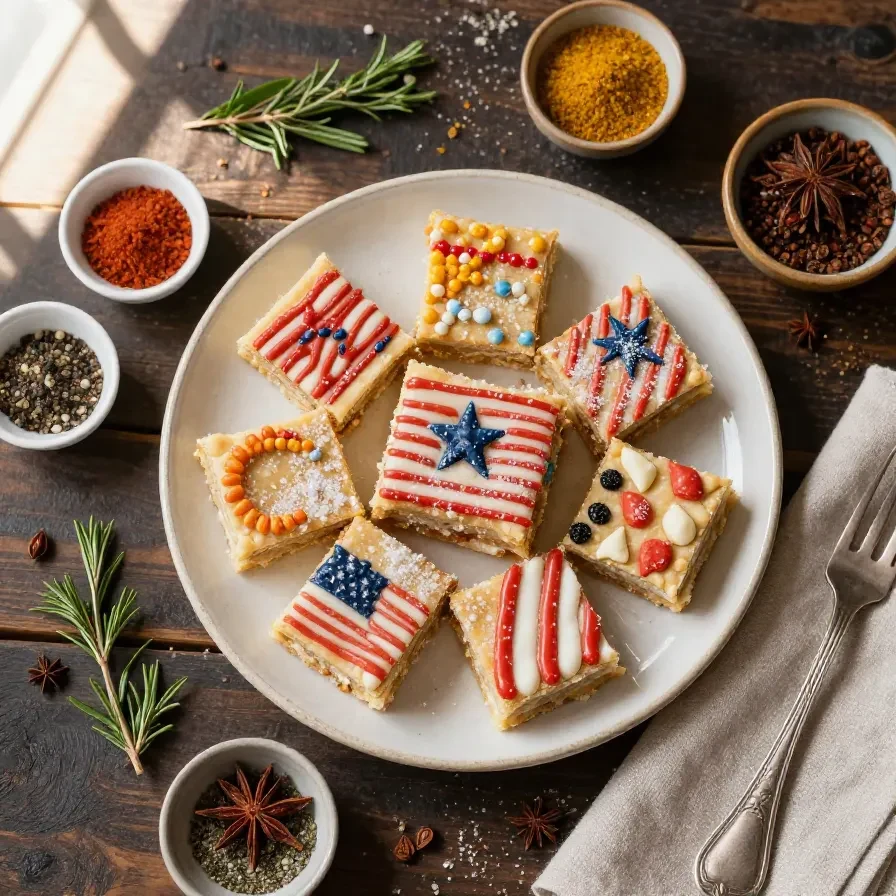
Patriotic bars are the perfect dessert for festive celebrations!

Patriotic bars are a delightful dessert made with a buttery sugar cookie base, vibrant red, white, and blue frosting, and patriotic sprinkles. Ready in just 40 minutes, this recipe yields 24 soft and chewy bars ideal for gatherings like Independence Day or Memorial Day. The creamy frosting and colorful design make these bars a must-have for your dessert table!

As someone who loves creating themed recipes, I find these bars so fun to make, especially when decorating them with bold stripes and sprinkles!

Table of Contents

Why are Patriotic Sugar Cookie Bars so popular?

These cookie bars are popular because they’re quick to make, easy to decorate, and perfect for patriotic holidays. The soft texture and vibrant colors make them visually appealing and crowd-friendly.

  • Festive design: The red, white, and blue frosting makes them perfect for celebrations like Memorial Day or the Fourth of July.
  • Universal appeal: With a soft cookie base and creamy frosting, they’re a hit with both kids and adults.
  • Simple to prepare: No rolling dough or cutting individual cookies—just press, bake, and frost.
  • Customizable: Add fun designs or extra sprinkles to make them your own.

What ingredients do you need for Patriotic Sugar Cookie Bars?

The recipe uses simple pantry staples like butter, sugar, and flour, along with food coloring for the vibrant frosting.

The unsalted butter ensures a creamy texture, while vanilla extract enhances the cookies’ flavor. The food coloring helps achieve the bold patriotic theme.

How do you make Patriotic Sugar Cookie Bars step by step?

Making these bars is straightforward—combine the ingredients, bake the cookie base, and finish with colorful frosting and sprinkles.

You might also enjoy our indulge in patriotic no-bake flag.

Step 1 — Prepare the baking pan

Preheat your oven to 350°F (175°C) and line a 9×13-inch baking pan with parchment paper. Leave an overhang for easy removal after baking.

Step 2 — Cream the butter and sugar

In a large mixing bowl, cream together the softened butter and granulated sugar until light and fluffy. This should take about 2-3 minutes.

Step 3 — Add eggs and vanilla

Beat in the eggs, one at a time, followed by the vanilla extract. Mix until fully combined and smooth.

For more ideas, check out our peanut butter cookie bars.

Step 4 — Mix dry ingredients

In a separate bowl, whisk together the all-purpose flour, baking powder, and salt. Gradually add the dry mixture to the wet, mixing just until combined. Avoid overmixing.

Step 5 — Bake the cookie base

Spread the cookie dough evenly into the prepared baking pan and smooth the surface with a spatula. Bake for 20-25 minutes or until the edges turn lightly golden.

Step 6 — Cool and frost

Allow the cookie bars to cool completely in the pan. To make the frosting, whisk powdered sugar, milk, and vanilla extract in a bowl. Divide into three portions, leaving one white and coloring the others red and blue.

Looking for something similar? Try our easy christmas sugar cookie fudge.

Step 7 — Decorate and serve

Spread the white frosting first, then add red and blue stripes or designs. Top with patriotic sprinkles, let the frosting set, and cut into bars for serving.

Frequently Asked Questions About Patriotic Sugar Cookie Bars

Can I use salted butter instead of unsalted?

Yes, but reduce the additional salt by half to prevent an overly salty flavor.

KitchenAid Artisan Stand Mixer

Kitchen ApplianceKitchenAid Artisan Stand Mixer

Makes mixing dough and frosting effortless — a must-have for baking enthusiasts.

View on Amazon →

OXO Good Grips Mixing Bowl Set

Essential CookwareOXO Good Grips Mixing Bowl Set

Durable and non-slip mixing bowls perfect for combining ingredients in this recipe.

View on Amazon →

How do I store these cookie bars?

Store them in an airtight container at room temperature for up to 3 days or in the fridge for up to a week.

Can I freeze the cookie bars?

Yes, freeze unfrosted bars tightly wrapped for up to 2 months. Add frosting and decorations after thawing.

What is the best way to cut these bars?

Use a sharp knife and clean it between cuts for neat edges.

Can I use gel food coloring?

Absolutely! Gel food coloring works well and requires less quantity for vibr

Patriotic Sugar Cookie Bars

Prep Time 20 minutes
Cook Time 25 minutes
Total Time 45 minutes
Servings 24 bars
Calories 210
These festive sugar cookie bars are soft, buttery, and topped with colorful frosting and sprinkles, perfect for patriotic celebrations.

Equipment

  • Mixing bowl
  • Whisk
  • Spatula
  • Baking Pan
  • Oven

Ingredients

Instructions 

  • Preheat your oven to 350°F (175°C) and line a 9x13-inch baking pan with parchment paper, leaving an overhang for easy removal.
  • In a large mixing bowl, cream together the softened butter and granulated sugar until light and fluffy, about 2-3 minutes.
  • Beat in the eggs, one at a time, followed by the vanilla extract, mixing until fully incorporated.
  • In a separate bowl, whisk together the all-purpose flour, baking powder, and salt.
  • Gradually add the dry ingredients to the wet ingredients, mixing just until combined. Do not overmix.
  • Spread the cookie dough evenly into the prepared baking pan, smoothing the top with a spatula.
  • Bake for 20-25 minutes, or until the edges are lightly golden and a toothpick inserted into the center comes out clean.
  • Allow the cookie bars to cool completely in the pan before frosting.
  • To make the frosting, whisk together the powdered sugar, 2 tablespoons of milk, and vanilla extract in a medium bowl. Add an additional tablespoon of milk if needed to reach your desired consistency.
  • Divide the frosting evenly into three bowls. Leave one bowl white, tint the second bowl with red food coloring, and the third bowl with blue food coloring.
  • Spread the white frosting over the cooled cookie bars as the base layer. Then, use the red and blue frostings to create stripes or designs for a patriotic theme.
  • Decorate with red, white, and blue sprinkles for the final touch.
  • Let the frosting set for 10-15 minutes before lifting the bars out of the pan using the parchment overhang. Cut into squares or rectangles and serve.

Notes

For best results, use gel food coloring for vibrant colors. Store leftovers in an airtight container at room temperature for up to 3 days.
Calories: 210kcal
Cost: $10
Course: Dessert
Cuisine: American
Keyword: 4th of July, patriotic dessert, sugar cookie bars

Loved this recipe? Save it to your favorite Pinterest board so you can easily find it later! ✨
Patriotic oreo balls recipe is a no-bake treat made with crushed Oreo cookies, cream cheese, and vibrant red, white, and blue chocolate coating. This fun dessert takes only 20 minutes of prep time, plus a short chilling period, to yield 24 perfectly festive bites. It’s ideal for celebrations like the Fourth of July or Memorial Day, offering both visual appeal and an irresistible creamy, crunchy texture.

The combination of smooth cream cheese, crunchy cookie crumbs, and sweet chocolate makes this dish a standout for patriotic gatherings. Whether enjoyed by kids or adults, its vibrant colors and playful sprinkles never fail to impress. I first experimented with this recipe a few summers ago while brainstorming no-bake desserts for a July 4th barbecue, and it’s been a hit ever since!

Table of Contents

Why are patriotic Oreo balls so popular?

Patriotic Oreo Balls are popular because they combine ease, flavor, and festive aesthetics in one dessert. As a no-bake treat, they’re accessible for all skill levels and perfect for hot summer days.

  • No-Bake: Perfect for when you’d rather not use the oven, especially in summer.
  • Customizable: Easily adjust sprinkles or colors to match any event theme.
  • Festive Look: The vibrant red, white, and blue design makes it ideal for patriotic celebrations.
  • Quick Assembly: Only 20 minutes of prep time needed for a professional-looking dessert.

What ingredients do you need for Patriotic Oreo Balls Recipe?

This recipe relies on six simple ingredients to achieve its festive flair and delicious flavor. Here’s what you’ll need:

  • 36 Oreo cookies
  • 8 oz cream cheese, softened
  • 12 oz white chocolate chips
  • Red food coloring
  • Blue food coloring
  • Red, white, and blue sprinkles

The softened cream cheese is essential for binding the cookie crumbs into a smooth, cohesive mixture. Meanwhile, the white chocolate provides the perfect, easy-to-color coating for vibrant results.

How do you make Patriotic Oreo Balls Recipe step by step?

This easy recipe involves shaping Oreo balls, chilling them, and dipping them in festive red, white, and blue chocolate. Follow these steps for the best results:

Step 1 — Crush the Oreos

Place the Oreo cookies in a food processor and blend until they become fine crumbs.

Step 2 — Mix with cream cheese

In a large mixing bowl, combine the Oreo crumbs with the softened cream cheese. Mix thoroughly until a dough-like consistency forms.

Step 3 — Shape the balls

Roll the mixture into small balls, about 1 inch in diameter, and place them on a baking sheet lined with parchment paper.

Step 4 — Chill

Refrigerate the Oreo balls for 20-30 minutes to firm up.

Step 5 — Prepare melted chocolate

Melt the white chocolate chips in a microwave-safe bowl in 15-second intervals, stirring after each, until smooth.

Step 6 — Divide and color chocolate

Divide the melted chocolate into three bowls. Leave one plain, tint one red, and the other blue by mixing in food coloring.

Step 7 — Dip and decorate

Dip each chilled Oreo ball into one of the colored chocolates, ensuring full coverage. Top with sprinkles before the chocolate sets.

Step 8 — Set and serve

Allow the coated Oreo balls to set at room temperature or in the fridge before serving and enjoying!

Frequently Asked Questions About Patriotic Oreo Balls Recipe

Can I make Patriotic Oreo Balls ahead of time?

Yes, you can make them up to 3 days in advance and store in an airtight container in the fridge.

Can I use a different type of chocolate?

Yes, milk or dark chocolate can be used, though the colors may not show as vibrantly.

How do I prevent the chocolate from cracking?

Ensure the Oreo balls are chilled, but not overly cold, before dipping to avoid thermal shock.

Can I make this recipe gluten-free?

Yes, substitute regular Oreos with gluten-free ones to create a gluten-free version.

What’s the best way to add food coloring?

Use gel-based food coloring to achieve vibrant colors without thinning the chocolate coating.

How do you store and serve Oreo balls?

Patriotic Oreo Balls can be stored in the fridge for up to a week or frozen for up to 2 months. Place them in an airtight container with layers separated by parchment paper.

For serving, let frozen Oreo balls thaw in the fridge for 1-2 hours. Serve them chilled directly from the fridge for the best texture and flavor.

What are some easy ingredient swaps for this recipe?

This recipe is versatile and adaptable to dietary needs or ingredient availability. Here are some ideas:

  • Dairy-Free: Use dairy-free cream cheese and white chocolate alternatives.
  • Vegan-Friendly: Opt for vegan cookies, cream cheese, and chocolate.

Each substitution maintains the core flavor while accommodating different diets.

What are the best ways to serve patriotic Oreo balls?

Patriotic Oreo Balls are perfect for themed parties, BBQs, or as a light dessert. Consider pairing them with:

  • Fruity Drinks: Lemonade or berry punch complements the sweet-rich flavors.
  • Ice Cream: Serve alongside vanilla ice cream for a refreshing touch.
  • Fruit Platters: Balance the sweetness with fresh summer fruits like watermelon or berries.
  • No-Bake Desserts: Pair with our indulge in patriotic no-bake flag cheesecake bars.

What are some expert tips for making the best Oreo balls?

Use these tips for flawless Oreo balls every time:

  • Chill Before Dipping: Cold Oreo balls are easier to handle and coat in chocolate.
  • Work Quickly: Chocolate can harden fast, so sprinkle while it’s still wet.
  • Microwave Tip: Melt chocolate in short bursts to prevent overheating.

These small steps ensure a smooth prep process and beautiful final presentation.

Patriotic Oreo Balls Recipe

Prep Time 30 minutes
Total Time 30 minutes
Servings 36 balls
Calories 120
A festive and easy dessert made with Oreo cookies, cream cheese, and colorful chocolate coatings.

Equipment

  • Food processor
  • Mixing bowl
  • Baking Sheet
  • Microwave-safe bowl
  • fork or skewer

Instructions 

  • Place the Oreo cookies in a food processor and blend until they become fine crumbs.
  • In a large mixing bowl, combine the Oreo crumbs with the softened cream cheese. Mix thoroughly until a dough-like consistency forms.
  • Roll the mixture into small balls, about 1 inch in diameter, and place them on a baking sheet lined with parchment paper.
  • Refrigerate the Oreo balls for 20-30 minutes to firm up.
  • While the Oreo balls chill, melt the white chocolate chips in a microwave-safe bowl in 15-second intervals, stirring after each interval, until smooth.
  • Divide the melted white chocolate into three separate bowls. Leave one bowl plain white, add a few drops of red food coloring to the second bowl, and a few drops of blue food coloring to the third bowl. Stir each bowl until the colors are fully combined.
  • Using a fork or skewer, dip each chilled Oreo ball into one of the colored chocolates, ensuring it is fully coated. Allow any excess chocolate to drip off before placing the ball back on the parchment-lined baking sheet.
  • While the chocolate is still wet, sprinkle the Oreo balls with red, white, and blue sprinkles for a festive touch.
  • Let the coated Oreo balls rest at room temperature or in the fridge until the chocolate sets completely.
  • Serve and enjoy!

Notes

You can use gel food coloring for more vibrant colors. Store the Oreo balls in an airtight container in the fridge for up to a week.
Calories: 120kcal
Cost: $10
Course: Dessert
Cuisine: American
Keyword: no-bake recipe, Oreo balls, patriotic dessert

Loved this recipe? Save it to your favorite Pinterest board so you can easily find it later! ✨
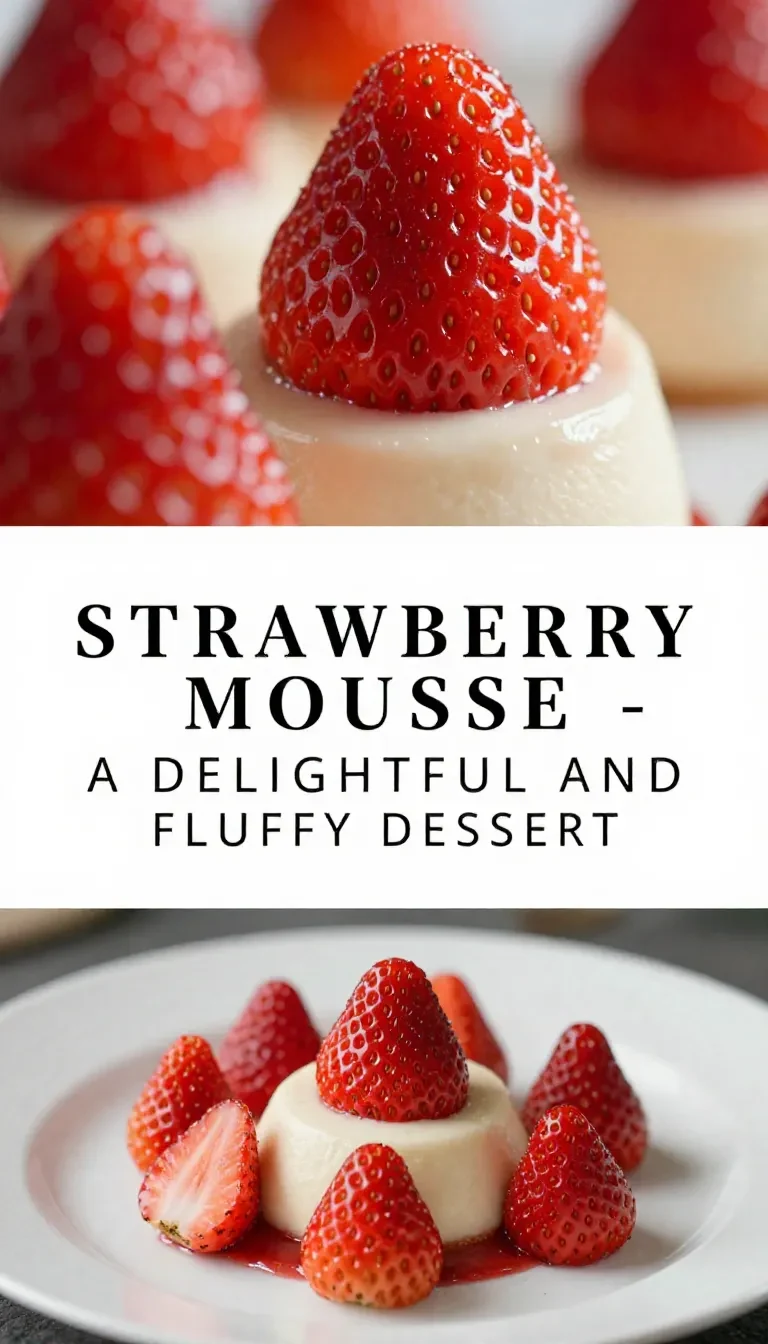
Easy dessert ideas no bake is a light and airy treat made with fresh strawberries, heavy cream, and agar-agar powder. This simple recipe requires only 20 minutes of prep time and 5 minutes of cooking to create a fluffy dessert that serves four. It combines the natural sweetness of strawberries with a creamy texture for a refreshing and indulgent experience.

When I first tested this recipe, I was amazed at how the smooth strawberry puree paired beautifully with the whipped cream, creating an unforgettable blend of flavors. It’s now become a go-to dessert for me, especially during spring celebrations.

Table of Contents

Strawberry Mousse – A Delightful and Fluffy Dessert is popular because it’s easy to make, visually appealing, and delivers a perfect balance of sweetness and creaminess. It’s ideal for spring gatherings or when you want a light yet satisfying dessert.

  • The airy texture is achieved by carefully folding whipped cream into the strawberry puree, creating a light yet rich mousse.
  • Fresh strawberries provide a natural sweetness and vibrant flavor, making it taste like a celebration of spring.
  • The dish is no-bake, saving time and effort while still being impressive enough for special occasions.
  • It pairs beautifully with other desserts like our 3 ingredient strawberry mousse for a strawberry-themed spread.

What ingredients do you need for Strawberry Mousse – A Delightful and Fluffy Dessert?

To make Strawberry Mousse – A Delightful and Fluffy Dessert, you’ll need fresh strawberries, cream, sugar, and agar-agar powder for a perfectly balanced recipe with a creamy texture.

  • 2 cups fresh strawberries, hulled and sliced
  • 1/2 cup granulated sugar
  • 1 tablespoon lemon juice
  • 1 cup heavy cream, chilled
  • 1/2 cup powdered sugar
  • 1/2 teaspoon vanilla extract
  • 1/3 cup cold water
  • 2 teaspoons agar-agar powder

Fresh strawberries are essential for the best flavor and natural sweetness, while agar-agar powder ensures the mousse sets perfectly without compromising its smooth texture.

How do you make Strawberry Mousse – A Delightful and Fluffy Dessert step by step?

Making Strawberry Mousse – A Delightful and Fluffy Dessert involves creating a smooth strawberry puree, folding it gently into whipped cream, and chilling to set for a dessert that’s light, fluffy, and full of fresh flavors.

Step 1 — Puree the Strawberries

In a blender or food processor, puree the strawberries until smooth.

Step 2 — Heat the Puree

Transfer the strawberry puree to a saucepan, add granulated sugar and lemon juice, and heat over medium-low heat. Stir occasionally until the sugar dissolves, then remove from heat and let it cool to room temperature.

Step 3 — Prepare the Agar-Agar

In a small saucepan, combine cold water and agar-agar powder. Heat over medium heat, stirring constantly, until the agar-agar dissolves completely. Remove from heat and allow it to cool slightly.

Step 4 — Mix Agar-Agar with Puree

Mix the cooled agar-agar mixture into the strawberry puree, stirring well to combine.

Step 5 — Whip the Cream

In a large mixing bowl, whip the heavy cream with powdered sugar and vanilla extract until soft peaks form.

Step 6 — Fold the Ingredients

Gently fold the strawberry puree mixture into the whipped cream until fully incorporated. Be careful not to deflate the whipped cream.

Step 7 — Chill and Serve

Divide the mousse into serving glasses or bowls, smoothing the tops. Chill in the refrigerator for at least 2 hours to set.

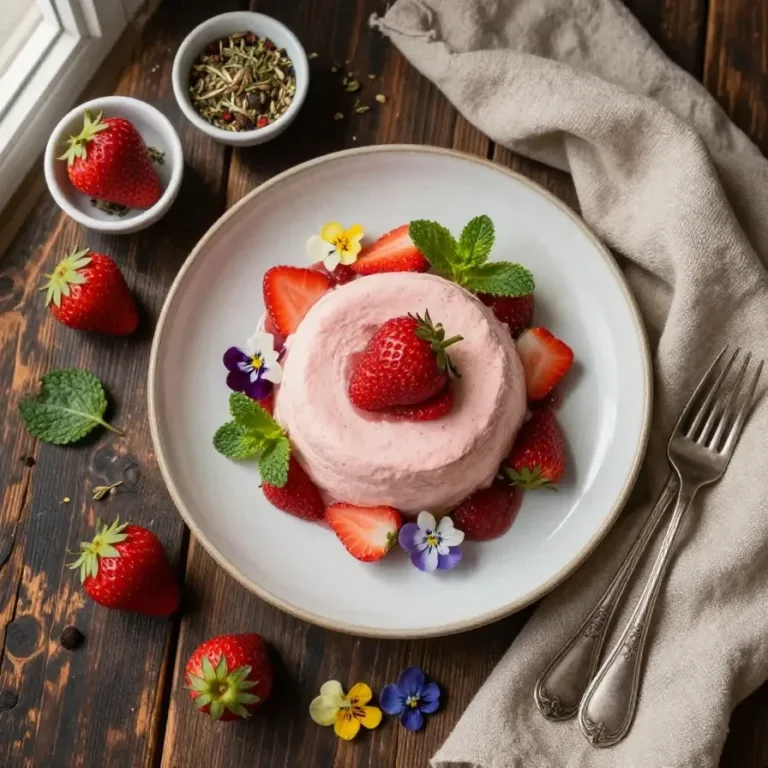
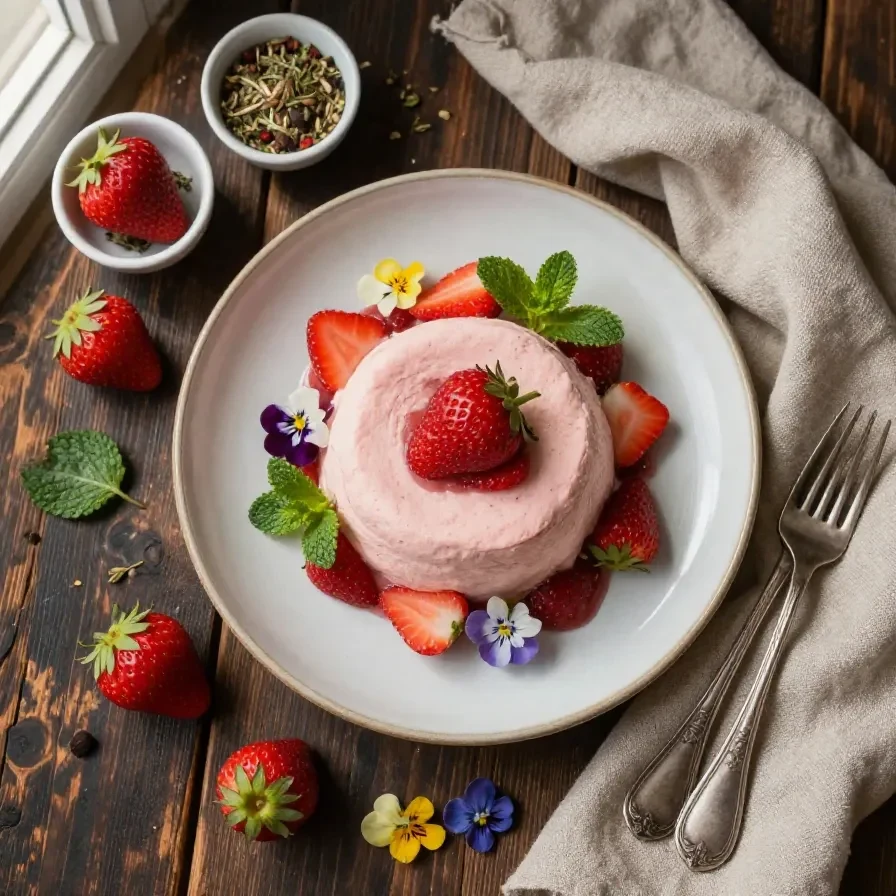
A glass filled with fluffy strawberry mousse topped with fresh strawberries and mint leaves.

Step 8 — Garnish

Before serving, garnish with fresh strawberry slices or a sprig of mint, if desired.

Frequently Asked Questions About Strawberry Mousse – A Delightful and Fluffy Dessert

Can I use frozen strawberries instead of fresh?

Yes, but fresh strawberries provide better flavor and texture. If using frozen, thaw and drain them first to avoid excess liquid.

How long can I store the mousse?

Strawberry mousse can be stored in the refrigerator for up to 3 days in an airtight container. The texture may slightly soften over time.

Is there a substitute for agar-agar?

You can use gelatin, but agar-agar is vegetarian and sets at room temperature, making it the better option for this recipe.

Can I make it ahead of time?

Yes, you can prepare the mousse a day ahead. Chill it in serving glasses for convenience before serving.

Do I need an electric mixer to whip the cream?

An electric mixer is recommended for ease and consistency, but you can whip the cream by hand with a whisk if preferred.

Can you swap out some ingredients?

If you’re out of certain ingredients, minor swaps can save the day without compromising the dish.

  • Swap agar-agar for gelatin if you’re not following a vegetarian diet. Gelatin sets a bit softer than agar-agar.
  • Replace powdered sugar with honey for a natural sweetener. Honey adds a slightly floral note to the mousse.
  • Use lime juice instead of lemon for a tangier citrus flavor. Lime complements the sweetness of strawberries beautifully.

What are some expert tips for making Strawberry Mousse?

A few expert shortcuts and tips can make your mousse preparation even easier.

  • Chill the mixing bowl and whisk before whipping cream. Cold utensils help the cream whip faster and achieve better peaks.
  • Use a sieve to strain the strawberry puree. This ensures a smoother final mousse by removing seeds.
  • Prepare the agar-agar just before adding it to the puree. This prevents it from setting too quickly and clumping.
  • Serve the mousse in clear glasses for a beautiful presentation, showcasing its layers and texture.

What is the history behind Strawberry Mousse?

Strawberry mousse has origins in French cuisine, where mousses were historically celebrated for their creamy textures and elegant presentations. It became a popular dessert in the early 20th century as refrigeration made chilled desserts more accessible.

Today, strawberry mousse remains a favorite springtime treat, often tying into May Day celebrations with its vibrant colors and seasonal ingredients. It’s an easy yet festive dessert that continues to delight generations.

What common mistakes should you avoid?

Avoid these pitfalls to ensure your Strawberry Mousse – A Delightful and Fluffy Dessert turns out perfectly every time.

  • Don’t over-whip the cream. Over-whipped cream becomes grainy and can affect the smoothness of the mousse.
  • Ensure the agar-agar is fully dissolved. Undissolved agar-agar can cause an uneven texture in your mousse.
  • Cool the puree completely before folding it into the cream. Warm puree can deflate the whipped cream and affect the mousse’s light texture.

Strawberry Mousse - A Delightful and Fluffy Dessert

Prep Time 20 minutes
Cook Time 10 minutes
Total Time 30 minutes
Servings 4 servings
Calories 250
A light and airy dessert made with fresh strawberries, whipped cream, and a touch of sweetness. Perfect for any occasion!

Equipment

  • Blender or Food Processor
  • Saucepan
  • Mixing bowl
  • Whisk
  • serving glasses or bowls

Ingredients

Instructions 

  • In a blender or food processor, puree the strawberries until smooth.
  • Transfer the strawberry puree to a saucepan, add granulated sugar and lemon juice, and heat over medium-low heat. Stir occasionally until the sugar dissolves, then remove from heat and let it cool to room temperature.
  • In a small saucepan, combine cold water and agar-agar powder. Heat over medium heat, stirring constantly, until the agar-agar dissolves completely. Remove from heat and allow it to cool slightly.
  • Mix the cooled agar-agar mixture into the strawberry puree, stirring well to combine.
  • In a large mixing bowl, whip the heavy cream with powdered sugar and vanilla extract until soft peaks form.
  • Gently fold the strawberry puree mixture into the whipped cream until fully incorporated. Be careful not to deflate the whipped cream.
  • Divide the mousse into serving glasses or bowls, smoothing the tops. Chill in the refrigerator for at least 2 hours to set.
  • Before serving, garnish with fresh strawberry slices or a sprig of mint, if desired.

Notes

You can substitute agar-agar powder with gelatin if preferred, but follow the package instructions for proper usage.
Calories: 250kcal
Cost: $10
Course: Dessert
Cuisine: International
Keyword: Strawberry Mousse
A glass filled with fluffy strawberry mousse topped with fresh strawberries and mint leaves.

Loved this recipe? Save it to your favorite Pinterest board so you can easily find it later! ✨
No bake 4th of july treats are delightful no-bake desserts made with crushed Oreos, cream cheese, and vibrant red, white, and blue candy coatings. Ready in under an hour, these bite-sized treats are perfect for Independence Day celebrations. This recipe yields approximately 24 truffles, combining rich, creamy textures with festive colors for a visually stunning and irresistibly smooth dessert. Once, in my pastry chef training days, I mastered the art of perfect truffles, which inspired this patriotic twist, now a favorite at my holiday gatherings.

Table of Contents

Patriotic Oreo Balls Recipe is popular because it combines ease, festive flair, and decadent flavor into one delightful dessert. Its vivid colors and creamy texture make it a showstopper at 4th of July gatherings.

  • Quick and fuss-free: These are no bake 4th of july treats that save time in the kitchen.
  • Kid-friendly: The vibrant colors and hands-on preparation make it a hit with children.
  • Customized festivity: The red, white, and blue coating adds Independence Day spirit to any table.
  • Make-ahead convenience: These Oreo truffles can be prepared ahead, allowing more time for celebration.

What ingredients do you need for Patriotic Oreo Balls Recipe?

To make Patriotic Oreo Balls Recipe, you’ll need a few key ingredients that are simple yet essential for the perfect truffles.

  • 1 package (14.3 oz) Oreo cookies
  • 8 oz cream cheese, softened
  • 1 cup red candy melts
  • 1 cup white candy melts
  • 1 cup blue candy melts
  • Optional: Sprinkles for decoration

The cream cheese ensures the filling is smooth and decadent, while the candy melts give the exterior its vibrant, patriotic colors.

How do you make Patriotic Oreo Balls Recipe step by step?

Making Patriotic Oreo Balls Recipe is simple and fun, with just a few easy steps to create these festive treats.

Step 1 — Crush the Oreos

Place Oreo cookies in a food processor and pulse until they form fine crumbs. Reserve a small amount for garnishing, if desired.

Step 2 — Blend with cream cheese

In a mixing bowl, combine the Oreo crumbs and softened cream cheese. Mix until fully blended and the mixture resembles a thick paste.

Step 3 — Roll into balls

Scoop out small portions of the mixture and roll them into balls, roughly 1 inch in diameter. Place onto a lined baking sheet.

Step 4 — Chill the balls

Transfer the tray to the refrigerator and chill the balls for 30 minutes to set.

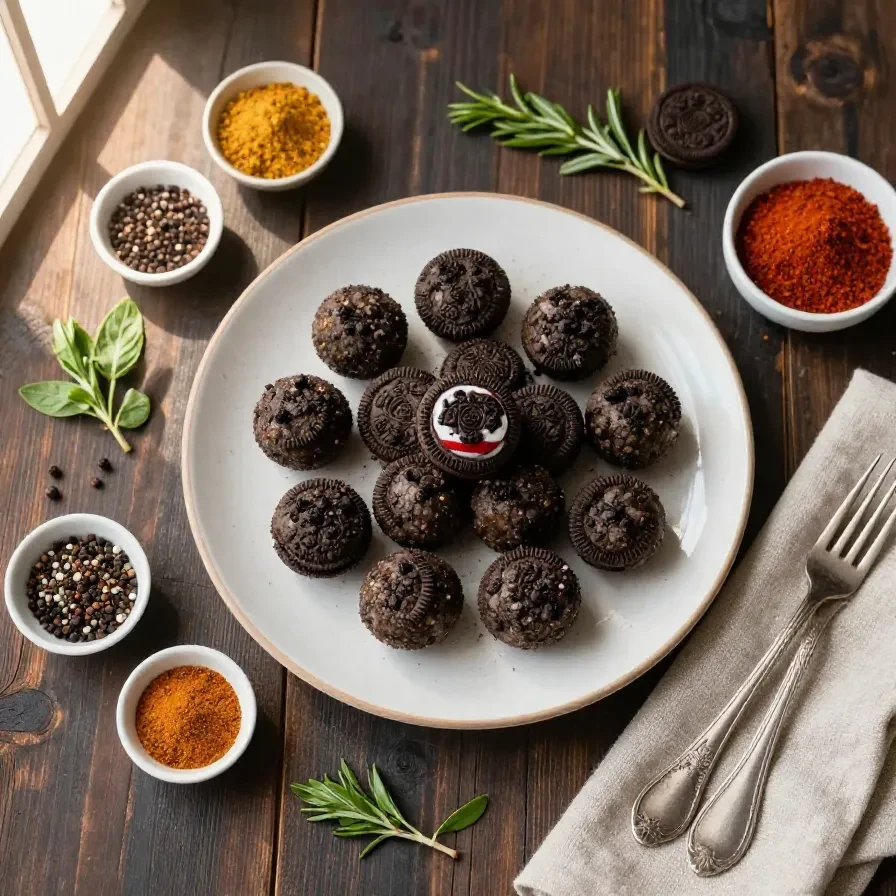
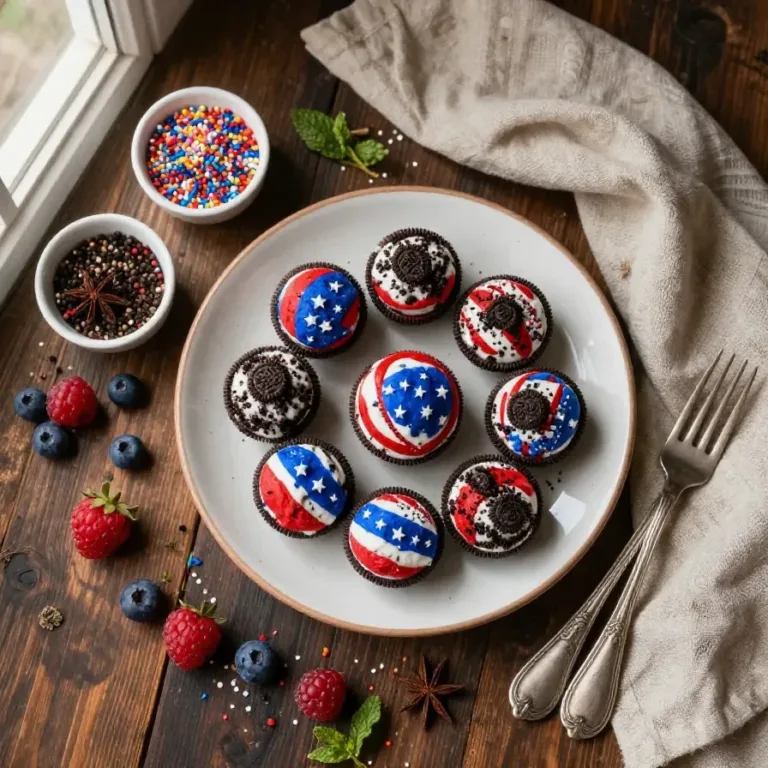
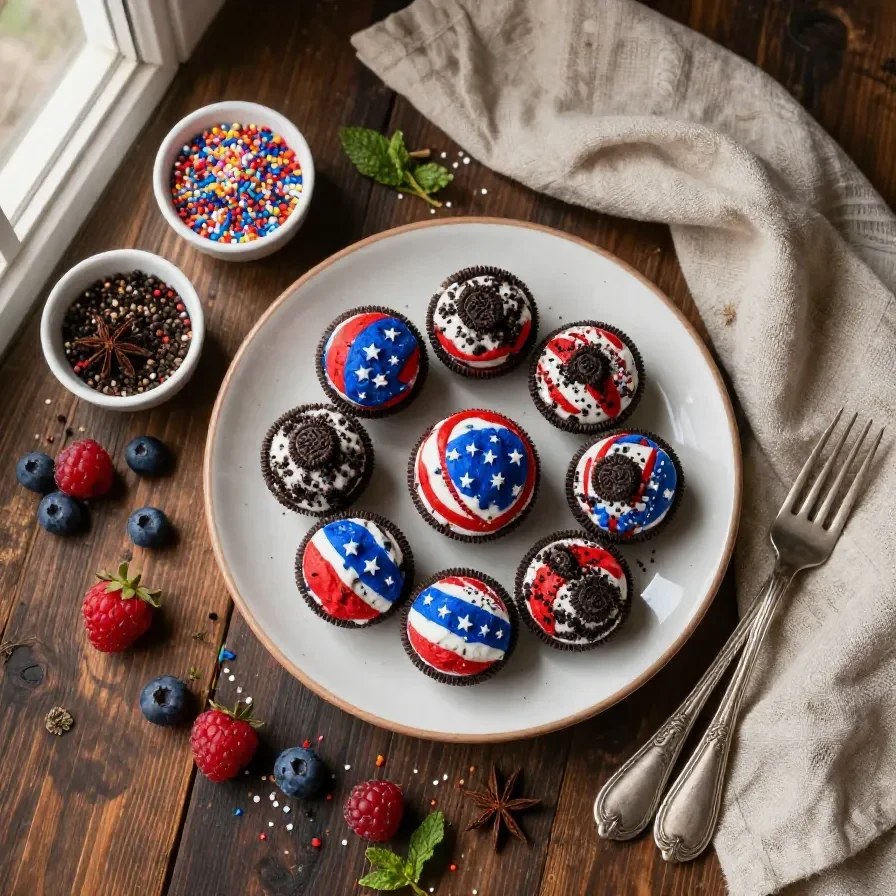
Red, white, and blue Oreo balls arranged on a festive plate, perfect for a patriotic celebration.

Step 5 — Melt the candy coatings

In separate microwave-safe bowls, melt the red, white, and blue candy melts. Heat in 30-second intervals, stirring until smooth.

Step 6 — Dip and decorate

Dip each chilled ball into the candy melts, alternating colors. Place back on the tray and add sprinkles while the coating is still wet.

Step 7 — Let set

Allow the coated Oreo balls to set completely at room temperature or chill briefly to speed up the process. Serve once the coating firms up.

Frequently Asked Questions About Patriotic Oreo Balls Recipe

Can you make these treats ahead of time?

Yes, Patriotic Oreo Balls Recipe can be made 1-2 days in advance and stored in the refrigerator until ready to serve.

What type of candy melts should I use?

Use high-quality candy melts for the best color and coating consistency. Brands like Wilton or Merckens work well.

How long do these Oreo balls last?

When stored in an airtight container in the fridge, these treats last up to 5 days.

Can I freeze Patriotic Oreo Balls?

Yes, freeze them for up to a month in a sealed container. Thaw in the fridge before serving.

Can I use chocolate instead of candy melts?

Yes, white chocolate can be tinted red and blue, but candy melts provide a smoother, quicker coating process.

What is the history behind Patriotic Oreo Balls?

The concept of Oreo truffles gained popularity as a no-bake dessert option. Adding patriotic hues to these iconic treats transformed them into a festive staple for 4th of July and other American holidays. Their ease of preparation and striking appearance make them ideal for celebrating with flair.

How do you store and reheat Patriotic Oreo Balls?

To store, place truffles in an airtight container in the refrigerator for up to 5 days or freeze for up to a month. They should be kept chilled to maintain freshness.

Reheating isn’t necessary, but if frozen, allow them to thaw in the refrigerator for a few hours before serving.

What can you pair Patriotic Oreo Balls with?

Pair these treats with our patriotic fruit salad for a balanced dessert platter. Add red, white, and blue drinks for an extra festive touch. They also complement savory dishes from our patriotic side dishes collection for a complete themed menu.

What mistakes should you avoid when making this recipe?

Avoid skipping the chilling step before coating, as warm truffles can cause uneven candy melts. Don’t overheat candy melts, which may lead to a burnt or clumpy texture. Lastly, ensure the cream cheese is fully softened to avoid lumps in the filling.

Patriotic Oreo Balls Recipe

Patriotic Oreo Balls Recipe
Red, white, and blue Oreo balls arranged on a festive plate, perfect for a patriotic celebration.

Loved this recipe? Save it to your favorite Pinterest board so you can easily find it later! ✨
This post contains affiliate links. As an Amazon Associate, I earn from qualifying purchases. This comes at no extra cost to you.


Homemade Funfetti Marshmallow Popcorn Treats Recipe

This Homemade Funfetti Marshmallow Popcorn Treats recipe is a fun and vibrant snack that combines crunchy popcorn, gooey marshmallow coating, and the cheerful sprinkle of rainbow colors. Perfect for parties or cozy movie nights, this dish is easy to prepare while delivering a satisfying mix of textures in every bite. Crafted with halal-certified ingredients, it’s ideal for anyone seeking quick sweet dishes recipes that are both festive and flavorful.

Table of Contents

Why This Homemade Funfetti Marshmallow Popcorn Treats Will Brighten Your Snack Time

  • Quick and easy preparation means you can whip up these treats in under 15 minutes. Perfect for last-minute snack cravings or spontaneous gatherings.
  • The gooey marshmallow coating adds a luscious texture that pairs beautifully with the light crunch of popcorn. Every bite is a delightful mix of softness and crispness.
  • Rainbow sprinkles bring a pop of color that makes this dish visually exciting. They also add a subtle sweetness that complements the buttery marshmallow coating.
  • Family-friendly and halal-certified ingredients ensure that this recipe works for diverse dietary preferences. It’s a crowd favorite for both kids and adults.

Everything You Need for Homemade Funfetti Marshmallow Popcorn Treats

The mini marshmallows are essential for creating the gooey, sweet coating. Rainbow sprinkles not only add color but also enhance the playful appearance of the dish, making it perfect for celebrations.

How To Make Homemade Funfetti Marshmallow Popcorn Treats Step by Step

  1. Start by popping your popcorn, either using an air popper or stovetop method. Once popped, place it into a large mixing bowl and remove any unpopped kernels to ensure a smooth texture.
  2. In a medium saucepan over low heat, melt the butter completely. Add the mini marshmallows and stir continuously until melted and smooth to prevent burning.
  3. Remove the marshmallow mixture from heat and stir in the vanilla extract and salt until fully combined for added flavor.
  4. Pour the marshmallow mixture over the popcorn in the large bowl. Use a spatula or your hands (lightly greased with butter to prevent sticking) to gently toss and coat the popcorn evenly.
  5. A bowl of colorful homemade Funfetti marshmallow popcorn treats, topped with rainbow sprinkles.

    Cuisinart Air Popcorn Maker

    Kitchen ApplianceCuisinart Air Popcorn Maker

    Effortlessly pop perfect, fluffy popcorn for recipes like this one.

    View on Amazon →

    Nordic Ware Baking Sheet

    Essential CookwareNordic Ware Baking Sheet

    A durable, non-stick baking sheet perfect for cooling and setting popcorn treats.

    View on Amazon →

  6. Sprinkle the rainbow sprinkles over the popcorn mixture and toss gently to distribute them evenly throughout the batch.
  7. Spread the coated popcorn onto a parchment-lined baking sheet and let it cool for about 15-20 minutes, giving the marshmallow coating time to set slightly.
  8. Once cooled, break the popcorn into smaller clusters and serve immediately or store in an airtight container for up to 2 days.

How to Store and Keep Your Popcorn Treats Fresh

Store your Homemade Funfetti Marshmallow Popcorn Treats in an airtight container at room temperature. They’ll stay fresh for up to 2 days, making them ideal for prepping ahead for events. Avoid refrigeration, as it can harden the marshmallow coating and affect the texture.

Common Questions About Funfetti Marshmallow Popcorn Treats

  • Can I use microwave popcorn? Yes, as long as it’s plain and not flavored or buttered. Flavored popcorn may overpower the balance of sweetness in this recipe.
  • What’s the best way to melt marshmallows? Low heat and continuous stirring are key to achieving a smooth and gooey consistency. Avoid overheating to prevent burning.
  • Can I substitute the sprinkles? Absolutely! You can use chocolate chips, crushed candy, or nuts to customize the texture and flavor to your liking.

Creative Serving Ideas for Homemade Popcorn Treats

  • Pair these sweet popcorn treats with hot chocolate for a cozy movie night.
  • Serve them in decorative paper cones or cups for a festive party presentation.
  • Combine them with salty snacks, like pretzels or chips, to create a fun sweet-and-savory mix.
  • Pack them in lunchboxes for an unexpected yet delightful midday snack.

Expert Tips for Perfecting This Recipe

  • Lightly grease your hands with butter to make tossing the popcorn hassle-free and prevent sticking.
  • Use freshly popped popcorn for the best texture—stale popcorn won’t have the same crunch.
  • Allow the marshmallow mixture to cool slightly before pouring it over the popcorn to avoid soggy spots.
  • Spread the coated popcorn thinly on the baking sheet to ensure even cooling and setting.


Homemade Funfetti Marshmallow Popcorn Treats

Prep Time 10 minutes
Cook Time 10 minutes
Total Time 20 minutes
Servings 8 servings
Calories 150
A fun and colorful treat made with popcorn, marshmallows, and rainbow sprinkles. Perfect for parties or a sweet snack!

Ingredients

Instructions 

  • Start by popping your popcorn, either using an air popper or stovetop method. Once popped, place it into a large mixing bowl and remove any unpopped kernels.
  • In a medium saucepan over low heat, melt the butter completely. Add the mini marshmallows and stir continuously until melted and smooth. Be careful not to overheat to prevent burning.
  • Remove the marshmallow mixture from heat and stir in the vanilla extract and salt until fully combined.
  • Pour the marshmallow mixture over the popcorn in the large bowl. Use a spatula or your hands (lightly greased with butter to prevent sticking) to gently toss and coat the popcorn evenly with the marshmallow mixture.
  • Sprinkle the rainbow sprinkles over the popcorn mixture and toss gently to distribute them throughout.
  • Spread the coated popcorn onto a parchment-lined baking sheet and let it cool for about 15-20 minutes, allowing the marshmallow mixture to set slightly.
  • Once cooled, break the popcorn into smaller clusters and serve immediately or store in an airtight container for up to 2 days.

Notes

For best results, use fresh popcorn and avoid overcooking the marshmallow mixture. You can substitute rainbow sprinkles with chocolate chips or nuts for a different flavor.
Calories: 150kcal
Cost: $8
Course: Snack
Cuisine: American
Keyword: Funfetti, Marshmallow Treats, popcorn

A bowl of colorful homemade Funfetti marshmallow popcorn treats, topped with rainbow sprinkles.

Loved this recipe? Save it to your favorite Pinterest board so you can easily find it later! ✨