As an avid cook and Blackstone griddle enthusiast, I’m always on the hunt for mouthwatering recipes that will impress my family and friends. Whether you’re planning a casual weeknight dinner or a festive gathering, I’ve gathered six of my favorite Blackstone recipes that are sure to delight your taste buds. From sizzling fajitas to decadent French toast, these dishes are not only delicious but also easy to prepare, making them perfect for any occasion. Join me as I share the secrets behind each recipe, complete with step-by-step tutorials that will elevate your cooking game and leave everyone asking for seconds!
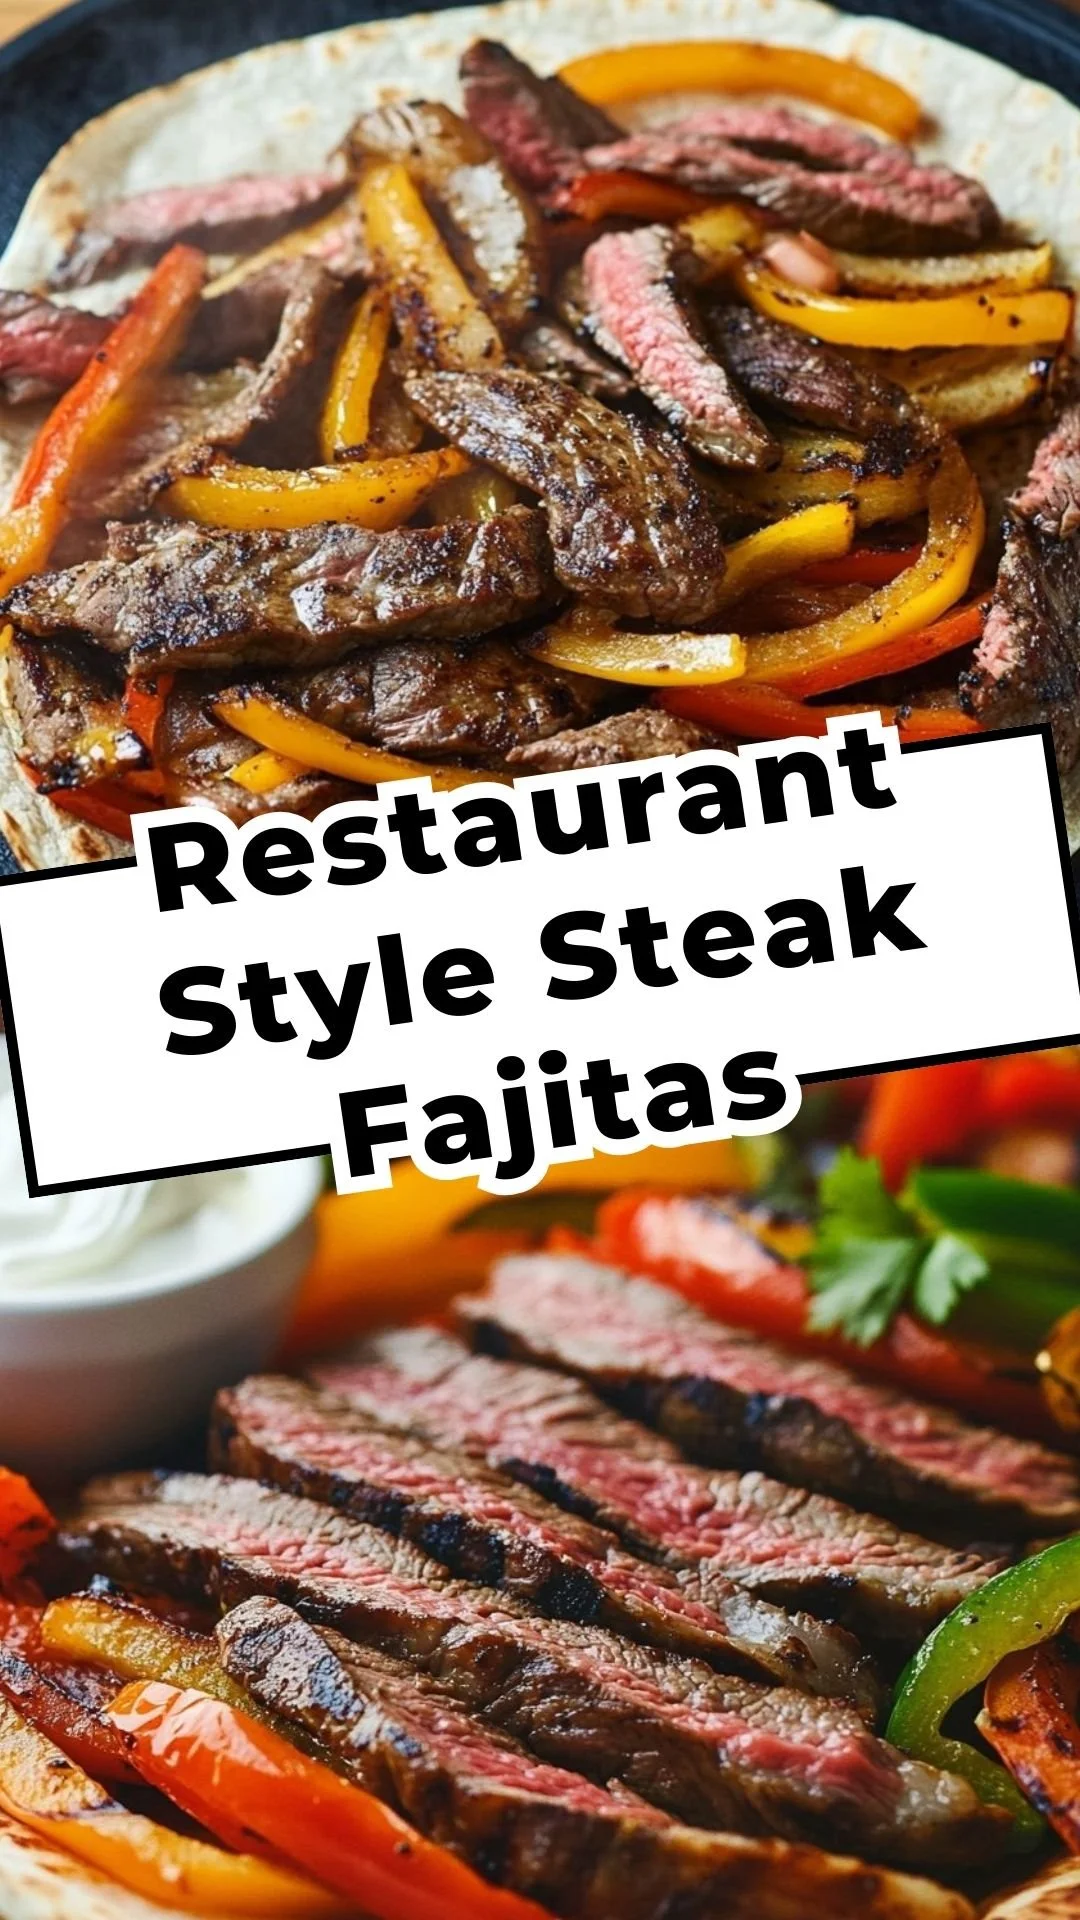
1. Blackstone Steak Fajitas
I can still hear the clink of forks and the soft laughter as my kids set napkins in uneven lines while the Blackstone sizzles just outside the back door. The air filled with that warm, peppery scent that drifts in and makes everyone pause whatever they are doing. It is one of those small moments I live for, when a simple meal turns quiet corners of the day into a shared pause. If you want to learn how to make steak fajitas that bring people together with minimal fuss and lots of flavor, start with a good piece of meat and a plan. I like to read a quick note about choosing flank steak for this cut — it helped me get better at slicing and serving with confidence. Learn why flank steak works so well here.
Why This Blackstone Steak Fajitas Feels Like Home
There is something about the sound of meat hitting a hot steel surface that feels both delightfully primal and incredibly comforting. On our Blackstone, the steak gets a little crust. The peppers go bright and soft. The whole thing comes together in a way that feels both hardworking and celebratory.
This recipe makes very few dishes and gives back a lot of joy. It is fast enough for weeknights, but special enough for a weekend when friends stop by. The flavors are familiar, so picky eaters usually come around, and the colorful platter looks like a little party in the middle of your table. Meanwhile, the method teaches you to trust sound and touch: a good sizzle, a confident flip, and a rest that turns hot juices into quiet gold.
Why Blackstone Steak Fajitas is Our New Family Favorite
The Blackstone flattop is a game changer for fajitas. It makes searing easy, gives an even heat, and lets you cook steak and vegetables in quick succession with minimal clean up. That matters when you want to spend time at the table, not washing pans.
It also gives you room to adapt. Use what you have. Invite the kids to add toppings. Let one person choose salsa, another pick a tortilla. Those small choices create memories and make dinner feel like a team sport.
The Simple Magic Behind Blackstone Steak Fajitas
“This is where the magic happens—when the aroma fills the kitchen and my kids come running in, asking ‘Is it ready yet?’”
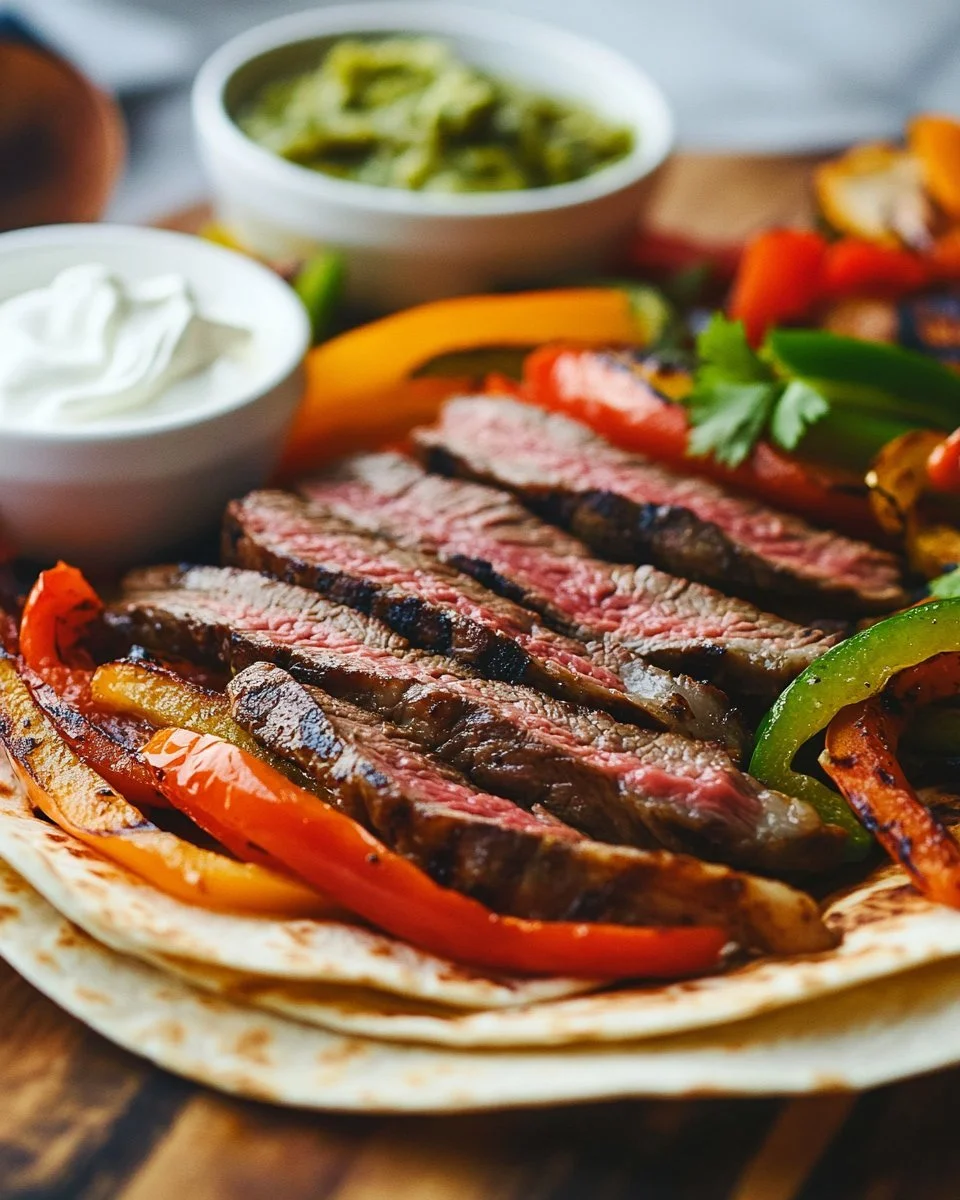
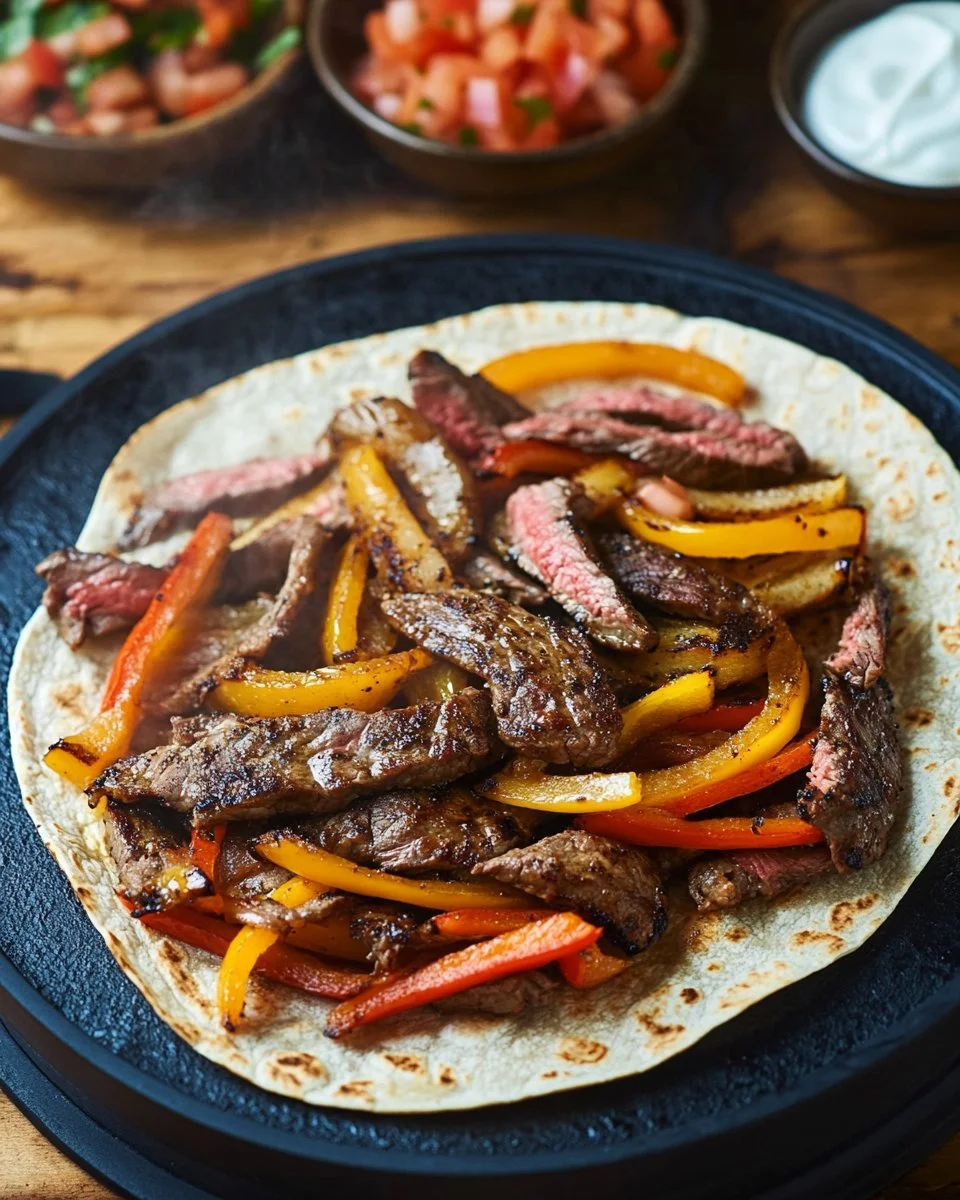
Next up, a quick overview: you’ll season the steak, sear it on the hot Blackstone until it is nicely browned, let it rest so the juices settle, and then cook the peppers and onions until they are soft and slightly charred. Slice the steak thin against the grain, plate it with the veggies, and serve with warm tortillas and your favorite toppings. Look for a deep brown crust on the meat, and veggies that are glossy and tender with a touch of char at the edges.
How to Make Blackstone Steak Fajitas, The Heartwarming Way
Step-by-Step Overview: Keeping It Simple
This is an honest, hands-on process that rewards patience. The steak needs a quick, hot sear, and the vegetables do best with a little time and a lot of love from the spatula. Once you taste the first bite wrapped in a warm tortilla, you will see why I keep coming back to this.
Ingredients You’ll Need
What goes into this dish is wonderfully simple.
1 lb flank steak
1 bell pepper, sliced
1 onion, sliced
2 tablespoons olive oil
1 tablespoon fajita seasoning
Tortillas
Salsa
Sour cream
Friendly note: Don’t skip the fresh toppings if you can swing them. A squeeze of lime or a handful of cilantro lifts everything. Use what’s in your fridge when a midweek scramble calls. If you want a show-stopping side, try a buttery compound that pairs well; I often serve this alongside a quick pan-buttered side inspired by a favorite cowboy butter steak recipe.
Step-by-Step Directions
-
Preheat the Blackstone grill over medium-high heat.
Let it get properly hot so you get that first great sizzle. That initial noise builds flavor and confidence. -
In a bowl, toss the flank steak with olive oil and fajita seasoning.
Make sure the steak is evenly coated. Pat it dry first if it is damp; a dry surface sears better. -
Grill the steak for about 4-5 minutes per side, or until cooked to your liking. Remove and let rest.
Aim for a golden brown crust. I watch the edges for color and use a quick touch test for feel. Resting for 5 to 10 minutes keeps juices where they belong. -
Add the sliced bell pepper and onion to the grill, cooking until softened.
Toss them often so they get that glossy finish and just a bit of char. A little browning here builds flavor, just like grandma showed me. -
Slice the steak thinly against the grain and serve with grilled veggies in tortillas. Top with salsa and sour cream.
Cutting across the grain keeps the meat tender. Let the kids sprinkle toppings; it is the fun bit that makes dinner a shared adventure.
Quick tip: If you want to try another thin steak cut next time, a few techniques from these ranch steak tips helped me when switching meats. These ranch steak cooking tips gave me confidence to adapt the method.
Serving Blackstone Steak Fajitas with Love
I set everything family-style in the center of the table so the meal feels like a small festival. Place the sliced steak on a platter, pile the peppers and onions beside it, and warm tortillas in a stack wrapped in a towel. Then add bowls of salsa, sour cream, lime wedges, and whatever quick toppings you love.
We each build our own fajitas. My youngest always chooses extra sour cream, my partner likes an avalanche of salsa, while I reach for a squeeze of lime and a sprinkle of cilantro. Having little bowls for every topping invites conversation. It becomes less about formal plates and more about passing things around, telling stories, and tasting little experiments together. For a richer option, see how the ribeye cap can change textures if you want to swap cuts on a special night. This ribeye cap guide explains the difference and when to splurge.
Storage & Reheat Tips (Keeping the Goodness)
Saving leftovers is one of life’s small wins. Once cooled, place steak and veggies in an airtight container and store in the fridge for up to 3 days. Keep tortillas separate to prevent sogginess.
For reheating, the oven or a skillet will bring back more of that just-made character. Heat the steak and veggies in a skillet over medium heat with a splash of water or a drizzle of oil, covered for a minute to steam, then uncover to crisp. The microwave is fine for a quick lunch, but it will not give the same texture.
If you plan to meal prep, slice the steak before refrigerating to make lunches a breeze. A little fresh lime and chopped cilantro brighten leftovers like magic.
My Kitchen Notes & Shortcuts
What I have learned making this again and again:
- Marinate lightly and briefly. A heavy, long marinade is not necessary for flank steak and can change the texture. Keep it simple.
- Prep the toppings ahead. Chop the peppers and onions earlier in the day so cooking is a short, fun sprint.
- Warm tortillas over the flattop. Wrap them in foil and place them on a cooler spot of the griddle for a few minutes.
- Use one spatula for veggies and one for meat if you are feeding picky kids; less cross-flavor drama helps.
- If you want a shortcut for slicing, chill the steak for 10 minutes after resting. Slightly firmer meat slices cleaner and easier.
Also, if you love experimenting with different cuts, I sometimes come back to resource notes about flank steak and its strengths when I’m planning a weeknight menu. A quick guide to flank steak has been a helpful refresher.
Family-Friendly Variations
Make this your family’s recipe by tweaking one or two things:
- Lighter version: Swap tortillas for lettuce cups and go heavy on salsa and veggies.
- Kid-friendly: Keep one pan with plain grilled steak pieces and another with the full-seasoned mix for adventurous eaters.
- Cheesy twist: Add a little shredded cheese on top of warm steak when plating for melt-in-the-mouth comfort.
- Smoky kick: Stir a teaspoon of smoked paprika into the fajita seasoning if you want to play with flavor.
- Plant-forward: Double the peppers and add sliced mushrooms for a satisfying, meat-forward texture without needing extra protein.
These changes are small but meaningful. Give one a try and you might surprise yourself. Food is flexible and meals are memory-making, not a test.
FAQs About Blackstone Steak Fajitas
Can I make this ahead for a busy week?
Absolutely. You can season and cook the steak earlier in the day and gently reheat just before serving. Letting it sit for a bit lets the flavors settle, much like an old family recipe.
What temperature should I aim for on the Blackstone?
Medium-high heat is ideal for a good sear. You want enough heat to produce a rapid browning without burning. If smoke starts to billow, reduce heat slightly.
How thin should I slice the steak?
Thin slices, about 1/4 inch, cut against the grain give the most tender bites. A steady, confident slice does wonders; shave it while the meat is a little warm for ease.
Can I use a different cut of beef?
Yes. Flank steak is traditional and budget-friendly, but you can use skirt steak, sirloin, or even thin ribeye cuts. Think about how each cut cooks and adjust timing.
Is fajita seasoning necessary?
You can make a simple mix of chili powder, cumin, garlic powder, salt, and a pinch of sugar. It adds a quick flavor lift, but the meat will still be delicious with just salt and pepper.
One Final Thought from My Kitchen
Before you go, remember that cooking together is half the recipe. Let someone help slice or arrange tortillas. Laugh at the imperfect napkin folds. These small acts make dinner feel like a place where everyone belongs.
Conclusion
I hope this Blackstone Steak Fajitas recipe becomes one of those meals that brings people to the table and keeps them there with good food and easy conversation. If you want more ideas for variations or step-by-step photos, these two resources have fantastic inspiration and extra techniques: Easy Blackstone Steak Fajitas Recipe – Gimme Some Grilling ® and Best Ever Blackstone Steak Fajitas (with Homemade Marinade). Until next time, happy cooking and may your kitchen be full of warmth and laughter.
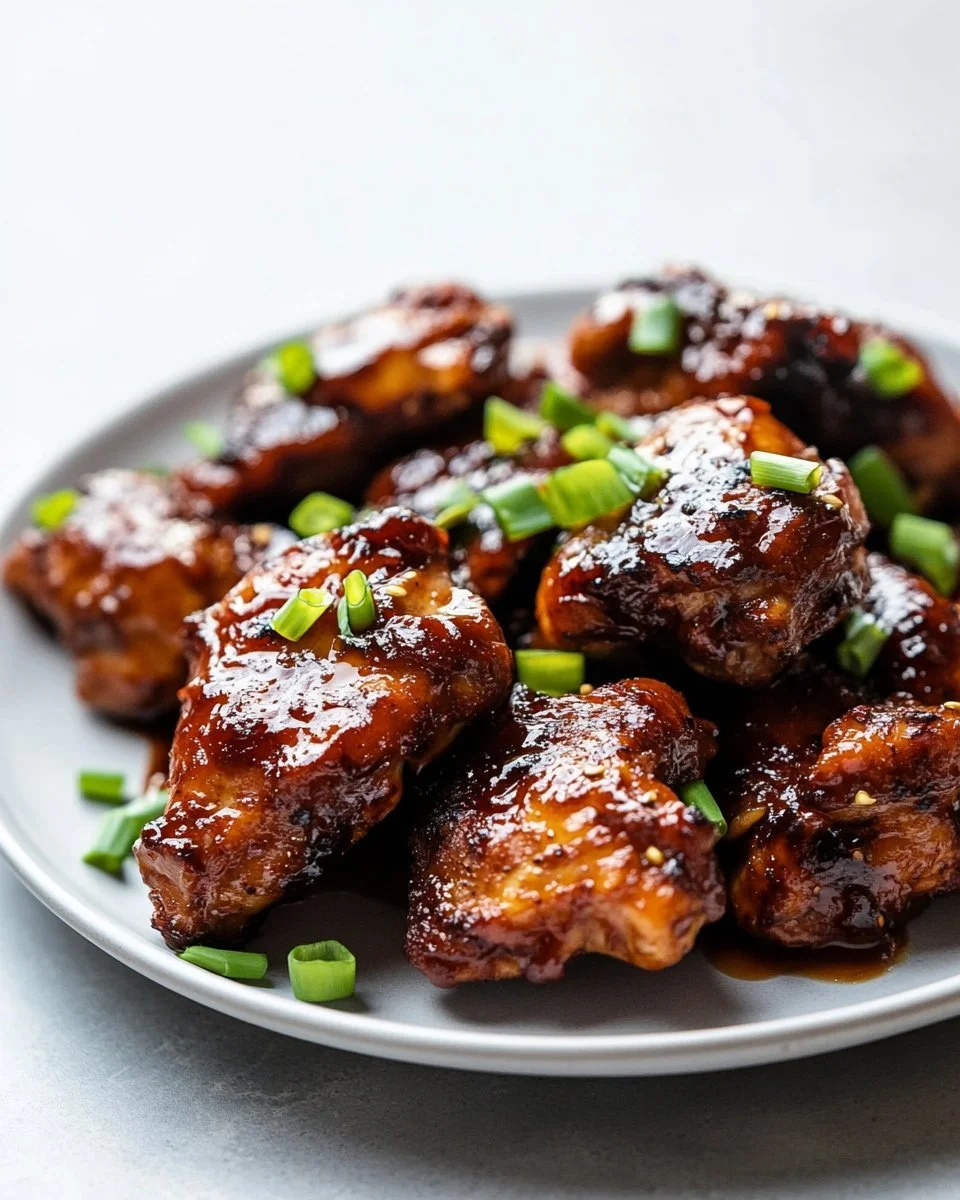
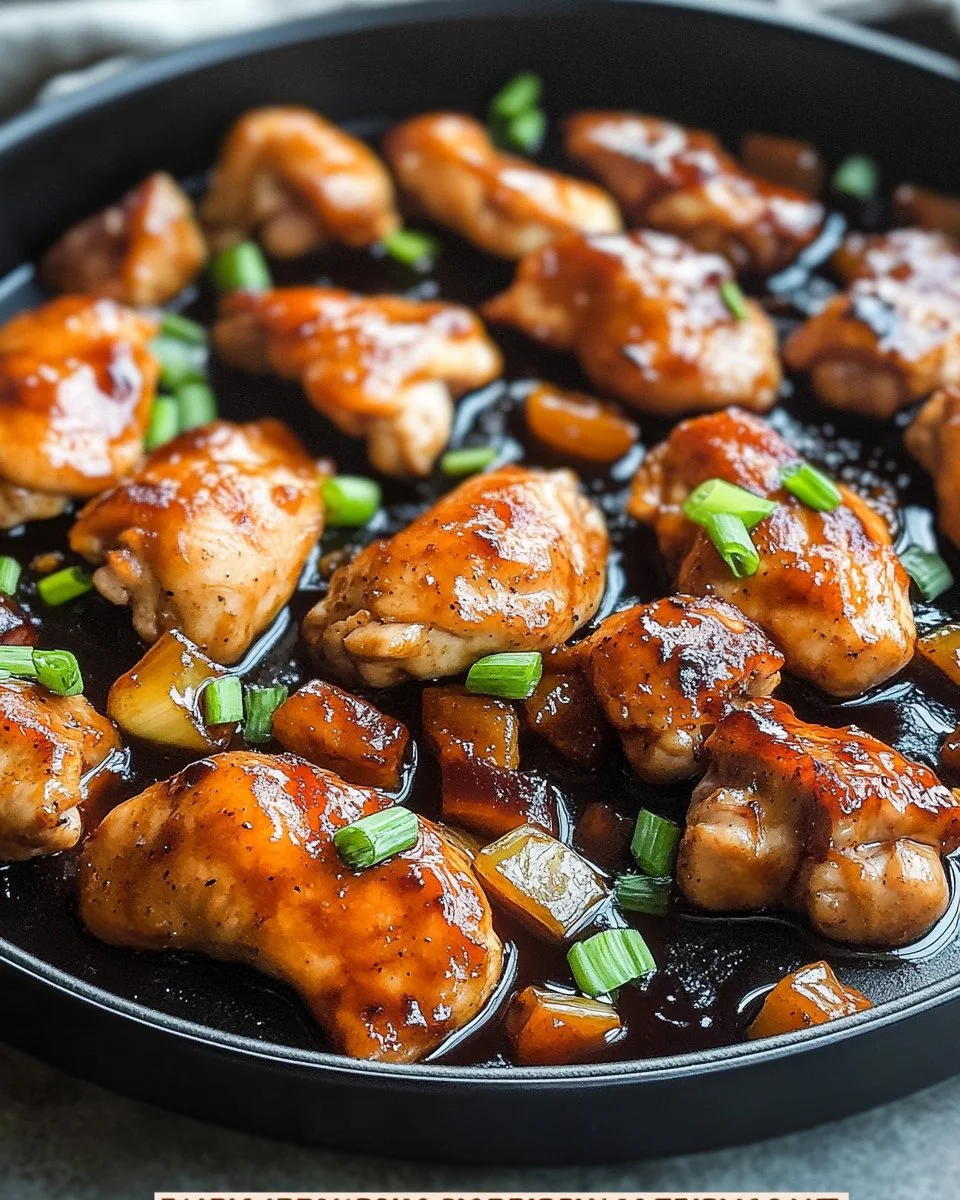
2. Blackstone Bourbon Chicken

There is the smell of brown sugar and bourbon warming the kitchen, and my youngest is already setting the table with the stubborn concentration of someone arranging a tiny kingdom. That moment, tins of laughter and the gentle clatter of plates, is what this recipe is for: a simple, cozy dish that brings us together without fuss. If you want a recipe that makes the house smell like comfort and still fits a busy weeknight, you are in the right place. For a quick idea of other easy family-friendly chicken meals you might pair this with, take a look at this simple chicken salad recipe that I turn to when I need a light, fast side.
Why This Blackstone Bourbon Chicken Feels Like Home
This Blackstone Bourbon Chicken hits the sweet spot between quick and special. It caramelizes beautifully on the griddle, giving you that sticky, glossy coating that feels like a small celebration after a long day. The bourbon adds warmth without feeling boozy, and the brown sugar creates the kind of golden char my grandmother would have approved of.
It matters because it is doable. You can marinate in the morning, cook in minutes on a hot griddle, and have a dish that tastes like you spent all afternoon fussing. It makes few dishes dirty, feeds a crowd, and pleases picky eaters and adventurous palettes alike. Meanwhile, it gives you time to sit, breathe, and maybe steal a piece as it rests.
How to Make Blackstone Bourbon Chicken, The Heartwarming Way
I like to think of this as a gentle, confident method rather than a strict instruction manual. The goal is glossy, caramelized chicken with a tender inside and a slightly sticky glaze that clings to every bite. If you have a Blackstone griddle, it gives you a broad, even surface that makes browning easy. If you do not, a heavy skillet will still do the job well.
“This is where the magic happens—when the aroma fills the kitchen and my kids come running in, asking ‘Is it ready yet?’”
Look for visual cues: the marinade reduces to a syrupy gloss, the outside of the thighs turns a deep golden brown with little blistered bits, and the juices run clear when you slice into the thickest part. Those tell you the chicken is cooked and the sauce has done its job.
Step-by-Step Overview: Keeping It Simple
-
In a bowl, combine bourbon, soy sauce, brown sugar, apple cider vinegar, garlic powder, ginger powder, salt, and pepper.
Mix until the sugar starts to dissolve. The marinade should smell sweet and a bit tangy. -
Add the chicken thighs to the marinade, cover, and refrigerate for at least 1 hour or overnight for best results.
Letting it sit overnight deepens the flavor, but an hour will still make a happy dish. -
Preheat the Blackstone griddle on medium-high heat.
You want the griddle hot enough to create immediate sear marks, but not smoke all the time. -
Remove chicken from the marinade and discard the marinade.
Pat the thighs slightly dry to help them brown and caramelize. -
Place the chicken on the griddle and cook for about 6-8 minutes on each side, or until cooked through and caramelized.
Resist the temptation to move them constantly. A little steady contact builds that lovely crust. -
Remove from heat and let the chicken rest for a few minutes.
Resting helps the juices redistribute so every bite is tender. -
Slice the chicken and garnish with green onions if desired. Serve warm.
A sprinkle of fresh onion or herbs brightens the sticky glaze and adds color.
A few of my small, practical assurances: a light brown char is your friend, not a flaw. If the griddle seems too hot and the outside is darkening too quickly, lower the heat a touch and give it a few more minutes—the inside will thank you. Let the kids help with minor tasks like tossing green onions. They love to feel useful and it creates good memories.
Ingredients You’ll Need
1.5 pounds boneless, skinless chicken thighs
1/2 cup bourbon
1/4 cup soy sauce
1/4 cup brown sugar
2 tablespoons apple cider vinegar
2 teaspoons garlic powder
1 teaspoon ginger powder
Salt and pepper to taste
Green onions for garnish (optional)
Don’t skip the brown sugar. It is the soul of that sticky glaze. If you do not have apple cider vinegar, a splash of rice vinegar works. If you are short on bourbon, add a little water and a touch more vinegar; the flavor will still be comforting. While you gather these, you might appreciate a warm batch of bone broth simmering for another weeknight dinner, which is why I often keep a basic homemade chicken bone broth ready in the fridge.
Serving Blackstone Bourbon Chicken with Love
This dish feels happiest at the center of the table, placed family-style so everyone can serve themselves. We usually slice the thighs and let everyone pile pieces over steamed rice, warm tortillas, or even a bed of simple greens. Add a bowl of quick pickled cucumbers or a crisp slaw for contrast. My eldest always asks for extra green onions and a squeeze of lime.
For sides, try roasted broccoli or stir-fried snap peas for crunch. If you want comfort overload, offer buttery mashed potatoes. My partner loves it with a little mayo-based slaw on the side. The great thing is that this recipe plays well with both humble and fancy additions.
If you like handheld dinners, put slices into warm tortillas, top with shredded cabbage, and drizzle a bit of extra sauce on top. At a recent Sunday dinner, my kids created little taco stacks and declared it a family holiday. It was loud, messy, and exactly what family dinners should be.
Storage & Reheat Tips (Keeping the Goodness)
Store leftover chicken in an airtight container in the refrigerator for up to 3 days. If you froze a portion, wrap it tightly and it will keep well for about 2 months. When reheating, I prefer the oven or a hot skillet because they restore texture far better than the microwave.
To reheat in the oven, place the chicken on a baking sheet, cover loosely with foil, and warm at 325 F for 10 to 15 minutes, or until heated through. For a stovetop refresh, warm a skillet over medium heat and add the slices, turning occasionally until hot and slightly re-glazed. The microwave is fine for a quick lunch, but it softens the exterior. Also, if you want to stretch the meal into something new, shred the leftover chicken and make a small casserole or fold it into quesadillas for a second night of easy dinners. When I am in a hurry, I often pair leftovers with a crockpot favorite like the Mississippi-style chicken for inspiration on slow, hearty flavors.
My Kitchen Notes & Shortcuts
- Marinate ahead. If you can marinate overnight, do it. The deeper color and flavor are worth the wait.
- Use thighs for juiciness. Thighs stay tender and handle the high heat of the griddle better than breasts.
- Control the glaze. If the marinade hits the hot griddle and reduces too fast, have a small splash of water ready to loosen it slightly so it coats rather than burns.
- Make extra sauce. I sometimes double the marinade, simmer half to a syrupy glaze, and reserve it to drizzle at the end. It feels like a small luxury.
- Kid-friendly step: Let them top with sliced green onions or sesame seeds. Small jobs build confidence.
I have learned to keep the tools simple: a reliable griddle or heavy skillet, a good pair of tongs, and a sharp knife. Those few things deliver consistent results. If you want to keep a lighter version, swap half the brown sugar for a lower-calorie sweetener, but I will say the original is worth the occasional indulgence.
Family-Friendly Variations
- Lighter version: Use chicken breasts or remove some sugar. Add more vinegar or a touch of orange juice to brighten the flavor.
- Spicy twist: Add a teaspoon of chili paste or a sprinkle of crushed red pepper to the marinade for a family favorite with a kick. Start small; you can always add more.
- Veg-forward: Toss sliced bell peppers, onions, and mushrooms on the griddle alongside the chicken for a simple one-pan meal. The vegetables pick up the glaze and taste fantastic.
- Grill version: If the weather is right, do this on the grill. Use a cast iron griddle on top to catch the glaze, or cook directly for a smokier finish.
- Saucy on rice bowls: Serve over rice with quick pickled carrots and a soft-boiled egg for a more grown-up bowl that still uses the same simple marinade.
Let your family make suggestions and try the ideas that match your week. The best variations are the ones that become little household traditions.
FAQs About Blackstone Bourbon Chicken
Q: Can I make this ahead for a busy week?
A: Absolutely. Make the marinade and marinate the chicken the night before. Cook when you get home and let the oven or skillet do the finishing work. It saves time and improves flavor.
Q: Is bourbon necessary?
A: The bourbon adds a warm, slightly caramel note. If you prefer not to use alcohol, substitute with apple juice or a bit of chicken stock and a splash more vinegar. It will still be delicious.
Q: How do I avoid burning the sauce on the griddle?
A: Keep an eye on the heat. If the sweet bits char too quickly, lower the heat and move the chicken to a cooler part of the griddle to finish cooking. A small splash of water to deglaze helps too.
Q: Can I use this marinade for other proteins?
A: Yes. Pork chops, beef strips, and even tofu can take well to this mix. Adjust cooking times to match the protein.
Q: How do I know when the chicken is done?
A: The safest and most reliable method is an instant-read thermometer. The internal temperature should reach 165 F. Visual cues like clear juices and firm texture help, but the thermometer removes doubt.
One Final Thought from My Kitchen
This dish is one of those small, repeatable joys. It is forgiving, fast, and full of flavor in a way that feels like a hug at the end of the day. I hope it becomes one of those recipes you pull out when you want everyone at the table, no matter how the day went. Give it a try—you might surprise yourself with how easy comfort can be.
Conclusion
If you want another perspective on cooking bourbon chicken on a flat top, I like this practical guide to Bourbon Chicken on the Griddle – Easy Blackstone Chicken Recipe which pairs well with the tips I share here. For a tried-and-true copycat approach, the team at Blackstone has a solid version you can compare in their recipe for CJ’s Copy Cat Bourbon Chicken.
Until next time, happy cooking. I hope this recipe fills your kitchen with warmth and your table with stories.
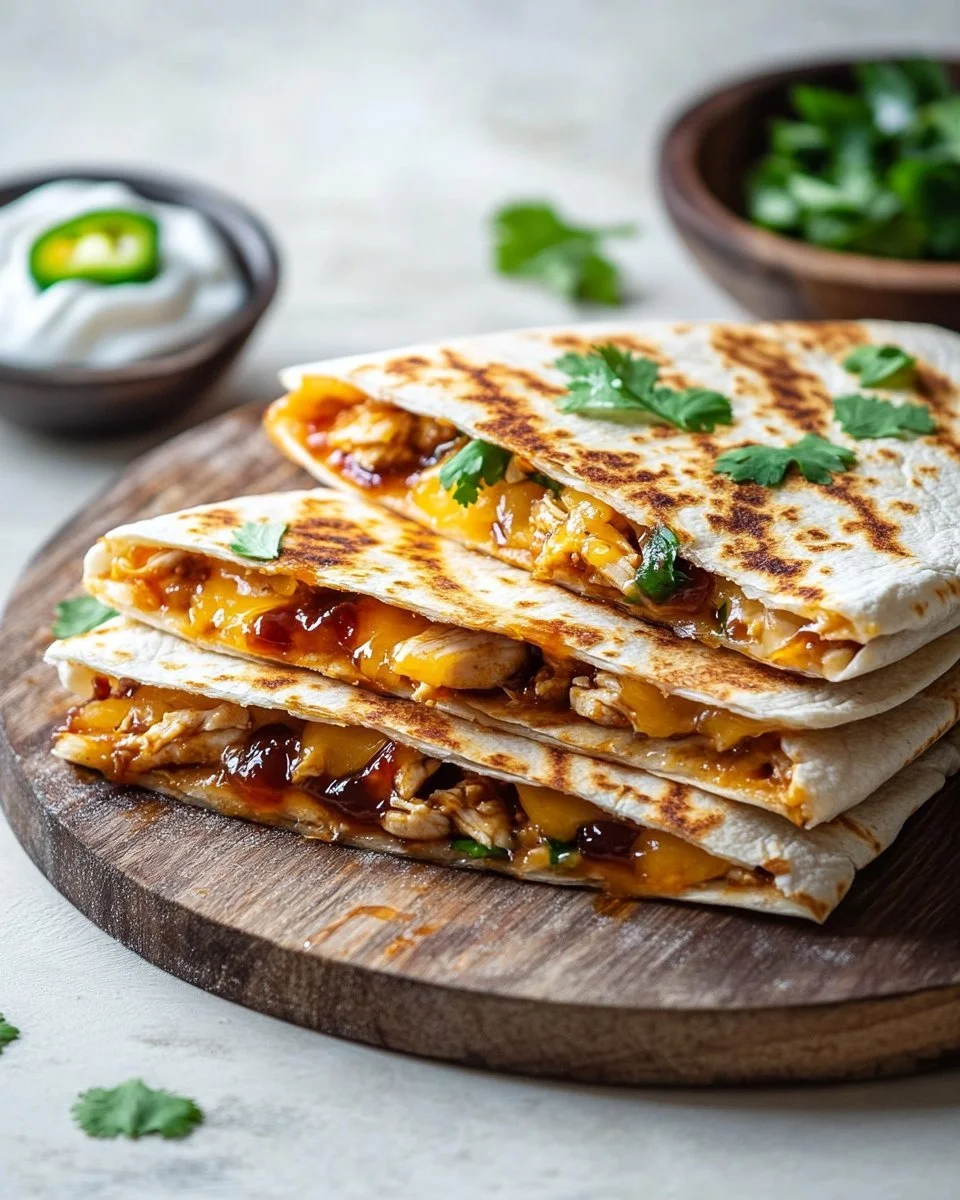
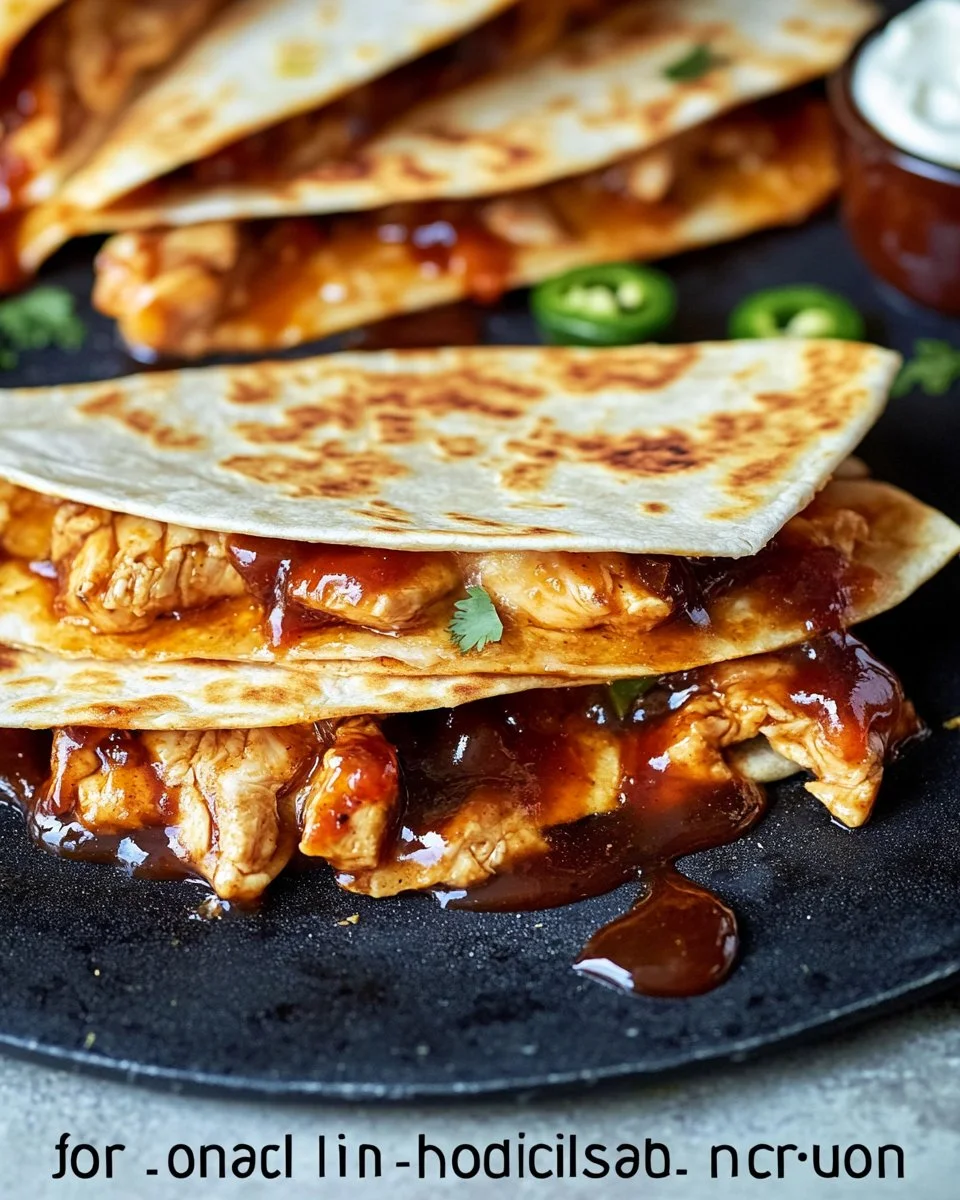
3. Blackstone Hot Honey BBQ Chicken Quesadillas

The scent of hot honey and smoky BBQ warming the kitchen makes my whole house slow down. My youngest sets out napkins while the older one counts tortillas, both of them grinning at the promise of crispy cheese and saucy chicken. It always feels like a small party when Blackstone Hot Honey BBQ Chicken Quesadillas are on the griddle, and yes, I sometimes pull an easy 4-ingredient chicken salad as a quick side when life gets extra busy.
Why Blackstone Hot Honey BBQ Chicken Quesadillas is Our New Family Favorite
This meal hits the sweet spot between speed and meaning. The chicken cooks up fast, the tortillas crisp in minutes, and the hot honey adds that sneaky little kick that gets everyone talking. In our house, it has replaced fussy dinners because everyone can help, and the cleanup is easy.
It matters because it brings people into the kitchen without fuss. The Blackstone griddle gives the quesadillas a golden, slightly charred edge that tastes like a treat but takes only a short time. Meanwhile, the BBQ sauce and hot honey play off each other — sweet, tangy, a little spicy — and that contrast keeps each bite interesting. This is one of those meals that feels special but is simple enough for a weeknight.
The Simple Magic Behind Blackstone Hot Honey BBQ Chicken Quesadillas
What’s the trick? Balance. A little salt on the chicken, enough heat on the griddle to brown the tortillas crisp, and not too much sauce so the quesadillas stay foldable instead of soggy. The cheese binds everything together and gives that melt everyone loves.
This recipe works because it uses ingredients many families already keep on hand, and it scales easily. Add a salad, or pair it with my favorite cozy broth when a chill is in the air, like the one I use in my chicken bone broth for a heartier meal.
How to Make Blackstone Hot Honey BBQ Chicken Quesadillas, The Heartwarming Way
“This is where the magic happens—when the aroma fills the kitchen and my kids come running in, asking ‘Is it ready yet?’”
Start with hot griddle, savory chicken, and a gentle drizzle of BBQ and hot honey. Look for cooked-through chicken with a bit of caramelized edges and a sticky shine from the sauce. When you fold the tortilla, watch the cheese melt and the edges crisp. That slight browning is your cue that the quesadilla is done and the crunch-to-cheese ratio is just right.
If you want a make-ahead angle, shred your cooked chicken and toss it with sauce an hour before dinner. It gives the flavors time to mingle, and then everything goes from griddle to table in under 10 minutes. For a smoky twist, try using a BBQ seasoning blend with a hint of smoked paprika — it’s one of my favorite tricks I learned from making BBQ bites with friends at a neighborhood cookout like the ones on Crockpot Mississippi Chicken nights.
Ingredients You’ll Need
- cooking oil of choice
- 1 pound boneless, skinless chicken thighs (or chicken breasts)
- kosher salt
- pepper
- BBQ seasoning blend
- 3 tablespoons BBQ sauce (plus more to drizzle in quesadillas)
- 2 tablespoons hot honey (plus more to drizzle in quesadillas)
- 4 large burrito size flour tortillas
- 3 cups shredded cheese of choice (cheddar, Monterey Jack, or a mix)
- 1/2 cup chopped cilantro (optional)
- Optional toppings: sour cream, jalapenos
Friendly notes: Don’t skip the fresh herbs. Cilantro adds a bright lift that keeps the quesadillas from feeling too heavy. Use what’s in your fridge; this is about creativity, not perfection. If you want a fun adult pairing, try a smoky iced tea from this quick guide on how to make a black tea shot you’ll love.
Step-by-Step Directions
-
Preheat griddle to medium.
Add a thin layer of cooking oil and let it heat until it shimmers. A hot griddle gives a quick, even sear. -
Add chicken, kosher salt, pepper, and BBQ seasoning.
Cook 6 minutes, mixing a few times with spatulas so it browns evenly. A little browning builds flavor, just like grandma showed me. -
Add BBQ sauce and hot honey.
Cook 2 more minutes, stirring so the sauce coats the chicken and gets sticky. The sauce should bubble lightly. -
Remove and scrape griddle clean and lower heat to medium-low.
Let the griddle cool slightly so the tortillas crisp without burning. -
Add more cooking oil and lay the tortillas flat on griddle.
The oil helps them get that golden color and keeps them from sticking. -
Sprinkle half of the cheese on one side of each tortilla.
Cheese is the glue here. Be generous but don’t overload. -
Add chicken, drizzle a little more BBQ sauce and hot honey, add cilantro if using, and remaining cheese.
Layer thoughtfully so every bite has sauce, chicken, and melted cheese. -
Fold the empty side of each tortilla over the filled side and cook the quesadillas a minute or two per side.
Press gently with a spatula to seal. Flip carefully and watch for even browning. -
Remove once the cheese is melted and the tortillas are crisped how you prefer.
Let them rest a minute so the cheese sets slightly, then slice into wedges. -
Serve with sour cream and jalapenos if desired.
A cool dollop of sour cream balances the heat. Passing bowls makes this a family-style event.
Quick tip: Let the kids help sprinkle cheese or choose toppings. It’s an easy, safe job and they love being part of the process.
Serving Blackstone Hot Honey BBQ Chicken Quesadillas with Love
We put the quesadillas on a big board at the center of the table, with bowls of sour cream, extra hot honey, sliced jalapenos, and a simple green salad. Everyone digs in, builds their perfect bite, and the kitchen stays warm and chatty.
One of our favorite sides is a quick slaw with lime and a pinch of sugar. It cuts through the richness and gives a crunchy contrast. For an easy family dessert, bake apples while you eat and serve them warm with a scoop of vanilla ice cream. My kids laugh when I say the warm apples are “kitchen magic.” If someone prefers a lighter plate, they can pair a wedge with the leftover chicken in a bowl with greens for a fast lunch the next day, which reminds me of the simple comfort found in a bowl like my Crockpot Mississippi Chicken served over rice.
Storage & Reheat Tips (Keeping the Goodness)
Store leftover quesadillas in an airtight container in the fridge for up to 3 days. If you stack them, place parchment paper between layers to stop them from sticking.
To reheat for the best texture, use a 350°F oven or a toaster oven. Place quesadillas on a baking sheet and heat 8 to 10 minutes until warmed through and crisp. The microwave works in a pinch for a quick lunch, but it makes the tortilla soft. For a fast crisp in the microwave, zap for 30 to 45 seconds and then finish in a hot skillet for a minute per side.
If you plan to freeze, wrap individually in foil and freeze up to one month. Reheat from frozen at 375°F for about 15 to 20 minutes.
My Kitchen Notes & Shortcuts
- Prep the chicken earlier in the day. Shredded chicken tossed with sauce 1 hour ahead tastes even better.
- Use pre-shredded cheese for speed, but freshly shredded melts a bit more evenly. Worth it if you have the extra minute.
- Swap thighs for breasts if you prefer leaner meat. Thighs stay juicy and forgive a little overcooking.
- Double the chicken and freeze half for busy nights. It’s a weeknight lifesaver.
- Let kids add toppings at the table. It keeps dinner fun and less stressful for the cook.
Family-Friendly Variations
- Kid friendly: Skip the hot honey or reduce it to 1 tablespoon and serve extra on the side for adults.
- Lighter version: Use whole wheat tortillas and half the cheese, and add a cup of finely chopped spinach to the filling.
- Veggie boost: Add sautéed bell peppers and onions with the chicken for extra flavor and texture.
- Spicy upgrade: Mix a diced jalapeno into the chicken filling for heat throughout, not just on top.
- Swap-ins: Try pulled pork or leftover rotisserie chicken in place of fresh-cooked chicken for a very quick version.
FAQs About Blackstone Hot Honey BBQ Chicken Quesadillas
Q: Can I make this ahead for a busy week?
A: Absolutely. Cook and shred the chicken, toss with sauce, and refrigerate. Assemble and cook the quesadillas when you are ready. The flavors will settle nicely, and the process feels almost instant at dinner time.
Q: What cheese melts best for this dish?
A: Monterey Jack and cheddar work beautifully. A mix gives both melt and flavor. Avoid low-moisture cheeses that stay dry.
Q: Can I use corn tortillas?
A: You can, but corn tortillas are smaller and more brittle. If you use them, keep the filling lighter and press gently. Burrito-size flour tortillas give the classic foldable quesadilla.
Q: Is Blackstone necessary, or can I use a skillet?
A: A skillet works very well. The Blackstone is great for big batches and gives even browning, but your cast-iron or nonstick pan will do the job for a family dinner.
Q: How spicy is the hot honey?
A: It depends on the brand. Start with 2 tablespoons and taste. Add more for a bolder kick or serve more at the table for those who like heat.
One Final Thought from My Kitchen
I hope these quesadillas bring an easy kind of joy to your week. They are one of those recipes I return to when I want something warm, fast, and comforting that still feels a little special. Make them once, then make them your own. And if your kids insist on making a tiny cheese mountain in the center before folding, let them. Those little things become our favorite stories.
Conclusion
If you want another home-cook version of Blackstone-style hot honey BBQ chicken, I love the playful spin shown in this Blackstone Hot Honey BBQ Chicken Quesadillas write-up for extra inspiration. For a bite-sized approach that uses similar flavors, check out the clever ideas in Blackstone Hot Honey BBQ Chicken Bites and borrow what you like.
Until next time, happy cooking. Give it a try — you might surprise yourself.
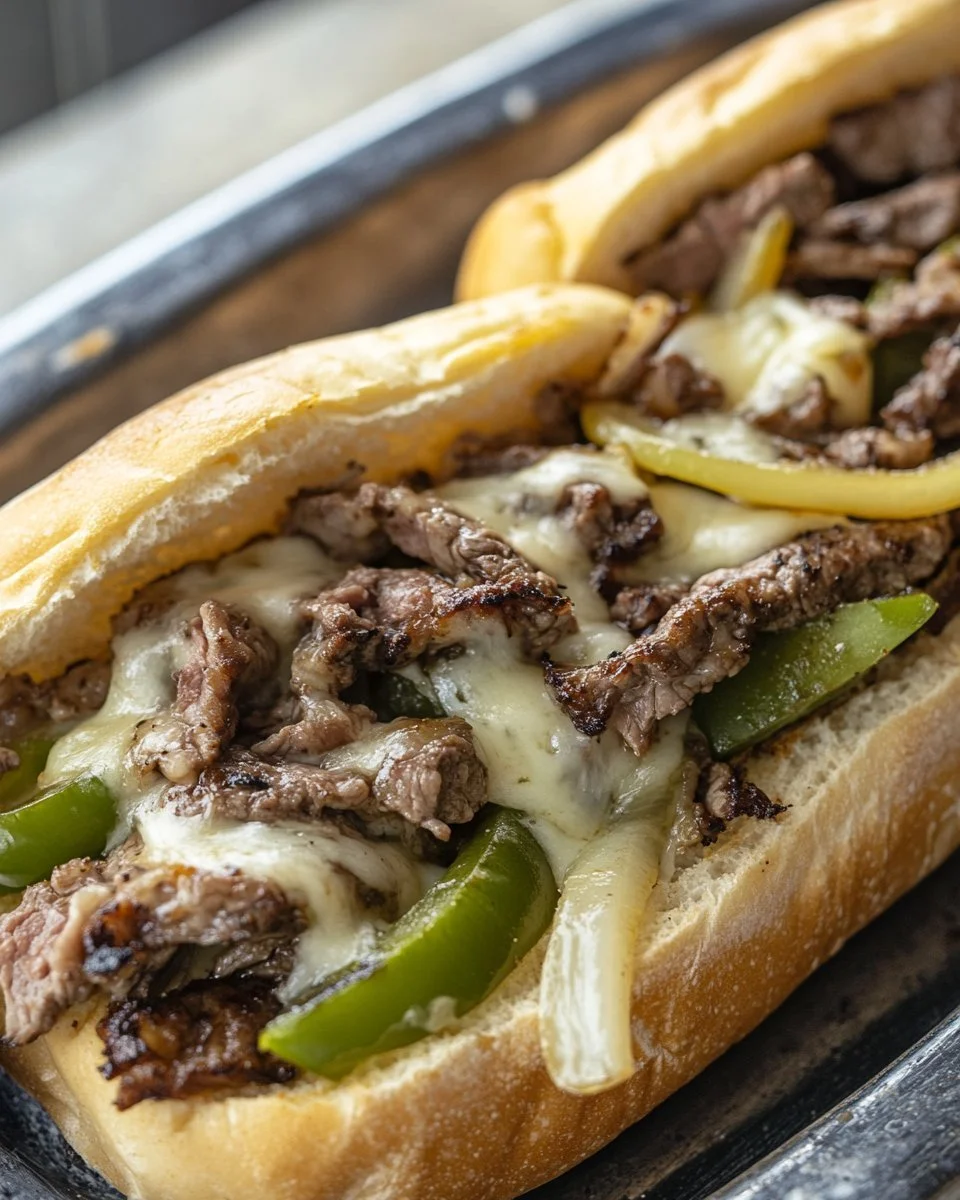
4. Authentic Blackstone Philly Cheesesteak
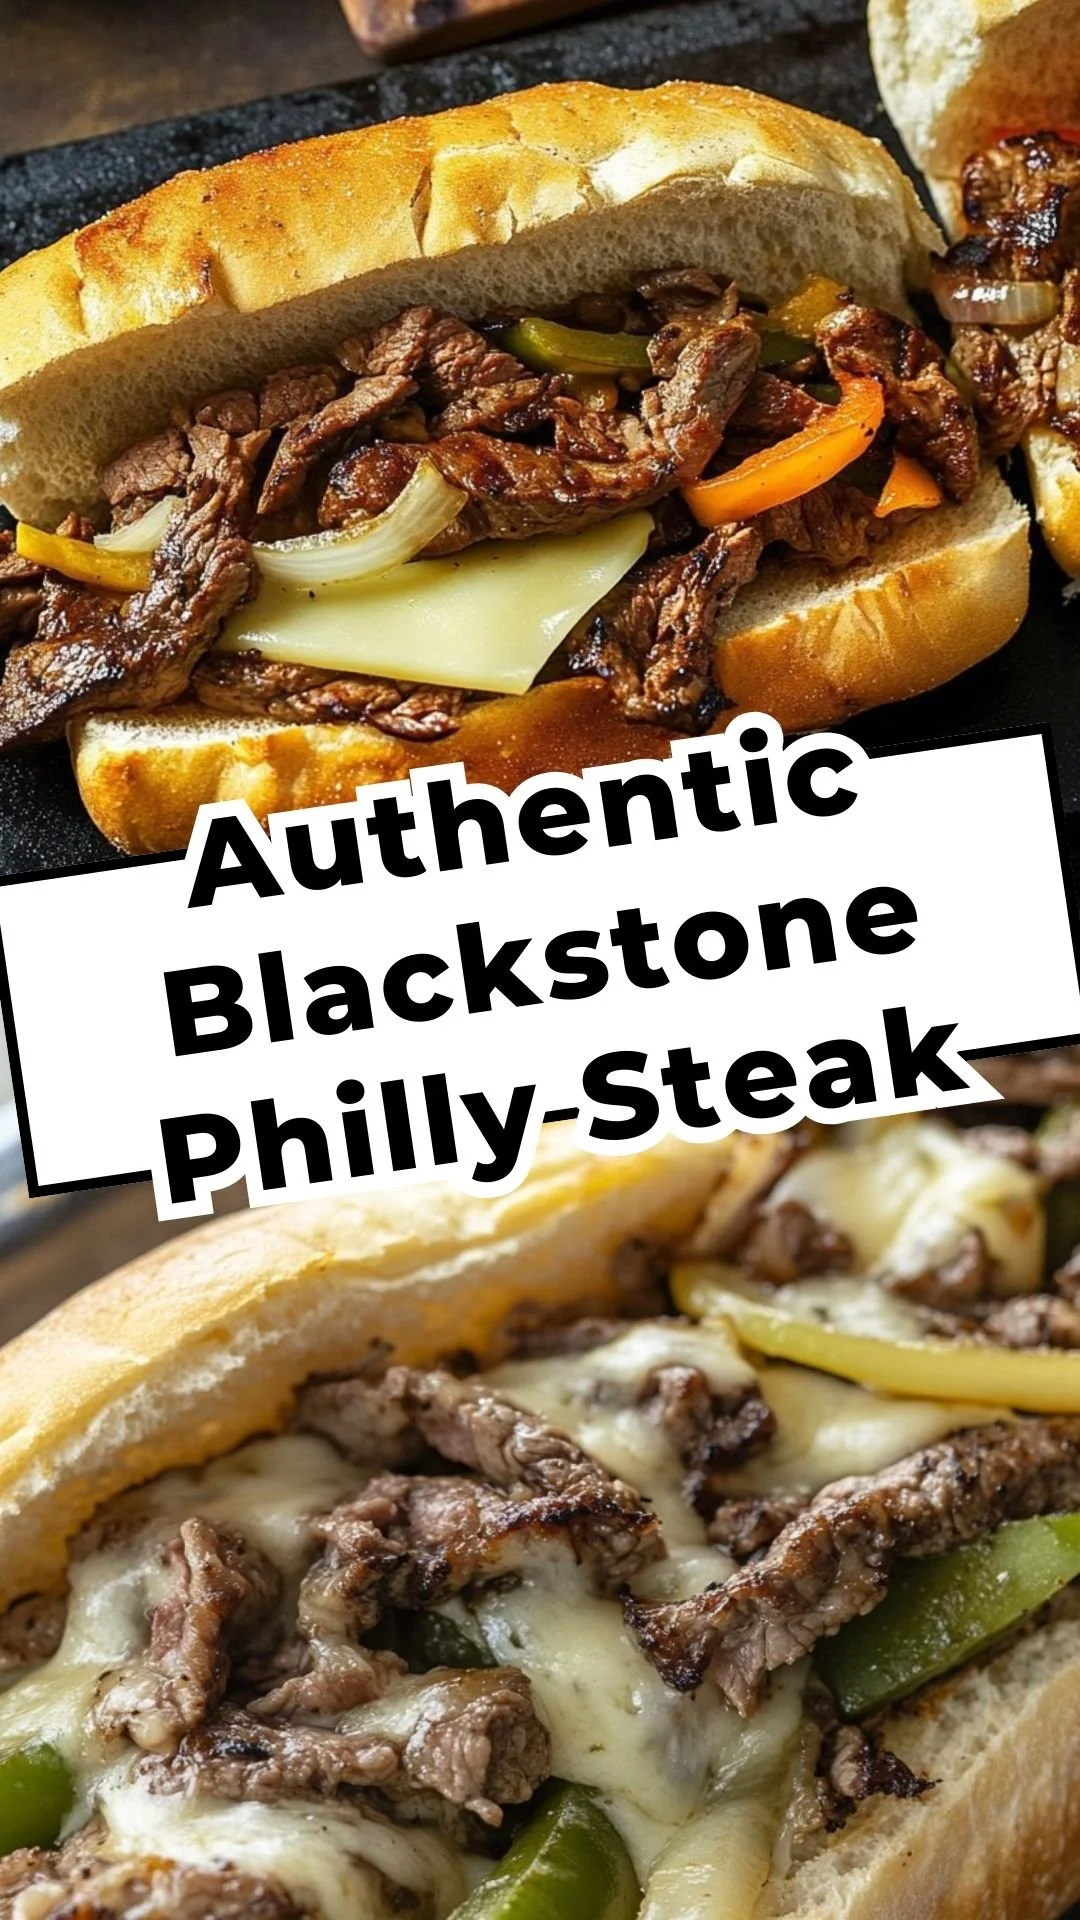
Nothing says family like the aroma of sizzling beef and caramelized vegetables drifting through the house. Picture this: you’re in the kitchen, the sound of laughter in the background as your kids set the table. There’s a warmth in the air, and suddenly, you’re hit with the delightful scent that reminds you a little of your grandma’s kitchen. That’s the feeling I get every time I whip up an Authentic Blackstone Philly Cheesesteak. With its hearty flavors and comforting familiarity, this dish brings everyone together, and trust me when I say, it’s an absolute familial favorite.
Why This Authentic Blackstone Philly Cheesesteak Feels Like Home
When I think about meals that evoke the warmth of home, the Authentic Blackstone Philly Cheesesteak tops the list. Why? Because it’s more than just a sandwich. It’s a whole experience, one that reminds me of family gatherings and the joy of sharing a meal with loved ones. It’s that perfect blend of savory flavors and textures that pairs beautifully with a casual, laughter-filled evening.
The best part? You can pull this meal together in no time. Whether it’s a busy weeknight or a lazy Sunday, this recipe transforms your kitchen into a hub of happiness. You won’t just feed your family; you’ll create memories too.
Why Authentic Blackstone Philly Cheesesteak is Our New Family Favorite
In our home, food goes beyond sustenance. It’s about connection and joy. The Authentic Blackstone Philly Cheesesteak captures this sentiment perfectly. It’s a delightful meal that caters to everyone’s taste buds—rich, cheesy, and filled with flavor.
From the moment the ingredients hit the griddle, the excitement begins. The sizzling sound as the steak hits the hot surface pairs with the sweet aroma of onions and peppers, making it feel special. It’s simple yet indulgent, and it has a magic that keeps my family coming back for more.
The Simple Magic Behind Authentic Blackstone Philly Cheesesteak
The joy of cooking this dish starts with its beauty—the vibrant colors of fresh vegetables and succulent steak mingling together. I often say that cooking should be fun, and this recipe certainly embodies that spirit. The ingredients come together with such ease, and there’s something truly satisfying about creating it from scratch.
The balance between the rich ribeye steak and the sweetness of the caramelized onions and peppers creates a harmony that feels comfortable yet indulgent. It’s this simple magic that makes our family gatherings even more delightful and full of flavor.
Why This Recipe Works for Our Busy, Joyful Nights
After a long day, the last thing I want is to spend hours in the kitchen. The Authentic Blackstone Philly Cheesesteak comes to the rescue with its quick cooking time and minimal cleanup. In just about 30 minutes, you can serve up a meal that feels like a treat. It’s the kind of dish that makes weeknight cooking effortless without sacrificing flavor.
Moreover, it allows the whole family to participate. My kids love helping out, whether it’s chopping veggies or assembling their own sandwiches. It’s a full-sensory cooking experience that encourages connection without stress.
How to Make Authentic Blackstone Philly Cheesesteak, The Heartwarming Way
Ready to dive in? Making an Authentic Blackstone Philly Cheesesteak is easier than it looks. You’ll find that the process is quick and enjoyable, filled with those crucial aroma and texture cues that hint at deliciousness.
Step-by-Step Overview: Keeping It Simple
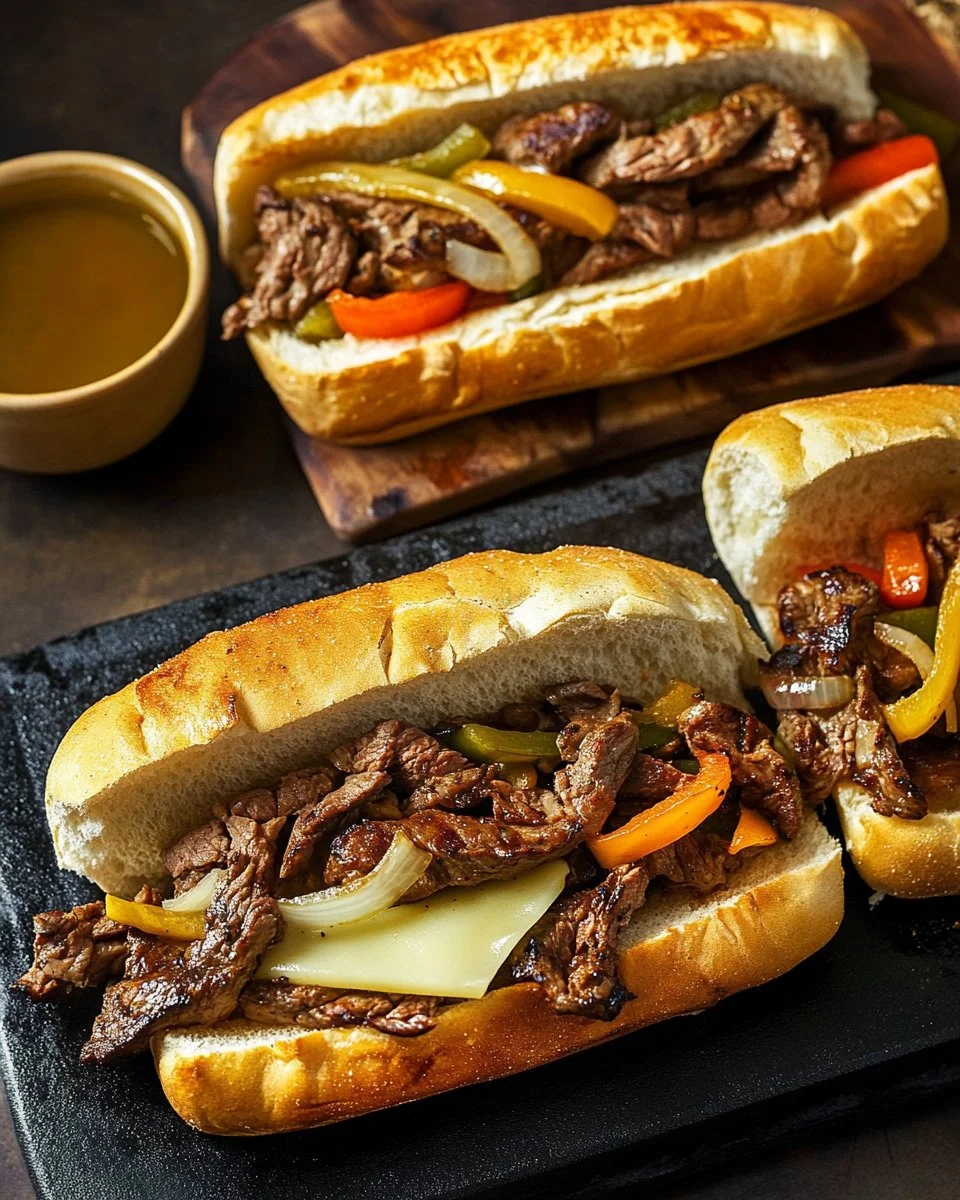
- Preheat the Blackstone griddle over medium-high heat.
- Drizzle olive oil on the griddle and add the sliced onions and bell peppers. Cook until softened and slightly caramelized.
- Push the veggies to one side of the griddle. Add thinly sliced ribeye steak to the griddle and season with salt and pepper. Cook until steak is browned.
- Mix the steak with the veggies and divide into portions. Top each portion with a slice of provolone cheese and allow to melt.
- Toast the hoagie rolls on the griddle until golden.
- Fill each toasted roll with the steak, onion, and pepper mixture. Serve immediately.
“This is where the magic happens—when the aroma fills the kitchen and my kids come running in, asking ‘Is it ready yet?’”
As you follow these steps, keep an eye out for those textures and colors. The onions should be golden and sweet, while the ribeye edges should be beautifully browned, melding with the veggies. Trust your senses; they’ll guide you.
Ingredients You’ll Need
To get started with your Authentic Blackstone Philly Cheesesteak, gather these ingredients:
- 1 lb ribeye steak, thinly sliced
- 1 onion, sliced
- 1 bell pepper, sliced
- 4 slices provolone cheese
- 4 hoagie rolls
- Salt and pepper to taste
- Olive oil for cooking
These ingredients are really the heart of the dish. Don’t skip out on the fresh herbs, as they add that soul to your meal. If you happen to have different veggies or cheese on hand, don’t hesitate to use those instead. Cooking should feel creative, not restrictive!
Step-by-Step Directions
-
Preheat the Blackstone griddle over medium-high heat. The heat makes all the difference, allowing that steak to sear beautifully.
-
Drizzle olive oil on the griddle and add the sliced onions and bell peppers. Cook until softened and slightly caramelized. This is where the sweet aroma starts dancing in the air, inviting everyone to the kitchen. Don’t rush this part; it builds flavor.
-
Push the veggies to one side of the griddle. Add the thinly sliced ribeye steak to the griddle and season with salt and pepper. Cook until the steak is browned. A little browning here builds flavor, just like grandma showed me.
-
Mix the steak with the veggies and divide into portions. Top each portion with a slice of provolone cheese and allow to melt. Watching that cheese ooze is a little slice of heaven.
-
Toast the hoagie rolls on the griddle until golden. This adds that perfect crisp texture that complements the juicy filling.
-
Fill each toasted roll with the steak, onion, and pepper mixture. Serve immediately, and watch as everyone digs in with smiles on their faces.
Serving Authentic Blackstone Philly Cheesesteak with Love
In our home, the best way to serve the Authentic Blackstone Philly Cheesesteak is family-style, right in the middle of the table. Everyone can help themselves! I often lay out extra toppings like jalapeños or hot sauce for the heat lovers and a creamy ranch for the kids who prefer it mild.
Sometimes, I’ll serve it with a side of crispy potato fries or a fresh salad to balance the richness. My kids often ask for their sandwiches topped with extra cheese and more veggies, making it a fun assembly experience. Sharing these moments while enjoying the meal creates a delightful atmosphere that we cherish.
Storage & Reheat Tips (Keeping the Goodness)
When it comes to leftovers, the Authentic Blackstone Philly Cheesesteak holds up quite well. If you have any sandwiches left (though it’s rare), allow them to cool before storing. Place them in an airtight container in the refrigerator. They tend to be best eaten within a couple of days.
For reheating, the microwave works for a quick lunch. However, for that just-cooked warmth, popping them in the oven for about 10 minutes at 350°F is the way to go. This keeps the bread crispy and the filling warm.
My Kitchen Notes & Shortcuts
- Use what you have: If you can’t find ribeye, thinly sliced chicken or turkey works well too.
- Prep-ahead: Slice veggies and steak the night before to save time.
- Make it fun: Let the kids help with stirring and assembling their sandwiches for a fun dinner experience.
- Freeze for later: You can freeze the filling before adding the cheese and rolls. Then, just reheat and fill when you’re ready for a quick meal.
Family-Friendly Variations
If you’re looking to mix things up, the world is your oyster with this recipe. Consider adding sautéed mushrooms for a rich twist or some spinach for an extra kick of nutrition. Think about turning this cheesesteak experience into a ‘build-your-own’ night, where everyone personalizes their sandwich with their favorite toppings.
Another fun variation can include making it a dip! Chop everything finely, mix with cream cheese, and serve it warm with crispy bread on the side. The possibilities are endless!
FAQs About Authentic Blackstone Philly Cheesesteak
Can I make this ahead for a busy week?
Absolutely! In fact, letting it sit for an hour allows the flavors to develop, much like an old family recipe.
What can I use if I don’t have hoagie rolls?
No worries. Any sandwich bread or even lettuce wraps work just fine. Get creative!
Can this recipe be made vegetarian?
Yes! Swap out the steak for sautéed mushrooms and add extra veggies of your choice.
One Final Thought from My Kitchen
Cooking is a way to share love, and nothing embodies that more than the Authentic Blackstone Philly Cheesesteak. I hope this dish finds its way into your family’s laughter and stories. If it does, my grandmother’s kitchen is smiling, joining in on the joy that food brings to our lives. Until next time, happy cooking!
5. Savory Blackstone Loaded Potatoes

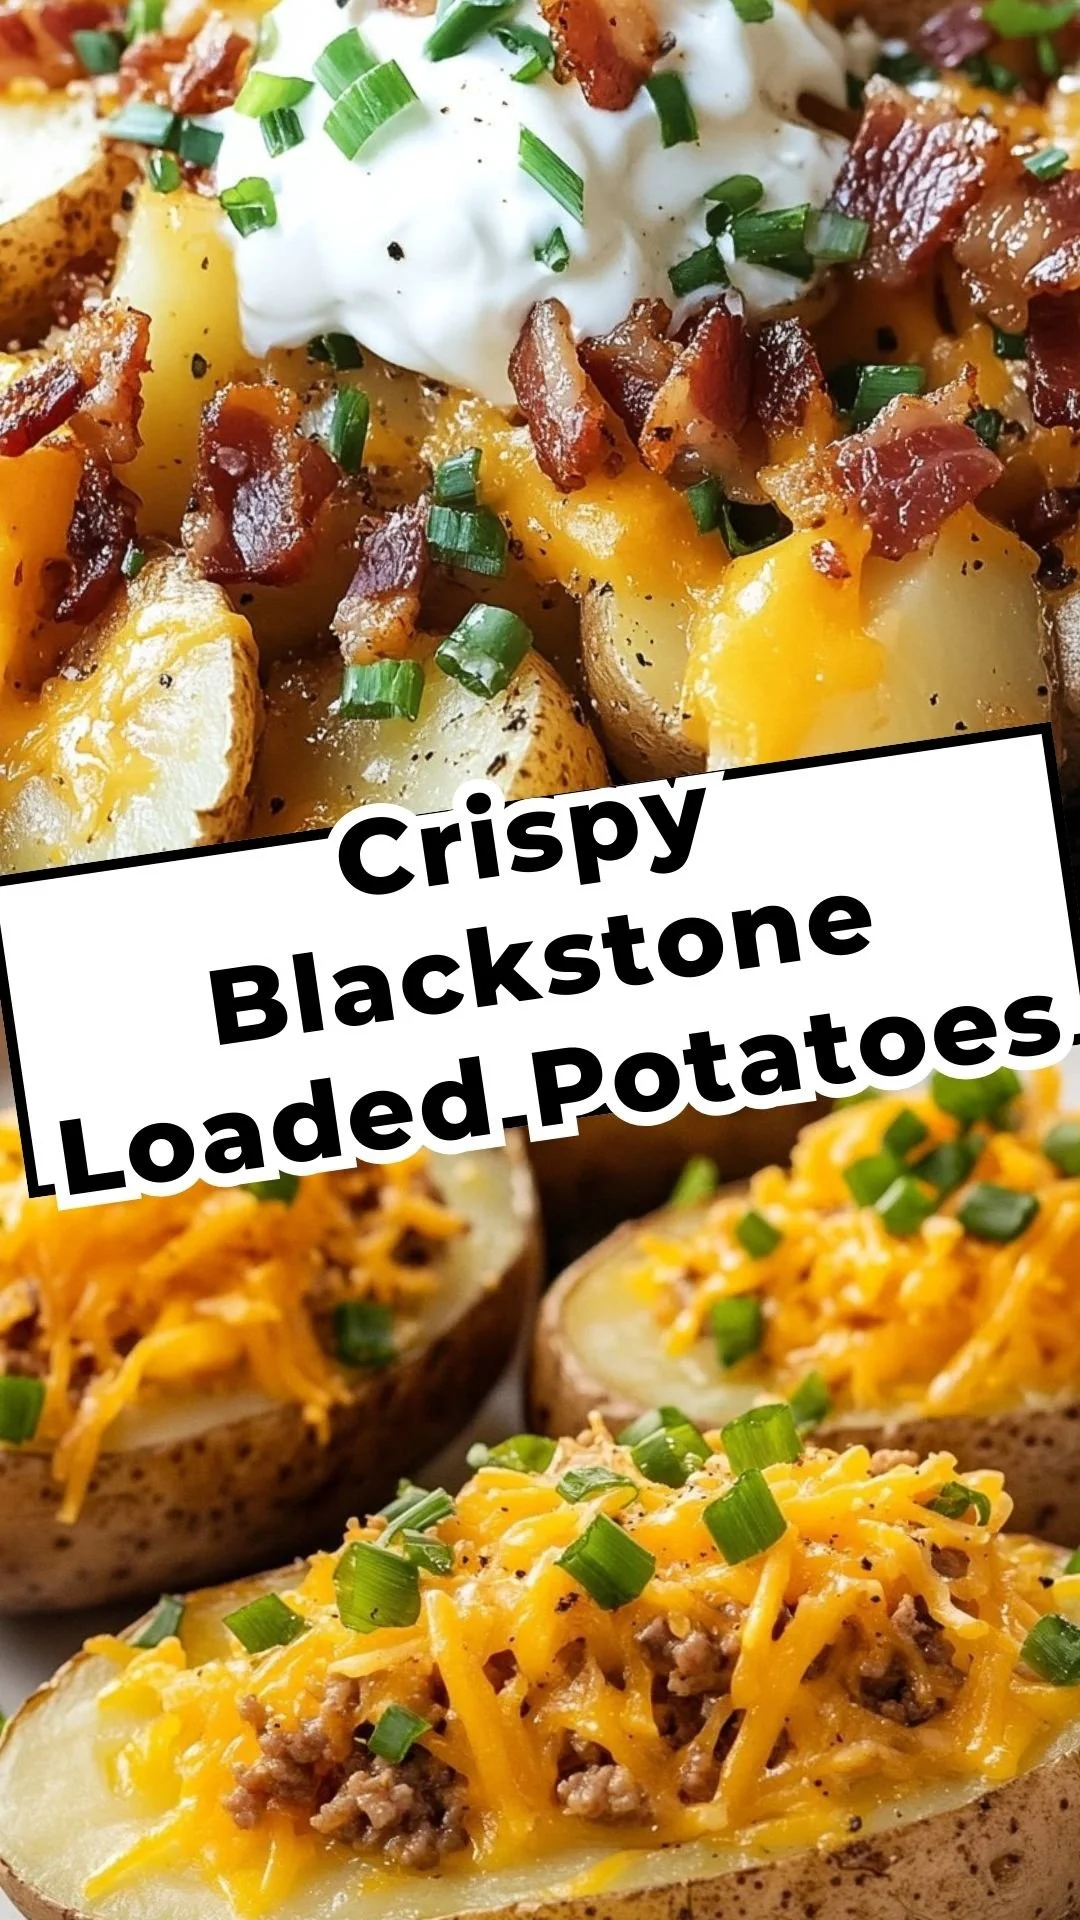
Each time I hover over the skillet full of potatoes, memories come rushing back to the kitchen of my youth. It’s a Saturday afternoon, the familiar sound of my kids setting the table fills the air, laughter spilling out like the scent of garlic sautéing away. As the sun begins to cast a warm golden light through the window, their eager faces gather around, eyes sparkling with anticipation. This moment is magic, where chaos and comfort meet, and the promise of a delicious meal awaits. Today, it’s all about Savory Blackstone Loaded Potatoes, and trust me, this recipe is pure joy on a plate.
Why This Savory Blackstone Loaded Potatoes Feels Like Home
Savory Blackstone Loaded Potatoes is more than just a dish in our household; it’s a little slice of warmth and happiness. It brings us together, effortlessly. There’s something about the combination of crispy, golden potatoes topped with bubbling cheese and savory toppings that feels like a heartfelt hug. Whether it’s a busy weeknight or a casual get-together, these potatoes never fail to please. Each bite brings back those cherished memories of family gatherings and holiday feasts.
This meal is adaptive and quick. You don’t need to be a culinary expert to make it, and that’s the beauty of it. Just like my grandmother taught me, the heart of the recipe lies in the love and connection shared around the table. Preparing these loaded potatoes is as straightforward as it gets, allowing you to focus on what truly matters: sharing a moment with your loved ones.
How to Make Savory Blackstone Loaded Potatoes, The Heartwarming Way
Cooking is often seen as a chore, but with the right recipe, it can be the highlight of your day. The process of making Savory Blackstone Loaded Potatoes transforms simple ingredients into a comforting meal that everyone will adore. You don’t need fancy techniques or elaborate skills. Just follow these easy steps and watch as the magic unfolds.
“This is where the magic happens—when the aroma fills the kitchen and my kids come running in, asking ‘Is it ready yet?’”
Ingredients You’ll Need
To get started, make sure you gather everything you need. Here’s the list:
- 2 pounds of potatoes
- 1 tablespoon olive oil
- 1 teaspoon garlic powder
- 1 teaspoon onion powder
- Salt and pepper to taste
- 1 cup shredded cheese
- 1/2 cup sour cream
- 1/2 cup cooked bacon bits
- Chopped green onions for garnish
Don’t stress about having the exact ingredients. Use what you have on hand and make it your own. That’s one of the joys of cooking—creativity is encouraged! And remember, those fresh herbs? They’re the soul of the dish, adding layers of flavor that make every bite exceptional.
Step-by-Step Directions
-
Preheat your Blackstone grill over medium heat. This ensures the potatoes cook evenly and get that lovely crispness.
-
Wash and cut the potatoes into wedges or cubes. Don’t worry about making them perfect; that rustic side adds character.
-
In a bowl, toss the potatoes with olive oil, garlic powder, onion powder, salt, and pepper. Coat them well so that every piece gets that delicious flavor.
-
Place the seasoned potatoes on the grill and cook for about 15-20 minutes, turning occasionally. You want them to be tender and golden brown.
-
Once cooked, remove them from the grill and sprinkle with shredded cheese. Close the grill lid for a couple of minutes to let the cheese melt beautifully.
-
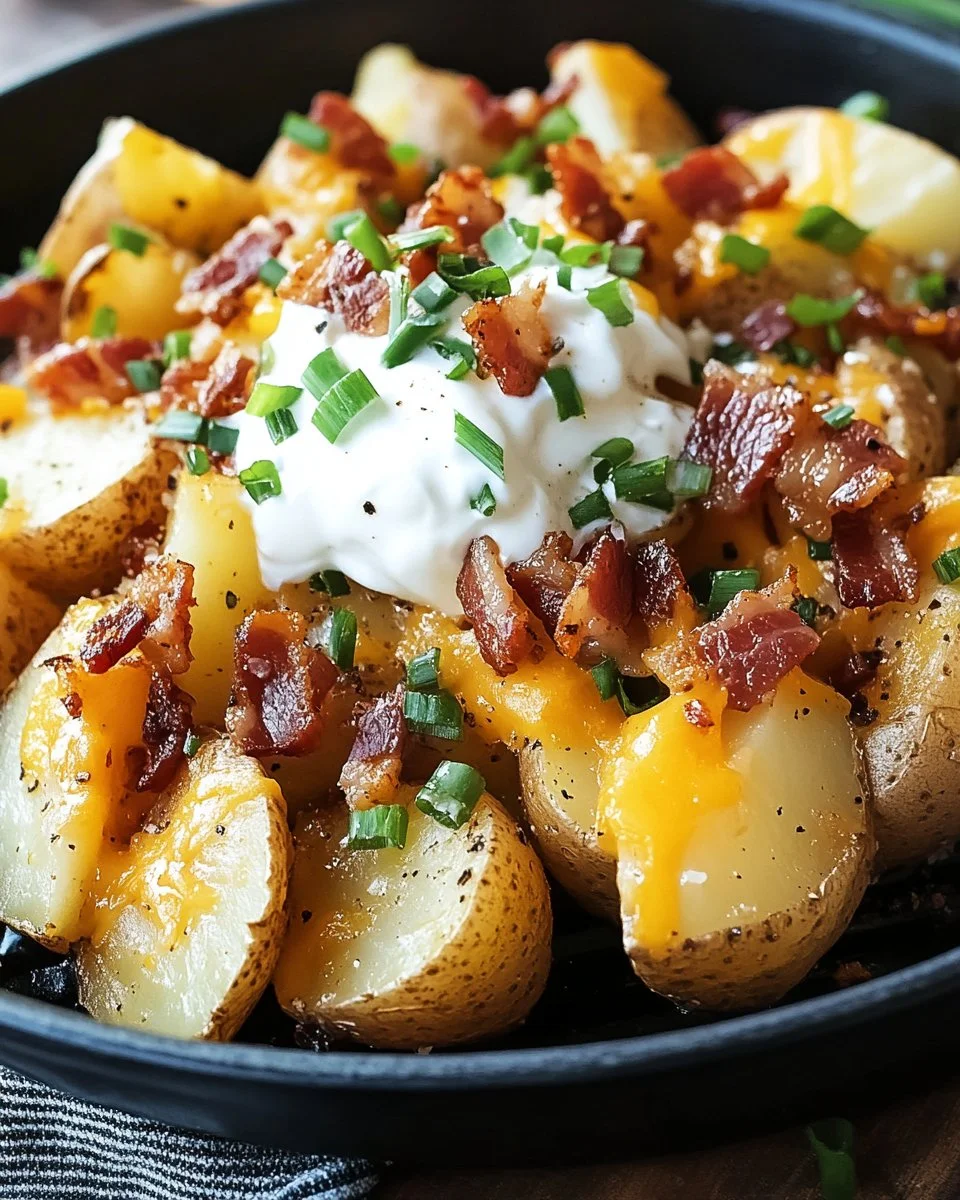
Serve the loaded potatoes topped with sour cream, bacon bits, and green onions. Watch as those toppings make the dish truly come alive.
Cooking doesn’t have to be stressful. A little browning here builds flavor, just like grandma showed me. And let the kids stir this part—it’s the fun bit! Encourage them to get involved, because cooking together creates memories that last a lifetime.
Serving Savory Blackstone Loaded Potatoes with Love
This dish is perfect for family-style serving. Spread those Savory Blackstone Loaded Potatoes in the center of the table and let everyone help themselves. It brings a sense of togetherness that is hard to replicate. Place a bowl of sour cream on the side, a dish of crispy bacon bits, and a sprinkle of fresh green onions—voilà, your table is set for a delightful meal.
Everyone in our family has their favorite way to enjoy these potatoes. Some prefer the salty crunch of bacon, while others drench theirs in sour cream. It’s a fun mix that sparks conversations and laughter, making meal times a cherished routine in our home.
Storage & Reheat Tips (Keeping the Goodness)
When it comes to leftovers, Savory Blackstone Loaded Potatoes can be your best friend. Start by letting the dish cool down before transferring it to an airtight container. This will keep the potatoes fresh. You can store them in the fridge for 3 to 4 days.
When it’s time to reheat, the microwave is fine for a quick lunch. However, if you want to revive that fresh-out-of-the-grill experience, use the oven. Preheat it to 350 degrees Fahrenheit, spread the potatoes on a baking sheet, and warm them until heated through. This method keeps that delightful crispness intact.
My Kitchen Notes & Shortcuts
Here are some of my favorite tips that make cooking Savory Blackstone Loaded Potatoes even easier:
-
Prep Ahead: You can cut the potatoes a few hours ahead and store them in water to prevent browning. Just dry them off before seasoning.
-
Cheese Choices: Feel free to experiment with cheeses. Cheddar, Monterey Jack, or even a spicy Pepper Jack can change the flavor profile.
-
Kid Involvement: Let your kids sprinkle the cheese and add the toppings. They love seeing their contributions make the meal special.
-
Freezing for Later: If you want to make these ahead of time, freeze the uncooked, seasoned potatoes. When you’re ready, just throw them on the grill straight from the freezer and cook a few extra minutes.
-
Herbs Galore: If you have fresh herbs like thyme or rosemary, toss them in with the potatoes for an extra boost of flavor. Don’t skip them, they make a difference!
Family-Friendly Variations
This recipe is truly versatile. You can make it your own with just a few tweaks:
-
Make It Loaded: Add toppings like jalapeños, avocado, or even guacamole for a fun twist.
-
Vegetarian Delight: Swap the bacon for a mix of roasted vegetables, or add some black beans for heartiness.
-
Spice It Up: Add a sprinkle of chili powder or paprika for a bit of heat. It brings everything to life.
-
Cheesy Creativity: Experiment with different cheese blends and textures. Try feta or goat cheese for an unexpected flavor.
-
Seasonal Variations: Use sweet potatoes in the fall or add seasonal vegetables like bell peppers and zucchini in the summer.
Cooking is about connection, and every change allows your family to put a personal twist on a classic dish. Those variations will not only please the palate but also encourage creativity in the kitchen.
FAQs About Savory Blackstone Loaded Potatoes
Can I make this ahead for a busy week?
Absolutely! In fact, letting it sit for an hour allows the flavors to mingle, just like an old family recipe. You can prepare everything in advance and cook when you’re ready.
What type of potatoes should I use?
Any starchy potato works great. Russets are classic, but Yukon Gold gives a creamier texture too. Choose your favorite!
Can this be made vegetarian?
Yes! Simply leave out the bacon or replace it with sautéed mushrooms or your favorite plant-based protein. You can still relish the delightful flavors.
How long do leftovers last?
Leftovers are good in the fridge for about 3 to 4 days. Just make sure to store them properly in an airtight container.
Can I cook these in the oven?
Certainly! If you don’t have a grill, bake them in the oven at 400 degrees Fahrenheit for about 30-35 minutes, flipping once. The result will still be tasty.
One Final Thought from My Kitchen
In the end, cooking is a journey, a joyful exploration of flavors, textures, and love. I hope these Savory Blackstone Loaded Potatoes find their way into your kitchen and your family’s embrace. May laughter echo in your homes as you gather around the table, just as we do. Until next time, happy cooking!
6. Blackstone French Toast
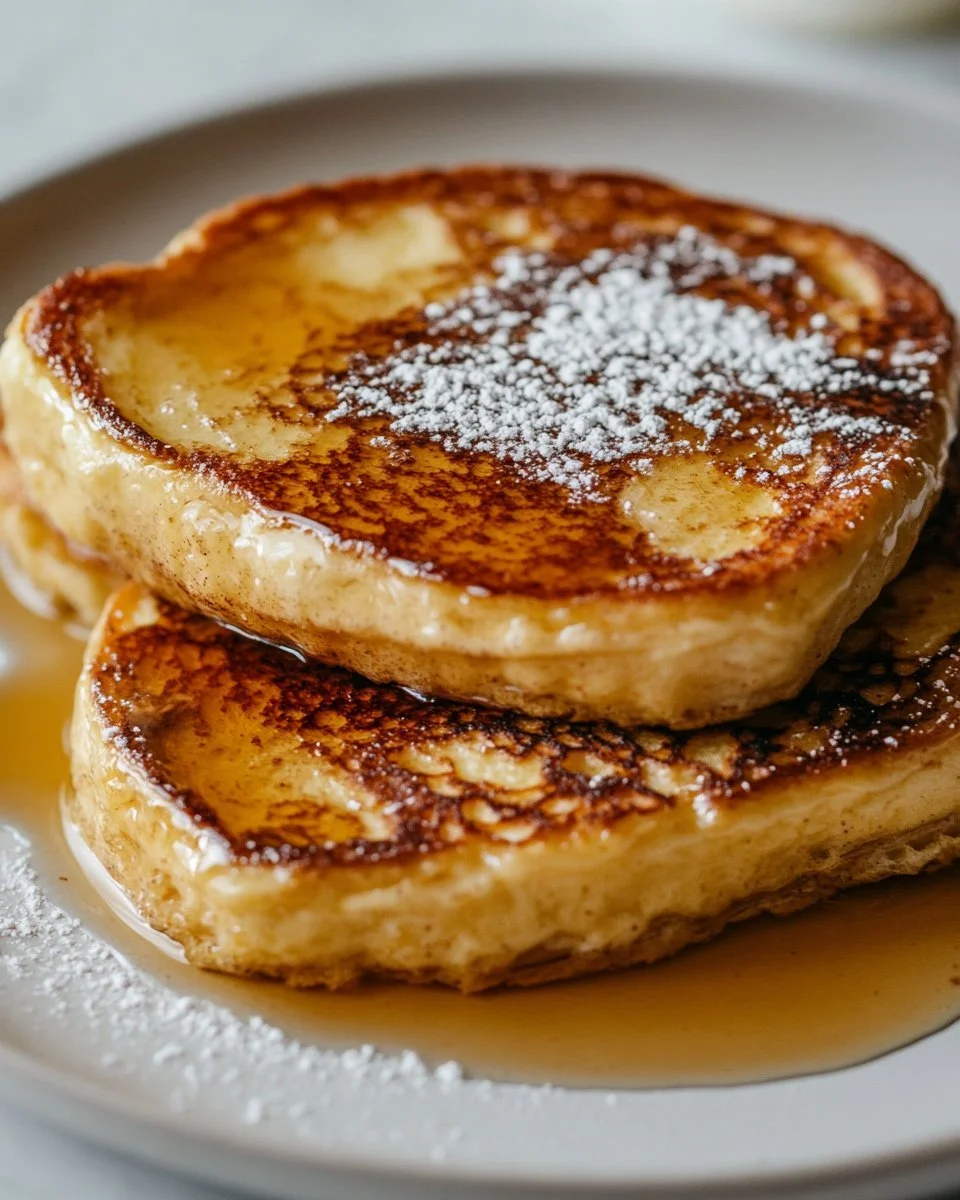

There’s something special about the sound of forks clinking against plates and the soft chatter of family as they gather around the table. Early on weekend mornings, the aroma of freshly cooked Blackstone French Toast fills the air, instantly bringing everyone into the kitchen. It reminds me of those quiet Sunday mornings at my grandmother’s house by the lake. The warm golden slices of toast topped with syrup and fruits feel like a cozy hug, making it easy to gather around and share stories over breakfast. Each dish we create holds a memory, and this one definitely has a cherished spot in our family kitchen.
Why This Blackstone French Toast Feels Like Home
Making Blackstone French Toast is more than just a simple breakfast. It’s about creating memories, indulging in warm flavors, and inviting everyone to the table. This dish captures the essence of home, evoking childhood memories and the cherished times we spend together.
The first sound of the sizzling griddle is enough to bring smiles to faces. As the bread cooks, the sweet aroma envelops the kitchen, setting the stage for laughter and joy. In our busy lives, meals like this stand out as little treasures. It’s not just about eating; it’s about sharing warmth and laughter, and this dish does just that.
Why Blackstone French Toast is Our New Family Favorite
This dish is an effortless way to bring joy into our mornings. Every bite offers a hint of nostalgia while also allowing for creativity. The combination of eggs, milk, and cinnamon creates a custard-like texture that envelops each slice of bread. When cooked to golden perfection on the Blackstone griddle, it turns into a breakfast worthy of any special occasion.
On those hectic mornings when everyone is rushing around, knowing that a warm, hearty breakfast is ready makes the day feel a little brighter. Blackstone French Toast checks off all the boxes: it’s quick, simple, and loved by everyone in the family. Whether paired with sweet maple syrup or a sprinkle of fresh fruit, it’s an instant classic that truly feels like home.
The Simple Magic Behind Blackstone French Toast
There’s a certain kind of magic that happens when busy families gather for a meal. Blackstone French Toast embodies that magic. With only a few ingredients, this simple dish transforms into something spectacular that draws everyone together.
The beauty of it lies in its simplicity and versatility. You can have a basic version or dress it up with your favorite toppings. It’s this mix of convenience and creativity that makes it a meal worth repeating. You might find yourself reaching for this recipe again and again, making it a staple in your family meals.
Why This Recipe Works for Our Busy, Joyful Nights
After long days filled with activities, the last thing anyone wants is to spend hours in the kitchen. Blackstone French Toast comes to the rescue here. This dish comes together quickly, allowing for a leisurely meal that doesn’t feel rushed.
When everyone’s involved, cooking becomes a joyful experience, rather than just a task. Kids can help dip the bread, stir the mixture, or even sprinkle fresh fruits on top when serving. It’s a wonderful way to encourage little ones to get involved in the kitchen while creating cherished family moments.
How to Make Blackstone French Toast, The Heartwarming Way
Cooking Blackstone French Toast is a delightful process that fills the home with comforting aromas. Here’s a quick overview of how this scrumptious dish comes together.
First, imagine a mixing bowl filled with whisked eggs, milk, vanilla, and a dash of cinnamon. The colors blend, creating a silky mixture where bread will soon soak up that flavor. As each soaked slice hits the hot griddle, the sound is music to the ears. You’re on the right track when you see them turn golden brown.
Cooking French Toast takes a little time but is entirely worth it when you see everyone’s bright smiles as you serve them this warm, delicious breakfast.
“This is where the magic happens—when the aroma fills the kitchen and my kids come running in, asking ‘Is it ready yet?’”
Ingredients You’ll Need
To create this cherished dish, gather a few simple ingredients. Here’s what you’ll need:
- 6 slices of bread
- 2 large eggs
- 1 cup milk
- 1 teaspoon vanilla extract
- 1 teaspoon ground cinnamon
- Butter or oil for cooking
- Maple syrup for serving
- Fresh fruits for topping (optional)
Before you start, remember to get creative with what you have on hand. A little tweak here and there can make all the difference. This is about comfort, so if you have a favorite bread or specialty toppings, throw those in the mix!
Step-by-Step Directions
-
Preheat the Blackstone griddle to medium heat. This ensures your French toast will cook evenly and achieve that perfect golden color.
-
In a mixing bowl, whisk together eggs, milk, vanilla extract, and ground cinnamon. This is the essential, creamy mixture that will soak into your bread.
-
Dip each slice of bread into the egg mixture, allowing it to soak for a few seconds on each side. Make sure not to rush this step; the longer they soak, the more flavor they will absorb.
-
Grease the griddle with butter or oil. Watch as it starts to sizzle, creating a non-stick surface for your toast.
-
Cook the soaked bread slices on the griddle for about 3-4 minutes on each side or until golden brown. You want a nice, even color; a little browning here builds flavor, just like grandma showed me.
-
Serve warm with maple syrup and fresh fruits on top. Every plate can be customized with all kinds of goodies. Let the kids sprinkle strawberries or bananas; it becomes an even more special meal when everyone shares in the excitement.
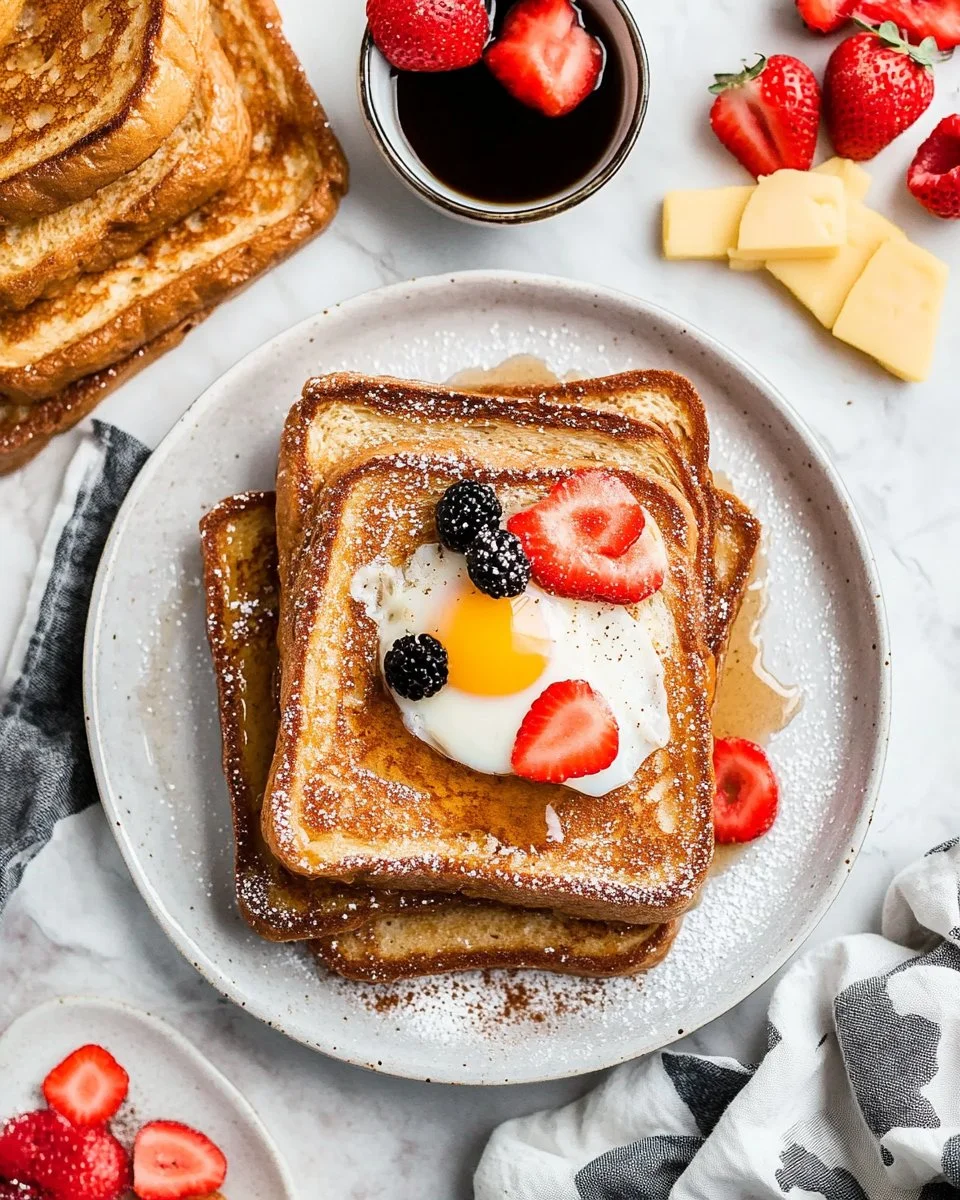
Serving Blackstone French Toast with Love
In our home, we enjoy serving this dish family-style right in the middle of the table. Everyone gathers with their plates and helps themselves to the warm, syrupy goodness. Some may want a generous drizzle of maple syrup, while others might prefer a sprinkle of powdered sugar and fresh fruits.
It’s always wonderful to see the kids choose their toppings. My daughter loves to create her mini stacks, filled with berries and a drizzle of syrup. Each plate tells a story filled with laughter and connection—because it’s not just about the food; it’s about the shared moments at our table.
Storage & Reheat Tips
If you happen to have leftovers (which is rare because they disappear quickly), storing and reheating Blackstone French Toast is simple.
To keep the goodness for tomorrow, place any leftover slices in an airtight container in the fridge. They can last for about three days. When you’re ready to enjoy them again, reheating in the oven is the best way to recapture that warm, fresh-out-of-the-griddle taste. Just pop them in at 350 degrees for about 10-15 minutes, and they’ll be ready to serve.
While the microwave is fine for a quick lunch, the oven brings back that just-made warmth. So give it the attention it deserves!
My Kitchen Notes & Shortcuts
After making Blackstone French Toast numerous times, I’ve learned a few tricks that help make this dish even smoother:
- Substitutions: If you’re low on milk, use almond, oat, or any other milk substitute you prefer.
- Prep Ahead: You can whisk the egg mixture and slice the bread the night before. That way, everything is ready when you wake up.
- Double the Batch: If you have family visiting, double the recipe. They’ll love the extra, and honestly, it’s just as easy to make more.
- Get the Kids Involved: Let them help dip the bread in the mixture; it’s a fun step for them and a way to bond over cooking.
- Experiment with Toppings: Get creative! Peanut butter, whipped cream, or even chocolate chips can give this dish a new twist.
Family-Friendly Variations
Every family has its favorites, and this recipe is no exception. While the classic version is unbeatable, here are some of our favorite fun variations:
- Berries Galore: Add a mix of fresh blueberries and strawberries to the egg mixture for a delightful burst of flavor.
- Nutty Banana: Top with sliced bananas and a sprinkle of chopped walnuts for a delicious crunch.
- Chocolate Indulgence: For a treat, add chocolate chips to the egg mix or sprinkle them on top before serving.
- Simple Substitutions: Swap out white bread for whole grain or challah for a richer flavor—there’s room for creativity!
These variations allow you to add your own family’s flair to the dish. Encourage everyone to experiment with their favorite toppings—a true expression of flavor and creativity for the whole family.
FAQs About Blackstone French Toast
Can I make this ahead for a busy week?
Absolutely! In fact, letting it sit for an hour lets the flavors get to know each other, just like an old family recipe.
What bread works best for French Toast?
Thick slices of bread, like brioche or challah, tend to lend a nice texture and flavor, but feel free to use any bread you have on hand.
Can I freeze the leftovers?
Yes! Wrap slices tightly in plastic wrap or foil, and store them in a freezer bag. They will keep for up to two months.
How do I reheat frozen French toast?
To reheat, simply pop them in the toaster or oven directly from the freezer. They’re just like fresh-baked in a flash.
One Final Thought from My Kitchen
I hope this Blackstone French Toast recipe finds its way into your family’s laughter and stories. It seems that each time we make it, we add a new layer to our kitchen’s story. There’s nothing more rewarding than a meal that brings people together, offering warmth and comfort in every bite.
Until next time, happy cooking! May your kitchen be filled with joy, and your table with love.

Blackstone Steak Fajitas
Ingredients
Main ingredients
- 1 lb flank steak Good for slicing and serving.
- 1 each bell pepper, sliced
- 1 each onion, sliced
- 2 tablespoons olive oil For tossing steak.
- 1 tablespoon fajita seasoning For seasoning the steak.
- tortillas For serving.
- salsa For topping.
- sour cream For topping.
Instructions
Preparation
- Preheat the Blackstone grill over medium-high heat.
- In a bowl, toss the flank steak with olive oil and fajita seasoning.
- Grill the steak for about 4-5 minutes per side, or until cooked to your liking. Remove and let rest.
- Add the sliced bell pepper and onion to the grill, cooking until softened.
- Slice the steak thinly against the grain and serve with grilled veggies in tortillas. Top with salsa and sour cream.