Startled awake by the sound of little feet racing across tile, I remember the kitchen filling with a bright, citrusy scent and the sun pouring through the window. My kids were setting the table, chattering about school projects, while a tray of oranges slowly changed from glossy fruit to crisp, jewel-like slices in the oven. That everyday chorus — small hands, warm mugs, and a simple snack shared — is what I think about when I make dried orange slices. They are easy, comforting, and somehow small enough to pass around like a secret the whole family shares. If you click here for a quick tea pairing idea, it might become your new cozy habit: how to make a black tea shot you’ll love.
Why This How to Make Dried Orange Slices Feels Like Home
There is something tender about turning fruit into something that lasts. Dried orange slices catch light like stained glass and hold a scent that can lift a room. They remind me of winter evenings where my grandmother would tuck a few into stockings and hang them by the window to catch the sun. The color brightens the day. The flavor is sweet and slightly tangy, with a hint of caramel when the edges brown a little in the oven.
These slices are more than a pretty garnish. They make a cup of tea feel extra special, they dress up a holiday table, and they are a calm, hands-on project kids can help with. If you love a home project that rewards you for a little patience, this is it. For a playful dinner idea that pairs well with citrus snacks, try this comforting bowl guide: how to make bibimbap ingredients, tips and flavor hacks.
Why How to Make Dried Orange Slices is Our New Family Favorite
This recipe lands right between simple and special. It asks for one main tool — your oven — and a handful of oranges. It takes time, yes, but almost all of that is hands-off. While the oven does its slow work, you can set the table, fold napkins, or read a book aloud. The slices are forgiving. A little unevenness only makes them charming.
If you worry about exact timing, don’t. Watch for the cues: the rinds should turn slightly crisp and the centers should feel a touch pliable at first, then firm as they cool. The look and fragrance will tell you the oven has done its work. And yes, it is easier than it looks. I promise you will learn the small signs fast.
“This is where the magic happens—when the aroma fills the kitchen and my kids come running in, asking ‘Is it ready yet?’”
The Simple Magic Behind How to Make Dried Orange Slices
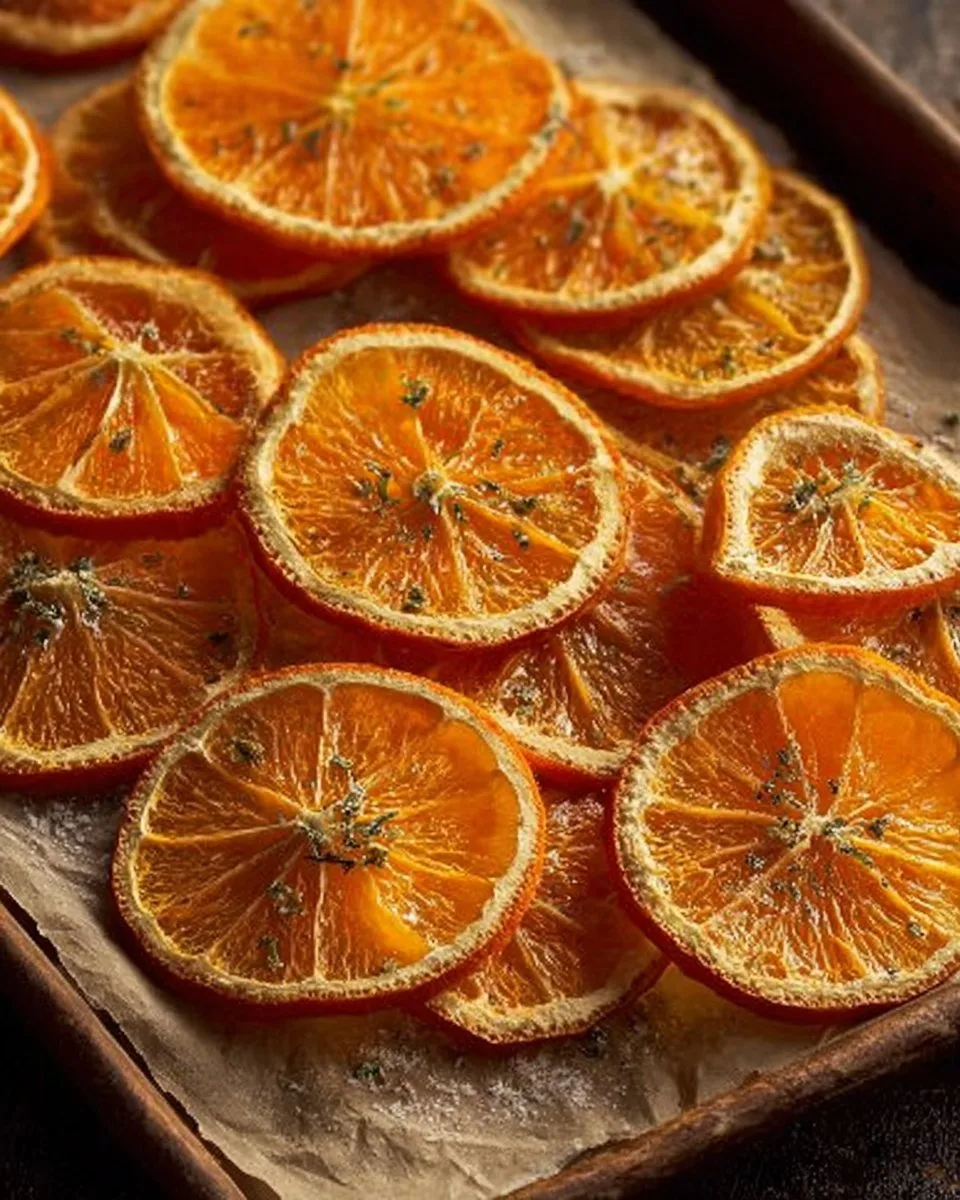
The magic is mostly gentle heat and time. Slow baking removes moisture and concentrates the orange flavor. The process keeps that bright citrus character while turning the texture chewy to crisp depending on how thin you slice and how long you dry them. Children love to poke the warm slices as they cool, and my family likes them in a bowl for snacking or strung on twine for a festive touch.
From there, the uses multiply. Toss a few slices into a hot mug of tea, use them to garnish cocktails, add them to a centerpiece, or pack them into little gifts. It all feels homemade in the best, easiest way.
How to Make How to Make Dried Orange Slices, The Heartwarming Way
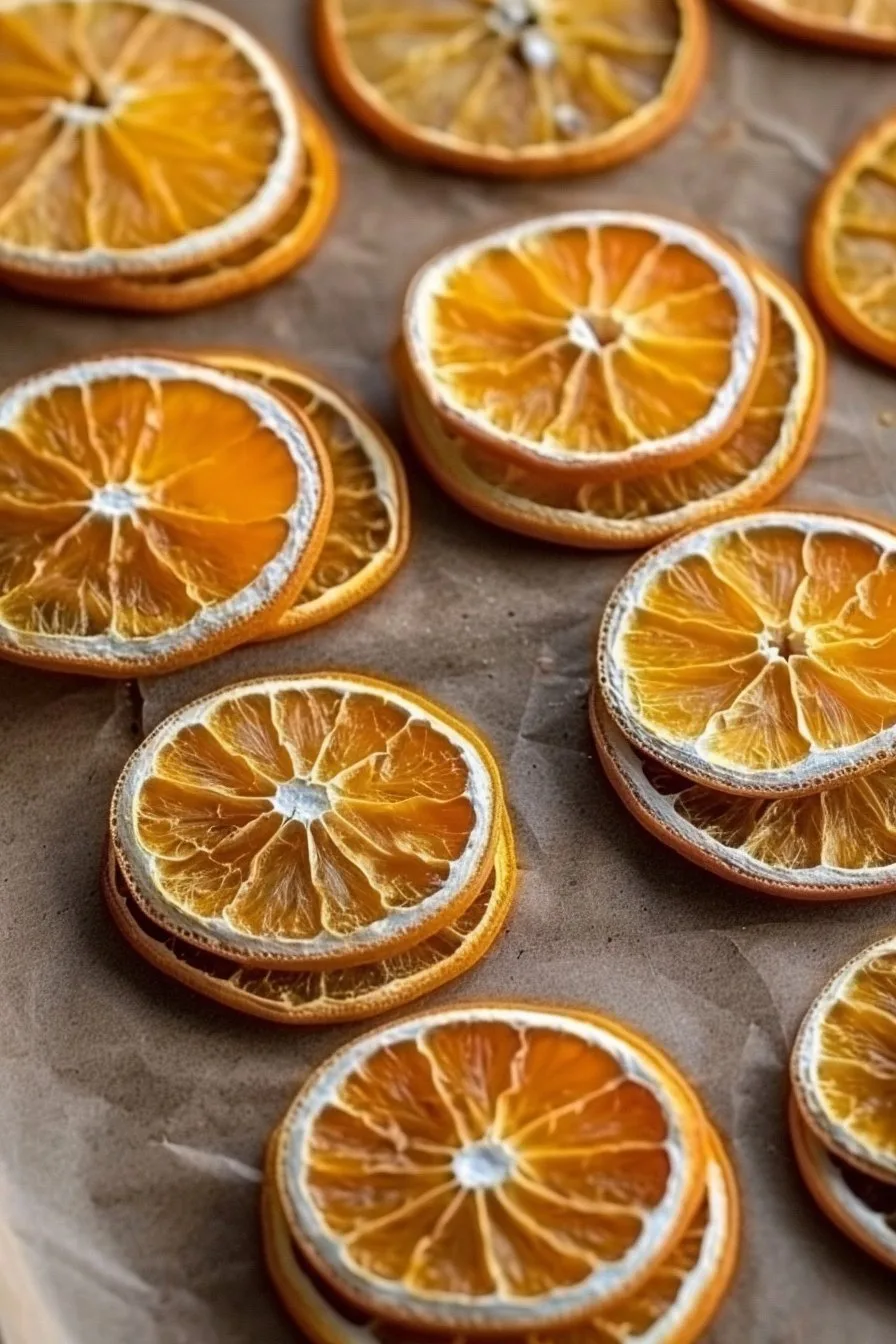
This is a short, friendly walk-through before we get to the step-by-step. You will wash and slice the oranges, place them on baking sheets so air can flow around them, and let the oven do its slow work. The centers will look a touch glossy when they come out, but they will fully set as they cool. Look for color — a warm, deep orange with tiny jewels of concentrated sweetness is a good sign.
Next up, we will go through the details, including small tips that save time and keep things tidy. Meanwhile, let the oven become your quiet companion.
Step-by-Step Overview: Keeping It Simple
Here is a short view of the process: slice, arrange, bake, flip, bake again, cool, store. It sounds too easy, and it is almost that easy. You will need a sharp knife or a mandoline and baking sheets lined with parchment. A reliable oven makes a big difference too. If you have a dehydrator, that works beautifully as well, but I will walk you through the oven method here.
If you want a quick, sippable treat to pair with your slices while they bake, consider trying a fruity pink drink to sip: how to make the perfect pink drink recipe at home.
Preparing How to Make Dried Orange Slices Without the Stress
You do not need to peel, core, or do anything fancy. Just clean fruit, a steady hand, and an oven. I like to start with room-temperature oranges so they slice cleanly. Use uniform slices to help them dry evenly, and line your pan so cleanup is easy. Invite the kids to help arrange the slices; they love creating neat little circles side by side.
Now let us list the ingredients so you can gather everything before the oven warms up.
Ingredients You’ll Need
Medium navel orange
Medium navel orange
Medium navel orange
Medium navel orange
Medium navel orange
Medium navel orange
Don’t worry if you have six or eight. Use what you have. These slices are forgiving, and you can make as many as you need. A small note from my kitchen: choose bright, firm oranges. They dry more evenly and color up nicely. If you want a slightly sweeter result, pick riper fruit. If you like them tart, go for a firmer, tangier orange.
A friendly tip: you can add a sprinkle of cinnamon after they cool, or brush a little honey before drying for a glossy look. For another small homemade touch you can pair them with, read about cream cheese filling tricks here: how to make cream cheese filling like a pro baker.
Step-by-Step Directions
-
Preheat the oven to 225°F.
Gather your baking sheets and parchment paper. Set a rack in the middle of the oven.
Tip: A consistent oven temperature helps the slices dry evenly, so let the oven fully preheat before placing the trays inside. -
Thinly slices navel oranges, to between ⅛ – ¼ inch thick, trying to slice them as uniformly as possible.
Use a sharp knife or mandoline for even cuts. Hold the orange steady and slice in one smooth motion.
Tip: Thinner slices will crisp more; slightly thicker ones stay chewy in the center when they cool. -
Lay, in a single layer, on parchment-lined baking sheets. Place the orange slices in the oven, and bake for 2 hours, rotating halfway through.
Make sure slices do not overlap so air moves freely. Rotate the pan left to right at the halfway mark.
Tip: If your oven runs hot, check them at 90 minutes to avoid browning too quickly. -
Remove the oranges from the oven, and flip over.
Use a thin spatula and turn each slice carefully. The slices will be warm but pliable.
Tip: Flipping helps both sides dry evenly. It is a satisfying step kids can help with if they are old enough. -
Return the orange slices to the oven, and bake for another 1 ½ – 2 hours, or until they are dried, and the rinds are slightly crisp, but the center is still slightly moist. The centers will fully dry as they cool.
Watch for edges that darken slightly; a little browning adds flavor. The centers should not feel sticky when cool.
Tip: If you prefer crisp centers, leave them in the oven a little longer, checking every 15 minutes to prevent burning. -
Store in an air tight container for up to 6 months.
Let the slices cool completely on a rack before storing to avoid trapped moisture. Use glass jars or a sealed container.
Tip: If any slices feel soft after cooling, return them to the oven for 10 to 15 minutes to finish drying.
These numbered steps will take patience, but the rhythm is calm. You can start this in the morning, do other tasks, and return to find trays of glowing slices that make the house smell like celebration. For a side project while the slices bake, try a quick skillet bread idea I love: how to make perfect hoe cakes every time.
The Cooking Process, Made Joyful
As the oranges dry, you will notice the scent deepen and the color intensify. The first hour is mild, and then the kitchen fills with a warmer, brighter smell. When you flip the slices, the heat will have gently transformed them. The rinds will become tender and then crisp, and the centers will set as they cool.
I treat the bake time as a slow, meditative part of the day. Put on some music, pour a cup of tea, and check on the trays now and then. The final product feels like a small craft gift you made for your table.
Serving How to Make Dried Orange Slices with Love
Serve these simply and often. We place a small bowl in the center of the table, and everyone reaches in between bites of dinner. For holiday gatherings, I thread them on twine and hang them as cheerful garlands. They make tea feel special, and cocktails look like they were made with care.
If you want to present them as a snack platter, add nuts, dark chocolate, and a few sprigs of rosemary or thyme for contrast. My daughter prefers hers scattered over a salad with fennel and arugula, and my son likes to tuck them between slices of soft cheese. It brings the family together to try new combinations, and that is the best part.
The Best Way to Share This Meal
Put the bowl in the middle of the table. Let children choose their favorites. Use them to decorate plates or to wedge a slice on a warm mug. They are versatile and pair well with sweet and savory foods alike.
When guests arrive, I often have a small stack tied with ribbon ready to pass around. It feels thoughtful without being fussy.
Storage & Reheat Tips (Keeping the Goodness)
Store completely cool slices in a dry, airtight container. Glass jars with tight lids work great. Keep them away from humidity and direct sunlight. A pantry shelf or a cool cabinet is perfect.
If slices soften from a humid day, pop them back into a 200°F oven for 10 to 12 minutes to refresh their texture. Avoid the microwave; it makes them rubbery. For longer storage, vacuum-seal or use a resealable bag with as much air removed as possible. Properly stored, they keep their flavor for months.
If you plan to use them in warm dishes, add them toward the end to keep their color and shape. They will warm through quickly and add a bright note.
My Kitchen Notes & Shortcuts
- Use a mandoline if you have one to make slices the same thickness. It saves time and gives consistent results.
- Line your baking sheets with parchment. Cleanup is instant and your slices won’t stick.
- Try mixing citrus types. Blood oranges and Cara Cara give beautiful color. Treat this as a playful test.
- Make extra and package in small jars for gifts. Tie with twine and a tag for a quick, homemade present.
- Get kids involved by having them lay out the slices. They love the responsibility and the neat rows.
I learned to be gentle with the fruit. Overcrowding is the biggest mistake. Give each slice breathing room and the oven will repay you.
Family-Friendly Variations
Make them spiced: sprinkle with a pinch of cinnamon or ground cloves after they cool.
Make them sweet: brush very lightly with honey before the final bake for a glossy finish.
Make them savory: add an herb sprig like rosemary to the jar when storing for a hint of savory aroma.
Make them decorative: thread slices onto twine with cranberries for a simple garland.
Make them colorful: mix oranges with lemons and limes for a rainbow of dried citrus.
These are invitations, not rules. Let your family pick favorites and make the process their own.
FAQs About How to Make Dried Orange Slices
Q: Can I make this ahead for a busy week?
A: Absolutely. The slices store well and are perfect to make in advance. They stay fresh in an airtight container and are ready to brighten any snack or dessert.
Q: Can I use other citrus like lemons or limes?
A: Yes, lemons and limes work beautifully. They dry differently, with lemons tending to get more translucent and limes keeping a deeper green edge when done right.
Q: Do I need to peel the oranges?
A: No. The peel adds texture and a pretty rim to each slice. It also helps the slices hold their shape during drying.
Q: Is a dehydrator better than an oven?
A: A dehydrator gives very even drying and is great if you make dried fruit often. The oven works well for occasional batches and gives a lovely, slightly caramelized edge.
Q: How do I keep the color bright?
A: Choose ripe, firm oranges and avoid too much browning. Slight browning adds flavor, but quick checks and rotating trays help keep slices vibrant.
One Final Thought from My Kitchen
I hope these dried orange slices find a place on your table and in your small rituals. They are simple enough for weeknight calm and special enough for guests. When you make them, you give a tiny, handmade gift to your home.
Until next time, give it a try. It is easier than it looks, and the small rewards — warm scent, bright color, shared smiles — are worth every minute.
Conclusion
If you want more detailed techniques or alternate methods, these guides are helpful and practical. For oven and dehydrator directions with step-by-step photos, see Dehydrated Oranges (dehydrator and oven directions) | Hilda’s Kitchen Blog. For a clear oven method and helpful timing notes, check How to Dry Orange Slices in the Oven ~ Barley & Sage. For an easy take on dried orange slices and creative uses, read How to Make Dried Orange Slices the Easy Way | Good Life Eats. For tips on keeping color vibrant and beautiful, visit The best Way To Dry Oranges So They Stay Vibrant – StoneGable. For extra dehydrating methods and small variations, this guide is a nice complement: How to make dried/dehydrated citrus – ShortGirlTallOrder.
Happy drying, and may your kitchen fill with light, laughter, and the bright smell of oranges.

Dried Orange Slices
Ingredients
Main Ingredients
- 6 medium navel oranges Choose bright, firm oranges for the best results.
Instructions
Preparation
- Preheat the oven to 225°F (107°C).
- Gather your baking sheets and line with parchment paper.
- Thinly slice navel oranges to between ⅛ - ¼ inch thick, trying to slice them as uniformly as possible.
- Lay the slices in a single layer on the parchment-lined baking sheets, ensuring they do not overlap.
Baking
- Bake the orange slices in the preheated oven for 2 hours, rotating the trays halfway through.
- Remove the oranges from the oven and carefully flip each slice over.
- Return the slices to the oven and bake for another 1 ½ - 2 hours, or until dried.
Cooling and Storing
- Let the slices cool on a rack completely before storing them in an airtight container for up to 6 months.